You have probably heard about an instant pot, or you’ve...
Read More
Instant pot is the kitchen appliance equivalent of a superhero. It’s our go-to appliance for quickly preparing weeknight meals and delectable desserts. Yogurt, cooked eggs, and other daily cooking techniques can be instantly accomplished, bringing our time and effort-saving abilities to new heights. It does most things well, but you will need to maintain it to continue cooking at the highest level.
Fortunately for you, learning how to deep clean and maintain an Instant Pot is not as difficult as you may think. Cleaning is a breeze, as the majority of the components—including the inner cooking pot, sealing ring, and lid—are easily removable and washable. See our step-by-step instructions for cleaning an Instant Pot properly.
How to Clean an Instant Pot
Clean and care for your pressure cooker using our tried and true method.
Things to prepare:
- Water that is warm and soapy
- Microfiber cloth or dishtowel
- Brush or toothbrush with a soft bristle
- Dishwasher (optional)
- Vinegar distilled in white
Step 1: Unplug and Disassemble
Before you begin cleaning, ensure that your Instant Pot is unplugged and has cooled completely. From the exterior cooker base, remove the lid, steam rack, and inner stainless-steel pot. Additionally, you may want to inspect the cord for damage or any necessary repairs at this time.

Step 2: How to Clean the Instant Pot base
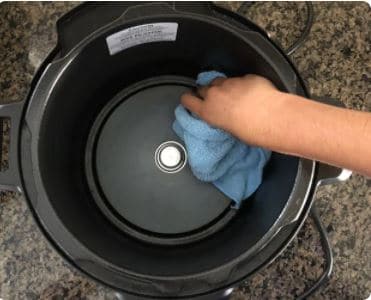
As with a slow cooker, the pressure cooker’s base contains the heating element and electronic components; therefore, this component should never be submerged in water or placed in the dishwasher. Wipe the exterior of the Instant Pot base with a damp cloth to remove any crumbs or food splatters.
If you need to clean the inside of the cooking base, wipe it down with a clean, wet cloth and immediately dry it. With a small scrubbing brush or toothbrush, clean the recessed area around the lip of the base to remove any stuck-on food. Ensure that your brush reaches all of the nooks and crannies!
After that, use a dry cloth to go over the rim once more. This will help prevent the formation of rust in that area. Because the food will contact the pot directly, you will almost certainly need to wash it after each use.
Step 3: How to Clean the Instant Pot Inner Pot
Instant Pots feature a stainless steel inner pot capable of various cooking methods, including searing and browning meats. The disadvantage is that food particles and char can cling to it. Rice is notoriously obstinate. Here are a few typical scenarios:
- Stains of a blue hue: Like any stainless-steel cookware, the Instant Pot may develop blueish colors due to minerals found in water and food. To remove these stains, soak the pot in white vinegar for approximately 5 minutes before rinsing. If there is more, soak a sponge in vinegar and apply some elbow grease.
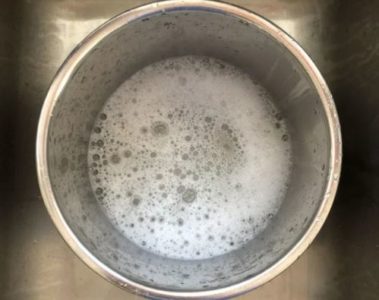
- Stuck-on food: To remove any build-up or food stains, soak the pot in soapy and warm water solution for a few minutes. The treatment significantly softens adhered debris, which should then easily scrub away. If that fails, try Bar Keeper’s Friend, which is safe for stainless-steel cookware such as the Instant Pot’s pot. Sprinkle a small amount onto the affected area and work the grime away with a soft, damp sponge. After a thorough rinse, you’re ready to go.
Additionally, the pot is dishwasher safe so that you can place it on the bottom rack for thorough cleaning.
Over time, you may notice water stains or discoloration visible on the bottom of the inner pot, but that can be scrubbed away with vinegar. You need to pour a cup of white vinegar into the bowl and soak for 5 minutes before dumping the vinegar and washing it with water. Steel wool and abrasive cleaners damage stainless steel surfaces, so they should not be used.
Step 4: How to clean Instant Pot steam rack
Because the steam rack is located within the inner pot and comes into direct contact with the food, it will also need to be thoroughly cleaned after each use.
The stainless steel steam rack is easily cleaned by hand with warm soapy water or placed on the top or bottom shelf of the dishwasher if there is enough space in the machine. If not, hand-wash and completely dry the item.
Step 5: Clean the lid and components of the Instant Pot
5.1 How to Clean an Instant Pot Lid
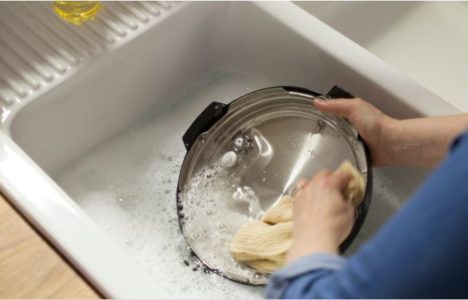
The anti-block shield and silicone sealing ring must be removed and cleaned before cleaning the lid of your Instant Pot. Clean the Instant Pot lid in warm soapy water or place it on the top rack of the dishwasher.
5.2 How to Clean an Instant Pot Anti-block Shield
An anti-block shield is a little round, or oval element (depending on the pressure cooker) is installed under the lid. Remove the shield from the lid after each use.
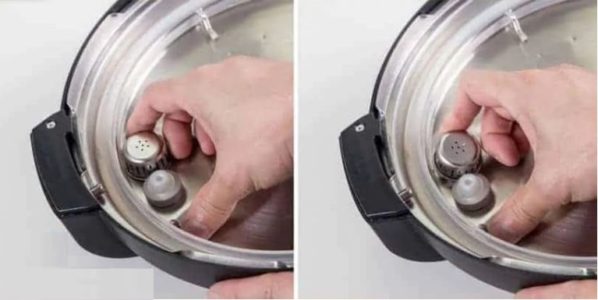
To remove the anti-block shield, gently push the piece toward the rim of the lid with your thumb and lift it to pop it off. Wash the shield by hand in warm, soapy water and dry with a clean cloth. Before reusing it, secure it in place on the lid.
5.3 How to Clean an Instant Pot Sealing Ring
Because the sealing ring absorbs food odors, you’ll want to clean it frequently. Remove the sealing ring and carefully inspect it for cracking, warping, or other signs of wear that indicate it should be replaced.
The sealing ring may be washed by hand in soapy water or the dishwasher. Due to its heat resistance, it is suitable for use on either rack of your dishwasher. Once completely dry, reattach it securely to the lid. This is a critical step, so secure it tightly.
Pro Tips:
- Alternatively, you can “steam clean” your Instant Pot by filling it with 2 cups of water or white vinegar and some finely chopped lemon rind, running the “Steam” program for 2 minutes with the sealing ring in place, and then allowing the sealing ring to air dry for a few minutes.
- Additionally, we strongly recommend purchasing multiple silicone sealing rings. Utilize one for sweet dishes and the other for savory.
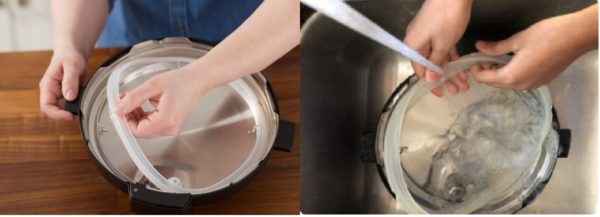
5.4 How to Clean an Instant Pot Steam Release Valve and Float Valve
Remove and clean the silicone ring that secures the float valve; reattach when dry. Always inspect the float valve to ensure it can move freely up and down.
To clean the Instant Pot Steam Release Valve (Venting Knob), you just need to pull it straight out for cleaning.
It is critical to wipe away food particles that accumulate on these valves. Ensure the float, and steam release valves on the lid are clean to help avoid potential problems with maintaining pressure.

5.5 How to Clean an Instant Pot Condensation Cup
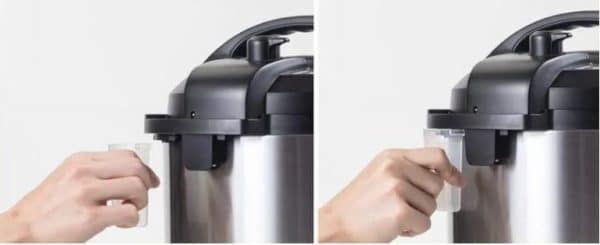
During the cooling process, this small cup collects condensation. It only needs to be washed occasionally because it does not accumulate much dirt. Simply slide it out, empty the liquid (if any), and rinse it thoroughly.
Step 6: How to Clean Instant Pot Exterior Housing & Rim
6.1 Clean an Instant Pot Exterior Housing
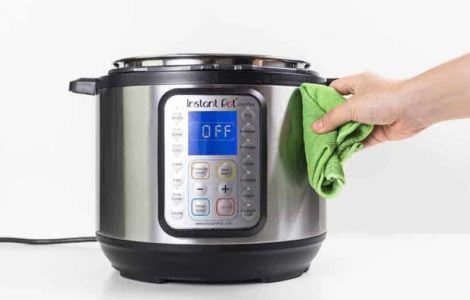
Don’t forget to clean the Instant Pot’s outer body; it requires attention, too.
- For general cleaning, use a very damp sponge to wipe the exterior of your Instant Pot.
- Dampen a sponge with white vinegar for blueish hard water stains and then blot with a moist (water) paper towel.
Note:
It is critical not to submerge it in water because the cooker contains the heating element. Therefore, when cleaning the cooker’s inside (not to be confused with the inner pot), use a damp cloth and dry immediately.
6.2 Clean an Instant Pot Rim
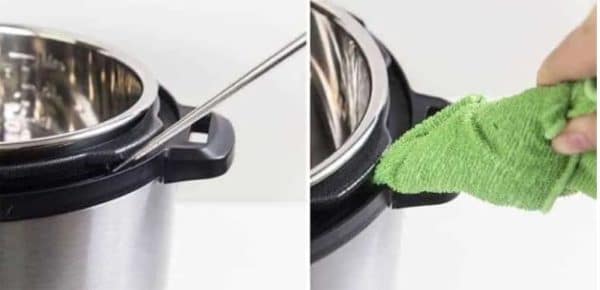
Food or liquid may drip into or become trapped in the rim as we cook with Instant Pot Pressure Cooker. The rim can be pretty challenging to clean and wipe.
- Clean Rim with Foam Brush: The easiest way to soak a craft foam brush with soapy water, then clean by sliding and scrubbing it around the rim.
- DIY Solution: If you do not have foam brushes on hand, you can also use a wet Microfiber Cleaning Cloth wrapped around a stick or chopstick to clean the rim by pushing the cloth around the edge.
Step 7: Reassemble the Instant Pot
Reassemble the Instant Pot lid once all parts are clean and dry. Double-check that the sealing ring, anti-block shield, and float valve are securely attached, as these components are required for the pressure cooker to operate correctly. Reassemble all pieces with the base and enjoy your freshly cleaned Instant Pot.
When Should an Instant Pot Be Cleaned?
To avoid food or odor buildup, all Instant Pot components that come into contact with food should be cleaned after each use. This includes the inner cooking pot, steam rack, and lid components such as the sealing ring and anti-block shield. Other components that do not necessarily become dirty regularly, such as the exterior or the condensation cup, can be cleaned on an as-needed basis.
Summary of the Instant Pot Cleaning Guide
- Parts that are dishwasher safe include the Instant Pot Liner (Stainless Steel Inner Pot), the Instant Pot Sealing Ring, and the Trivet (Steamer Rack)
- Exterior: Never submerge the exterior housing in water or other liquid.
- Rim: Using a foam brush, clean the edge.
- Inner Pot: Using White Vinegar or Bar Keepers Friend, remove the rainbow stains.
- Lid: Rinse the lid thoroughly with warm soapy water.
- Silicone Sealing Ring: Deodorize with White Vinegar or purchase an additional pair of Silicone Sealing Rings.
- Instant Pot Parts: Periodically, if necessary, rinse the Anti-Block Shield, Steam Release Valve, and Condensation Collector of the Instant Pot.
How to Clean an Instant Pot - FAQs
While the central unit cannot be submerged, the inner pot, lids, and accessories are dishwasher safe. Yes, the pressure cooker lid can even be placed in the dishwasher.
Fill 1 cup water, 1 cup vinegar, and a few lemon peels in the inner pot. 2 minutes on the “Steam” setting in the Instant Pot, then naturally release the pressure. Remove the sealing ring from the lid of the Instant Pot once it has been unlocked and allow it to air dry.
In the Instant Pot, combine 2 cups water or white vinegar with a roughly chopped lemon rind. Then, for 2 minutes, execute the steam program. Remove the ring and allow it to air dry. If that does not work, soak the ring overnight in vinegar, a natural odor remover.
To avoid food or odor buildup, all Instant Pot components that come into contact with food should be cleaned after each use. This includes the inner cooking pot, steam rack, and lid components, such as the sealing ring and anti-block shield.
It’s simple to use white vinegar to remove odors from the silicone ring:
- Fill the cooking insert with two cups of vinegar.
- Seal the lid.
- Set “Steam” setting for two minutes.
Once your cycle is complete, allow the sealing ring to dry before replacing it entirely.
Conclusion
Cleaning an Instant Pot is much less complicated than you might expect. All that is required is a thorough cleaning, washing, and reassembly. These instructions on how to clean an Instant Pot will help you keep your pressure cooker clean— and ensure that it continues to serve you well for years to come.
These cleaning suggestions will assist you in ensuring that your Instant Pot has a long and productive life. As you can see, maintaining your Instant Pot is quite simple. Only occasionally will you require a more thorough cleaning.
It takes little time to clean, and the benefit of deep cleaning outweighs any inconvenience associated with maintaining it. Take good care of your Instant Pot, and it will look after you.
Related Posts
Should you buy an Instant Pot? – Here’s what you need to know
Instant Pots have emerged as a standard in small kitchen...
Read MoreTop-rated Instant Pot you should buy
The Instant Pot completely dominated the appliance market in the...
Read MoreWhy Trust Us
You will find what you are looking for at Jody's Bakery. From classic to luxury brands, you'll find both. We will help you to select appliances that fit your needs, budget and lifestyle. Whether you want to stop by to learn more — or plan to make a major purchase — we’ll treat you like family and assist you every step of the way. Shop with us today to receive friendly and experienced help along the way.


… [Trackback]
[…] Find More to that Topic: jodysbakery.com/how-to-clean-an-instant-pot/ […]
… [Trackback]
[…] Find More to that Topic: jodysbakery.com/how-to-clean-an-instant-pot/ […]
… [Trackback]
[…] Find More Information here on that Topic: jodysbakery.com/how-to-clean-an-instant-pot/ […]
… [Trackback]
[…] Information on that Topic: jodysbakery.com/how-to-clean-an-instant-pot/ […]
… [Trackback]
[…] Find More Info here to that Topic: jodysbakery.com/how-to-clean-an-instant-pot/ […]
… [Trackback]
[…] Read More Information here on that Topic: jodysbakery.com/how-to-clean-an-instant-pot/ […]
… [Trackback]
[…] Find More here to that Topic: jodysbakery.com/how-to-clean-an-instant-pot/ […]
… [Trackback]
[…] Read More on that Topic: jodysbakery.com/how-to-clean-an-instant-pot/ […]
… [Trackback]
[…] Find More here on that Topic: jodysbakery.com/how-to-clean-an-instant-pot/ […]
… [Trackback]
[…] Find More Information here to that Topic: jodysbakery.com/how-to-clean-an-instant-pot/ […]
… [Trackback]
[…] Read More here to that Topic: jodysbakery.com/how-to-clean-an-instant-pot/ […]
… [Trackback]
[…] There you will find 28227 more Information on that Topic: jodysbakery.com/how-to-clean-an-instant-pot/ […]
… [Trackback]
[…] Find More to that Topic: jodysbakery.com/how-to-clean-an-instant-pot/ […]
… [Trackback]
[…] Read More on that Topic: jodysbakery.com/how-to-clean-an-instant-pot/ […]
… [Trackback]
[…] Here you can find 68300 additional Info on that Topic: jodysbakery.com/how-to-clean-an-instant-pot/ […]
… [Trackback]
[…] Read More Information here on that Topic: jodysbakery.com/how-to-clean-an-instant-pot/ […]