Instant Pot pot roast with potatoes and gravy is the...
Read More

Yogurt in the Instant Pot? It’s not only simple—it’ll add a new sense of adventure to your yogurt affair! To make great yogurt, all you have to do is press the right buttons, take a look at it occasionally, and get the job done.
To make yogurt, you do not require an Instant Pot; however, an Instant Pot is a fantastic yogurt maker.
If you enjoy yogurt, we recommend giving it a try; we believe you will be hooked. We love our homemade yogurt. It has a silky and luxurious feel to it. We’ve turned into a snob when it comes to yogurt.
Why Should Use The Instant Pot To Make Yogurt?
- Technically, yogurt is not cooked. It is incubated and kept at a constant warm temperature (between 110 and 116°F) for an extended period. This promotes the growth and multiplication of desirable, heat-loving bacteria.
- The programming of an Instant Pot maintains the temperature precisely within that target zone, avoiding a slew of potential issues—such as stringy yogurt caused by hot temperatures.
- It’s inexpensive! In general, milk is less expensive than yogurt (especially when on sale).
- The majority of the time spent preparing is hands-off.
- You maintain complete control over the ingredients and sugar content.
- You can customize the flavors with vanilla, honey, jam, or spices.
- Utilizing your last batch of yogurt to begin the next is satisfying frugally.
How Long Do You Make Yogurt in the Instant Pot?
- The time required for yogurt to incubate and set varies between 4 and 12 hours. Because the first batch is so variable, we recommend starting it in the morning on a day when you’ll be at home for the majority of the day. Once you’ve established a good routine, you can leave the house or make the yogurt overnight while it incubates.
- This variability is since fermentation involves a large number of variables. The more active and fresh your starter is, the shorter the time required (usually). It frequently takes longer the first time you use a dry heirloom starter.
- Technically, it takes between 12 and 24 hours from a milk carton to a breakfast bowl. This includes chilling and then draining your finished yogurt if desired. If this seems excessive, keep in mind that this process is 99 percent automated.
What Equipment Is Required to Make Yogurt in The Instant Pot?
- Instant Pot (any model except the LUX)
- A digital thermometer with instant-read capability or a candy thermometer
- Strainer, cheesecloth, and small jars are optional.
What Are the Ingredients Required for Homemade Yogurt?
There are only two ingredients required: a yogurt starter and your preferred dairy milk.
1. Choosing Yogurt starters
- A yogurt starter is a culture of beneficial, living bacteria that aids in the fermentation of milk into yogurt. Yogurt starters have the potential to make or break your yogurt-making endeavors. Therefore, keep in mind that not all yogurts work as yogurt starters!
- When purchasing a yogurt starter, you must check the ingredients list of the store-bought yogurt. It must contain viable bacterial cultures to function as a yogurt starter.
- A live culture typically contains at least two distinct bacterial species (L. bulgaricus and S. thermophilus).
Note: The consistency and flavor of homemade yogurt will vary depending on the type of bacteria cultures used in the yogurt starter. Occasionally, it does make a significant difference! Therefore, choose the brand that appeals to you the most for the most consistent result.
2. Choosing a Milk Type
- Choosing the appropriate type of milk is a critical step in successfully making homemade yogurt, as the type of milk determines the thickness and creaminess of the yogurt.
- After experimenting with 2 percent milk, 3.25 percent milk, and 3.8 percent milk, we discovered that 3.8 percent whole milk with the highest milk fat content produced the thickest and creamiest homemade yogurt.
How To Make Yogurt in the Instant Pot
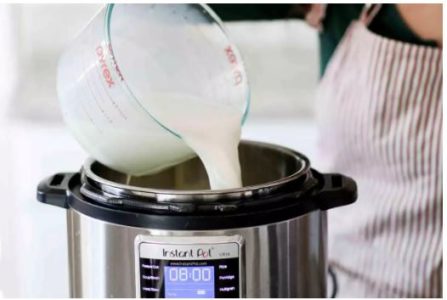
1. In the Instant Pot, bring the milk to a boil:
- Pour the milk into the Instant Pot’s insert. On the lid, secure it. It is irrelevant whether the steam vent is open or closed.
- To begin, press the “Yogurt” button, then “Adjust” until the digital readout indicates “Boil” or “HIGH.” (The readout will vary according to your model. If you require clarification, refer to the yogurt section of your Instant Pot manual.)
- Following that, you’ll need to press the “start” button on some Instant Pot models. It will eventually bring the milk to 180° F. (this kills off undesirable microorganisms). Typically, it takes around 30 minutes.When the Instant Pot is finished, it will beep and display the word “Yogt.”
2. Cool the milk:
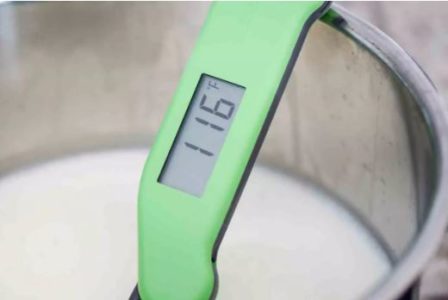
- Immediately after the Instant Pot beeps, please turn it off and remove the hot milk insert. Place the thermometer in the milk and wait until the temperature reaches 116° F. This process can take up to an hour.
- To expedite the cooling process, place the hot milk in a bath of ice water and stir; the temperature will drop in approximately 5 minutes. (If the temperature falls below 110°F, replace the insert in the cooker, press “Yogurt,” then “Adjust,” and monitor the thermometer until it returns to the proper range. Remove the cooker’s insert.)
- Take the thermometer out. A film of coagulated milk will form on the surface of the milk; carefully scrape this off with a spoon and discard (this film will not ruin your yogurt, but it will create an unappealing texture once it is finished).
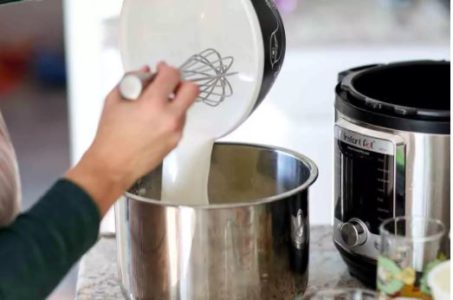
3. Temper the starter:
- In a medium bowl, combine the starter and about 1/2 cup of warm milk.
- Whisk until smooth before pouring into the milk insert and whisking to combine.
4. Incubate the yogurt
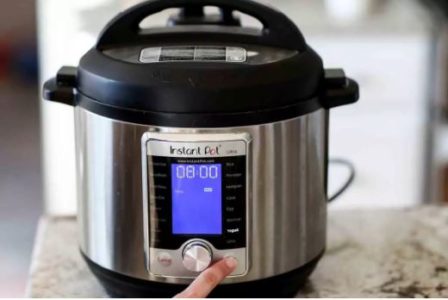
- Replace the milk insert in the Instant Pot, lock the lid (the steam vent may be open or closed again), and press YOGURT. On specific models, such as the Ultra, you’ll need to press “adjust” to switch from “HIGH” to “MEDIUM.”
- Following that, if the readout does not read “8:00,” use the + button to add time until it does.
- The Instant Pot will incubate your yogurt for 8 hours before shutting down (the display will read “Yogt” once the default programming of 8 hours is complete). The +/- buttons allow you to adjust the incubation time.
- Note that the timer counts up when incubating yogurt (when pressure cooking with your Instant Pot, the readout counts down). Thus, when the readout indicates “2:45,” it sets for two hours and forty-five minutes.
5. Examine your yogurt:
- After 4 hours, begin checking on the yogurt. You don’t want to shake the Instant Pot too much while the yogurt is incubating—this can cause the yogurt not to set correctly.
- Your yogurt can set in as little as four hours or as much as twelve hours. Much of it is determined by the activity of the cultures in your starter—a fresher starter requires significantly less time to incubate. Take your time, and don’t give up!
- When peeking, open the lid carefully; a lot of condensation forms around the gasket, and you want to prevent it from dripping back onto the yogurt.
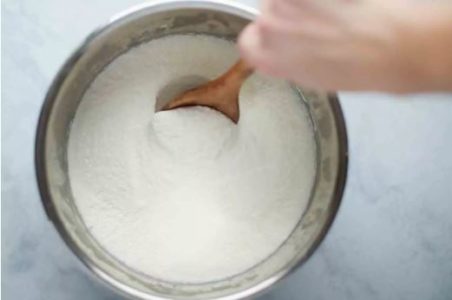
- When the yogurt jiggles in unison when gently nudged with the insert, it is set, and it does not run when the pot is tipped slightly. On the surface and along the edges, you may notice a clear liquid (the whey).
6. Bring the yogurt to room temperature without stirring.
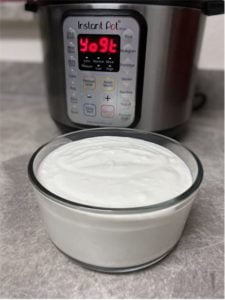
- Once the yogurt has set, remove the insert gently from the cooker. Pouring it out or stirring it at this point will result in a runny yogurt, which you do not want.
- You can place the insert on a rack to speed up the cooling process, but do not immediately place it in the refrigerator, as rapid temperature changes can also thin your yogurt.
- Set it in the fridge once it has reached room temperature (about 2 hours).
7. Refrigerate for at least six hours
- While the yogurt may appear lumpy after chilling, vigorous whisking will smooth it out.
- You may now strain the mixture or transfer it to sterile containers (I like quart glass jars).
Tips
- To make thicker yogurt, keep the lid on, press YOGURT, and then ADJUST until the digital readout reads “boil” or “HIGH” again. Start a 5-minute timer; once the timer goes off, continue with the recipe below. This slightly longer cooking time results in a thicker yogurt.
- According to some sources, ultra-pasteurized milk will not work, but we tried many times, and it works perfectly well. The reduced-fat dairy produces a thinner yogurt than whole milk, but it is perfectly acceptable to use. You can even use half-and-half to make yogurt!
- Some recipes specify that nonfat dry milk should be added to regular milk before adding the starter. We used to do this, but it hasn’t made a noticeable difference in the final product, so we’ve stopped.
- While you can technically make an entire gallon at a time in the Instant Pot, it’s best to keep it manageable for your first few attempts, minimizing any (unlikely!) failures. Additionally, even with your trusty Instant Pot, the larger the volume of milk, the more difficult it is to maintain a constant incubation temperature.
How Long Can Homemade Yogurt Be Stored in the Refrigerator?
Yogurt is alive, and as time passes, it gets tangier and thinner. Our yogurt stays good in the fridge for about a week and a half. Two weeks is doable, but pushing it is not a good idea.
If you want to keep it for a more extended period, you can freeze it. Fresh yogurt keeps exceptionally well in the freezer for up to two months.
Note that the texture may change slightly upon thawing, appearing more liquid or grainy than initially. Before using, vigorously stir for 30 seconds to even out the texture. All frozen foods must be wholly and slowly defrosted in the refrigerator.
- Servings: 08 Servings
- Yield: 6 1/2 cups
- Level: Easy
- Equipment: Instant Pot
- Prep Time: 05 mins
- Cook Time: 30 mins
- Incubation time: 8 hours
- Total Time: 8 hours 35 mins
Ingredients
- 2 tablespoons yogurt starter
- 1/2 gallon (2 quarts) Pasteurized milk or whole milk
Directions
1. In the Instant Pot, bring the milk to a boil
2. Cool the milk
3. Temper the starter
4. Incubate the yogurt
5. Examine your yogurt
6. Bring the yogurt to room temperature without stirring.
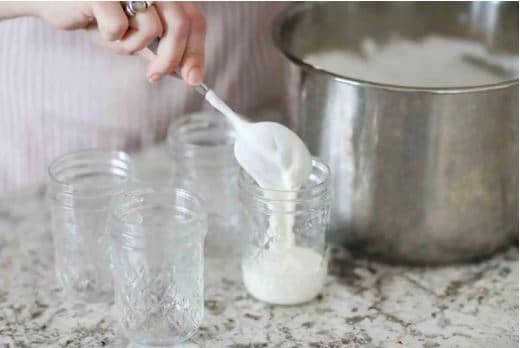
7. Refrigerate for at least six hours
How to make yogurt in the Instant Pot - FAQs
At first, it isn’t easy to distinguish between yogurt and warm, tangy milk.
When finished, the yogurt should be a solid mass, not a runny liquid. When you gently nudge the insert, it will jiggle like loose Jell-O.
The set yogurt will occasionally pull away from the sides of the insert, revealing some clear liquid (the whey) floating between the pot and the set yogurt. This is all perfectly normal.
Most commercial yogurt contains stabilizers (such as pectin, carrageenan, or starch) to help it maintain its body. Your successful homemade yogurt may be a little thinner than the commercial yogurt you’re used to. It’s frequently a little lumpy as well. Do not be concerned!
- To make smooth yogurt, whisk it vigorously once it’s chilled and again right before serving.
- Strain the yogurt through a cheesecloth to create a thick, creamy Greek-style yogurt.
To begin, flavor yogurt only after it has been finished and chilled. Otherwise, you risk interfering with its proper setup.
We prefer to flavor my yogurt only just before eating or portioning it. This way, we’re not bound by anything and can incorporate plain yogurt into recipes.
You can use raw milk, but your results may be inconsistent since raw milk already contains microbial life (the microbes in the raw milk and the starter sometimes compete).
These will work just as well as cow’s milk yogurt, though the texture and flavor will slightly differ. Goat milk yogurt is tart and goaty, with a lighter body than sheep milk yogurt; sheep milk yogurt is rich and intense.
No. The Instant Pot acts as an incubator for the yogurt, maintaining a temperature of around 110°F for several hours, something that stovetop pressure cookers are incapable of doing.
Conclusion
This homemade Instant Pot Yogurt is incredibly simple to make and takes no time at all to prepare using only your Instant Pot. Homemade yogurt is soft, rich, creamy, and extremely tasty. This nutritious yogurt can be used in various ways, including cooking, baking, breakfast, and dinners.
With an Instant Pot, you never have to worry about over-boiling or under-cooking yogurt, searching for a yogurt starter, or spending an excessive amount of money on the healthiest yogurts on the market.
Related Posts
Instant Pot Chicken Stock
This Instant Pot Chicken Stock recipe is the simplest and...
Read MoreBest affordable electric pressure cookers review and buying guide
Have you ever considered buying an electric pressure cooker for...
Read MoreTop-rated Instant Pot you should buy
The Instant Pot completely dominated the appliance market in the...
Read MoreWhy Trust Us
You will find what you are looking for at Jody's Bakery. From classic to luxury brands, you'll find both. We will help you to select appliances that fit your needs, budget and lifestyle. Whether you want to stop by to learn more — or plan to make a major purchase — we’ll treat you like family and assist you every step of the way. Shop with us today to receive friendly and experienced help along the way.


… [Trackback]
[…] Find More on to that Topic: jodysbakery.com/how-to-make-yogurt-in-the-instant-pot/ […]
… [Trackback]
[…] Read More Info here on that Topic: jodysbakery.com/how-to-make-yogurt-in-the-instant-pot/ […]
… [Trackback]
[…] Read More on to that Topic: jodysbakery.com/how-to-make-yogurt-in-the-instant-pot/ […]
… [Trackback]
[…] Info on that Topic: jodysbakery.com/how-to-make-yogurt-in-the-instant-pot/ […]
… [Trackback]
[…] Find More Information here to that Topic: jodysbakery.com/how-to-make-yogurt-in-the-instant-pot/ […]
… [Trackback]
[…] Read More to that Topic: jodysbakery.com/how-to-make-yogurt-in-the-instant-pot/ […]
… [Trackback]
[…] Read More on on that Topic: jodysbakery.com/how-to-make-yogurt-in-the-instant-pot/ […]
… [Trackback]
[…] There you can find 4089 more Info to that Topic: jodysbakery.com/how-to-make-yogurt-in-the-instant-pot/ […]
… [Trackback]
[…] Read More on that Topic: jodysbakery.com/how-to-make-yogurt-in-the-instant-pot/ […]
… [Trackback]
[…] Information to that Topic: jodysbakery.com/how-to-make-yogurt-in-the-instant-pot/ […]
… [Trackback]
[…] Read More Information here to that Topic: jodysbakery.com/how-to-make-yogurt-in-the-instant-pot/ […]
… [Trackback]
[…] Read More here on that Topic: jodysbakery.com/how-to-make-yogurt-in-the-instant-pot/ […]
… [Trackback]
[…] Find More Info here to that Topic: jodysbakery.com/how-to-make-yogurt-in-the-instant-pot/ […]
… [Trackback]
[…] Information to that Topic: jodysbakery.com/how-to-make-yogurt-in-the-instant-pot/ […]
… [Trackback]
[…] Here you will find 20957 additional Information on that Topic: jodysbakery.com/how-to-make-yogurt-in-the-instant-pot/ […]
… [Trackback]
[…] Info on that Topic: jodysbakery.com/how-to-make-yogurt-in-the-instant-pot/ […]