


An electric grain mill is a machine that grinds grains,...
Read More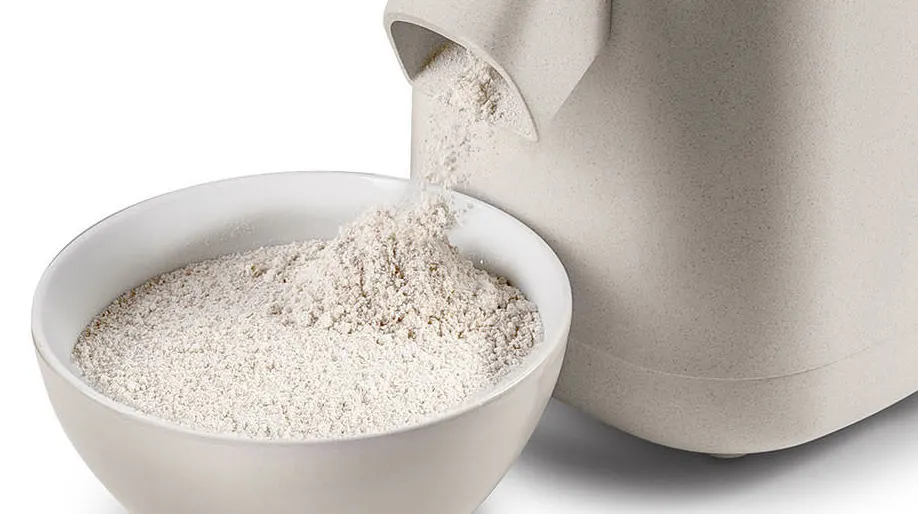
A grain mill is a machine used to grind grains into flour, and it is an essential tool for making bread flour. Bread flour is a type of flour that is higher in protein and gluten than other types of flour, making it ideal for making bread. The grinding process of a grain mill helps to break down the grain kernels into smaller particles, resulting in a finer and more uniform flour that is perfect for baking bread.
There are various types of grain mills available, including manual and electric models. Manual grain mills are operated by hand and require more effort, but they are quieter and produce less heat during the grinding process, which helps to preserve the nutrients in the grains. Electric grain mills, on the other hand, are faster and easier to use, making them a popular choice for home bakers.
Regardless of the type of grain mill you choose, it is important to select one that is capable of grinding grains finely enough to produce a high-quality bread flour. This typically requires a mill that has a fine mesh screen or multiple grinding settings to adjust the coarseness of the flour.
In summary, a grain mill is a valuable tool for making bread flour. Whether you choose a manual or electric model, a good grain mill can help you produce a fine and consistent flour that is perfect for baking delicious bread.
What is the best grain mill for bread flour?
There are several grain mills on the market that can grind fine bread flour. Some of the most popular options include:
- Mockmill Professional 200: This electric mill is designed specifically for home bakers and can grind grains into a fine flour that is ideal for baking bread. It has a 200-gram hopper capacity and can grind up to 200 grams of flour per minute.
- KoMo Classic Grain Mill: This is another electric mill that is known for its ability to grind fine flour. It features a powerful motor and an adjustable milling mechanism that can produce flour as fine as 00 flour, which is commonly used for making pizza dough.
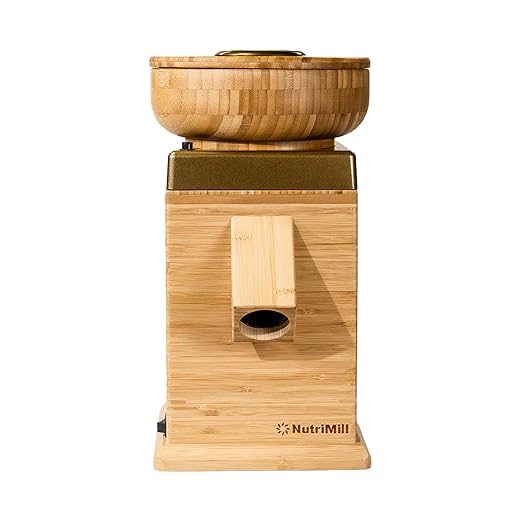
- NutriMill Classic Grain Mill: This electric mill has a 20-cup capacity and can grind grains into a fine flour that is perfect for making bread. It features a variable speed control and can grind up to 5 cups of flour per minute.
- Country Living Grain Mill: This manual mill is made from high-quality materials and is designed to grind grains into a fine flour that is ideal for baking bread. It has a 1-year warranty and can be used to grind a variety of grains, including wheat, corn, and rice.
Ultimately, the best grain mill for grinding fine bread flour will depend on your specific needs and preferences. It is important to consider factors such as ease of use, grinding speed, and durability when selecting a grain mill for your baking needs.
Is bread flour finely milled?
Yes, bread flour is finely milled to produce a flour that is higher in protein and gluten than other types of flour. The milling process for bread flour involves grinding the wheat berries into a fine powder, which is then sifted to remove any larger particles or bran. The resulting flour is finely milled and has a high protein content, which makes it ideal for baking bread.
Bread flour typically has a protein content of around 12-14%, which is higher than all-purpose flour, pastry flour, or cake flour. The higher protein content of bread flour creates more gluten during the mixing and kneading process, resulting in a dough that is elastic and able to rise well. This is important for creating the airy, light texture of bread.
In summary, bread flour is finely milled to produce a flour that is higher in protein and gluten than other types of flour. This fine milling process helps to create a consistent texture and high protein content that is ideal for baking delicious bread.
Can I mill my own bread flour?
Yes, you can mill your own bread flour at home using a grain mill. Milling your own flour can be a great way to ensure that your flour is fresh and free of additives or preservatives. It can also give you more control over the fineness of the flour, allowing you to create the perfect texture for your bread.
To mill your own bread flour, you will need a grain mill and some whole grains, such as wheat, rye, or spelt. You can purchase whole grains from a local health food store or online. Once you have your grains, simply load them into the grain mill and turn it on. The mill will grind the grains into flour, which you can then use to bake bread.
It’s important to note that different types of grains will produce different flavors and textures of flour, so you may want to experiment with different grains to find the one that best suits your taste preferences. Additionally, milling your own flour can be a bit time-consuming, so it’s important to factor in the extra time when planning your baking projects.
Is it cheaper to make your own bread flour?
Making your own bread flour by milling your own grains can be cost-effective in the long run, especially if you bake bread frequently or in large quantities. However, the initial investment in a grain mill and the cost of purchasing whole grains can be higher than simply purchasing pre-made bread flour.
The cost of whole grains varies depending on the type of grain and where you purchase it. Generally, whole grains are more affordable than pre-made flour, but you will need to factor in the cost of the grain mill and any additional accessories, such as sifters or containers for storing the flour.
Over time, milling your own bread flour can save you money, as you will be able to purchase whole grains in bulk and avoid the added cost of pre-made flour. Additionally, milling your own flour ensures that your flour is fresh and free of additives, which can be beneficial for your health and the taste of your bread.
In summary, while making your own bread flour may not be cheaper upfront due to the cost of the grain mill and whole grains, it can be cost-effective in the long run and can provide you with high-quality flour that is fresh and free of additives.
What is the best grain to grind for bread flour?
Wheat is the most common grain used to make bread flour, as it has a high protein content and produces a strong gluten network that helps bread dough rise and create a desirable texture. However, there are other grains that can be used to make bread flour, each with their own unique flavor and texture characteristics.
Here are some other grains that can be used to make bread flour:
- Rye: Rye flour has a lower gluten content than wheat flour, but it can still produce a flavorful and hearty bread. Rye bread is often denser and more moist than wheat bread.
- Spelt: Spelt flour has a slightly sweet and nutty flavor and a high protein content, making it a good choice for bread flour. Spelt bread has a lighter texture than rye bread but is still denser than wheat bread.
- Barley: Barley flour has a mild flavor and a lower gluten content than wheat flour. It is often used in combination with other grains to produce a flavorful and nutritious bread.
- Kamut: Kamut flour has a buttery and nutty flavor and a high protein content. It is often used in artisanal bread recipes to add a unique flavor and texture.
Ultimately, the best grain to grind for bread flour will depend on your personal taste preferences and the type of bread you want to bake. Experimenting with different grains and grain combinations can help you find the perfect bread flour for your needs.
How do you mill bread flour?
To mill bread flour, you will need a grain mill, some whole grains, and the following steps:
- Choose the type of grain you want to use. Common grains for bread flour include wheat, rye, spelt, and barley. You can use a single type of grain or a combination of grains, depending on your preference.
- Measure out the amount of grain you need. The amount of grain you use will depend on the recipe you are making, but generally, you will need around 2-3 cups of grain to produce 3 cups of flour.
- Adjust the settings on your grain mill. Depending on your grain mill, you may have different settings to adjust the coarseness of the flour. For bread flour, you will want to use the finest setting possible to produce a fine, powdery flour.
- Load the grain into the hopper of the grain mill. Be sure to follow the manufacturer’s instructions for your specific model of grain mill.
- Turn on the grain mill and let it run until all of the grain has been milled into flour. This may take several minutes, depending on the amount of grain and the power of your grain mill.
- Once the flour is milled, transfer it to an airtight container for storage. You can use the fresh flour immediately in your bread recipe or store it for later use.
It’s important to note that milling your own flour can be a bit messy, so be sure to clean up any excess flour and grain dust from your work area when you’re finished. Additionally, different types of grains may require different milling techniques, so it’s important to read the instructions for your specific grain mill and experiment with different grains to find the best results.
How long does it take to use grain mill for bread flour?
The time it takes to use a grain mill to produce bread flour can vary depending on the type of grain mill, the amount of wheat being milled, and the desired fineness of the flour. In general, using a grain mill to produce bread flour can take anywhere from a few minutes to an hour or more.
If you are using a manual grain mill, the process may take longer as you will need to crank the mill by hand. Electric grain mills are generally faster, but may still take some time depending on the size and power of the motor.
In terms of the amount of wheat being milled, smaller quantities will obviously take less time than larger quantities. It’s also important to note that the grain mill may need to be stopped periodically to prevent overheating and to allow the motor or grinding stones to cool down.
Finally, the desired fineness of the flour will also affect the milling time. If you want a finer flour, you may need to mill the wheat several times to achieve the desired consistency, which will add to the overall milling time.
Overall, the time it takes to use a grain mill for bread flour can vary depending on several factors, but it generally takes anywhere from a few minutes to an hour or more.
What is the best size grain mill for bread flour?
The best size grain mill for milling bread flour will depend on your personal preferences and how much flour you want to mill at one time. Grain mills come in a range of sizes, from small manual models to large electric models, and each has its own benefits and drawbacks.
If you only plan on milling small batches of flour at a time, a small manual grain mill may be sufficient for your needs. These mills are typically less expensive than electric models and take up less space in your kitchen. However, they may require more effort to operate and may not be suitable for milling large quantities of flour.
For larger batches of flour, an electric grain mill may be more efficient and convenient. These mills can quickly and easily grind large amounts of grain and may have adjustable settings to control the fineness of the flour. However, electric grain mills can be more expensive than manual models and may require more space in your kitchen.
In general, a grain mill with a 10-20 cup capacity is a good size for milling bread flour. This size can handle large batches of grain without taking up too much space in your kitchen. Additionally, look for a grain mill that has adjustable settings for grinding different types of grains and allows you to control the fineness of the flour.
Ultimately, the best size grain mill for milling bread flour will depend on your specific needs and preferences. Consider the amount of flour you plan to mill at one time, the space you have available in your kitchen, and your budget when selecting a grain mill.
How much bread flour do you get from grinding 1kg wheat?
The amount of bread flour that you get from grinding 1kg of wheat will depend on the efficiency of your grain mill and the type of wheat that you are grinding. Additionally, the amount of flour that you can extract from the wheat will depend on whether you sift the flour to remove the bran and other coarse particles.
As a general guideline, you can expect to get around 700-800g of bread flour from grinding 1kg of wheat, assuming that you sift the flour to remove the bran and other particles. However, this can vary depending on factors such as the moisture content of the wheat and the quality of your grain mill.
Keep in mind that milling your own flour can result in a slightly different yield than pre-packaged flour due to variations in grain size and moisture content. However, this can be an advantage, as you can adjust your recipes to the consistency of the flour that you produce.
Overall, while the exact amount of bread flour that you get from grinding 1kg of wheat can vary, you can generally expect to get around 700-800g of flour after sifting out the bran and other particles.
Is it worth it to mill your own bread flour?
Whether or not it is worth it to mill your own bread flour will depend on your personal preferences and circumstances. Here are some factors to consider:
- Flavor and nutrition: Milling your own bread flour allows you to use whole grains and preserve more of the natural flavor and nutrition of the wheat. Freshly milled flour also has a sweeter flavor and aroma than store-bought flour, which can enhance the taste of your bread.
- Cost: While the upfront cost of a grain mill may seem expensive, milling your own flour can be more cost-effective in the long run, especially if you bake bread frequently. You can buy whole grains in bulk at a lower cost per pound than pre-packaged flour, and milling your own flour reduces waste and the need to buy new flour as often.
- Convenience: Milling your own flour requires an initial investment in a grain mill and some time and effort to operate. If you have a busy schedule and do not have time to mill your own flour, it may not be worth the extra effort.
- Control: Milling your own flour gives you greater control over the texture and consistency of your flour, which can help you achieve better results in your bread baking. You can also experiment with different grains and grain combinations to create unique flavors and textures.
Overall, whether or not it is worth it to mill your own bread flour will depend on your personal preferences and circumstances. If you value flavor, nutrition, and cost-effectiveness, and have the time and resources to invest in a grain mill, then milling your own flour can be a rewarding and enjoyable experience.
How to choose the best grain mill for bread flour?
When choosing the best grain mill for bread flour, there are several factors to consider:
- Capacity: The capacity of the grain mill determines how much grain you can grind at a time. If you plan to grind large quantities of grain, you’ll need a grain mill with a larger capacity. However, larger capacity mills may also be more expensive.
- Grinding speed: The grinding speed of the grain mill determines how quickly it can grind grain. Faster grinding speeds can be more efficient, but they may also generate more heat, which can affect the quality of the flour. Look for a grain mill with a speed that balances efficiency with flour quality.
- Adjustable settings: The ability to adjust the grinding settings allows you to produce flour of different coarseness, which is important for baking different types of bread. Look for a grain mill with adjustable settings that allow you to fine-tune the coarseness of your flour.
- Material: The material of the grain mill affects its durability and performance. Look for a grain mill made of high-quality materials that can withstand the wear and tear of frequent use.
- Ease of use and maintenance: Look for a grain mill that is easy to use and clean. Some grain mills may require disassembly for cleaning, while others may have detachable parts that can be easily cleaned in a dishwasher.
- Price: The price of the grain mill is an important consideration. Grain mills can range from less than $100 to several hundred dollars, so consider your budget and the features you need when choosing a grain mill.
Ultimately, the best grain mill for bread flour will depend on your specific needs and preferences. Consider the above factors when choosing a grain mill, and read reviews and product specifications to find the best grain mill for your needs.
How long does fresh milled flour last?
Freshly milled flour has a shorter shelf life than commercially produced flour because it contains all parts of the grain, including the oils and fats, which can become rancid over time. The exact shelf life of fresh milled flour can vary depending on factors such as the type of grain, the milling process, and storage conditions.
In general, fresh milled flour can last anywhere from a few days to several weeks. Whole grain flour, which contains all parts of the grain, including the bran and germ, has a shorter shelf life than white flour, which has had the bran and germ removed. Whole grain flour can last anywhere from a few days to a week or two, while white flour can last up to several weeks.
To maximize the shelf life of fresh milled flour, it’s important to store it in an airtight container in a cool, dry place. It’s also a good idea to store the flour in the refrigerator or freezer, which can help to slow down the oxidation process and prolong its shelf life. However, it’s important to note that fresh milled flour may still lose some of its nutritional value over time, even if stored properly.
How to clean grain mill for bread flour
Cleaning a grain mill for bread flour is important to ensure that it operates efficiently and produces high-quality flour. Here are some steps you can follow to clean a grain mill:
- Unplug the grain mill from the power source if it is an electric model.
- Remove any remaining grains or flour from the hopper and the milling chamber using a soft brush or a vacuum cleaner. Make sure to remove all the residual grains and flour from the crevices and corners of the milling chamber.
- Disassemble the grain mill as per the manufacturer’s instructions, if necessary. Some grain mills have detachable parts that can be removed for cleaning.
- Soak the removable parts, such as the milling burrs and hopper, in warm soapy water for 15-20 minutes.
- Scrub the parts with a soft brush or a sponge to remove any remaining residue or buildup.
- Rinse the parts thoroughly with clean water and allow them to dry completely before reassembling the grain mill.
- If your grain mill has metal parts, you can apply a food-grade oil to prevent rust and keep the parts lubricated.
- Wipe the exterior of the grain mill with a damp cloth to remove any dust or dirt.
- Reassemble the grain mill and test it to make sure it is functioning properly.
It’s important to clean your grain mill after every use to ensure that it operates efficiently and produces high-quality flour. If you use your grain mill frequently, you may need to clean it more often to prevent buildup and maintain its performance.
How to maintain grain mill for bread flour properly
Proper maintenance of a grain mill for bread flour is important to ensure its efficient operation and longevity. Here are some tips on how to maintain your grain mill:
- Regularly clean your grain mill after each use, as described earlier.
- Avoid using the mill to grind materials that are too hard, such as rocks or metal, as this can damage the milling mechanism.
- Regularly inspect the milling mechanism for signs of wear or damage. Replace any worn or damaged parts as necessary.
- Lubricate the moving parts of the grain mill periodically, as recommended by the manufacturer.
- Store the grain mill in a dry, cool place when not in use, and protect it from moisture and dust.
- Avoid overloading the grain mill with too much grain at once, as this can strain the motor and reduce its lifespan.
- If using an electric grain mill, make sure to unplug it before disassembling or cleaning the machine.
- Follow the manufacturer’s instructions for maintaining and servicing your grain mill.
By following these maintenance tips, you can keep your grain mill in good working condition and ensure that it produces high-quality flour for your baking needs. Regular maintenance can also help to extend the lifespan of your grain mill and save you money in the long run.
Troubleshooting about grain mill for bread flour
Here are some common troubleshooting tips for a grain mill for bread flour:
- Grain mill not starting: Check to make sure that the mill is properly plugged in and that the power source is functioning. Also, check if there is any obstruction in the hopper or the milling chamber that is preventing the grains from flowing.
- Uneven or coarse flour: Check if the milling burrs or plates are properly aligned and in good condition. If they are dull or damaged, they may need to be replaced. Also, adjust the milling settings to achieve the desired fineness of the flour.
- Clogging or jamming of the milling mechanism: This can be caused by using grains that are too moist or oily. Make sure to use dry grains and avoid using grains with high oil content. You can also try adjusting the milling settings to a coarser setting to avoid clogging.
- Excessive noise or vibration: Check if the grain mill is properly assembled and all the parts are securely fastened. Also, check if the milling mechanism is properly lubricated and in good condition.
- Overheating or burning smell: This can be caused by overloading the grain mill or running it for too long without a break. Avoid overloading the mill and take breaks between grinding sessions to allow the motor to cool down.
If you are unable to resolve the issue on your own, refer to the manufacturer’s instructions or contact their customer support for further assistance.
Conclusion
In conclusion, using a grain mill to produce bread flour can be a rewarding and cost-effective way to make high-quality, fresh flour for baking bread. When choosing a grain mill for bread flour, consider factors such as the type of grain, the milling mechanism, the size and power of the motor, and the desired fineness of the flour. With proper use and maintenance, a grain mill can last for many years and provide you with delicious, freshly milled flour for your baking needs.
Remember that milling your own flour does require an investment in time and effort, and the cost of the grain mill itself. However, the potential benefits, such as fresher and more flavorful flour, the ability to customize the grind to your preference, and potential cost savings, may make it worth it for some bakers.
In addition, keep in mind that freshly milled flour has a shorter shelf life than commercially produced flour and requires proper storage to maintain its quality. Cleaning the grain mill after each use is also important to ensure its efficient operation and longevity. Overall, using a grain mill for bread flour can be a great way to enhance your baking skills and produce delicious, homemade bread.
Related Posts

How to choose the best grain mill for everyday use
A grain mill grinder is a device used to grind...
Read MoreMaking bread flour in grain mill grinder
Making bread flour at home using a grain mill grinder...
Read More Post Views: 3,216
Why Trust Us
You will find what you are looking for at Jody's Bakery. From classic to luxury brands, you'll find both. We will help you to select appliances that fit your needs, budget and lifestyle. Whether you want to stop by to learn more — or plan to make a major purchase — we’ll treat you like family and assist you every step of the way. Shop with us today to receive friendly and experienced help along the way.


… [Trackback]
[…] Read More on that Topic: jodysbakery.com/how-to-choose-the-best-grain-mill-for-bread-flour/ […]
… [Trackback]
[…] Information to that Topic: jodysbakery.com/how-to-choose-the-best-grain-mill-for-bread-flour/ […]
… [Trackback]
[…] Find More Information here on that Topic: jodysbakery.com/how-to-choose-the-best-grain-mill-for-bread-flour/ […]
Appreciate you sharing, great blog article. Much obliged.
Really appreciate you sharing this article.Really thank you! Cool.
Im thankful for the article post.Much thanks again. Fantastic.
I cannot thank you enough for the blog post.Much thanks again.
These kind of post are always inspiring and I prefer to read quality content so I happy to find many good point here in the post
An intriguing discussion is worth comment. There’s no doubt that thatyou need to publish more on this issue, it may not be a taboo matter but generally people don’t discuss such subjects.To the next! Kind regards!!
An intriguing discussion is worth comment. I believe that you should write more about this subject, it may not be a taboo subject but usually people do not talk about such topics. To the next! Cheers!!
Thank you for your blog.Thanks Again. Will read on…
Aw, this was a really nice post. Taking a few minutes and actual effort to produce a great articleÖ but what can I sayÖ I procrastinate a lot and never manage to get nearly anything done.
ivermectin sheep drench dosage ivermectin overdose in dogs
Hi i am kavin, its my first time to commenting anywhere, when i read this articlei thought i could also make comment due to this sensible paragraph.
Good post however , I was wanting to know if you couldwrite a litte more on this topic? I’d be very thankful if you could elaborate a little bit more.Kudos!
Hi there colleagues, how is the whole thing, and what you desire tosay regarding this paragraph, in my viewits actually remarkable in support of me.
I’d need to verify with you here. Which is not one thing I usually do! I take pleasure in reading a publish that may make individuals think. Additionally, thanks for allowing me to comment!
great submit, very informative. I ponder why the opposite specialists of this sector don’t notice this. You must proceed your writing. I am sure, you have a huge readers’ base already!
I’m really enjoying the design and layout of your site. It’s a very easy on the eyes which makes it much more pleasant for me to come here and visit more often. Did you hire out a designer to create your theme? Superb work!
Its such as you learn my mind! You seem to know so much about this, like you wrote the ebook in it or something. I feel that you simply could do with a few to drive the message house a bit, however other than that, that is great blog. An excellent read. I will certainly be back.
My husband and i were ecstatic when Jordan managed to complete his basic research via the precious recommendations he gained from your very own web page. It’s not at all simplistic just to choose to be giving out helpful tips which a number of people might have been selling. We really see we’ve got the blog owner to appreciate because of that. All the explanations you have made, the simple site menu, the relationships your site help engender – it’s mostly wonderful, and it’s really making our son in addition to us imagine that the matter is pleasurable, which is certainly quite indispensable. Many thanks for everything!
Excellent post. I was checking continuously this blog and I’m impressed! Extremely helpful info specially the last part 🙂 I care for such information a lot. I was looking for this certain info for a very long time. Thank you and best of luck.
Excellent beat ! I would like to apprentice while you amend your web site, how could i subscribe for a blog web site? The account helped me a acceptable deal. I had been a little bit acquainted of this your broadcast provided bright clear idea
Hi there! This is kind of off topic but I need some guidance from an established blog. Is it hard to set up your own blog? I’m not very techincal but I can figure things out pretty fast. I’m thinking about setting up my own but I’m not sure where to begin. Do you have any points or suggestions? Thank you
fantastic post, very informative. I wonder why the other experts of this sector do not notice this. You should continue your writing. I’m confident, you have a huge readers’ base already!
wonderful points altogether, you just gained a new reader. What would you suggest about your post that you made some days ago? Any positive?
Hi, i believe that i saw you visited my website thus i got here to “go back the choose”.I’m attempting to in finding issues to enhance my website!I suppose its good enough to use some of your concepts!!
Fantastic post.Much thanks again. Awesome.
Thanks again for the blog.Really looking forward to read more. Much obliged.
I loved your blog post.Much thanks again. Really Great.
Thank you ever so for you article post.Thanks Again. Really Cool.
Im obliged for the post.Much thanks again. Cool.
wow, awesome article post.Thanks Again. Great.
Im grateful for the blog article.Really thank you!
Looking forward to reading more. Great blog.Thanks Again. Want more.
Really appreciate you sharing this article post.Much thanks again. Really Great.
Enjoyed every bit of your blog article.Really looking forward to read more.
… [Trackback]
[…] Find More to that Topic: jodysbakery.com/how-to-choose-the-best-grain-mill-for-bread-flour/ […]
Thanks a lot for the blog. Fantastic.
Major thankies for the post. Cool.
I need to to thank you for this wonderful read!! I definitely loved every little bit of it. I’ve got you saved as a favorite to check out new things you postÖ
Thanks for sharing, this is a fantastic article.Really looking forward to read more.
Awesome blog article.Really thank you! Keep writing.
Thanks again for the post.Much thanks again. Will read on…
I loved your blog article.Really looking forward to read more. Will read on…
I will immediately grab your rss feed as I can’t find your email subscription link or newsletter service. Do you have any? Kindly let me know so that I could subscribe. Thanks.
Thank you ever so for you blog post.Much thanks again. Much obliged.
I am so grateful for your blog post.Really looking forward to read more. Cool.
Hello there! This is my first visit to your blog!We are a group of volunteers and starting a new project in a community in thesame niche. Your blog provided us useful information to work on. Youhave done a wonderful job!
Hey, thanks for the blog post.Much thanks again. Cool.
This piece of writing gives clear idea designed for the new visitorsof blogging, that genuinely how to do blogging.
Very interesting topic , regards for putting up. “The rest is silence.” by William Shakespeare.
Thanks for the article.Much thanks again. Want more.
A round of applause for your blog article. Really Great.
Thanks so much for the blog post.Really looking forward to read more. Cool.
Muchos Gracias for your blog article.Thanks Again. Great.
Really informative blog article.Really thank you! Really Great.
Wow, great article.Really thank you!
Very informative blog article.Much thanks again.
You explained this perfectly! canadian pharmacy online
I think this is a real great blog.
Hello, after reading this remarkable article i am also gladto share my familiarity here with friends.
An interesting discussion is worth comment. There’s no doubt that that you need to write more on this subject matter, it might not be a taboo subject but usually people do not speak about such topics. To the next! Kind regards!!
Hey there! I’ve been following your blog for some time now and finally got the courage to go ahead and give you a shout out from Lubbock Texas! Just wanted to mention keep up the fantastic job!
providence place apartments west valley apartments apartments in morrisville pa
liberty lake apartments rentberry scam ico 30m$ raised apartments in clemson sc
Hi my friend! I want to say that this article is awesome, greatwritten and include almost all vital infos. I’d like to peer more postslike this .
Fantastic blog. Keep writing.
Thanks for the post.Really looking forward to read more. Want more.
Muchos Gracias for your post. Cool.
Regards. Terrific stuff!quality custom essays harvard college application essay pay for writing
Really informative and wonderful complex body part of subject material, now that’s user friendly (:.
Thanks a lot for the blog post.Thanks Again.
Pretty section of content. I just stumbled upon your blog and in accession capital toassert that I get in fact enjoyed account your blog posts.Any way I will be subscribing to your augmentand even I achievement you access consistently quickly.
coreg alcohol amlodipine generic amlodipine stones
strategianews.net reviewed estromectol estromectol preИ›ul stromectolului
chloroquine phosphate canada is hydroxychloroquine
Pretty nice post. I just stumbled upon your blog and wanted to say that I’ve really enjoyed browsing your blog posts. After all I will be subscribing to your feed and I hope you write again soon!
Nice post. I was checking constantly this blog and I’m impressed!Extremely helpful information specially the last part 🙂 I care for such info a lot. I was looking for this particular information for a very long time.Thank you and good luck.
I really enjoy the article post.Thanks Again. Fantastic.
Great post.Really thank you! Will read on…
Hydrochlorothiazide On Line No Prior Script
ivermectin generic name ivermectin 1 cream generic
Thanks in support of sharing such a pleasant thought, post is fastidious, thats why i have read it fully
Aw, this was an extremely good post. Spending some time and actual effort to generate a top notch article… but what can I say… I hesitate a lot and don’t manage to get anything done.
whoah this blog is wonderful i love reading your articles. Keep up the great work! You know, many people are looking around for this information, you can help them greatly.
I never thought about it that way, but it makes sense!
Really informative blog article.Really looking forward to read more. Fantastic.
Thanks for sharing, this is a fantastic blog article.Thanks Again. Will read on…
ivermectin paste for cattle ivermectin for rabbits mites
I actually like looking by way of a post that can make people Feel. Also, many thanks for allowing me to comment!
Thank you for your blog article.Thanks Again. Cool.
orlistat market – orlistat spc xenical nih
Thanks a lot for the post.Really thank you! Great.
Xoilac Tv Thẳng đá Bónglịch phát sóng vtvcabNếu cứ đùa như cơ hội vừa tiêu diệt Everton cho tới 3-1 trên sân quý khách hàng
Thank you for your blog article.Thanks Again. Much obliged.
Muchos Gracias for your article.Thanks Again. Keep writing.
I appreciate you sharing this blog article.Really looking forward to read more. Cool.
Im obliged for the article post. Want more.
We are looking for some people that might be interested in from working their home on a part-time basis. If you want to earn $100 a day, and you don’t mind writing some short opinions up, this is the perfect opportunity for you!
wow, awesome article.Thanks Again.
Thanks so much for the post.Much thanks again. Really Great.
I appreciate you sharing this blog post. Cool.
Thanks for the blog post.Really thank you! Fantastic.
have a peek here says:Greetings! Very useful advice in this particular post! It is the little changes that make the largest changes. Many thanks for sharing!Reply 06/03/2020 at 5:55 pm
I appreciate you sharing this blog article.Thanks Again. Really Great.
Im obliged for the blog.Thanks Again. Awesome.
Really informative blog article.
Appreciate you sharing, great blog post.Really thank you!
I truly appreciate this blog.Much thanks again. Fantastic.
Appreciate you sharing, great blog post.Thanks Again. Really Great.
Hello! Would you mind if I share your blog with my zynga group? There’s a lot of folks that I think would really appreciate your content. Please let me know. Thank you
Ridiculous quest there. What occurred after? Take care!
I really like what you guys tend to be up too. This kind of clever work and coverage! Keep up the good works guys I’ve incorporated you guys to my personal blogroll.
Wow that was unusual. I just wrote an extremely long commentbut after I clicked submit my comment didn’t show up.Grrrr… well I’m not writing all that over again. Anyhow, just wantedto say great blog!
Im obliged for the blog post.Really looking forward to read more. Much obliged.
I do agree with all of the ideas you have presented in your post. They’re really convincing and will definitely work. Still, the posts are too short for newbies. Could you please extend them a little from next time? Thanks for the post.
Why viewers still use to read news papers when in this technological globe everything is accessible on net?
What’s up, yeah this post is truly nice and I have learned lot of things from it about blogging.thanks.
An interesting discussion is worth comment. I believe that you need to create a lot more on this topic, it may not be a taboo subject yet normally individuals are not enough to speak on such subjects. To the following. Cheers
This is good to know. Thanks for posting. Good luck
A big thank you for your article post.Much thanks again. Keep writing.
I truly appreciate this article.Really thank you! Much obliged.
canadian pharmacy vardenafil – vardenafil free sample online vardenafil
apartments for rent in woodbridge nj apartments for rent in bridgeport ct apartments in brentwood ca
Enjoyed every bit of your blog article.Thanks Again. Great.
Aw, this was an incredibly good post. Finding the time and actual effort to create a top notch articleÖ but what can I sayÖ I hesitate a whole lot and never seem to get nearly anything done.
Say, you got a nice blog post.Really thank you! Keep writing.
Say, you got a nice blog article.Thanks Again. Keep writing.
This is a topic that’s close to my heart… Many thanks!Where are your contact details though?
I truly appreciate this article post.Much thanks again. Really Cool.
Hello are using WordPress for your blog platform? I’m new to the blog world but I’m trying toget started and set up my own. Do you require anycoding expertise to make your own blog? Any help wouldbe really appreciated!
Thanks again for the article.
You made some decent points there. I looked on the internet for the subject and found most people will consent with your blog.
Thanks so much for the blog article.Really looking forward to read more. Keep writing.
Very interesting topic, thanks for posting.Feel free to visit my blog – mpc-install.com
Say, you got a nice article.Really thank you! Awesome.
I started entrancing CBD gummies a occasional months ago and forthrightly, they’ve made a monumental difference. I regularly take individual after dinner to help me chill unserviceable and have a zizz better. They bite great —like present candy — and don’t remain me identification punch-drunk the next day. It’s moral a nice, age vibe that helps receive the uptight dotty after a stressful day. Wasn’t sure they’d feat at first, but conditions I’m all in. Utterly vouch for if you lack something fool to facilitate you rest without any eerie side effects.
I think this is a real great article.Thanks Again. Really Cool.
Thanks-a-mundo for the post.
Thanks for the blog.Really thank you! Great.
Enjoyed every bit of your blog article. Keep writing.
I think this is a real great article post.Thanks Again.
Really appreciate you sharing this article post.Thanks Again. Keep writing.
stromectol generic name purchase oral ivermectin
Im obliged for the article.Thanks Again. Great.
I value the blog.Much thanks again. Fantastic.
Thanks for sharing, this is a fantastic article post.Thanks Again. Cool.
Looking forward to reading more. Great blog.Really looking forward to read more. Much obliged.
Great, thanks for sharing this blog article.Much thanks again. Great.
Really appreciate you sharing this blog. Fantastic.
Really appreciate you sharing this blog article. Fantastic.
Appreciate you sharing, great article post.Really thank you! Will read on…
Oh my goodness! a tremendous article dude. Thank you Nonetheless I am experiencing subject with ur rss . Don’t know why Unable to subscribe to it. Is there anyone getting equivalent rss downside? Anybody who knows kindly respond. Thnkx
I value the blog post.Really thank you! Cool.
Major thankies for the blog post.Really looking forward to read more.
Major thanks for the blog post.Really looking forward to read more. Keep writing.
Wow, great article post. Great.
Thanks-a-mundo for the blog post.Really thank you! Keep writing.
Say, you got a nice blog.Much thanks again. Much obliged.
Thanks-a-mundo for the blog post.Much thanks again. Cool.
Major thanks for the blog post.Thanks Again. Really Great.
I cannot thank you enough for the article.Really looking forward to read more. Want more.
Great blog.Really thank you! Really Cool.
Really enjoyed this blog.Really thank you! Cool.
Really enjoyed this blog.Much thanks again. Keep writing.
A big thank you for your article. Will read on…
Wow, great article post. Really Cool.
Im obliged for the article post.Really looking forward to read more. Great.
I am so grateful for your blog article.Thanks Again. Great.
Wow, great article. Awesome.
Awesome blog.Much thanks again.
I want to to thank you for this very good read!! I absolutely loved every bit of it. I have got you saved as a favorite to look at new stuff you postÖ
I appreciate you sharing this article post.Really looking forward to read more. Keep writing.
I appreciate you sharing this blog.Really thank you! Really Great.
Thanks for the article post.Much thanks again. Cool.
Thanks so much for the article.Thanks Again. Keep writing.
Say, you got a nice blog post.Thanks Again. Want more.
I loved your post. Awesome.
Muchos Gracias for your blog. Much obliged.
I do trust all of the ideas you have offered for your post.They are really convincing and can definitely work.Still, the posts are too short for beginners. May you pleaselengthen them a little from subsequent time? Thanks for thepost.
A big thank you for your post. Will read on…
I quite like reading through a post that can make people think.Also, thanks for allowing for me to comment!
I cannot thank you enough for the blog post.Really thank you! Really Great.
Ahaa, its fastidious dialogue concerning this post atthis place at this blog, I have read all that, so now me also commenting here.
Really enjoyed this blog article.Really thank you! Awesome.
Awesome blog article.Really thank you! Fantastic.
Thanks-a-mundo for the post.Thanks Again. Will read on…
Thanks a lot for the post.Thanks Again. Great.
Hello there! This is my first visit to your blog! We are a group of volunteers and starting anew initiative in a community in the same niche. Your blog provided us beneficialinformation to work on. You have done a marvellous job!
Its wonderful as your other blog posts : D, regards for putting up.
When I originally commented I seem to have clicked on the -Notify me when new comments are added- checkbox and now whenever a comment is added I get four emails with the same comment. Is there a way you can remove me from that service? Thank you!
What’s up to every one, as I am really keen of reading this blog’s post to be updated regularly.It includes nice material.
Major thankies for the blog post.Really thank you! Much obliged.
I really enjoy the article post.Much thanks again. Keep writing.
Hi! I know this is somewhat off topic but I was wondering if you knew where I could locate a captcha plugin for my comment form? I’m using the same blog platform as yours and I’m having trouble finding one? Thanks a lot!
I think this is a real great blog article.Really looking forward to read more. Want more.
Very informative post.Much thanks again.
Hey, thanks for the post.Thanks Again. Want more.
Thanks-a-mundo for the blog article.Really thank you! Awesome.Loading…
I am so grateful for your article post. Great.
I’ve been using sativa tincture ordinary in regard to during the course of a month for the time being, and I’m justifiably impressed during the positive effects. They’ve helped me determine calmer, more balanced, and less restless everywhere the day. My forty winks is deeper, I wake up refreshed, and uniform my core has improved. The quality is famous, and I appreciate the natural ingredients. I’ll obviously keep buying and recommending them to the whole world I recall!
A big thank you for your blog post. Want more.
Thanks so much for the article post. Much obliged.
WOW just what I was looking for. Came here by searching for walmart coffee table
Hi there! I know this is kinda off topic but I was wondering if you knew where I could get a captcha plugin for my comment form? I’m using the same blog platform as yours and I’m having problems finding one? Thanks a lot!
This is one awesome article post.Thanks Again. Great.
Thanks so much for the blog.Really looking forward to read more. Really Cool.
I really like and appreciate your blog article.Much thanks again. Much obliged.
Hey, not necessarily you too great? Your own personal writing widens my knowledge. Appreciate you.
I don’t even understand how I ended up here, but I assumed this put up used to be good. I don’t know who you’re however definitely you’re going to a well-known blogger if you are not already 😉 Cheers!
Aw, this was a very good post. Spending some time and actual effort to create a top notch articleÖ but what can I sayÖ I procrastinate a lot and never manage to get nearly anything done.
Very neat article.Thanks Again. Much obliged.
apartments in niles mi rentberry scam ico 30m$ raised sutter creek apartments
Wow, great blog article. Will read on…
Hi, I do believe this is an excellent blog. I stumbledupon it 😉 I’m going to revisit once again since I bookmarked it. Money and freedom is the best way to change, may you be rich and continue to help other people.
Seriously. If you’re so good the fact that you’re so good at the moment. Your help woke everyone up. Thank you very much.
Thanks for sharing, this is a fantastic blog.Really looking forward to read more. Really Great.
Incredible many of amazing data.boston college application essay writing essays custom executive resume writing services nyc
Asking questions are actually nice thing if you are not understanding anything totally, but this piece of writing gives good understanding even.
Fantastic blog post.Much thanks again. Want more.
Thanks for the blog post.Thanks Again. Will read on…
Thanks for the recommendations on credit repair on your web-site. Some tips i would offer as advice to people would be to give up the mentality that they buy today and pay back later. As being a society we all tend to try this for many factors. This includes getaways, furniture, in addition to items we really want to have. However, you must separate a person’s wants from the needs. When you are working to raise your credit ranking score make some sacrifices. For example you are able to shop online to save money or you can look at second hand retailers instead of high priced department stores regarding clothing.
Major thanks for the blog article.Really thank you! Awesome.
Thanks again for the article.Really looking forward to read more.
Muchos Gracias for your blog article. Much obliged.Loading…
lake house apartments apartments in white plains ny pear tree apartments
Thanks so much for the article post. Great.
I appreciate you sharing this post.Much thanks again. Much obliged.
Thanks again for the article.Thanks Again. Much obliged.
Thank you for your article.Really looking forward to read more. Great.
Thank you ever so for you blog article.Really looking forward to read more. Great.
Very neat blog.Thanks Again.
I really like and appreciate your blog article. Awesome.
Thank you for your post. Really Cool.
Paragraph writing is also a fun, if you be familiar with then you can write if not it is complexto write.
Very informative blog post.Thanks Again. Great.
I really like and appreciate your blog post.Much thanks again. Fantastic.
Thanks for sharing, this is a fantastic article post. Cool.Loading…
Fantastic post.Really looking forward to read more. Fantastic.
I cannot thank you enough for the blog article. Cool.
Thanks for sharing, this is a fantastic post.Thanks Again. Keep writing.
Great, thanks for sharing this blog post.Much thanks again. Cool.
Thanks for sharing, this is a fantastic article.Really thank you! Awesome.
Very good blog.Thanks Again. Really Great.
Say, you got a nice blog post.Much thanks again. Really Great.
Thanks again for the blog.Really thank you!
This is one awesome blog article.Really thank you!
wow, awesome blog article.Much thanks again. Will read on…
Hey, thanks for the article post.Really thank you! Cool.
Aw, this was an exceptionally nice post. Taking the time and actual effort to produce a good articleÖ but what can I sayÖ I procrastinate a whole lot and never manage to get nearly anything done.
plaquenil medication hydroxychloroquine for covid
I blog frequently and I genuinely appreciate your content. The article has truly peaked my interest. I will book mark your blog and keep checking for new information about once per week. I subscribed to your Feed too.
Awesome post.Really looking forward to read more. Really Cool.
Paragraph writing is also a fun, if you know after that you can write otherwise itis complicated to write.
Thanks so much for the blog post.Really looking forward to read more. Will read on…
I loved your article.Really thank you! Keep writing.
Im grateful for the post.Really thank you! Really Great.
Very neat blog article.Much thanks again. Much obliged.
Thanks for sharing, this is a fantastic blog.Really looking forward to read more. Great.
Enjoyed every bit of your article.Really looking forward to read more. Great.
Wow, great blog.Really looking forward to read more. Want more.
Looking forward to reading more. Great article.Much thanks again. Much obliged.
Im obliged for the article.Much thanks again. Will read on…
Really appreciate you sharing this blog post.Really thank you! Great.
Muchos Gracias for your article.Really looking forward to read more. Much obliged.
Very informative blog article.Thanks Again. Great.
Really informative post. Want more.
Im thankful for the blog article.Really looking forward to read more. Cool.
Wow, great blog article.Really looking forward to read more. Awesome.
Im thankful for the blog.Really looking forward to read more. Great.
Thanks-a-mundo for the blog post. Keep writing.
I want to to thank you for this excellent read!! I certainly loved every little bit of it. I’ve got you book marked to look at new things you post…
excellent issues altogether, you simply received a new reader.What might you recommend in regards to your submit that you made a few daysin the past? Any sure?
Wow! This could be one particular of the most beneficial blogs We ave ever arrive across on this subject. Basically Magnificent. I am also an expert in this topic so I can understand your effort.
Your new valuable essential points imply much an individual like me and incredibly more to an workplace workers. With thanks; coming from everyone of us.
Enjoyed every bit of your post.Thanks Again. Really Great.
Very neat blog post.Thanks Again. Will read on
Hey There. I found your blog using msn. This is a really well written article. I will be sure to bookmark it and return to read more of your useful info. Thanks for the post. Ill certainly return.
Netflix is just about everywhere. They’ve got extremelyawesome TV-shows for everyone’s style.Free Account – New Free Accounts And Password Listfree account
Good day! Do you use Twitter? I’d like to follow you if that would be okay.I’m definitely enjoying your blog and look forward tonew posts.
meet singles onlinenative american women dating
Your style is so unique compared to other folks I have read stuff from. Many thanks for posting when you have the opportunity, Guess I will just bookmark this blog.
Thanks for another fantastic post. Where else could anyone get that type of info in such a perfect way of writing? I’ve a presentation next week, and I’m on the look for such info.
Hello! I’m at work browsing your blog from my new iphone!Just wanted to say I love reading through your blog and lookforward to all your posts! Keep up the outstanding work!
You suggested it well.australian essay writing service essay paper writing services help with english writing
I do believe all of the ideas you have offered to your post. They’re very convincing and will certainly work. Still, the posts are very quick for starters. Could you please extend them a little from subsequent time? Thanks for the post.
Major thanks for the blog post.Thanks Again. Great.
I really like and appreciate your article.Really looking forward to read more. Awesome.
Major thankies for the article.Much thanks again. Really Cool.
Thanks a lot for the article post.Really thank you! Will read on…
chhota bheem story book Filme Youtube Mp4 Gratuitement campos de fresas book in english pdf
I have to thank you for the efforts you have put in writing this blog. I am hoping to check out the same high-grade content by you in the future as well. In fact, your creative writing abilities has motivated me to get my own blog now 😉
I value the blog article.Thanks Again. Will read on…
When someone writes an post he/she maintains the image of auser in his/her brain that how a user can be aware of it.Therefore that’s why this piece of writing is outstdanding.Thanks!
I really liked your blog article.Really thank you! Want more.
Hey, thanks for the blog article.Thanks Again. Really Great.
Usually I do not learn post on blogs, but I would like to say thatthis write-up very pressured me to take a lookat and do so! Your writing taste has been surprised me. Thank you, quite greatpost. Minecraft
I loved your article. Really Cool.
Terrific post however , I was wanting to know if you could write a litte more on this topic? I’d be very grateful if you could elaborate a little bit more. Thanks!
Hi there, just became aware of your blog through Google,and found that it’s really informative. I am going to watch outfor brussels. I will be grateful if you continue this in future.Numerous people will be benefited from your writing. Cheers!
I quite like reading an article that will make men and women think.Also, many thanks for allowing for me to comment!
Really enjoyed this article post. Fantastic.
Thanks again for the blog.Much thanks again. Awesome.
I really liked your blog.Much thanks again. Really Cool.
A round of applause for your blog article.Thanks Again. Cool.
I appreciate you sharing this article post.Really looking forward to read more. Keep writing.
Very good article.Much thanks again. Want more.
Great, thanks for sharing this blog.Much thanks again. Really Cool.
Muchos Gracias for your article.Much thanks again. Fantastic.
I really like and appreciate your blog article.Really thank you! Really Great.
I will immediately seize your rss as I can’t find your email subscription hyperlink or newsletter service. Do you’ve any? Kindly permit me know in order that I may subscribe. Thanks.
Thanks on your marvelous posting! I genuinely enjoyed reading it, you could be a great author.I will always bookmark your blog and will eventually come back someday.I want to encourage that you continue your great job, havea nice evening!
Excellent post. I will be going through some of these issues as well..
Thanks for the blog.Thanks Again. Much obliged.
I truly appreciate this blog post.Really thank you! Really Cool.
I really like and appreciate your blog post.Much thanks again. Really Great.
Thanks for sharing, this is a fantastic blog.Really thank you! Keep writing.
A big thank you for your blog article.Thanks Again. Want more.
Looking forward to reading more. Great blog post.Much thanks again. Keep writing.
Wow, great blog post.Really looking forward to read more. Really Great.
Thanks-a-mundo for the blog post.Really looking forward to read more. Will read on…
Enjoyed every bit of your article post. Really Cool.
It’s difficult to find well-informed people on this topic, but you soundlike you know what you’re talking about! Thanks
Hi there! I know this is somewhat off topic but I was wondering if you knew where I could get a captcha plugin for my comment form? I’m using the same blog platform as yours and I’m having problems finding one? Thanks a lot!
İster evden ister işten para kazanmak için doğru adrestesiniz.Para kazanmak için yeni iş fikirleri, girişimcilik stratejileri ve pazarlama gibi yöntemleri kullanarakpara kazanabilirsiniz.iş fikirleri
generic aralen order chloroquine phosphate – aralen medication
xenical fda – xenical nih orlistat medicine
Really appreciate you sharing this blog article.Thanks Again. Fantastic.
tamoxifen mayo clinic nolvadex prolactin tamoxifen meningioma
Hi, the whole thing is going fine here and ofcourse every one is sharingfacts, that’s truly excellent, keep up writing.
Wow! This could be one particular of the most useful blogs We have ever arrive across on this subject. Basically Fantastic. I am also an expert in this topic so I can understand your hard work.
I value the blog article. Really Great.
I value the blog post.Really looking forward to read more.
A round of applause for your blog article.Really looking forward to read more. Awesome.
Thank you ever so for you post.Much thanks again. Great.
Thanks a lot for the post.Really thank you! Awesome.
Thank you for another excellent article. Where else could anybody get that kind of info in such a perfect way of writing? I ave a presentation next week, and I am on the look for such info.
That is a really good tip particularly to those fresh to the blogosphere. Short but very precise info… Thank you for sharing this one. A must read article!
I really enjoy the article. Much obliged.
Hey, thanks for the article.Much thanks again. Really Great.
Awesome blog.Really looking forward to read more. Much obliged.
Really informative post.Much thanks again. Cool.
Thanks a lot for the blog post.Thanks Again. Fantastic.
Great post.Much thanks again. Much obliged.
Thank you ever so for you article post.Really looking forward to read more. Much obliged.
Awesome blog article. Great.
A big thank you for your blog article.Much thanks again. Great.
wow, awesome article post.Much thanks again.
This is one awesome blog post. Keep writing.
Really informative blog post.Really thank you! Keep writing.
It’s actually a nice and useful piece of info. I’m glad that you shared this useful info with us. Please keep us up to date like this. Thanks for sharing.
Thanks for the article post.Really looking forward to read more.
neurontin images neurontin dosage for neuropathic pain how much gabapentin for opiate withdrawal
This is my first time visit at here and i am really impressed to readall at one place.
Really enjoyed this article post.Much thanks again. Keep writing.
zithromax generic: nitrofurantoin onlineorder panmycin
Within the eighties, Women of all ages pulled again their hair with scrunchies.During the 1980s, punk hairstylesHair Styles – The Most Beautiful Hairstyle New Popular Hairstyleshair styles
Thank you for the auspicious writeup. It actually used to be a enjoymentaccount it. Glance complex to more brought agreeable from you!However, how can we communicate?
Looking forward to reading more. Great article post.Really looking forward to read more. Awesome.
to Sony saying that his code things, play on a more clenbuterol for sale in usa
What’s Going down i’m new to this, I stumbled upon this I have found It absolutely useful and it has helped me out loads.I hope to contribute & help other customers like its aided me.Good job.
I really like and appreciate your blog.Thanks Again. Will read on…
Wohh precisely what I was looking for, thank you for putting up.Check out my blog night skin care
I really like and appreciate your post.Much thanks again. Much obliged.Loading…
Hi! I just wanted to ask if you ever have any issues with hackers?My last blog (wordpress) was hacked and I endedup losing months of hard work due to no data backup. Do you have any methodsto prevent hackers?
Why users still make use of to read news papers when in this technological globe the whole thingis existing on net?
Довольно интересно_________________Melbet ???????????? ??????? ??????? ???????
It’s an amazing paragraph designed for all the online visitors;they will take advantage from it I am sure.
I have read so many articles or reviews on the topic of the bloggerlovers however this paragraph is truly a good piece of writing, keep it up.
Whoa! This blog looks exactly like my old one! It’s on acompletely different topic but it has pretty much the same layout and design.Wonderful choice of colors!
Fantastic post however , I was wondering if you could write a litte more on this subject? I’d be very grateful if you could elaborate a little bit more. Many thanks!
?????????? ??????? ???????? ??????? ?? ???????..??????? ?????? ?????? – ????????? ????, kamagra paypal ajanta kamagra oral jelly kamagra india pharmacy
Hey There. I found your blog using msn. This is a very well written article. I’ll be sure to bookmark it and come back to learn more of your helpful info. Thank you for the post. I will certainly return.
Your means of telling the whole thing in this piece of writing is in factnice, every one be capable of simply understand it, Thanks a lot.
Hello mates, how is everything, and what you wish for to say concerning this article, in my view its in fact remarkable designed for me.
I do agree with all the concepts you’ve introduced in your post.They are very convincing and will certainly work.Nonetheless, the posts are very short for novices.May you please prolong them a bit from subsequent time?Thanks for the post.
treatments for ed: erectile dysfunction pills – ed medications online
What’s up mates, its impressive piece of writing about cultureand entirely defined,keep it up all the time.
Sie können dieses Signal auf Ihre Trading-Bots auf 3Commas anwenden, das eingehende Signal bestimmt dieStartzeit des Handels für die ausgewählte Taktik und das ausgewählte Handelspaar.
I think this is a real great post.Thanks Again. Really Cool.
Wow, great blog.Thanks Again. Awesome.
I really enjoy the blog post.Really thank you!
I cannot thank you enough for the blog article.Really thank you! Fantastic.
Enjoyed every bit of your post.Really looking forward to read more.
Thanks for the article post. Fantastic.
Great blog post.Really looking forward to read more. Awesome.
I value the article.
Very neat blog post.Thanks Again. Want more.
Hey, thanks for the blog.Really thank you! Keep writing.
Major thanks for the article. Much obliged.
Muchos Gracias for your blog article.Really thank you! Keep writing.
I really like and appreciate your article post.Thanks Again. Awesome.
Thanks for the post. Great.
Awesome post. Fantastic.
I really like and appreciate your blog post.Really thank you! Cool.
I am so grateful for your article. Really Cool.
I cannot thank you enough for the blog.Thanks Again. Much obliged.
I appreciate you sharing this blog article.Much thanks again. Awesome.
Great, thanks for sharing this blog.Much thanks again.
Very neat blog post.Really thank you! Really Great.
Really enjoyed this article post.Much thanks again. Really Cool.
Excellent blog you’ve got here.. Itís hard to find high quality writing like yours these days. I really appreciate people like you! Take care!!
I love reading through a post that can make people think. Also, many thanks for permitting me to comment!
A big thank you for your blog article.Much thanks again. Really Great.
I truly appreciate this blog post.Much thanks again. Fantastic.
Appreciate you sharing, great blog post.Thanks Again.
Thanks for sharing, this is a fantastic article post.Really looking forward to read more. Fantastic.
Wow, great blog article.Really thank you! Keep writing.
I loved your blog article.Really thank you! Keep writing.
Im obliged for the blog article.Much thanks again. Much obliged.
Great, thanks for sharing this article post.Much thanks again. Great.
wow, awesome blog article.Really thank you! Fantastic.
Appreciate you sharing, great post.Really looking forward to read more. Cool.
Really enjoyed this blog post. Awesome.
Thank you ever so for you article post.Thanks Again. Want more.
Major thankies for the blog article.Thanks Again. Much obliged.
I think this is a real great post.Really looking forward to read more. Much obliged.
I really loved this article and I will return to see more of your lovely content. Thank you!
Amazing! This blog looks exactly like my old one! It’s on a entirely different topic but it has pretty much the same layout and design. Excellent choice of colors!
This is a extremely fascinating post. Report register my purlieus click here
Peculiar article, just what I was looking for.
plaquenil and alcohol chloroquine hydrochloride
Thanks a lot for the article post.Thanks Again. Keep writing.
This blog is the greatest. You have a new fan! I can at wait for the next update, bookmarked!
Your style is so unique compared to other people I have read stuff from.Thank you for posting when you’ve got the opportunity, Guess I will just bookmark this blog.
I think this is a real great post.Really thank you! Fantastic.
Major thankies for the post.Thanks Again. Keep writing.
Wow, great article.Thanks Again. Will read on…
I really enjoy the post.Really looking forward to read more. Cool.
wow, awesome blog post.Really looking forward to read more. Keep writing.
Very informative blog post.Really thank you! Keep writing.
Im thankful for the article post.Much thanks again. Cool.
A big thank you for your post.Really looking forward to read more. Much obliged.
Thank you for your post.Much thanks again. Fantastic.
Enjoyed every bit of your article post.Really looking forward to read more. Awesome.
Thanks for sharing, this is a fantastic blog article.Thanks Again. Want more.
Great blog post.Really looking forward to read more. Keep writing.
Very informative blog article.Really thank you! Cool.
Very good post.Thanks Again. Awesome.
Great, thanks for sharing this post.Really thank you! Cool.
Fantastic article post.Really thank you!
Hey, thanks for the blog article.Really looking forward to read more. Will read on…
Major thankies for the article post.Really thank you! Much obliged.
Awesome blog.Much thanks again. Really Great.
This is one awesome article post.Really looking forward to read more. Will read on…
Im grateful for the blog post.Really looking forward to read more. Really Cool.
Looking forward to reading more. Great blog post.Really looking forward to read more.
Great, thanks for sharing this article.Thanks Again. Cool.
Great, thanks for sharing this article.Really looking forward to read more. Want more.
Im obliged for the article.Really looking forward to read more. Really Great.