

A sandwich griller, also known as a sandwich press or...
Read MoreA sandwich griller, also known as a sandwich press or sandwich maker, is a versatile kitchen appliance designed to create delicious toasted sandwiches quickly and easily. With two heated plates that press and seal the bread and fillings together, a sandwich griller provides a convenient way to prepare warm and crispy sandwiches in just a few minutes.
Whether you prefer classic combinations like grilled cheese or more elaborate creations with various fillings, a sandwich griller can accommodate a wide range of ingredients, from cheese and meats to vegetables and spreads. The grilling process not only heats the fillings but also gives the bread a delightful toasted texture and appetizing grill marks.
Sandwich grillers come in various sizes and designs, accommodating different sandwich sizes and quantities. They are commonly used in homes, offices, and cafes to whip up satisfying sandwiches for quick meals or snacks. Easy to use and easy to clean, a sandwich griller is a popular kitchen gadget for those seeking a hassle-free way to enjoy perfectly grilled sandwiches.
Our Top Picks

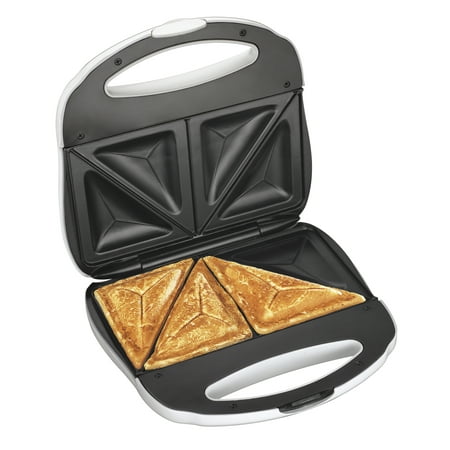
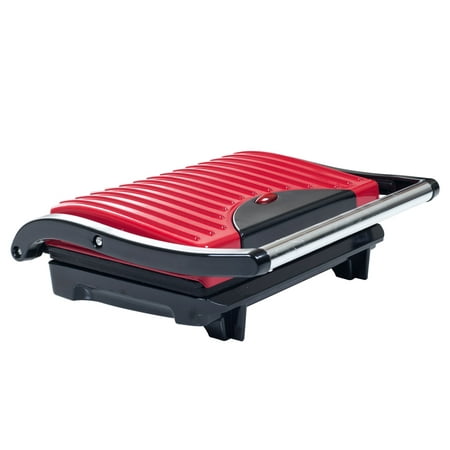
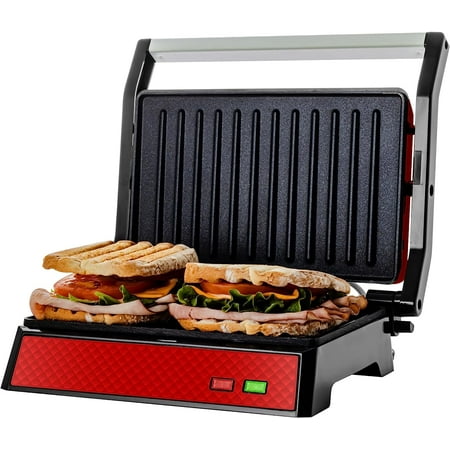
Hamilton Beach Electric Panini Press Grill with Locking Lid, Opens 180 Degrees for Any Sandwich Thickness, Nonstick 8" X 10" Grids, Red (25462Z)
5.0
Amazon.com
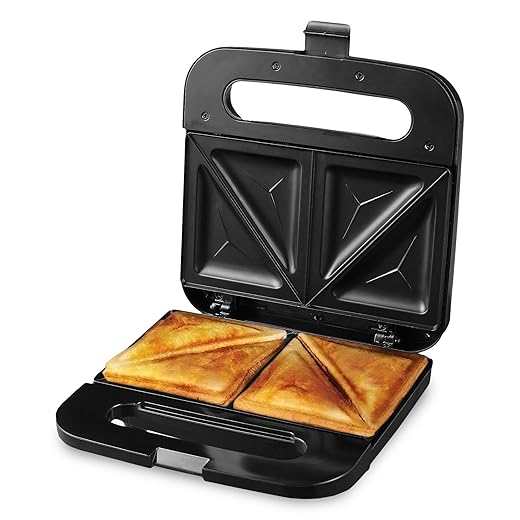
OVENTE Electric Sandwich Maker with Non-Stick Plates, Indicator Lights, Cool Touch Handle, Easy to Clean and Store, Perfect for Cooking Breakfast, Grilled…
4.0
Amazon.com

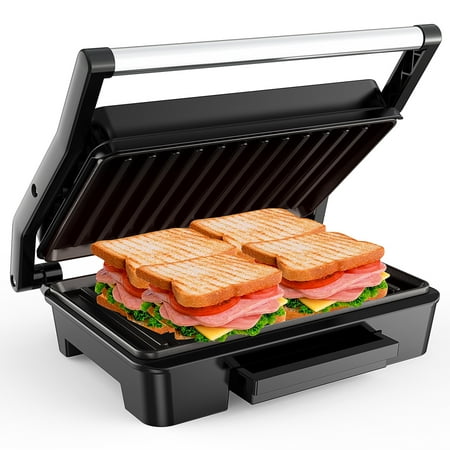
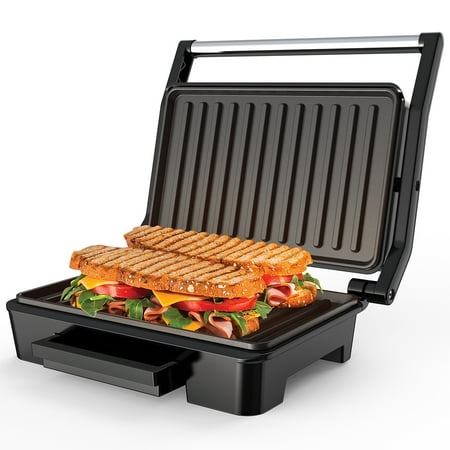
Chefman Electric Panini Press Grill and Gourmet Sandwich Maker w/ Non-Stick Coated Plates, Opens 180 Degrees to Fit Any Type or Size Food, Dishwasher Safe…
4.0
Amazon.com

Breakfast Sandwich Maker – Hot Dog Toaster – Egg Panini Press Pan – Nonstick Sandwich Skillet with Removable Handle
4.0
Amazon.com

Hamilton Beach Electric Sandwich Maker Toaster with Nonstick Plates Makes Omelets and Grilled Cheese, 4 Inch, Easy to Store, Black (25430)
4.0
Amazon.com

Aigostar Sandwich Maker with Non-stick Deep Grid Surface for Egg, Ham, Steaks Compact Electric Grill Black, ETL Certificated, Roy
4.0
Amazon.com

Proctor Silex 4 Serving Panini Press, Sandwich Maker and Compact Indoor Grill, Upright Storage, Easy Clean Nonstick Grids, Black (25440PS)
5.0
Amazon.com

Elite Gourmet ESM2207# Sandwich Panini Maker Grilled Cheese Machine, Tuna Melt Omelets Non-stick Surface, 2 Slice, Black
4.0
Amazon.com

Panini Press Grill, Sandwich Maker with Non-stick Plates, Opens 180 Degrees for Any Size, Indicator Lights, Electric Indoor Grill by Aigostar, Sliver
4.0
Amazon.com
Panini Press Sandwich Maker, 2 Slice Stainless Steel Panini Press Grill, Non-Stick Sandwich Press Maker with Removable Drip Tray for Any Thickness Sandwich,…
4.0
'Panini Press Grill, Stainless Steel Sandwich Maker with Double Non-Stick Coated Plates & Removable Drip Tray, 10.6" W x 8.7" H x 3.5" D)
4.0
Classic Cuisine Panini Press Gourmet Sandwich Maker With Nonstick Plates
4.0
OVENTE Electric Indoor Panini Press Grill and Sandwich Maker with Non-Stick Coated Plates, Opens 180 Degrees to Fit Any Type or Size Food, Temperature…
5.0
Proctor Silex Sandwich Maker, Nonstick Surface, White, Model 25401P
5.0
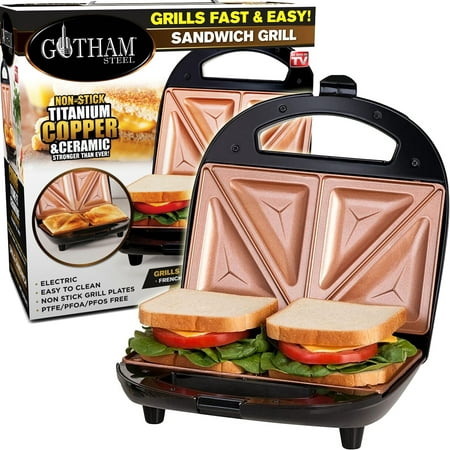
Gotham Steel Dual Electric Sandwich Maker and Panini Grill with Ultra Nonstick Copper Surface
4.0
What is a sandwich griller used for?
A sandwich griller is a versatile kitchen appliance used for toasting, grilling, and creating a variety of sandwiches. It consists of two heated plates that apply heat and pressure to the bread and fillings, resulting in a toasted texture and often grill marks on the bread. Here are some common uses for a sandwich griller:
- Grilled Cheese Sandwiches: One of the most classic uses for a sandwich griller is making grilled cheese sandwiches. The heat from the plates melts the cheese inside while toasting the bread to a crispy texture.
- Panini Sandwiches: A sandwich griller is perfect for making Panini-style sandwiches. You can use various combinations of meats, cheeses, vegetables, and spreads, and the grill marks on the bread add a delightful aesthetic.
- Stuffed Toasties: A sandwich griller can seal the edges of a sandwich, creating a pocket-style sandwich often referred to as a “toastie.” This prevents fillings from falling out during cooking, making it great for stuffed sandwiches.
- Open-Faced Sandwiches: You can create open-faced sandwiches by placing the bread and toppings on one plate of the griller. This is particularly useful for sandwiches with melted cheese, veggies, or other toppings.
- Quesadillas: A sandwich griller can also be used to make quesadillas, where tortillas are filled with cheese and other ingredients and toasted until the cheese is melted and the tortilla is crispy.
- Pizzas: Some sandwich grillers are versatile enough to handle small-sized pizzas. You can place pizza dough, sauce, cheese, and toppings on the plates to create a quick and easy personal pizza.
- Warm Wraps: If you have flatbreads or tortillas, you can warm them up and melt cheese or other fillings using a sandwich griller.
- Reheating Leftovers: A sandwich griller can be used to reheat leftover sandwiches, wraps, or even small portions of food.
In summary, a sandwich griller is a convenient appliance that can handle a variety of sandwich-making tasks. It’s suitable for creating different types of sandwiches, toasting bread, melting cheese, and adding grill marks for that appealing grilled appearance.
Which brand is best for sandwich griller?
There are several reputable brands that are known for producing high-quality sandwich grills. The “best” brand can vary based on individual preferences, needs, and budget. Here are a few well-regarded brands in the sandwich griller category:
- Breville: Breville is known for its innovative kitchen appliances, and they offer sandwich grills with features like adjustable height control and non-stick surfaces.
- Cuisinart: Cuisinart produces a variety of kitchen appliances, including sandwich makers that often have versatile features and durable construction.
- Hamilton Beach: Hamilton Beach offers a range of kitchen gadgets, including affordable sandwich press options that are user-friendly and efficient.
- George Foreman: George Foreman is known for its popular line of grills, including compact sandwich grills with non-stick cooking surfaces and adjustable temperature controls.
- Panini Presses: Some specialized brands like “Panini Press” offer sandwich presses specifically designed for making Panini-style sandwiches, often with ridged plates for creating grill marks.
- T-fal: T-fal offers sandwich and Panini makers with features such as adjustable thermostat and indicator lights for easy use.
- Kenwood: Kenwood produces a variety of kitchen appliances, including sandwich makers that are often designed for durability and even cooking.
When choosing a brand for your sandwich griller, consider factors like your cooking needs, available space, features you desire (adjustable temperature, removable plates, etc.), and your budget. Reading customer reviews and checking product specifications can help you make an informed decision based on your preferences.
What is the difference between a sandwich maker and a sandwich griller?
A sandwich maker and a sandwich griller are two terms that are often used interchangeably to refer to the same kitchen appliance. However, there can be slight differences in how these terms are interpreted based on the design and features of the appliance.
- Sandwich Maker: A sandwich maker typically refers to a compact kitchen appliance with two hinged plates that seal the edges of a sandwich while toasting it. It’s designed to create pocket-style sandwiches by sealing the edges, preventing fillings from falling out during cooking. This type of sandwich maker is commonly used for making grilled cheese, pocket sandwiches, or stuffed toasties.
- Sandwich Griller: A sandwich griller, on the other hand, is often used to describe an appliance that grills and toasts sandwiches without necessarily sealing the edges. It may have flat or ridged plates that apply heat and pressure to the bread and fillings, creating grill marks and a toasted texture. This type of griller can be used for open-faced sandwiches, Panini-style sandwiches, or even for grilling other types of food like meats and vegetables.
In practice, the terms “sandwich maker” and “sandwich griller” are often used interchangeably, and the actual features of the appliance will determine its functionality. Some appliances might combine both concepts, allowing you to make pocket-style sandwiches or open-faced grilled sandwiches depending on how you use it. When shopping for one of these appliances, it’s a good idea to carefully read the product description and features to ensure it meets your desired cooking style and preferences.
What can you do with sandwich griller?
A sandwich griller is a versatile kitchen appliance that can be used to create a wide range of delicious dishes beyond just sandwiches. Here are some creative ways you can use a sandwich griller:
- Grilled Breakfast Sandwiches: Make breakfast sandwiches with cooked eggs, bacon, cheese, and veggies. The griller will toast the bread and melt the cheese while heating the fillings.
- Fruit Panini: Create sweet sandwiches by using sliced fruits like bananas, strawberries, or peaches along with cream cheese or Nutella. The heat will caramelize the fruits and create a delightful flavor.
- Grilled Veggie Wraps: Grill tortillas filled with grilled or roasted vegetables, cheese, and your favorite spreads for a tasty vegetarian wrap.
- Dessert Panini: Make dessert Panini with ingredients like Nutella, marshmallows, and sliced bananas, or try combinations like peanut butter and chocolate chips.
- Stuffed Flatbreads: Prepare stuffed flatbreads with fillings like cooked meats, vegetables, and cheese, then grill them for a warm and satisfying meal.
- Quesadillas: Use the griller to make perfectly crispy quesadillas filled with cheese, beans, chicken, and more.
- Mini Pizzas: Create mini pizzas by placing pizza dough, sauce, cheese, and toppings on the plates and grilling until the cheese is melted and bubbly.
- Grilled Fish or Chicken: Marinate fish or chicken fillets and grill them on the griller for a quick and healthy meal.
- French Toast: Make French toast by dipping slices of bread in an egg mixture, grilling until golden brown, and serving with your favorite toppings.
- Reheating Leftovers: Use the griller to reheat leftover sandwiches, wraps, or even small portions of cooked meals.
- Stuffed Paratha: Create stuffed Indian flatbreads known as parathas by filling them with spiced vegetables, cheese, or minced meat.
- Crispy Tortillas: Place tortillas on the griller to crisp them up for dipping into salsa, guacamole, or other dips.
Remember to consider the heat settings and cooking times for different ingredients, as more delicate items might require less heat to prevent overcooking. The sandwich griller’s versatility allows you to experiment with various ingredients and flavors to create unique and delicious meals.
Which is better grill or sandwich maker?
The choice between a grill and a sandwich maker depends on your cooking preferences, needs, and the types of dishes you want to prepare. Both appliances have their own advantages and can be useful in different situations. Here’s a comparison to help you decide which might be better for you:
Sandwich Maker:
Pros:
- Sealed Sandwiches: A sandwich maker seals the edges of the bread, preventing fillings from spilling out during cooking. This is ideal for stuffed or pocket-style sandwiches.
- Compact Size: Sandwich makers are often compact and easy to store, making them a good choice for smaller kitchens.
- Quick Cooking: They typically cook sandwiches quickly, making them convenient for on-the-go meals.
- Ease of Use: Most sandwich makers are user-friendly with simple controls.
Cons:
- Limited to Sandwiches: Sandwich makers are specifically designed for making sandwiches and might not be as versatile for other dishes.
Grill:
Pros:
- Versatility: Grills are more versatile and can be used for a wider range of dishes, including sandwiches, Panini, grilled vegetables, meats, and more.
- Grill Marks: Grills provide grill marks on food, giving it an appealing appearance and enhanced flavor.
- Open-Faced Dishes: Grills can accommodate open-faced sandwiches and dishes with larger fillings.
- Cooking Options: Some grills come with adjustable temperature settings for different cooking needs.
Cons:
- No Sealed Edges: Grills do not seal the edges of sandwiches like sandwich makers do, so you might need to be cautious about fillings falling out.
- Size: Grills can be larger and take up more counter space compared to compact sandwich makers.
In essence, if you primarily want to make sealed and pocket-style sandwiches quickly, a sandwich maker might be suitable. On the other hand, if you’re looking for a more versatile appliance that can handle various dishes beyond sandwiches, a grill might be the better choice. Consider your cooking habits, the types of meals you enjoy preparing, and the available space in your kitchen when making your decision.
How do you use a sandwich griller?
Using a sandwich griller is generally straightforward, but the specific steps can vary slightly based on the model and features of the appliance. Here’s a general guide on how to use a sandwich griller:
- Preheat the Griller: Plug in the griller and turn it on to allow it to preheat. Many grillers have indicator lights that show when they’re ready for use.
- Prepare the Ingredients: While the griller is preheating, prepare your sandwich ingredients. This could include bread slices, fillings like cheese, meats, vegetables, spreads, and any desired seasonings.
- Assemble the Sandwich: Place one slice of bread on the bottom plate of the griller. Arrange your desired fillings on top of the bread. Make sure to leave some space around the edges to prevent overflow during cooking. Place the second slice of bread on top.
- Close the Griller: Gently close the top plate of the griller over the sandwich. The top plate will press down on the sandwich, applying heat and pressure.
- Cook the Sandwich: Allow the sandwich to cook for a few minutes, typically around 3 to 5 minutes, depending on the griller and the ingredients. The heat from the plates will toast the bread and melt the fillings.
- Check for Doneness: Check the sandwich to ensure it’s cooked to your desired level of crispiness and melty fillings. Lift the top plate slightly to peek at the sandwich’s progress without fully opening the griller.
- Remove and Serve: Once the sandwich is cooked to your liking, carefully open the griller and use a spatula to lift the sandwich off the plates. Place it on a plate or cutting board.
- Allow to Cool: Give the sandwich a moment to cool slightly before cutting it or handling it, as the fillings may be hot.
- Clean the Griller: Once the griller has cooled down completely, clean the plates according to the manufacturer’s instructions. Most grillers have non-stick surfaces that are easy to clean.
It’s important to note that some grillers might have adjustable temperature settings, so you can customize the cooking temperature based on the type of sandwich and your preferences. Additionally, some grillers have removable plates for easier cleaning. Always refer to the user manual that comes with your specific griller for detailed instructions and safety precautions.
How do you grill a sandwich without a griller?
Grilling a sandwich without a dedicated sandwich griller can still be achieved using alternative methods and kitchen tools. Here’s how you can grill a sandwich without a griller:
1. Stovetop Pan:
- Heat a non-stick skillet or frying pan over medium heat.
- Butter the outer sides of two bread slices.
- Place one slice, butter side down, in the heated pan.
- Layer your desired fillings on top of the bread in the pan.
- Place the second bread slice on top, butter side facing up.
- Use a spatula to press down on the sandwich gently.
- Cook for a few minutes until the bottom bread slice is golden brown and toasted.
- Carefully flip the sandwich using the spatula.
- Cook the other side until it’s toasted and the fillings are heated through.
- Remove from the pan and allow to cool slightly before cutting and serving.
2. Oven:
- Preheat your oven to a moderate temperature (around 350°F or 180°C).
- Assemble your sandwich as desired.
- Butter the outer sides of the bread slices.
- Place the sandwich on a baking sheet or directly on an oven rack.
- Bake for about 10-15 minutes or until the bread is toasted and the fillings are heated.
- Keep an eye on the sandwich to prevent it from overcooking.
- Remove from the oven and let it cool slightly before cutting.
3. Toaster Oven:
- Preheat your toaster oven to a moderate temperature.
- Assemble the sandwich and butter the outer sides of the bread slices.
- Place the sandwich directly on the toaster oven rack or on a tray if needed.
- Toast the sandwich for a few minutes on each side until the bread is crispy and the fillings are warmed.
- Monitor the sandwich to avoid burning.
- Allow the sandwich to cool slightly before slicing and serving.
Keep in mind that these methods might not replicate the grill marks and even cooking provided by a sandwich griller, but they can still produce a tasty toasted sandwich. Adjust cooking times and temperatures based on the thickness of your bread and the fillings you’re using. Additionally, be cautious when using open flames or hot surfaces, and always use kitchen tools to handle the sandwich safely.
Is sandwich griller healthy?
The healthiness of a sandwich griller depends on the ingredients you use and how you use the appliance. Here are some factors to consider:
- Ingredient Choices: The healthiness of the sandwich primarily depends on the ingredients you use. Opt for whole-grain or whole-wheat bread for added fiber and nutrients. Choose lean proteins like turkey, chicken, or plant-based options. Load up on vegetables to increase vitamins and minerals. Use modest amounts of cheese and spreads to control calories and fat.
- Portion Control: Portion size matters. While a sandwich griller can make delicious sandwiches, overindulging in larger portions or calorie-dense fillings can impact the healthiness of the meal.
- Cooking Techniques: The grilling process can add flavor and texture, but be cautious with the amount of added fats like butter or oil. Excessive buttering of the bread or using too much oil can increase calorie and fat content.
- Balance: A balanced sandwich with a variety of nutrients from different food groups is healthier. Incorporate a mix of carbohydrates, protein, healthy fats, and plenty of vegetables.
- Moderation: Enjoying a grilled sandwich occasionally as part of a balanced diet is generally fine. However, relying heavily on high-calorie, processed, or fatty ingredients might not contribute to a balanced diet.
- Customization: One of the benefits of using a sandwich griller is that you have control over the ingredients. You can customize your sandwich to suit your dietary preferences and nutritional goals.
- Cooking Techniques: Grilling can reduce the need for excessive frying or using large amounts of oil. Using cooking spray or a small amount of healthy oil can help prevent sticking without adding too many extra calories.
In summary, a sandwich griller can be a tool for creating healthy and delicious sandwiches as long as you make mindful ingredient choices and control portion sizes. Balancing nutrients, incorporating whole foods, and being cautious with added fats can contribute to healthier sandwich options.
Do you need oil in sandwich griller?
Whether you need oil in a sandwich griller depends on the type of griller you’re using and your personal preference. Here are some considerations:
- Non-Stick Surface: Many modern sandwich grillers come with non-stick cooking plates. These plates are designed to prevent food from sticking, even without the need for additional oil or butter.
- Butter or Oil for Flavor: Some people choose to lightly butter or brush oil on the outer sides of the bread slices before grilling. This can add flavor, create a crispy texture, and help with browning. However, it’s important to use these in moderation to avoid adding excess calories and fat.
- Filling Ingredients: The ingredients you’re using in the sandwich might also affect whether you need oil. If you’re using ingredients that release moisture (like tomatoes), using a small amount of oil or butter on the bread can help prevent sogginess.
- Health Considerations: If you’re trying to reduce calorie and fat intake, you can experiment with using minimal or no oil. Non-stick surfaces can often handle grilling without added fats.
- Cooking Spray: An alternative to brushing oil is using a cooking spray. Cooking sprays provide a thin layer of oil and can be a lower-calorie option.
In summary, oil is not always necessary in a sandwich griller, especially if you’re using a model with non-stick plates. Using oil sparingly or using alternative methods like cooking spray can add flavor and prevent sticking without significantly increasing the calorie content of your meal. It’s a good idea to experiment and find the approach that works best for your taste preferences and health goals.
Should you clean a sandwich griller?
Yes, it’s important to clean a sandwich griller after each use to maintain its performance, hygiene, and longevity. Cleaning the griller ensures that any leftover food particles, oil, or grease are removed, preventing them from accumulating and affecting the flavor of future sandwiches. Here’s how to clean a sandwich griller:
- Unplug and Allow to Cool: Before cleaning, make sure the griller is unplugged and has had sufficient time to cool down.
- Remove Removable Plates (if applicable): Some sandwich grillers have removable plates for easy cleaning. If your griller has this feature, follow the manufacturer’s instructions to remove the plates.
- Wipe Crumbs and Debris: Use a dry cloth or paper towel to wipe away any loose crumbs, food particles, or debris from the cooking plates and the surrounding area.
- Wash Removable Plates (if applicable): If your griller has removable plates, wash them with warm soapy water. Avoid using abrasive sponges or scouring pads that could damage the non-stick coating.
- Wipe with Damp Cloth: For the main body of the griller, including the top and sides, use a damp cloth to wipe away any remaining residue. Make sure the cloth is not too wet to avoid moisture getting into the electrical components.
- Cleaning the Drip Tray: Some grillers have a drip tray that collects excess oil and grease. Empty and wash this tray to prevent buildup.
- Cleaning the Exterior: Wipe down the exterior of the griller to remove any fingerprints, spills, or stains.
- Dry Thoroughly: After cleaning, make sure all components are thoroughly dry before using the griller again. Moisture can affect the performance and safety of electrical appliances.
- Regular Maintenance: In addition to cleaning after each use, perform occasional deep cleanings by using a mixture of baking soda and water or a gentle kitchen cleaner on the cooking plates. Always check the manufacturer’s recommendations for cleaning solutions to avoid damaging non-stick coatings.
Proper cleaning and maintenance will not only keep your sandwich griller in good condition but also ensure that the flavors of different sandwiches do not mix due to leftover residue. Always refer to the manufacturer’s instructions for specific cleaning guidelines and recommendations for your sandwich griller model.
How to maintain sandwich griller
Maintaining your sandwich griller properly will ensure its longevity, optimal performance, and safe operation. Here’s how to effectively maintain your sandwich griller:
- Regular Cleaning: Clean your sandwich griller after each use to prevent the buildup of food particles, oils, and residues. Refer to the previous response for detailed cleaning steps.
- Use Cooking Spray: If your griller doesn’t have non-stick plates, consider using a cooking spray before grilling to prevent sticking and make cleaning easier.
- Avoid Metal Utensils: Never use metal utensils or sharp objects to scrape or clean the cooking plates, as they can damage the non-stick surface.
- Be Gentle: When closing the top plate, avoid slamming it shut. Gently close it to prevent unnecessary stress on the hinges and mechanisms.
- Don’t Overload: Be mindful of the fillings you use in your sandwiches. Overloading the sandwich with too many ingredients can cause them to spill out during cooking and potentially damage the griller.
- Cool Down Before Cleaning: Always let the griller cool down before cleaning it. Cleaning while it’s still hot can lead to burns and might affect the cleaning process.
- Store Properly: When not in use, store the griller in a dry and clean area. Avoid storing it near water sources or in humid environments.
- Inspect Power Cord: Regularly check the power cord for any signs of damage, fraying, or wear. If you notice any issues, stop using the griller and consider getting the cord repaired or replaced.
- Regular Deep Cleaning: Perform occasional deep cleaning sessions where you remove and clean removable plates (if applicable) and thoroughly clean all components. Refer to the user manual for specific recommendations.
- Avoid Overheating: Don’t leave the griller on for extended periods without food inside. Overheating can damage the appliance and affect its longevity.
- Use Recommended Settings: If your griller has adjustable temperature settings, use them according to the recommended guidelines in the user manual. Using excessive heat can lead to damage.
- Follow Manufacturer’s Instructions: Always refer to the manufacturer’s instructions and guidelines for cleaning, maintenance, and usage. Each griller model may have specific recommendations.
By following these maintenance practices, you can ensure that your sandwich griller remains in good working condition and continues to provide you with delicious grilled sandwiches for years to come.
Troubleshooting about sandwich griller
If you encounter issues with your sandwich griller, troubleshooting can help you identify and potentially resolve the problem. Here are some common problems you might face with a sandwich griller and possible solutions:
1. Griller Not Heating Up:
- Check if the griller is properly plugged into a working power outlet.
- Ensure the power switch or temperature settings are turned on.
- If the griller has a preheat indicator, wait for it to indicate that the appliance is ready.
2. Uneven Cooking:
- Make sure the sandwich is centered on the cooking plates for even heat distribution.
- If the griller has adjustable height settings, ensure the top plate is not pressing down too tightly, which can cause uneven cooking.
3. Sandwich Sticking to Plates:
- If the griller doesn’t have non-stick plates, use a small amount of cooking spray or butter on the bread to prevent sticking.
- Avoid using metal utensils that can scratch the non-stick surface, making it more prone to sticking.
4. Burnt Sandwiches:
- Adjust the cooking time or temperature settings if your sandwiches are getting burnt quickly.
- If using butter or oil on the bread, use a moderate amount to prevent excessive browning.
5. Filling Spills Out:
- Don’t overstuff your sandwiches. Leave some space around the edges to prevent fillings from spilling out during cooking.
6. Griller Smells or Smokes:
- If you notice a burning smell or smoke, turn off and unplug the griller immediately.
- Check for any food debris stuck to the heating elements that could be causing the issue.
7. Hinges or Latches Issues:
- If the griller’s hinges or latches aren’t working properly, make sure there’s no obstruction preventing them from closing properly.
- If there’s a mechanical issue, refer to the manufacturer’s instructions for potential solutions.
8. Electrical Problems:
- If you experience electrical issues like flickering lights or unusual sounds, unplug the griller and discontinue use. Contact the manufacturer or a professional technician for assistance.
9. Plates Not Heating Evenly:
- If you notice uneven heating on the plates, it could be due to a malfunctioning heating element. Consider contacting customer support or a technician.
10. Maintenance Issues:
- If the griller is not performing as expected, it might need thorough cleaning or maintenance. Follow the cleaning and maintenance guidelines provided by the manufacturer.
If your troubleshooting efforts do not resolve the issue, it’s best to consult the user manual or contact the manufacturer’s customer support for further assistance. Additionally, if the griller is still under warranty, you might be eligible for repairs or replacement if there’s a manufacturing defect.
Conclusion
In conclusion, a sandwich griller is a versatile and convenient kitchen appliance that allows you to create a wide variety of delicious toasted and grilled sandwiches. With its heated plates, the griller provides an efficient way to achieve crispy bread and melted fillings, making it a popular choice for quick meals and snacks. From classic grilled cheese sandwiches to innovative Paninis and stuffed toasties, a sandwich griller offers endless possibilities for culinary creativity.
To make the most of your sandwich griller:
- Choose high-quality ingredients for a flavorful and nutritious sandwich.
- Experiment with different fillings, spreads, and bread types to create your favorite combinations.
- Keep the griller clean and well-maintained to ensure optimal performance and longevity.
- Adjust cooking times and temperatures based on your preferences and the specific ingredients you’re using.
- Exercise caution with hot surfaces and electrical components to ensure safety during operation and cleaning.
Whether you’re a fan of classic comfort food or enjoy exploring new culinary creations, a sandwich griller can be a valuable addition to your kitchen arsenal, providing a quick and enjoyable way to prepare satisfying meals with a delightful toasted twist.
Related Posts
How does sandwich toaster work?
A sandwich toaster, also known as a sandwich maker or panini press,...
Read MoreBread machine sweet potato sandwich rolls
Bread machine sweet potato sandwich rolls are a type of...
Read MoreFollow us
Post Views: 1,182
Why Trust Us
You will find what you are looking for at Jody's Bakery. From classic to luxury brands, you'll find both. We will help you to select appliances that fit your needs, budget and lifestyle. Whether you want to stop by to learn more — or plan to make a major purchase — we’ll treat you like family and assist you every step of the way. Shop with us today to receive friendly and experienced help along the way.


What a compelling and insightful read! The author did a fantastic job. I’m curious to know how others feel about this topic. Click on my nickname for more engaging discussions.