
Thin waffles, also known as “crispy waffles” or “French-style waffles,”...
Read More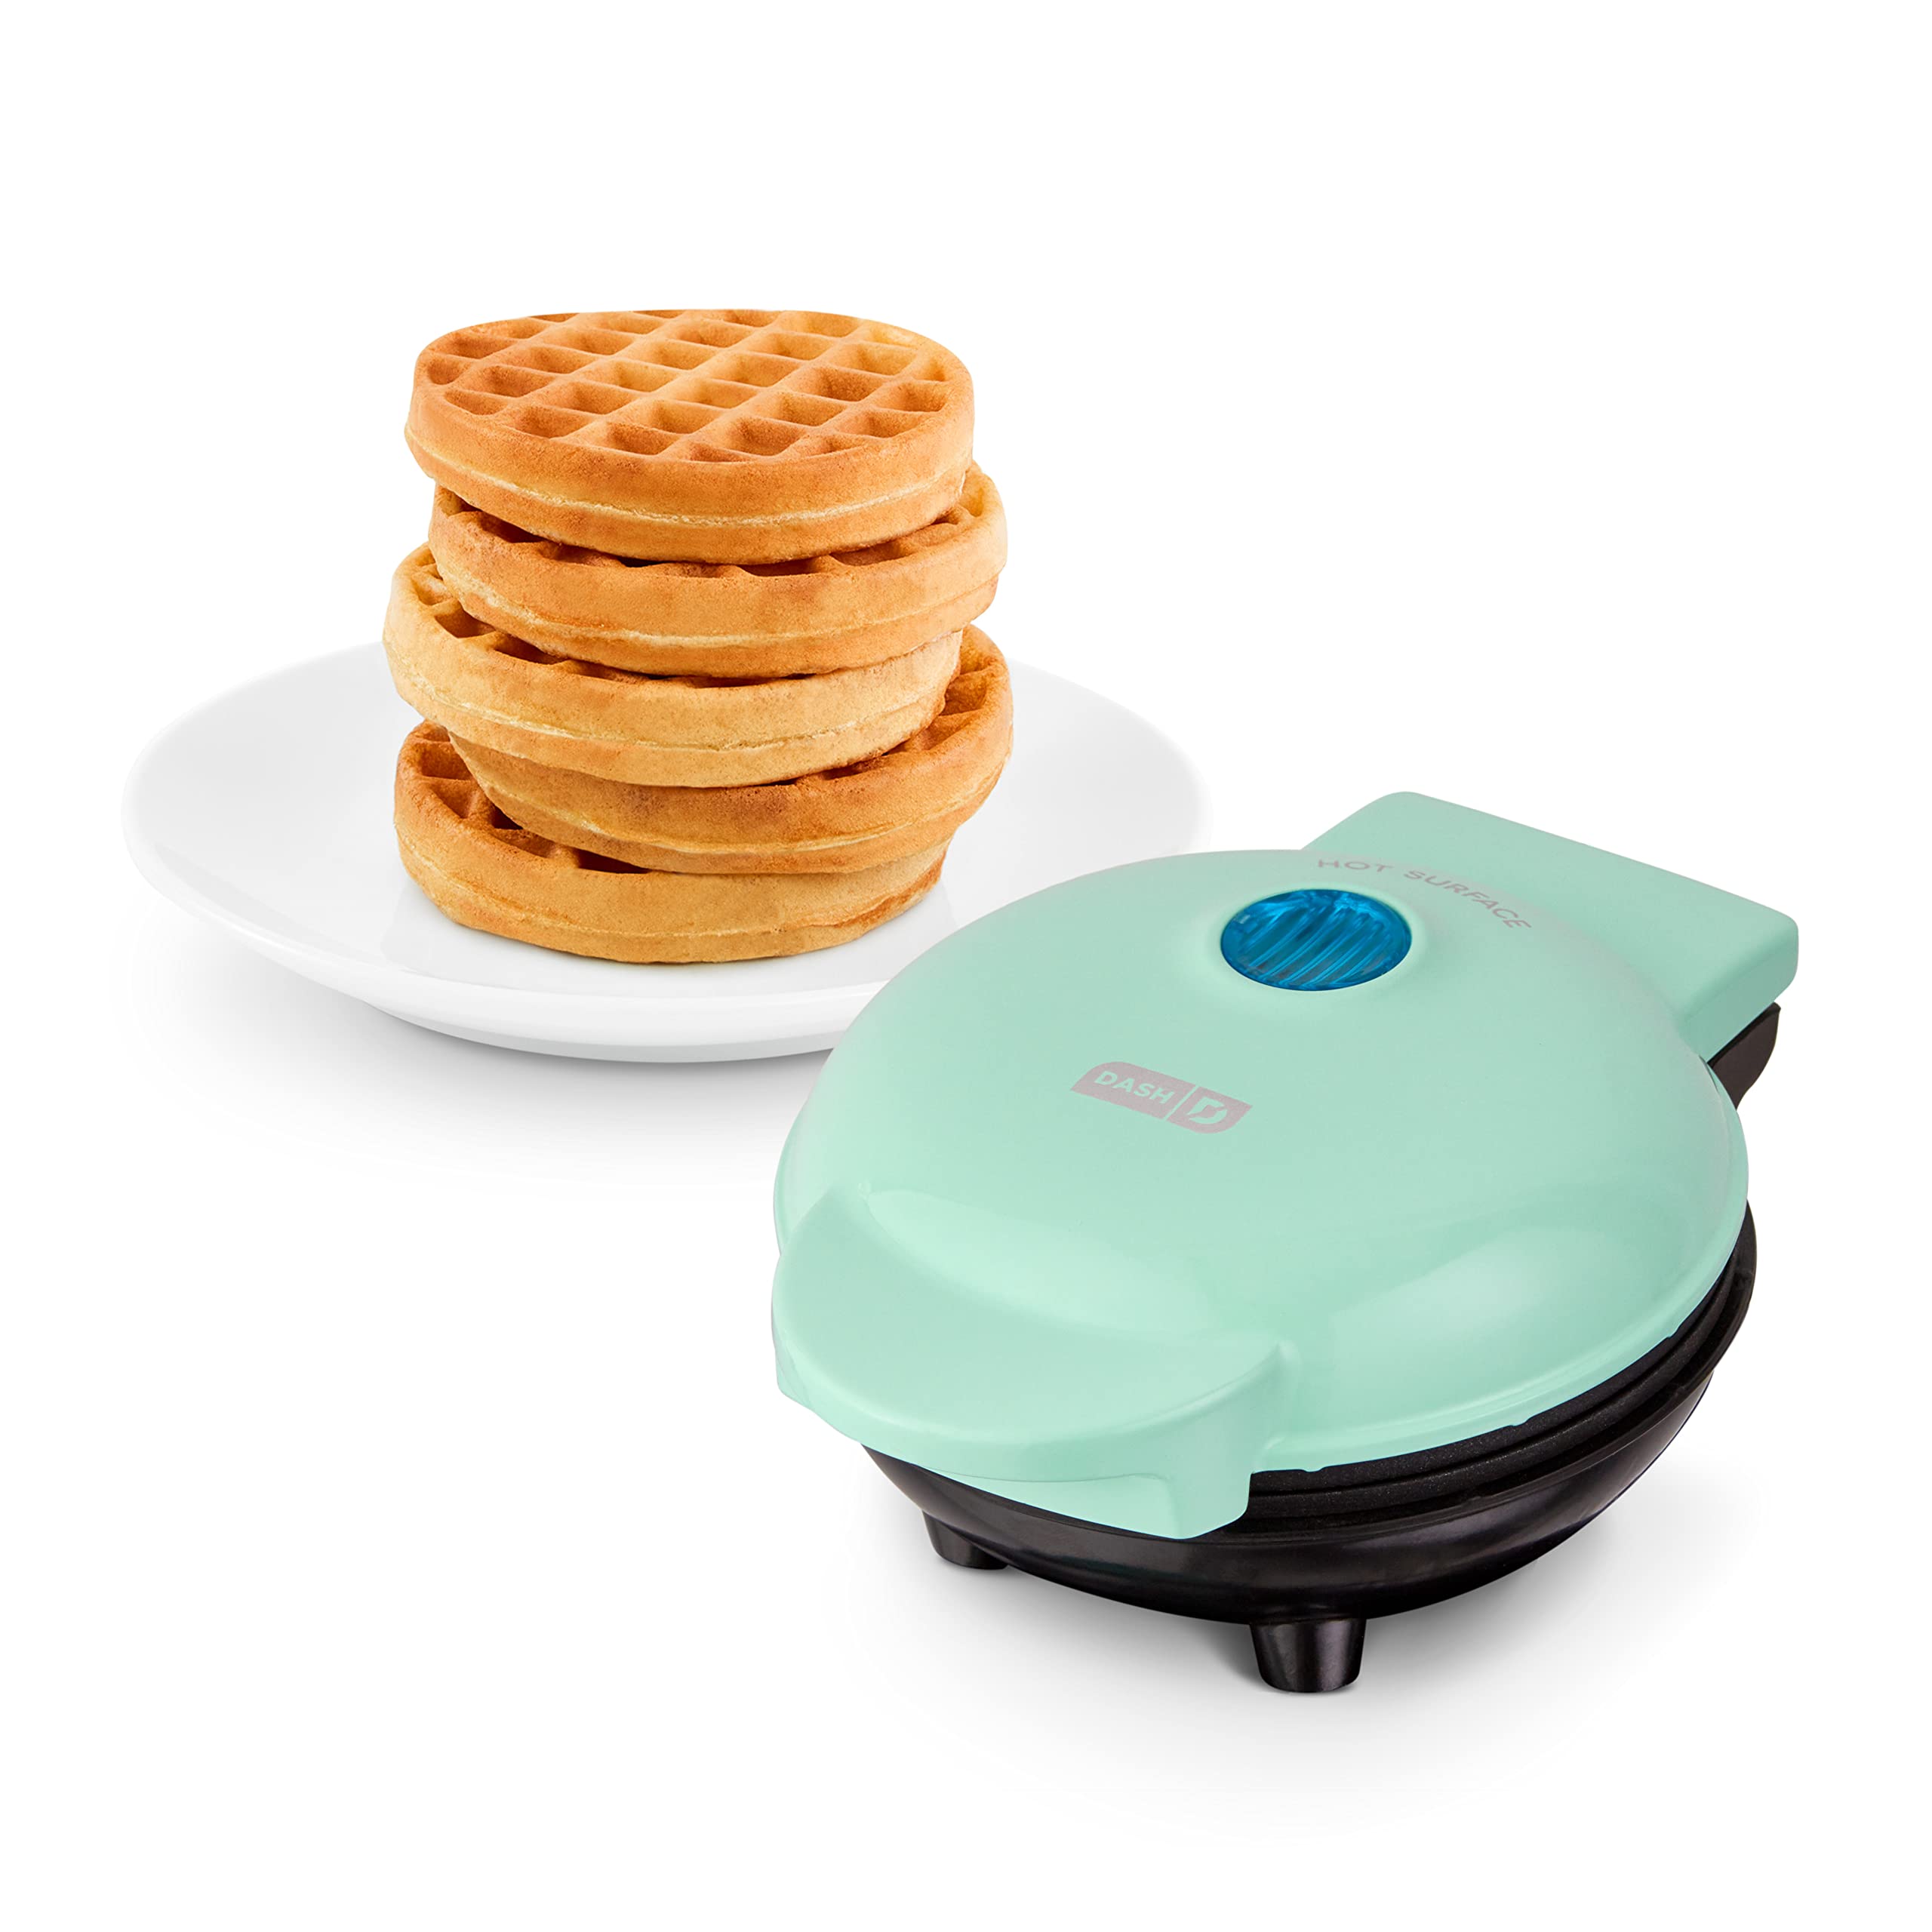
The mini waffle maker is a compact and versatile kitchen appliance designed specifically for making delicious and perfectly-sized waffles. It is a smaller version of the traditional waffle maker, making it ideal for individuals or small households who want to enjoy freshly baked waffles without the need for a large, bulky machine.
Mini waffle makers are known for their convenience and ease of use. They typically feature a non-stick cooking surface that allows for easy removal of the waffles and quick cleanup afterward. The compact size makes them portable, so you can easily take them on trips or store them in small kitchens with limited counter space.
Despite their small size, mini waffle makers are capable of producing evenly cooked waffles with crispy exteriors and fluffy interiors. They often come with indicator lights that show when the appliance is preheated and when the waffles are ready to be served. Some models even offer temperature control settings, allowing you to customize the browning level of your waffles according to your preferences.
Mini waffle makers are not limited to making waffles alone. They can also be used to cook other breakfast treats like pancakes, hash browns, and even grilled sandwiches. Their versatility and compact design make them a popular choice for those who enjoy experimenting with different recipes or want to create fun and unique snacks.
In conclusion, the mini waffle maker is a practical and efficient kitchen tool that brings the joy of homemade waffles to individuals and small households. Its small size, convenience, and versatility make it a delightful addition to any kitchen, allowing you to enjoy a warm and delightful breakfast treat whenever you crave it.
What is the best mini waffle maker?
There are several reputable brands known for producing quality mini waffle makers, such as Dash, Cuisinart, Presto, and Hamilton Beach. It is recommended to read customer reviews, compare features, and consider factors like size, cooking surface material, temperature control, and additional features to determine which mini waffle maker aligns best with your requirements.
You can also consult online shopping platforms, consumer review websites, and cooking forums to gather more information and insights from users who have purchased and used mini waffle makers. Their experiences and feedback can help you make an informed decision based on your preferences and budget.
DASH Mini Maker for Individual Waffles, Hash Browns, Keto Chaffles with Easy to Clean, Non-Stick Surfaces, 4 Inch, Aqua
5.0
Amazon.com

Elite Gourmet EWM015M Electric Nonstick Mini Waffle Maker, Belgian Waffles, Compact Design, Hash Browns, Keto, Snacks, Sandwich, Eggs, Easy to Clean, Mint
4.0
Amazon.com

Nostalgia MyMini Personal Electric Waffle Maker, 5-Inch Cooking Surface, Waffle Iron for Hash Browns, French Toast, Grilled Cheese, Quesadilla, Brownies,…
5.0
Amazon.com

CROWNFUL Mini Waffle Maker Machine, 4 Inch Chaffle Maker with Compact Design, Easy to Clean, Non-Stick Surface, Recipe Guide Included, Perfect for Breakfast,…
4.0
Amazon.com
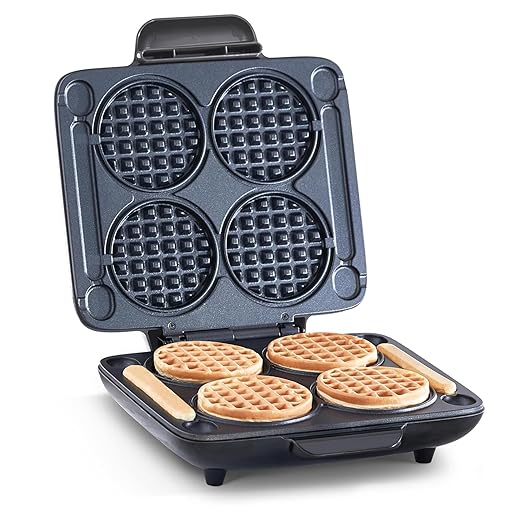
DASH Multi Mini Waffle Maker: Four Mini Waffles, Perfect for Families and Individuals, 4 Inch Dual Non-stick Surfaces with Quick Release & Easy Clean – Graphite
Amazon.com

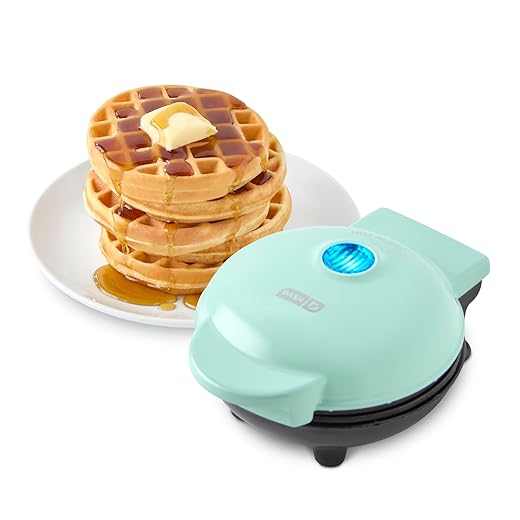
Dash Mini Waffle Maker (2 Pack) for Individual Waffles Hash Browns, Keto Chaffles with Easy to Clean, Non-Stick Surfaces, 4 Inch, Halloween, Orange
5.0
Amazon.com
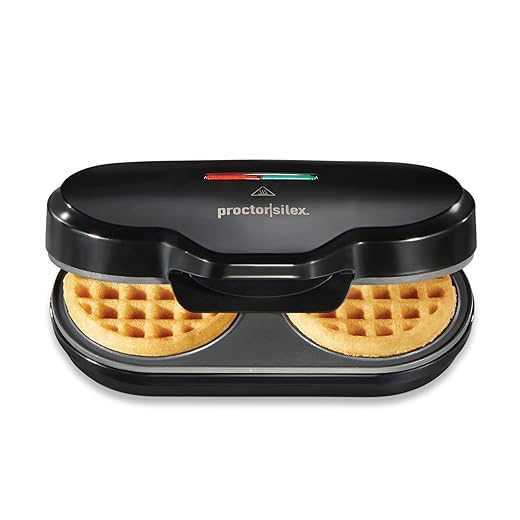
Proctor Silex Double Mini Waffle Maker Machine with 4” Round Non-stick Grids, Makes 2 Personalized Individual Breakfast Chaffles and Hashbrowns, Compact,…
5.0
Amazon.com

FineMade Mini Waffle Maker Machine, Small Waffle Bites Maker for Kids, Makes 8 x 2” Tiny Waffle Bites, Ideal for Breakfast, Snacks, Desserts and More
4.0
Amazon.com

Nostalgia MWF5AQ MyMini Personal Electric Waffle Maker, Hash browns, French Toast Grilled Cheese, Quesadilla, Brownies, Cookies, Red
4.0
Amazon.com

Burgess Brothers Mini Waffle Maker | Portable Electric Non-Stick Waffle Iron | Belgian Waffle Maker Makes 4 Inch Waffles | Includes Bamboo Sporks
4.0
Amazon.com
What is the mini waffle maker called?
The mini waffle maker is simply called a “mini waffle maker.” However, there are various brands that produce mini waffle makers, and they may have different model names or product lines. Some popular brands include Dash, Cuisinart, and Hamilton Beach, and they offer a range of mini waffle makers with different features, sizes, and designs. So, while the general term is “mini waffle maker,” you may find specific models with unique names depending on the brand or manufacturer.
What can you cook in mini waffle maker?
While mini waffle makers are primarily designed for making waffles, they can be surprisingly versatile and used to cook various other delicious treats. Here are some examples of what you can cook in a mini waffle maker:
- Waffles: Of course, the main purpose of a mini waffle maker is to make waffles. You can create classic waffles with various batters, including buttermilk, chocolate, cinnamon, or even savory options like cornbread waffles.
- Pancakes: Mini waffle makers can also be used to cook pancakes. Simply pour pancake batter onto the cooking surface, close the lid, and cook until golden brown.
- Hash browns: Mini waffle makers are excellent for making crispy hash browns. Grate or shred potatoes, season them with your preferred spices, and place the mixture onto the cooking surface. Close the lid and cook until golden and crispy.
- Grilled cheese sandwiches: Transform your mini waffle maker into a sandwich press. Layer cheese and your favorite fillings between two slices of bread, place the sandwich in the waffle maker, and cook until the cheese is melted and the bread is toasted.
- Quesadillas: Create quick and delicious quesadillas by placing a tortilla in the mini waffle maker, adding cheese, and any desired fillings. Close the lid and cook until the cheese is melted and the tortilla is crispy.
- Brownies: Use your mini waffle maker to make small, individual brownies. Pour brownie batter onto the cooking surface, close the lid, and cook until the brownies are set.
- Omelets: Whip up individual-sized omelets by pouring beaten eggs and your desired fillings onto the cooking surface of the mini waffle maker. Close the lid and cook until the eggs are fully set.
- Falafel: Make mini falafel patties by forming the mixture of ground chickpeas, herbs, and spices into small balls or patties. Place them on the cooking surface, close the lid, and cook until they are golden brown.
These are just a few examples, and the possibilities are virtually endless. Get creative and experiment with different recipes and ingredients to see what you can create in your mini waffle maker. Just ensure that whatever you cook is suitable for the cooking surface and won’t stick excessively.
Can you toast bread in a mini waffle maker?
Yes, you can toast bread in a mini waffle maker. While mini waffle makers are not specifically designed for toasting bread like a traditional toaster, they can still be used to achieve a toasted and crispy result.
Here’s how you can toast bread in a mini waffle maker:
- Preheat the mini waffle maker: Plug in the waffle maker and wait for it to preheat. Most models have indicator lights that will let you know when it has reached the desired temperature.
- Prepare the bread: Take a slice or slices of bread and place them in the mini waffle maker. You can leave the bread as is or butter one or both sides for added flavor and crispiness.
- Close the lid: Close the lid of the mini waffle maker and press it down gently to apply even pressure on the bread.
- Toast the bread: Allow the bread to toast for a few minutes, keeping an eye on it to prevent burning. The cooking time will vary depending on the desired level of toasting and the specific mini waffle maker you are using.
- Check the bread: Lift the lid and check the bread to see if it has reached your preferred level of toasting. If it needs more time, close the lid and continue toasting until it reaches the desired crispness.
- Remove the toasted bread: Once the bread is toasted to your liking, use a heat-resistant utensil, such as tongs or a spatula, to carefully remove the toasted bread from the mini waffle maker.
It’s important to note that the toasting process in a mini waffle maker may be different from a traditional toaster. The heat distribution and contact with the cooking surface may result in a slightly different texture or pattern on the bread. However, it can still produce a nicely toasted and crispy result.
Always be cautious when using the mini waffle maker to toast bread, as the cooking surfaces can become hot. Follow the safety guidelines provided by the manufacturer and use heat-resistant utensils to handle the toasted bread.
Can you make a fried egg in a mini waffle maker?
Yes, you can make a fried egg in a mini waffle maker. While it might not be the traditional method of frying an egg in a pan, the mini waffle maker can still be used to cook a perfectly shaped and evenly cooked fried egg.
Here’s how you can make a fried egg in a mini waffle maker:
- Preheat the mini waffle maker: Plug in the waffle maker and wait for it to preheat. Most models have indicator lights that will let you know when it has reached the desired temperature.
- Prepare the egg: Crack an egg into a small bowl or ramekin, being careful not to break the yolk. You can season the egg with salt, pepper, or any desired herbs or spices.
- Lightly grease the cooking surface (optional): Depending on the non-stick coating of your mini waffle maker, you may choose to lightly grease the cooking surface with non-stick cooking spray or a small amount of oil. This step can help prevent sticking, but it may not be necessary if your waffle maker has an effective non-stick surface.
- Pour the egg onto the cooking surface: Open the mini waffle maker and pour the egg onto the center of the lower cooking plate. Be mindful not to pour too much, as it may overflow when the lid is closed.
- Close the lid: Close the lid of the mini waffle maker gently, ensuring that it doesn’t press down too forcefully on the egg.
- Cook the fried egg: Allow the egg to cook in the closed waffle maker for a few minutes. The cooking time will vary depending on the desired level of doneness and the specific mini waffle maker you are using. For a sunny-side-up egg with a runny yolk, you’ll need less cooking time compared to a fully cooked egg with a firm yolk.
- Check the egg: Lift the lid and check the egg to see if it has reached your preferred level of doneness. If it needs more time, close the lid and continue cooking until it reaches the desired consistency.
- Remove the fried egg: Once the egg is cooked to your liking, use a heat-resistant utensil, such as a spatula, to carefully remove the fried egg from the mini waffle maker.
Remember to follow the safety guidelines provided by the manufacturer and exercise caution when handling the hot mini waffle maker and removing the cooked fried egg. Enjoy your homemade fried egg and consider using it as a delicious addition to a breakfast sandwich or as a topping for other dishes.
How big are the waffles in a mini waffle maker?
The size of waffles produced by a mini waffle maker can vary depending on the specific model and brand. However, as a general guideline, mini waffle makers typically produce waffles that are smaller in size compared to standard or Belgian waffle makers.
The exact dimensions of the waffles can vary, but mini waffle makers commonly produce waffles that are around 3 to 4 inches (7.5 to 10 cm) in diameter or width. These smaller-sized waffles are ideal for individual servings or for creating bite-sized portions.
It’s important to consider the size and capacity of your specific mini waffle maker when preparing the batter. Pouring too much batter can result in overflow or improperly formed waffles. Following the manufacturer’s recommendations regarding batter quantity can help ensure the waffles are the right size and shape for your mini waffle maker.
If you prefer larger-sized waffles, you may need to explore larger waffle maker models that are specifically designed to produce bigger waffles.
How much mix to put in mini waffle maker?
The amount of waffle batter or mix to put in a mini waffle maker can vary depending on the specific size and capacity of your waffle maker, as well as the desired thickness of the waffles. Here are some general guidelines to help you determine the appropriate amount:
- Read the instruction manual: The manufacturer’s instruction manual usually provides specific guidance on the recommended amount of batter or mix to use for your particular mini waffle maker. It may suggest a certain volume or fill level to ensure optimal results.
- Use a measuring cup or scoop: If you don’t have specific instructions, a good starting point is to use a standard measuring cup or scoop to portion the batter. A common recommendation is about 1/4 to 1/3 cup of batter for each waffle in a mini waffle maker. However, adjust this amount based on the size and capacity of your specific waffle maker.
- Leave space for expansion: It’s important not to overfill the mini waffle maker as the batter will expand and spread during cooking. Leaving a small margin around the edges of the cooking plates can help prevent overflow and ensure the batter cooks evenly.
- Trial and error: Since each waffle maker can vary, it may take some experimentation to find the perfect amount of batter for your desired waffle thickness and texture. You can start with a smaller amount of batter and adjust accordingly for subsequent batches until you achieve the desired results.
Remember, it’s always better to slightly underfill the waffle maker than to overfill it. If you pour too much batter, it may overflow and create a mess.
By following these guidelines and considering the specifics of your mini waffle maker, you can determine the appropriate amount of batter or mix to achieve delicious and well-formed mini waffles.
How do you use a mini waffle maker?
Using a mini waffle maker is relatively straightforward. Here are the general steps to follow:
- Preheat the mini waffle maker: Plug in the waffle maker and wait for it to preheat. Most mini waffle makers have indicator lights that will let you know when it has reached the desired temperature.
- Prepare the waffle batter: While the waffle maker is preheating, prepare your waffle batter according to your preferred recipe. Make sure to mix the ingredients thoroughly until you have a smooth batter.
- Apply non-stick spray (if needed): Depending on the non-stick coating of your mini waffle maker, you may need to lightly spray the cooking surface with non-stick cooking spray or brush it with a small amount of oil. Some models have a non-stick surface and do not require additional greasing.
- Pour the batter: Once the waffle maker is preheated and the cooking surface is prepared, open the lid and pour the desired amount of batter onto the center of the lower cooking plate. Be careful not to overfill to prevent the batter from overflowing.
- Close the lid: Close the lid of the mini waffle maker and gently press it down to ensure even cooking. The lid may have a latch or a locking mechanism to keep it closed during cooking.
- Cook the waffle: Allow the waffle to cook for the recommended time, typically around 2 to 4 minutes, or until the indicator light signals that it’s done. Avoid opening the lid during cooking to maintain heat and prevent the waffle from sticking.
- Remove the waffle: Once the waffle is cooked, carefully open the lid and use a heat-resistant utensil, such as a silicone spatula, to gently lift the waffle from the cooking surface. The waffle should easily release if the mini waffle maker has a non-stick coating.
- Repeat the process: If you want to make more waffles, repeat the steps above, starting from pouring the batter, until you have cooked all the desired waffles.
- Serve and enjoy: Place the cooked waffle on a plate and serve it warm with your favorite toppings, such as maple syrup, fruits, whipped cream, or powdered sugar.
Remember to always refer to the instruction manual provided by the manufacturer for specific usage guidelines and safety precautions, as different mini waffle maker models may have slight variations in operation.
Do you need to spray a mini waffle maker?
Whether you need to spray a mini waffle maker with non-stick cooking spray or oil depends on the specific model and its non-stick coating. Some mini waffle makers come with a non-stick surface that is designed to release the waffles easily without the need for additional greasing. In such cases, spraying the cooking surface may not be necessary and can even lead to excess oil buildup.
However, if your mini waffle maker doesn’t have a reliable non-stick coating or if you prefer extra assurance to prevent sticking, lightly spraying the cooking surface with non-stick cooking spray or brushing it with a small amount of oil can help. This can create a barrier between the batter and the cooking surface, making it easier to remove the cooked waffles without them sticking.
It’s important to note that if you do decide to use cooking spray or oil, it’s advisable to use it sparingly. Too much oil or spray can result in excessive greasiness and can affect the texture and appearance of the waffles.
Always refer to the specific instructions and recommendations provided by the manufacturer of your mini waffle maker. They can provide guidance on whether you need to spray the cooking surface and any other specific considerations for optimal performance and maintenance of your appliance.
How long do you cook a waffle in a mini waffle maker?
The cooking time for waffles in a mini waffle maker can vary depending on the specific model, the recipe used, and personal preferences for the desired level of crispiness. However, as a general guideline, cooking a waffle in a mini waffle maker typically takes around 2 to 4 minutes.
It’s important to note that mini waffle makers usually have indicator lights that signal when the appliance is preheated and when the waffle is ready. Preheating time can range from 1 to 5 minutes, depending on the model. Once the mini waffle maker is preheated, you can pour the waffle batter onto the cooking surface, close the lid, and cook the waffle for the recommended time or until the indicator light signals that it’s done.
To determine the precise cooking time for your mini waffle maker, it’s always best to refer to the instruction manual provided by the manufacturer, as it may include specific recommendations and guidelines based on the particular model you have. Additionally, you can also adjust the cooking time based on personal preference for a softer or crisper waffle.
How do I know when my mini waffle is done?
Knowing when a mini waffle is done can be determined by a few indicators. Here are some common signs to look for:
- Indicator light: Many mini waffle makers come with an indicator light that signals when the waffle is cooked. The light typically turns on when the waffle maker is preheated and then turns off or changes color when the waffle is done. Refer to the instruction manual of your specific model to understand the meaning of the indicator light.
- Steam: During the cooking process, steam is often produced as moisture in the batter evaporates. When the steam significantly reduces or stops coming out from the waffle maker, it can be an indication that the waffle is nearing completion.
- Visual cues: The appearance of the waffle can provide clues about its doneness. As the waffle cooks, it typically changes color from a pale batter to a golden brown. You can peek at the waffle through the lid or open the waffle maker slightly to check for the desired level of browning and crispness. A well-cooked waffle should have a uniformly golden exterior.
- Texture: When you touch the waffle with a heat-resistant utensil, such as a spatula, it should feel firm and hold its shape without being overly soft or undercooked. The texture should be crispy on the outside and tender on the inside.
- Personal preference: The cooking time can also depend on personal preference. If you prefer a softer waffle, you might remove it from the waffle maker a bit earlier. For a crispier waffle, you can leave it a bit longer.
It’s important to note that cooking times can vary depending on the specific mini waffle maker, recipe, and personal preferences. Some trial and error might be needed to find the perfect cooking time that yields the desired waffle texture and appearance. Over time, you will become more familiar with your mini waffle maker and adjust the cooking time accordingly.
How many times do you flip a mini waffle maker?
In general, you do not need to flip a mini waffle maker during the cooking process. Mini waffle makers are designed to cook waffles evenly on both sides without the need for flipping.
Once you pour the batter into the mini waffle maker and close the lid, the heat from the cooking plates will evenly cook the waffle from both sides simultaneously. The lid of the waffle maker applies pressure to ensure even cooking and helps create a crispy exterior while maintaining a soft and fluffy interior.
It’s important to resist the temptation to open the lid and flip the waffle during cooking, as this can disrupt the cooking process and result in an unevenly cooked or deflated waffle.
Simply follow the recommended cooking time provided by the manufacturer or monitor the visual cues, such as the color and texture, to determine when the waffle is done. Once the waffle is cooked to your desired level, you can carefully lift the lid, remove the waffle using a heat-resistant utensil, and repeat the process for subsequent waffles if desired.
Remember to always refer to the specific instructions provided by the manufacturer of your mini waffle maker for any model-specific guidelines on cooking techniques.
How hot does a mini waffle maker get?
The temperature at which a mini waffle maker operates can vary depending on the specific model and brand. However, most mini waffle makers typically reach a temperature range of around 300 to 400 degrees Fahrenheit (150 to 200 degrees Celsius) during the cooking process.
The cooking plates of the waffle maker are designed to distribute heat evenly and ensure proper cooking of the batter. The high temperature helps to quickly cook the waffle, creating a crispy exterior while maintaining a fluffy interior.
It’s important to note that the cooking temperature can vary between different models, so it’s always advisable to refer to the instruction manual provided by the manufacturer for specific temperature guidelines and safety precautions. Following the recommended temperature settings will help you achieve the best results and avoid any potential risks associated with excessive heat.
How long do you leave waffles in a mini waffle maker?
The cooking time for waffles in a mini waffle maker can vary depending on several factors, including the specific model of the waffle maker, the thickness of the batter, and personal preference for the level of browning and crispness. However, as a general guideline, mini waffles usually take around 2 to 4 minutes to cook.
To determine the optimal cooking time for your mini waffle maker, you can follow these steps:
- Preheat the waffle maker: Plug in the waffle maker and wait for it to reach the desired cooking temperature. Most models have indicator lights that will let you know when it’s preheated.
- Pour the batter: Pour the appropriate amount of batter into the preheated waffle maker. Refer to the manufacturer’s instructions for guidance on the recommended batter amount and fill level for your specific model.
- Close the lid: Close the lid of the waffle maker gently but securely, ensuring it is fully closed to allow for even cooking.
- Monitor the waffle: Keep an eye on the waffle as it cooks. The color and texture will change gradually. Look for a golden brown color on the outside and a crisp texture.
- Check for doneness: After a couple of minutes, you can check the waffle for doneness by carefully lifting the lid and using a heat-resistant utensil to peek at the waffle’s color and texture. If it needs more time, close the lid and continue cooking.
- Adjust cooking time: Depending on your preference for waffle texture, you can adjust the cooking time. If you like a softer, lighter waffle, you can remove it from the waffle maker earlier. For a crisper waffle, leave it in a bit longer.
It’s important to note that the cooking time can vary between different models and recipes. You may need to do some trial and error to find the ideal cooking time that produces the desired waffle texture and appearance.
Always refer to the specific instructions provided by the manufacturer of your mini waffle maker, as they may provide model-specific guidelines on cooking times and temperature settings.
How do you clean mini waffles?
Cleaning a mini waffle maker is typically a straightforward process. Here’s a step-by-step guide on how to clean a mini waffle maker:
- Unplug the waffle maker: Before cleaning, make sure the mini waffle maker is unplugged and completely cooled down. This will prevent any risk of burns or electrical accidents.
- Remove any excess crumbs or batter: Use a soft-bristle brush or a cloth to gently brush away any loose crumbs or batter from the cooking surface and the surrounding areas. Be careful not to scratch the non-stick coating, if present.
- Wipe the cooking surface: Dampen a soft cloth or sponge with warm water and mild dish soap. Gently wipe the cooking surface to remove any residue or stuck-on batter. Avoid using abrasive scrubbers or harsh chemicals that could damage the non-stick coating.
- Clean the outer surfaces: Use the damp cloth or sponge to clean the outer surfaces of the mini waffle maker, including the exterior of the cooking plates, handle, and other parts. If necessary, you can also use a mild cleaning solution suitable for the specific material of the appliance, following the manufacturer’s recommendations.
- Dry the waffle maker: After cleaning, use a dry cloth or towel to wipe off any moisture from the mini waffle maker. Make sure it is completely dry before storing it or using it again.
- Clean hard-to-reach areas (if applicable): Some mini waffle makers have removable cooking plates or other detachable parts that can be washed separately. If your mini waffle maker has removable plates, follow the manufacturer’s instructions for removing and cleaning them. You may be able to wash them in warm soapy water or place them in the dishwasher if they are dishwasher-safe.
Always refer to the specific cleaning instructions provided by the manufacturer of your mini waffle maker, as different models may have slight variations in cleaning methods. Following the manufacturer’s guidelines will help ensure proper maintenance and longevity of your appliance.
By regularly cleaning your mini waffle maker after each use, you can keep it in good condition and ready for your next delicious batch of waffles.
Benefits of using mini waffle maker
Using a mini waffle maker offers several benefits that make it a popular choice among cooking enthusiasts. Here are some benefits of using a mini waffle maker:
- Compact and Space-Saving: Mini waffle makers are smaller in size compared to standard waffle makers, making them compact and easy to store. They take up less countertop space and are suitable for smaller kitchens or for those who have limited storage space.
- Quick and Efficient Cooking: Mini waffle makers typically heat up quickly, allowing you to make waffles in a matter of minutes. Their smaller size also means that the waffles cook faster compared to larger waffle makers, which is convenient for those who are short on time or want to enjoy freshly made waffles without a long wait.
- Portability: Mini waffle makers are lightweight and portable, making them ideal for taking on trips, camping, or other outdoor activities. You can easily pack them in a bag or suitcase and enjoy homemade waffles wherever you go.
- Versatility: While mini waffle makers are primarily designed for making waffles, they can often be used for more than just waffles. Many models allow you to get creative and experiment with different recipes. You can use them to cook items like pancakes, hash browns, paninis, quesadillas, and more, expanding their versatility in the kitchen.
- Portion Control: Mini waffle makers produce smaller-sized waffles, which can be advantageous for portion control. If you’re conscious about serving sizes or prefer smaller servings, mini waffles can help you regulate your portion sizes more easily.
- Easy to Clean: Cleaning a mini waffle maker is generally easier and quicker compared to larger waffle makers. With their smaller cooking surface and compact design, they are often easier to wipe clean or disassemble for washing, depending on the model.
- Fun and Novelty: Mini waffle makers can add a touch of fun and novelty to your cooking experience. Their adorable size and cute waffle shapes can make breakfast or snack time more enjoyable, especially for children or those who appreciate whimsical kitchen gadgets.
Remember to choose a mini waffle maker that fits your specific needs and preferences, considering factors such as cooking surface material, non-stick coating, and additional features. Always refer to the manufacturer’s instructions and safety guidelines when using and maintaining your mini waffle maker for optimal performance and longevity.
Factors to consider when choosing the best mini waffle maker
When choosing the best mini waffle maker for your needs, there are several factors to consider. Here are some important factors to keep in mind:
- Size and Capacity: Mini waffle makers come in various sizes, so consider how many waffles you want to make at once and how much counter or storage space you have available. Look for a size that suits your needs, whether it’s a single waffle or multiple waffles at a time.
- Cooking Surface Material: The cooking surface material can impact the cooking performance and durability of the waffle maker. Non-stick surfaces are commonly used, as they make it easier to release the waffles without sticking. Some models may use ceramic or other materials for the cooking surface. Consider your preference for non-stick properties and ease of cleaning.
- Temperature Control: Some mini waffle makers have adjustable temperature controls, allowing you to customize the cooking temperature based on your preference and the recipe you’re using. Having temperature control can be beneficial for achieving the desired level of browning and crispness in your waffles.
- Indicator Lights: Look for a mini waffle maker that features indicator lights to signal when the waffle maker is preheated and when the waffles are done. These lights provide convenience and help ensure you don’t overcook or undercook your waffles.
- Versatility and Additional Features: Consider if you want a mini waffle maker that can do more than just make waffles. Some models have interchangeable plates or attachments, allowing you to make pancakes, sandwiches, or other dishes. Additional features like removable plates for easier cleaning or built-in timers can also enhance the functionality of the waffle maker.
- Power and Heating Element: Check the wattage and heating element of the mini waffle maker. Higher wattage models generally heat up faster and cook waffles more quickly. A reliable and efficient heating element ensures even and consistent cooking.
- Brand and Reviews: Research and read reviews about different mini waffle maker brands and models to gather insights about their performance, durability, and customer satisfaction. Opting for a reputable brand with positive reviews can give you confidence in the quality and reliability of the product.
- Price and Budget: Determine your budget and consider the price range of the mini waffle makers available. Keep in mind that higher-priced models may offer additional features or better durability, but you can also find affordable options that meet your needs.
By considering these factors, you can narrow down your options and choose a mini waffle maker that aligns with your preferences, cooking requirements, and budget.
How to maintain mini waffle maker properly
Proper maintenance of your mini waffle maker can help ensure its longevity and optimal performance. Here are some tips to help you maintain your mini waffle maker:
- Read the instructions: Always refer to the manufacturer’s instructions and guidelines specific to your mini waffle maker. These instructions often include valuable information regarding cleaning, care, and any specific maintenance requirements.
- Allow it to cool down: Before cleaning or performing any maintenance tasks, ensure that the mini waffle maker has cooled down completely. Unplug it from the power source and let it cool to a safe temperature to avoid any risk of burns.
- Clean after each use: Clean the mini waffle maker after each use to remove any residual batter, oil, or debris. Follow these steps for cleaning:
- Wipe the cooking plates: Use a damp cloth or sponge to gently wipe the cooking plates. Avoid using abrasive materials or harsh chemicals that could damage the non-stick coating.
- Remove excess batter: If there is any stuck-on batter, you can use a soft brush or a wooden utensil to gently remove it. Be careful not to scratch the surface.
- Clean the exterior: Wipe the exterior of the waffle maker with a damp cloth to remove any spills or stains.
- Removable plates (if applicable): If your mini waffle maker has removable plates, follow the manufacturer’s instructions for removing and cleaning them separately. Some models are dishwasher-safe, while others require handwashing.
- Avoid immersing in water: Most mini waffle makers are not submersible and should not be fully immersed in water. Keep the electrical components away from water to prevent damage.
- Use non-abrasive cleaning tools: When cleaning the mini waffle maker, use non-abrasive cleaning tools like soft cloths, sponges, or brushes to avoid scratching or damaging the cooking surfaces.
- Avoid sharp utensils: Avoid using sharp or metal utensils that can scratch the non-stick coating of the cooking plates. Opt for silicone, nylon, or wooden utensils that are gentle on the surface.
- Store properly: Once the mini waffle maker is clean and dry, store it in a cool and dry place. If your mini waffle maker has a cord, wrap it neatly to avoid any tangling or damage.
- Periodic maintenance: Depending on the specific model, there may be additional maintenance tasks recommended by the manufacturer, such as periodically oiling the cooking plates or inspecting the electrical components. Refer to the instruction manual for any specific maintenance requirements.
By following these maintenance tips, you can keep your mini waffle maker in good condition, prolong its lifespan, and ensure that it continues to produce delicious waffles.
Troubleshooting about mini waffle maker
If you encounter any issues with your mini waffle maker, here are some common troubleshooting tips to help you resolve the problem:
Waffles sticking to the plates:
- Make sure to properly preheat the waffle maker before adding the batter.
- Apply a thin layer of cooking spray or brush the plates with oil before pouring the batter.
- Avoid using excessive amounts of batter that can overflow and stick to the sides.
- Wait until the waffle is fully cooked before opening the lid to prevent it from tearing or sticking.
Uneven cooking or browning:
- Ensure that the mini waffle maker is properly preheated before adding the batter.
- Distribute the batter evenly across the cooking plates to ensure consistent cooking.
- Close the lid firmly to provide even heat distribution.
- If the mini waffle maker has adjustable temperature settings, experiment with different temperatures to find the optimal one for your desired browning level.
Waffles not cooking through:
- Check that the mini waffle maker is fully preheated before adding the batter.
- Avoid opening the lid too early or frequently during cooking, as it can disrupt the cooking process.
- Ensure that you’re using the correct amount of batter and spreading it evenly across the cooking plates.
- If needed, increase the cooking time slightly to ensure thorough cooking.
Waffle maker not heating up:
- Verify that the power cord is securely plugged into a functioning electrical outlet.
- Check if there is a power indicator light that should be on when the unit is heating up.
- Ensure that the mini waffle maker is not placed on a heat-sensitive surface that could interfere with its heating capabilities.
- If the unit still doesn’t heat up, contact the manufacturer’s customer support for assistance or consider getting it repaired or replaced if it’s within the warranty period.
Excessive smoke or burning smell:
- Make sure the mini waffle maker is clean and free from any residue or buildup that could be causing the smoke or smell.
- Check for any trapped food particles or spilled batter on the heating elements or other areas.
- Ensure that you’re using the appropriate cooking temperature and not overheating the waffle maker.
- If the problem persists, discontinue use and contact the manufacturer or seek professional assistance to avoid any potential safety hazards.
Remember to consult the instruction manual provided by the manufacturer for specific troubleshooting tips and recommendations for your mini waffle maker model.
Conclusion
In conclusion, a mini waffle maker is a versatile and compact kitchen appliance that allows you to make delicious homemade waffles with ease. It offers several benefits, including its small size, quick cooking time, and portability. Mini waffle makers are easy to use and maintain, and they provide a fun and convenient way to enjoy waffles whenever you want.
When choosing a mini waffle maker, consider factors such as size, cooking surface material, temperature control, and additional features to find one that suits your needs and preferences. Proper maintenance, such as regular cleaning and following the manufacturer’s instructions, ensures the longevity and optimal performance of your mini waffle maker.
Whether you’re making traditional waffles, experimenting with different recipes, or using it for other creative cooking ideas, a mini waffle maker is a handy tool that brings the joy of homemade waffles into your kitchen. Enjoy the process of creating delicious waffles and exploring the various possibilities this compact appliance has to offer.
Related Posts
Is a Belgian waffle maker different?
A Belgian waffle maker is a kitchen appliance specifically designed...
Read MoreAre waffle makers worth it?
A waffle maker is a kitchen appliance specifically designed to...
Read MoreHow to use a food dehydrator for fruit
Post Views: 1,231
Why Trust Us
You will find what you are looking for at Jody's Bakery. From classic to luxury brands, you'll find both. We will help you to select appliances that fit your needs, budget and lifestyle. Whether you want to stop by to learn more — or plan to make a major purchase — we’ll treat you like family and assist you every step of the way. Shop with us today to receive friendly and experienced help along the way.

