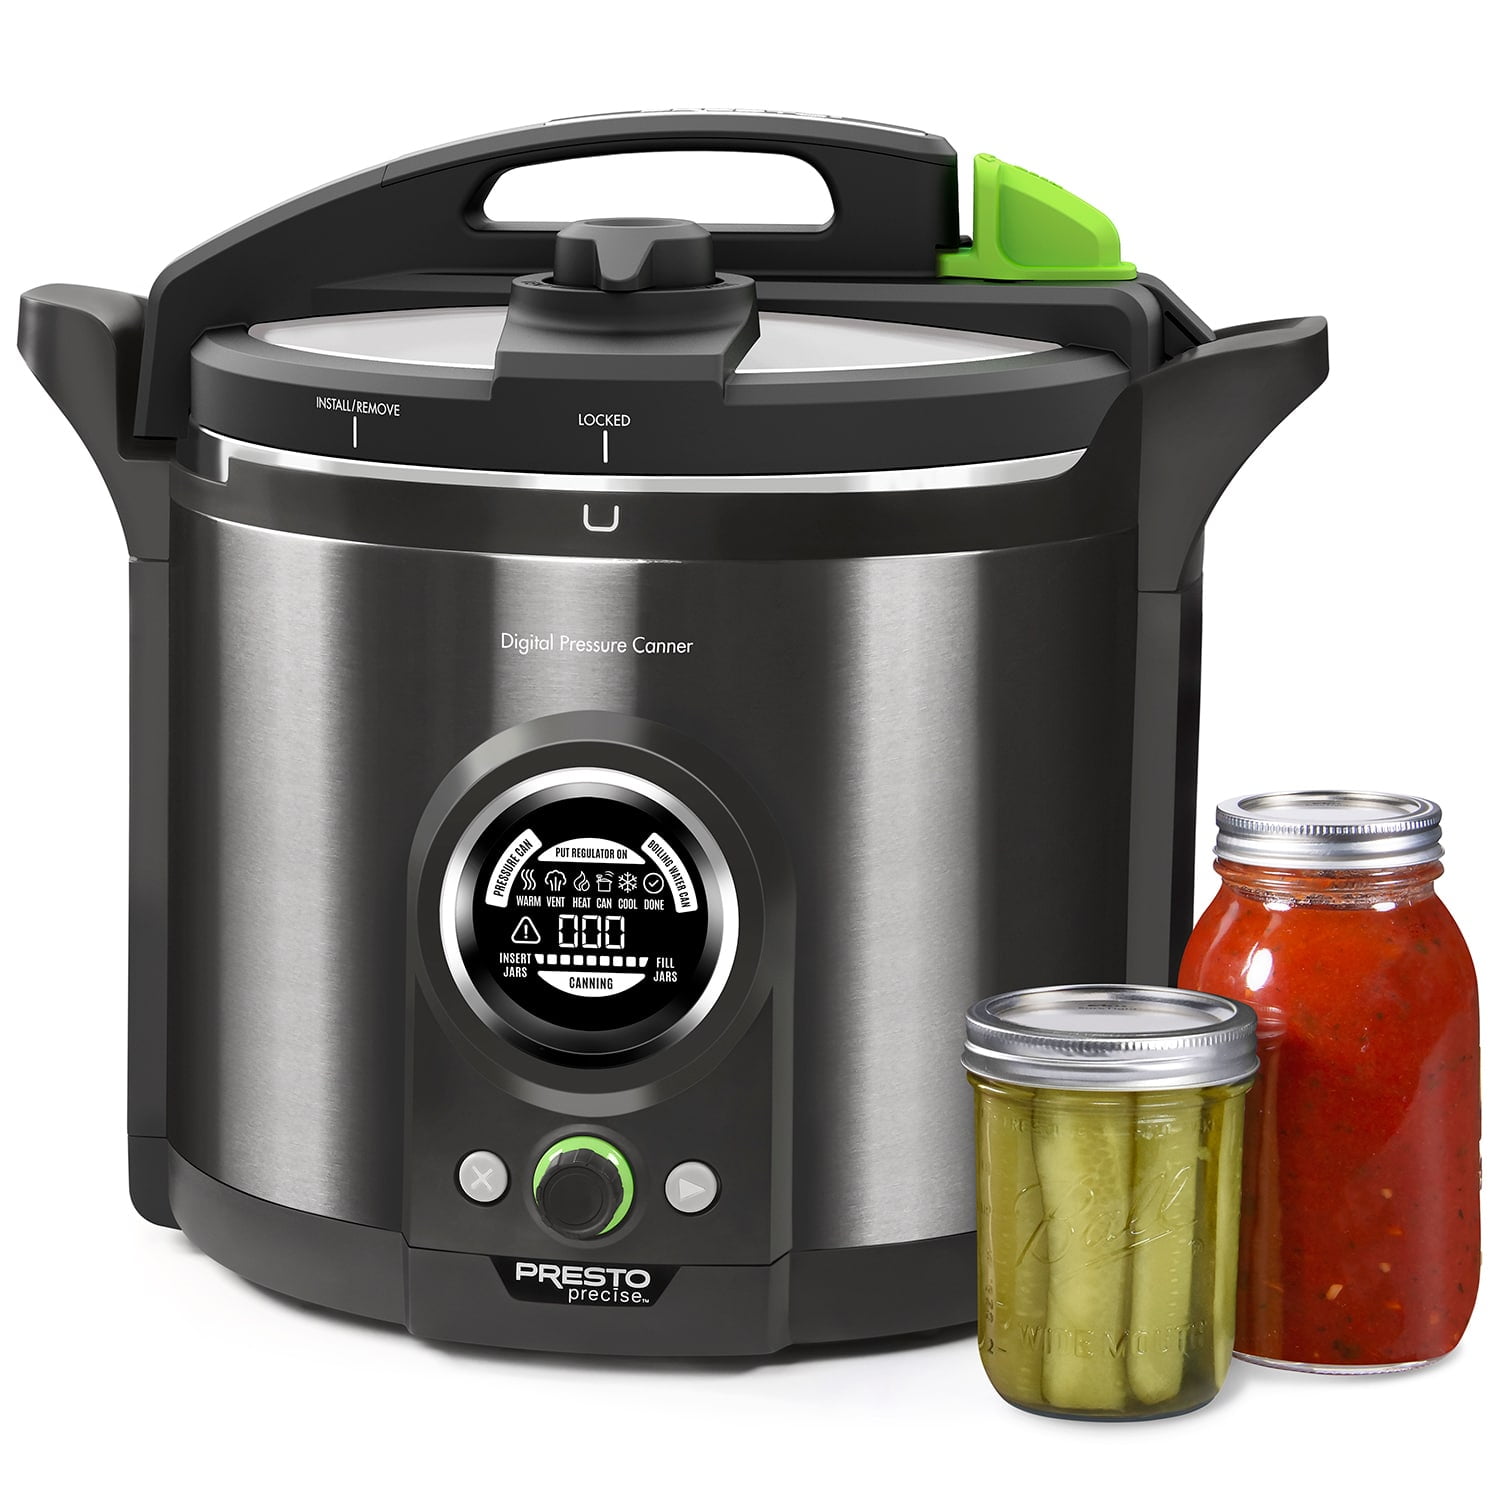
Are you interested in pressure canning but concerned that an error will cause your canner to explode or your family to become ill? Good news: pressure canning does not have to be intimidating! It is one of my favorite food preservation methods. In today’s post, I address several frequently asked questions about pressure canning to help you feel comfortable preserving food in this manner.
Before we begin our Q&A, there is a fantastic resource I want you to notice. Thousands of readers and listeners are navigating my free pressure canning video series. I am ecstatic about this. Vegetables, meats, soups, and broths that have been pressure-canned are shelf-stable and require only re-heating to be ready for consumption. The e-course will teach you everything you need to know to safely and safely stock your pantry with wholesome, ready-to-eat, home-cooked meals.
Can I pressure can using an electric pressure cooker or electric canner?
No, electric pressure cookers cannot be used for pressure canning.
Most individuals are familiar with the Instant Pot, and Ball also offers an electric water bath canner, but neither can be used safely for pressure canning. People have asked me about using these for pressure canning; understandably, they are confused. However, the fact that a pressure cooker like the Instant Pot cooks under pressure does not mean that it can be used for canning. Some models of electric pressure cookers include information on pressure canning in their operation manuals or advertise this capability.
However, they failed the test conducted by a third party. The National Center for Home Food Preservation conducted this research, and you can read their article for more details.
Two reasons why an electric pressure cooker should not be used for pressure canning
Electric pressure cookers cannot be used for safe canning for two primary reasons.
- You cannot choose the exact number of pounds of pressure. For instance, if you live at an altitude of fewer than 1,000 feet above sea level, your meats, vegetables, and combination recipes, such as soups, require ten pounds of pressure. If you live at a higher altitude, you must add five pounds to the pressure and can at fifteen pounds of pressure. For safe pressure canning, you must choose the appropriate pounds based on the recipe and your altitude. Unfortunately, most electric pressure cookers do not allow you to select the pressure in pounds.
- The pressure is not maintained uniformly throughout the duration. Second, even if a pressure cooker allows you to select the pounds of pressure, it does not support that pressure throughout the entire processing time, which means it cannot kill harmful bacteria in the food you are canning.
Regardless of what the manual says, it is neither safe nor recommended to use an electric pressure cooker for pressure canning for these reasons. Please share this with anyone who believes they can pressure can in an electric pressure cooker. Please share it on Facebook, Instagram, and other social media platforms to spread the word because pressure canning is incredible and can be done safely. I would love it if every household safely canned and preserved their food. Please help me spread the word so that people can learn to can safely.
What happens if the pressure drops below the minimum required for my recipe?
Many individuals wonder what to do if their canner’s pressure falls below the recipe’s requirements while processing. For instance, suppose you are preserving pints of green beans, which I demonstrate in detail in my complimentary video series. I apply ten pounds of pressure for twenty minutes at my altitude. You begin timing once your pressure canner has reached the appropriate pounds of pressure. When the pressure goes ten pounds, you start your timer.
To ensure that botulism spores and other types of bacteria are killed, your canner must maintain the proper pressure throughout the entire processing time. Therefore, I must reset my timer if I was sixteen minutes into canning green beans and the pressure dropped below ten pounds. The times specified in recipes for pressure canning are particular to the required temperature.
Dangerous spores are eliminated only when they are held at that temperature and pressure for the duration of the processing time. Therefore, if your pressure drops during processing, you must begin again.
Is well water safe for canning? What should I do about mineral deposits in my canner?
This question first appeared on my membership site, the Pioneering Today Academy. This is one of the locations where the Home Canning with Confidence course can be found. One of our members was using her pressure canner for the first time when she noticed white deposits on the jars and inside the canner. This is usually caused by hard water or various minerals when using well water.
Due to our rural location, we have our own well. Actually, I’m relieved because I don’t have to worry about chlorine and other water-treatment chemicals. Our well water is tested to ensure that it is safe to drink, and it is also suitable for canning. I’ve used nothing else for canning, both as a child and since I got married and began canning on my own.
If your well water contains a high concentration of minerals, particularly calcium, you may observe white deposits after you have canned. As you remove the jars from the pressure canner, guarantees may be left on the outside of the jars or even within the pressure canner.
If you observe this, you need not worry. It’s normal, and your food jars are lovely. However, you can prevent mineral deposits by adding a half-cup of vinegar to the canner’s water.
Why is the interior of my canner turning dark? Is it still a viable option?
When you initially receive your pressure canner, it is a beautiful silver color. However, when you use it for the first time, the interior will turn dark unless you are canning tomatoes. You might wonder, “Oh my goodness, is this typical? What is happening?” It’s perfectly normal, and just as I suggested, to prevent mineral deposits, you can use vinegar to remedy the situation.
When you can tomato sauce, for example, some of the acid from the tomatoes will leak out during processing, causing the sauce to turn silver again. The next time you use it for something that does not contain tomatoes, it will darken again. Utilization of a pressure canner is a typical indication. Consider it an honor badge!
What proportion of water should I add to my pressure canner?
You will fill your canner with about two inches of water. When pressure canning, you do not fill the canner to the top as you would with a water bath canner. Read the instruction manual for your pressure canner. My older pressure canner required 1.5 quarts of water, which corresponds to roughly the two-inch mark. My other All-American twenty-one-and-a-half-quart canner needs two inches of water. Ultimately, follow the instructions in your manual, but it will likely equal two inches of water.
What does “double stacking” in pressure canning entail, and how do I do it safely?
As my children grew older, I began canning more and needed to do more at once. At that time, we invested in an All-American canner with a capacity of twenty-one and a half quarts. Now, twenty-one and a half quarts do not mean you can simultaneously store twenty-one-quart jars. Instead, this is the amount of liquid that the pot could hold. I can simultaneously process seven-quart jars or double stack and process nineteen pints. To double stack, you do not need to increase the water or cooking time, but you must use a second rack.
Which pressure canner should I purchase?
I am frequently asked what size or type of pressure canner I suggest. Because the answer is not as simple as “this is the best one,” I’ve dedicated an entire blog post to providing links and advice. Your choice of a pressure canner will be influenced by the size of your family, your budget, and the type of stove you have. You can read my earlier post for a more detailed response, but I will also discuss it briefly here.
Due to their weight and shape, only a few pressure canner models are suitable for glass stove tops. Observe the instructions for your stove. A few specifically stated that they were safe for glass-top stoves, such as this Presto Pressure canner. I do not have a glass stove top and have never canned one, but many people in the Pioneer Today Academy and the Home Canning with Confidence e-course do. They are careful when lifting the canner on and off the stove, and they successfully can on their glass-top stoves.
On an induction stove, it is impossible to use a pressure canner. Instead, you can create an outdoor kitchen by purchasing a propane camp stove with legs. When it is boiling, I move my canning process outdoors. I am aware some individuals use a propane burner on their gas grill to pressure cans. If you have an induction stove or a glass top that you do not feel comfortable using for pressure canning, there are alternatives to purchasing a new stove for your kitchen. This is the outdoor canning stove I use.
Any pressure can be utilized with a gas or electric stove. Invest in a larger pressure canner if you believe you will want to double-stack and have the funds. You are not required to double stack all the time, but the option is available when you need to process a greater volume.
Also, we must always consider our budget. Some pressure canners models are inexpensive but do the job adequately. My previous blog post, which can be accessed via the link provided, discusses particular models. The same information is also available in my series on pressure canning.
How can I determine if an older pressure canner model is safe?
It is normal to feel anxious when using a pressure canner, particularly an older model. There are ways to determine whether the used pressure canner you purchased or the one in the back of your cabinet is safe. If your pressure canner has only the dial gauge that displays pounds of pressure and not the weighted gauge that you place on the small vent pipe, you must have the dial tested. Once a year, you should have the dial gauge tested to ensure that it displays the correct pounds of pressure. If you have the weighted gauge, you can always rely on it and disregard the dial, as the weighted gauge will always provide an accurate reading. This is the advantage of a weighted gauge.
If you come across an extremely old gasket-type pressure canner, such as one that belonged to your grandmother forty or fifty years ago, replace the gaskets. Over time, the rubber will shrink and become brittle, rendering it an ineffective sealant. Instead, it allows some steam and heat to escape, preventing the canner from reaching the proper pressure. If you are purchasing a used canner or it has been a while since the gaskets were replaced, you should always buy new ones. They are inexpensive, costing less than ten dollars, so that you can keep a spare on hand.
Check the bottom for a UL stamp if a pressure canner is extremely old. Typically, it will be enclosed in parentheses. If it lacks this feature, it is likely too old to be used safely as a pressure canner. This recommendation comes from the National Center for Home Food Preservation, which tests and documents safe food preservation methods in the United States and is regarded as one of the most important resources for information and safety regarding home canning.
How long must I wait between multiple canning batches under pressure on the same day?
If you are using your pressure canner to process multiple canning batches daily, you may wonder how long you should wait between canning sessions. After processing, you must turn off the heat under the pressure canner and leave it alone. Never remove the canner before the pressure naturally decompresses through cooling and returning to room temperature. Pressure cookers may instruct you to release pressure using cold water or a valve manually, but you never do that with a pressure canner. Instead, turn off the heat and allow the pressure to release naturally.
Once the pressure has been released, the lid can be carefully removed. In my course on pressure canning, I demonstrate various tests to determine when it is safe to remove the lid. Because attempting to remove the lid while it is under pressure could result in burns or, depending on how much pressure remains, the lid being pushed up with great force and hot steam. Most models are now equipped with locks that prevent them from being opened while under pressure, but I also teach you other precautions to ensure that the pressure is completely reduced before the lid is removed. Once the steps are understood, they are simple.
Wait ten minutes with the lid off after reducing the pressure and removing the lid before placing the jars on a folded towel on the counter to complete the cooling process. There are two causes for the 10-minute delay. The first step is siphoning, which involves the headspace in your jars. Headspace is the space between the liquid’s top and the jar’s top, and each recipe specifies a different amount. Critical to the success of the canning process, the headspace should always be the same as what the recipe calls for. Regardless, canning does result in a loss of liquid, known as siphoning, and leaving your jars in the canner for ten minutes after removing the lid helps reduce siphoning.
The second reason we leave the jars in the canner is to prevent any temperature shock that could cause the jars to crack or break. Give your jars ten minutes to cool from the canner’s extremely elevated temperature to room temperature. This is also why hot jars are always placed on a folded towel. Never place freshly canned items on a cold countertop to avoid broken jars.
Your wait for the canner’s pressure to naturally decrease, including the ten minutes with the lid removed, should total approximately forty-five minutes. It may take as little as thirty minutes, depending on the size of your pressure canner, the temperature in your home, and other variables. In general, however, you should allow one hour after turning off the burner before removing the jars and beginning a new batch. You could do multiple runs with your pressure canner on the same day, but you must plan for a one-hour break between each run to allow the canner to depressurize.
That answers the recent questions I’ve received about pressure canners. Check out my free video training if you’re interested in learning more about home pressure canning with assurance. Check back soon to register for the workshop on organic gardening that will be held in October. Until next week, best of luck with canning and gardening!
Related Posts
Why Trust Us
You will find what you are looking for at Jody's Bakery. From classic to luxury brands, you'll find both. We will help you to select appliances that fit your needs, budget and lifestyle. Whether you want to stop by to learn more — or plan to make a major purchase — we’ll treat you like family and assist you every step of the way. Shop with us today to receive friendly and experienced help along the way.