Disclaimer: There are affiliate links in this post. At no cost to you, I get commissions for purchases made through links in this post.

Halloween cheesecake recipes

Halloween cheesecake is a delightful and spooky dessert perfect for celebrating the Halloween season. This creamy and indulgent dessert combines the rich flavors of a classic cheesecake with creative Halloween-themed decorations and toppings. It often features vibrant orange and black colors, spiderweb designs, and fun, festive garnishes like candy eyeballs, gummy worms, or chocolate bats.

Halloween cheesecake is a treat that not only satisfies your sweet tooth but also adds a touch of eerie fun to your holiday celebrations. Whether served at Halloween parties or enjoyed as a family dessert, it’s a ghoulishly good addition to any spooky gathering.

Is making Halloween cheesecake a good idea?

Making Halloween cheesecake is a fantastic idea if you’re looking to add a fun and delicious dessert to your Halloween celebration. Here are some reasons why it’s a great choice:

  • Festive Treat: Halloween cheesecake allows you to embrace the Halloween spirit with themed decorations and colors. It’s an excellent way to make your dessert table or Halloween party more festive.
  • Creative Outlet: Making Halloween cheesecake offers an opportunity for creativity. You can decorate it with spiderwebs, creepy-crawly creatures, or other spooky designs to delight your guests.
  • Versatile Dessert: Cheesecake is a crowd-pleaser, and it’s versatile when it comes to flavor options. You can make classic cheesecake or add Halloween-inspired flavors like pumpkin, caramel, or chocolate to suit your taste.
  • Customization: You can personalize your Halloween cheesecake to match your party theme or preferences. Whether you want a more whimsical or eerie design, the options are endless.
  • Enjoyment for All Ages: Halloween cheesecake is a treat that appeals to both kids and adults. It can be a highlight of your Halloween festivities and enjoyed by everyone.
  • Make Ahead: You can make your Halloween cheesecake in advance and refrigerate it until your Halloween gathering. This allows you to focus on other aspects of your party preparations.
  • Impressive Presentation: A well-decorated Halloween cheesecake can serve as a striking centerpiece for your dessert table, impressing your guests with your culinary skills.

Overall, making Halloween cheesecake is a creative and delicious way to enhance your Halloween celebrations. Whether you’re hosting a party or simply enjoying it with family and friends, it’s sure to be a hit.

What kind of ingredient to make Halloween cheesecake?

To make a Halloween cheesecake, you’ll need a combination of ingredients for the crust, cheesecake filling, and optional decorations. Here’s a list of common ingredients used in Halloween cheesecake recipes:

For the Crust:

  • Graham cracker crumbs (for a classic crust) or chocolate cookie crumbs (for a chocolate crust)
  • Granulated sugar
  • Unsalted butter, melted

For the Cheesecake Filling:

  • Cream cheese (usually four 8-ounce packages)
  • Granulated sugar
  • Eggs (usually four large eggs)
  • Vanilla extract
  • Food coloring (if you want to tint the cheesecake a specific Halloween color, like green for Frankenstein or orange for pumpkins)
  • Flavorings or spices (e.g., pumpkin pie spice for pumpkin-flavored cheesecake)

Optional Halloween Decorations:

  • Candy eyes (for spooky creatures)
  • Black decorating gel or melted chocolate (for creating designs)
  • Edible insects (gummy worms, chocolate bugs, etc.)
  • Candy tombstones or edible decorations (for graveyard scenes)
  • Marshmallows (for bolts in a Frankenstein-themed cheesecake)
  • Pumpkin-shaped candies or marzipan pumpkins (for a pumpkin patch)
  • Halloween-themed sprinkles (for a festive touch)
  • Red gel icing (for a bloody effect)
  • Cookie tombstones (for a graveyard scene)
  • Whipped cream (for ghostly designs)
  • Candy corn (for a colorful border)
  • White chocolate chips or candy melts (for spiderweb designs)

These ingredients can be mixed and matched to create various Halloween cheesecake themes and designs. Feel free to get creative and adapt the ingredients to suit your desired Halloween cheesecake style.

How to make Halloween cheesecake

Making Halloween cheesecake is a creative and delicious way to celebrate the spooky season. Here’s a basic recipe to get you started:

Ingredients:

For the Crust:

  • 1 1/2 cups graham cracker crumbs
  • 1/4 cup granulated sugar
  • 1/2 cup unsalted butter, melted

For the Cheesecake Filling:

  • 4 packages (8 ounces each) cream cheese, softened
  • 1 1/4 cups granulated sugar
  • 4 large eggs
  • 1 cup sour cream
  • 1 teaspoon vanilla extract
  • Orange and black food coloring (gel or liquid)

For the Halloween Decorations (optional):

  • Whipped cream or whipped topping
  • Halloween-themed sprinkles
  • Candy eyeballs
  • Gummy worms
  • Chocolate bats or spiders

Instructions:

  1. Preheat the Oven: Preheat your oven to 325°F (163°C). Place a large baking dish filled with hot water on the bottom rack of the oven. This will help prevent cracks in your cheesecake.
  2. Prepare the Crust: In a mixing bowl, combine the graham cracker crumbs, 1/4 cup granulated sugar, and melted butter. Press this mixture firmly into the bottom of a 9-inch springform pan to form the crust.
  3. Make the Filling: In a large mixing bowl, beat the softened cream cheese and 1 1/4 cups granulated sugar until smooth. Add the eggs one at a time, mixing well after each addition. Stir in the sour cream and vanilla extract until the batter is creamy.
  4. Divide and Color: Divide the cheesecake batter into two portions. Add orange food coloring to one portion and black food coloring to the other. Mix until the desired colors are achieved.
  5. Layer the Colors: Starting with one color (e.g., orange), pour a portion of the batter onto the crust. Smooth it out evenly. Carefully add the second color (e.g., black) on top of the first color, creating a layered effect.
  6. Create Swirls: Use a knife or a skewer to create swirls and marbled patterns in the cheesecake, blending the colors together slightly.
  7. Bake: Place the springform pan on the center rack of the preheated oven. Bake for about 45-50 minutes, or until the edges are set, and the center is slightly jiggly. Turn off the oven and crack the oven door. Let the cheesecake cool in the oven for about 1 hour.
  8. Chill: Remove the cheesecake from the oven and refrigerate it for at least 4 hours or overnight to set.
  9. Decorate: Once the cheesecake is fully chilled, remove it from the springform pan. Decorate the top with whipped cream or whipped topping and Halloween-themed decorations like sprinkles, candy eyeballs, gummy worms, and chocolate bats.
  10. Serve: Slice and serve your Halloween cheesecake to enjoy a spooktacular dessert!

Feel free to get creative with your Halloween cheesecake decorations to make it uniquely spooky and festive for the occasion.

How long does it take to make Halloween cheesecake?

The time it takes to make Halloween cheesecake can vary depending on several factors, including the recipe you’re using, your level of experience, and whether you’re making a no-bake or baked cheesecake. Here’s a general time frame for making a Halloween cheesecake:

  • Preparation Time: This includes gathering your ingredients, preparing the crust, and setting up your kitchen. This step typically takes about 15-20 minutes.
  • Crust Preparation: Creating the crust, whether it’s using graham cracker crumbs, cookie crumbs, or another base, can take an additional 10-15 minutes.
  • Cheesecake Filling: Preparing the cheesecake filling, which involves mixing the cream cheese, sugar, eggs, and any flavorings, usually takes around 15-20 minutes.
  • Baking Time (if applicable): If you’re making a baked cheesecake, the baking time can vary but generally ranges from 45 minutes to 1 hour, depending on the recipe and the oven temperature.
  • Cooling and Chilling: After baking, the cheesecake needs to cool at room temperature for about 1-2 hours to prevent cracking. Then, it should be refrigerated for at least 4 hours or overnight to set properly. This step can take several hours or overnight.
  • Decoration: Decorating your Halloween cheesecake with spooky-themed designs and toppings can take an additional 15-30 minutes, depending on the complexity of your decorations.

In total, making a Halloween cheesecake can take anywhere from 3 hours to overnight, depending on whether you’re making a no-bake or baked cheesecake and the chilling time required. It’s important to plan ahead and consider the cooling and chilling time when preparing your cheesecake for a specific event or celebration.

No-bake cheesecakes tend to come together more quickly since they don’t require baking or extended cooling time. Baked cheesecakes, on the other hand, have a longer preparation time due to baking and the necessary cooling and chilling phases for the cheesecake to set properly.

How to store Halloween cheesecake properly

Properly storing Halloween cheesecake is essential to maintain its freshness and prevent it from spoiling. Here are steps to store Halloween cheesecake properly:

  • Cool at Room Temperature: After baking or assembling your cheesecake, allow it to cool at room temperature for about 1-2 hours. This helps prevent condensation from forming when you transfer it to the refrigerator.
  • Refrigerate: Once the cheesecake has cooled at room temperature, cover it with plastic wrap or aluminum foil to seal it tightly. Place it in the refrigerator. Refrigeration is essential to prevent the cheesecake from spoiling due to the dairy content.
  • Use an Airtight Container: If you have an airtight container large enough to accommodate your cheesecake, you can use it instead of plastic wrap or foil. An airtight container helps maintain the freshness of the cheesecake and prevents odors from the fridge from affecting it.
  • Chill Properly: Allow the cheesecake to chill in the refrigerator for at least 4 hours, but overnight is preferable. Chilling allows the cheesecake to set properly and develop its flavor.
  • Avoid Freezing if Possible: While cheesecake can be frozen for longer storage, it’s best enjoyed within a few days to a week when stored in the refrigerator. Freezing can alter the texture and may result in a less desirable consistency.
  • Keep it Away from Strong Odors: Store the cheesecake away from strong-smelling foods in the refrigerator to prevent it from absorbing unwanted odors.
  • Slice as Needed: If you have leftover cheesecake, it’s a good idea to slice and individually wrap or store each slice. This makes it easier to take out and enjoy a portion without thawing the entire cheesecake.
  • Enjoy Promptly: Cheesecake is best enjoyed within 3-5 days of preparation when stored in the refrigerator. Beyond this timeframe, the quality may begin to deteriorate.
  • Serve Chilled: When serving leftover cheesecake, make sure to serve it chilled from the refrigerator for the best texture and flavor.

Proper storage and handling will help your Halloween cheesecake remain fresh and delicious for as long as possible. If you plan to store it for an extended period, consider freezing individual slices or portions for later enjoyment.

Tips for making Halloween cheesecake

Making Halloween cheesecake can be a fun and creative culinary project. Here are some tips to help you create a spooktacular Halloween cheesecake:

  • Plan Your Theme: Decide on a Halloween theme for your cheesecake. Whether it’s classic Halloween motifs like spiders, pumpkins, or ghosts, or a specific Halloween movie or character, having a clear theme will guide your decorations and design.
  • Use Food Coloring: To achieve vibrant Halloween colors in your cheesecake, use gel food coloring. It provides more intense and consistent colors compared to liquid food coloring. Remember to use complementary colors for a striking effect (e.g., orange and black).
  • Prepare the Crust Well: Pay attention to the crust as it forms the base of your cheesecake. Make sure it’s firmly pressed into the pan to prevent it from falling apart when sliced.
  • Bake or No-Bake: Decide whether you want to make a baked or no-bake cheesecake. No-bake cheesecakes are quicker to prepare and set in the refrigerator, while baked cheesecakes have a different texture and require more time.
  • Layer Colors Creatively: If you’re making a layered or marbled cheesecake with different colors, think about how you want them to appear. You can create swirls, patterns, or distinct layers for a visually appealing effect.
  • Chill Properly: Allow your cheesecake to chill in the refrigerator for the recommended time. This ensures it sets properly and has the right texture.
  • Decorate with Precision: Use decorating tools like piping bags, food-safe brushes, and toothpicks for precise and intricate designs. Edible decorations like candy eyeballs, gummy worms, or chocolate shapes can add a whimsical touch.
  • Create a Centerpiece: If your cheesecake is for a Halloween party, consider making it the centerpiece of your dessert table. Surround it with other spooky treats and decorations to enhance the Halloween ambiance.
  • Practice Patience: Decorating can be a bit time-consuming, especially if you’re creating detailed designs. Take your time and enjoy the creative process.
  • Experiment with Flavors: Don’t be afraid to experiment with different cheesecake flavors. Pumpkin, chocolate, caramel, or even fruit-flavored cheesecakes can all be transformed into Halloween-themed desserts with the right decorations.
  • Plan Ahead: Cheesecakes often benefit from being made a day in advance, as they can set and develop better flavor. Plan your baking schedule accordingly.
  • Slice Carefully: Use a sharp, clean knife to slice the cheesecake for serving. Dip the knife in hot water and wipe it dry between each cut for clean slices.

Remember that Halloween cheesecake is not only about taste but also about the visual impact. Have fun with your decorations and let your creativity run wild to create a memorable and spooky dessert that will be a hit at your Halloween celebration.

5 Halloween cheesecake recipes

Here are two Halloween cheesecake recipes for you to try:

1. Pumpkin Spice Halloween Cheesecake:

Ingredients:

For the Crust:

  • 1 1/2 cups graham cracker crumbs
  • 1/4 cup granulated sugar
  • 1/2 cup unsalted butter, melted

For the Cheesecake Filling:

  • 4 packages (8 ounces each) cream cheese, softened
  • 1 cup granulated sugar
  • 1 cup canned pumpkin puree
  • 3 large eggs
  • 1 teaspoon vanilla extract
  • 1 teaspoon pumpkin pie spice (or a mixture of cinnamon, nutmeg, and cloves)
  • Orange and black food coloring (gel or liquid)

For the Topping:

  • Whipped cream
  • Halloween-themed sprinkles
  • Candy corn or other Halloween candies
Instructions:
  1. Preheat your oven to 325°F (163°C). Place a large baking dish filled with hot water on the bottom rack of the oven to create a steamy environment.
  2. In a bowl, combine the graham cracker crumbs, 1/4 cup sugar, and melted butter. Press this mixture into the bottom of a 9-inch springform pan to create the crust.
  3. In a large mixing bowl, beat the softened cream cheese until smooth. Add 1 cup sugar and beat until well combined.
  4. Mix in the canned pumpkin puree, eggs, vanilla extract, and pumpkin pie spice until the batter is creamy and smooth.
  5. Divide the cheesecake batter into two portions. Add orange food coloring to one portion and black food coloring to the other. Mix until you achieve the desired colors.
  6. Starting with one color (e.g., orange), pour a portion of the batter onto the crust. Smooth it out evenly. Carefully add the second color (e.g., black) on top, creating a marbled effect.
  7. Use a knife or skewer to create swirls and patterns in the cheesecake, blending the colors together slightly.
  8. Bake in the preheated oven for about 45-50 minutes, or until the edges are set, and the center is slightly jiggly. Turn off the oven and crack the door open. Allow the cheesecake to cool in the oven for about 1 hour.
  9. Remove the cheesecake from the oven and refrigerate it for at least 4 hours or overnight to set.
  10. Before serving, decorate the top with whipped cream, Halloween-themed sprinkles, and candy corn or other Halloween candies.

2. Spiderweb Chocolate Cheesecake:

Ingredients:

For the Chocolate Crust:

  • 1 1/2 cups chocolate cookie crumbs (e.g., Oreos)
  • 1/4 cup unsalted butter, melted

For the Chocolate Cheesecake Filling:

  • 4 packages (8 ounces each) cream cheese, softened
  • 1 1/4 cups granulated sugar
  • 4 large eggs
  • 1 cup sour cream
  • 1 teaspoon vanilla extract
  • 1/2 cup unsweetened cocoa powder
  • Black food coloring (gel or liquid)

For the Spiderweb Decoration:

  • 1/4 cup white chocolate chips or white candy melts
  • A few drops of black food coloring
Instructions:
  1. Preheat your oven to 325°F (163°C). Place a large baking dish filled with hot water on the bottom rack of the oven for moisture.
  2. In a mixing bowl, combine the chocolate cookie crumbs and melted butter. Press this mixture into the bottom of a 9-inch springform pan to create the crust.
  3. In a large mixing bowl, beat the softened cream cheese until smooth. Add the granulated sugar and continue to beat until well combined.
  4. Mix in the eggs one at a time, followed by the sour cream and vanilla extract.
  5. Sift the unsweetened cocoa powder into the batter and mix until fully incorporated. Add black food coloring to achieve a deep, dark color.
  6. Pour the chocolate cheesecake batter onto the crust and smooth it out evenly.
  7. To create a spiderweb decoration, melt the white chocolate chips or candy melts. Add a few drops of black food coloring and stir until the color is uniform.
  8. Using a piping bag or a plastic sandwich bag with a small corner snipped off, pipe concentric circles of the black chocolate over the surface of the cheesecake. Then, use a toothpick or skewer to drag lines from the center outward to create the spiderweb effect.
  9. Bake the cheesecake in the preheated oven for about 45-50 minutes, or until the edges are set, and the center is slightly jiggly. Turn off the oven, crack the door open, and let the cheesecake cool inside for about 1 hour.
  10. Remove the cheesecake from the oven, refrigerate it for at least 4 hours or overnight to set, and then slice and serve.

3. Pumpkin Swirl Cheesecake:

Ingredients:

For the Crust:

  • 1 1/2 cups graham cracker crumbs
  • 1/4 cup granulated sugar
  • 1/2 cup unsalted butter, melted

For the Pumpkin Swirl:

  • 1 cup canned pumpkin puree
  • 1 teaspoon pumpkin pie spice
  • 1/4 cup granulated sugar

For the Cheesecake Filling:

  • 4 packages (8 ounces each) cream cheese, softened
  • 1 1/4 cups granulated sugar
  • 4 large eggs
  • 1 teaspoon vanilla extract

For the Spiderweb Decoration (optional):

  • 1/2 cup white chocolate chips or white candy melts
  • Black food coloring
Instructions:
  1. Preheat your oven to 325°F (163°C).
  2. In a bowl, combine the graham cracker crumbs, 1/4 cup sugar, and melted butter. Press this mixture into the bottom of a 9-inch springform pan to create the crust.
  3. In a separate bowl, mix together the canned pumpkin puree, pumpkin pie spice, and 1/4 cup sugar to create the pumpkin swirl.
  4. In a large mixing bowl, beat the softened cream cheese until smooth. Add 1 1/4 cups sugar and continue to beat until well combined.
  5. Mix in the eggs one at a time, followed by the vanilla extract.
  6. Pour the cheesecake filling onto the crust.
  7. Drop spoonfuls of the pumpkin swirl mixture onto the cheesecake filling.
  8. Use a knife to create swirls and patterns, blending the pumpkin into the cheesecake batter.
  9. Bake in the preheated oven for about 45-50 minutes or until the edges are set, and the center is slightly jiggly. Turn off the oven, crack the door open, and let the cheesecake cool inside for about 1 hour.
  10. Remove the cheesecake from the oven and refrigerate it for at least 4 hours or overnight to set.
  11. If desired, create a spiderweb decoration on top by melting the white chocolate chips or candy melts, adding black food coloring, and piping a spiderweb design on the chilled cheesecake.
  12. Slice and serve your delicious pumpkin swirl cheesecake with a spooky twist.

4. Chocolate Graveyard Cheesecake:

Ingredients:

For the Chocolate Crust:

  • 1 1/2 cups chocolate cookie crumbs (e.g., Oreos)
  • 1/4 cup unsalted butter, melted

For the Chocolate Cheesecake Filling:

  • 4 packages (8 ounces each) cream cheese, softened
  • 1 1/4 cups granulated sugar
  • 4 large eggs
  • 1 cup sour cream
  • 1 teaspoon vanilla extract
  • 1/2 cup unsweetened cocoa powder

For the Graveyard Decorations:

  • Chocolate sandwich cookies (e.g., Oreos)
  • Milano cookies or other rectangular cookies
  • Candy tombstones or edible decorations
  • Gummy worms
Instructions:
  1. Preheat your oven to 325°F (163°C).
  2. In a bowl, combine the chocolate cookie crumbs and melted butter. Press this mixture into the bottom of a 9-inch springform pan to create the crust.
  3. In a large mixing bowl, beat the softened cream cheese until smooth. Add 1 1/4 cups sugar and continue to beat until well combined.
  4. Mix in the eggs one at a time, followed by the sour cream and vanilla extract.
  5. Sift the unsweetened cocoa powder into the batter and mix until fully incorporated.
  6. Pour the chocolate cheesecake filling onto the crust.
  7. Bake in the preheated oven for about 45-50 minutes or until the edges are set, and the center is slightly jiggly. Turn off the oven, crack the door open, and let the cheesecake cool inside for about 1 hour.
  8. Remove the cheesecake from the oven and refrigerate it for at least 4 hours or overnight to set.
  9. Create a graveyard scene on top of the cheesecake by using chocolate sandwich cookies as tombstones, rectangular cookies as graves, candy tombstones, and gummy worms as creepy crawlers.
  10. Decorate your chocolate graveyard cheesecake to look like a spooky cemetery, and serve to delight your Halloween guests.

5. Frankenstein’s Monster Cheesecake:

Ingredients:

For the Oreo Crust:

  • 1 1/2 cups crushed chocolate sandwich cookies (e.g., Oreos)
  • 1/4 cup unsalted butter, melted

For the Cheesecake Filling:

  • 4 packages (8 ounces each) cream cheese, softened
  • 1 1/4 cups granulated sugar
  • 4 large eggs
  • 1 teaspoon vanilla extract
  • Green food coloring (gel or liquid)

For the Frankenstein Decoration:

  • Black decorating gel or melted chocolate for details
  • Candy eyes
  • Red gel icing for scars and mouth
  • Marshmallows for bolts (if desired)
Instructions:
  1. Preheat your oven to 325°F (163°C).
  2. In a bowl, combine the crushed chocolate sandwich cookies and melted butter. Press this mixture into the bottom of a 9-inch springform pan to create the crust.
  3. In a large mixing bowl, beat the softened cream cheese until smooth. Add 1 1/4 cups sugar and continue to beat until well combined.
  4. Mix in the eggs one at a time, followed by the vanilla extract.
  5. Add green food coloring to achieve the desired Frankenstein green hue.
  6. Pour the green cheesecake filling onto the Oreo crust.
  7. Bake in the preheated oven for about 45-50 minutes or until the edges are set, and the center is slightly jiggly. Turn off the oven, crack the door open, and let the cheesecake cool inside for about 1 hour.
  8. Remove the cheesecake from the oven and refrigerate it for at least 4 hours or overnight to set.
  9. Decorate your Frankenstein’s Monster cheesecake by using black decorating gel or melted chocolate to create facial details, attaching candy eyes, drawing scars and a mouth with red gel icing, and adding marshmallow bolts (if desired) to complete the look of Frankenstein’s monster.
  10. Slice and serve your delightful and spooky Frankenstein cheesecake to thrill your Halloween guests.

Enjoy creating these Halloween cheesecake masterpieces that are both delicious and visually impressive!


Some suggestions about Halloween cheesecake decorations

Decorating Halloween cheesecakes can be a lot of fun and allows for creativity. Here are some spooky and creative decoration ideas for your Halloween cheesecakes:

  1. Spiderweb Design: Use black decorating gel or melted chocolate to create intricate spiderweb patterns on top of the cheesecake. Place a plastic or edible spider in the center for an eerie touch.
  2. Candy Eyes: Candy eyeballs add a playful and spooky element to your cheesecake. You can use them to create edible monster faces or simply scatter them on top.
  3. Edible Insects: Gummy worms, edible ants, or chocolate-covered bugs can crawl around the edges of the cheesecake for a creepy-crawly effect.
  4. Cemetery Scene: Use chocolate sandwich cookies as tombstones and rectangular cookies as graves. Add candy tombstones and gummy worms as graveyard decorations. Arrange them on top of the cheesecake to create a cemetery scene.
  5. Frankenstein’s Monster: Create a Frankenstein-themed cheesecake by tinting the cheesecake filling green and decorating the top with black gel for scars, candy eyes, and marshmallow bolts on the sides to resemble Frankenstein’s monster.
  6. Pumpkin Patch: Decorate with small pumpkin-shaped candies, orange and green icing, or marzipan pumpkins to create a pumpkin patch on top of your cheesecake.
  7. Bloody Drizzle: Use red gel icing to create a bloody or dripping effect on the cheesecake. It’s perfect for a vampire-themed dessert.
  8. Ghostly Whipped Cream: Top your cheesecake with whipped cream ghosts. Pipe ghost shapes using whipped cream and add mini chocolate chips for the eyes.
  9. Mummy Wraps: Create mummy-inspired designs by drizzling white chocolate or cream cheese frosting in a zigzag pattern over the cheesecake. Add candy eyes to complete the mummy look.
  10. Haunted House: Use gingerbread cookies or graham crackers to create a haunted house on top of the cheesecake. You can also use black icing to add spooky windows and details.
  11. Witch’s Cauldron: Decorate with a witch’s cauldron made from black icing. Fill it with colorful candy “brew” and add a witch’s hat or broomstick as an edible topper.
  12. Bats and Cats: Use black fondant or black icing to cut out bat and cat shapes. Place them on top of the cheesecake for a spooky silhouette effect.
  13. Candy Corn Border: Surround the edge of the cheesecake with candy corn to create a vibrant and classic Halloween border.
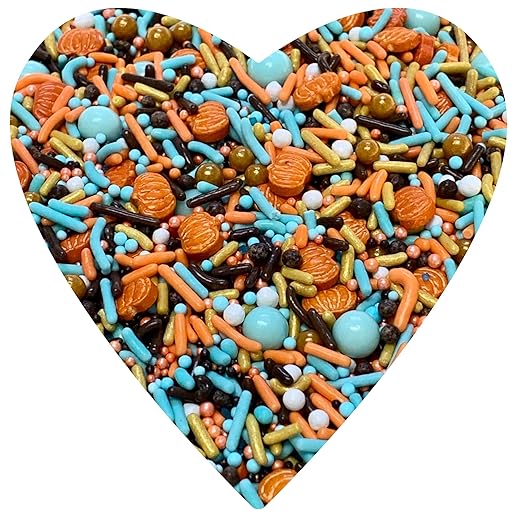
  14. Colorful Sprinkles: Sprinkle Halloween-themed sprinkles all over the top of your cheesecake for a festive and colorful touch.

Remember to have fun with your decorations and let your imagination run wild. Feel free to combine different elements to create a unique and spooky Halloween cheesecake that will impress your guests. Happy decorating!

Related Posts

Why Trust Us

You will find what you are looking for at Jody's Bakery. From classic to luxury brands, you'll find both. We will help you to select appliances that fit your needs, budget and lifestyle. Whether you want to stop by to learn more — or plan to make a major purchase — we’ll treat you like family and assist you every step of the way. Shop with us today to receive friendly and experienced help along the way.

10 Comments
  1. This Halloween cheesecake recipe is a wickedly delightful twist on a classic dessert! I can already picture my guests’ faces when they see this spooktacular treat on the table. Can’t wait to indulge in a slice of frightfully delicious cheesecake!

  2. As someone with an insatiable sweet tooth, this Halloween cheesecake is calling my name! The combination of flavors and the spooky decorations make it the perfect centerpiece for my Halloween dessert table. Thanks for sharing this enchanting recipe!

  3. Pumpkin spice and everything nice—this Halloween cheesecake recipe is a must-try for fall! The seasonal flavors combined with the eerie decorations make it an ideal treat for spooky celebrations. I’m already preheating my oven to give it a go!

  4. Candy corn lovers unite! This Halloween cheesecake recipe has captured my sweet tooth’s attention. The incorporation of candy corn and the vibrant colors make it the perfect treat for the spookiest time of the year. Can’t wait to whip up a batch!

  5. Wow! This Halloween cheesecake looks wickedly delicious. The recipe is easy to follow, and the decorative touches add a charmingly spooky vibe. It’s going straight into my Halloween party menu. Thanks for sharing your delightful creation!

  6. Midnight cravings just got a whole lot better with this Halloween cheesecake! The dark chocolate drizzle and graveyard scene make it the perfect indulgence for a hauntingly good night. Count me in for making this spine-chillingly scrumptious dessert!

  7. Wow, superb blog layout! How lengthy have you ever been blogging for?
    you made running a blog glance easy. The full look of your site is excellent, let
    alone the content material! You can see similar here sklep internetowy

  8. Hi! Do you know if they make any plugins to help with Search Engine
    Optimization? I’m trying to get my site to rank for
    some targeted keywords but I’m not seeing very good success.
    If you know of any please share. Appreciate it! I saw similar article here: Backlink Building

  9. Hello! Do you know if they make any plugins to help with SEO?
    I’m trying to get my website to rank for some targeted keywords but I’m not seeing very good results.

    If you know of any please share. Appreciate it! You can read similar blog here:
    Link Building

  10. Hello! Do you know if they make any plugins to help with SEO?
    I’m trying to get my site to rank for some targeted keywords but I’m not seeing very good success.
    If you know of any please share. Thanks! You can read similar blog here:
    GSA List

    Leave a reply

    Best Deals For You

    Gifts to make Mom smile.
    SaveSavedRemoved 0

    Gifts to make Mom smile.

    00

    Celebrate Mother's Day with Heartfelt Gifts She'll Cherish Forever! As Mother's Day approaches, it's time to honor the incredible women who have shaped our lives with love, care, and devotion. Show your appreciation for the special mother figures in your life with thoughtful gifts that speak volumes of your ...

    $5.49 $13.99 Buy It Now
    Best price
    Anova Culinary Sous Vide Precision Cooker Pro
    SaveSavedRemoved 0

    Anova Culinary Sous Vide Precision Cooker Pro

    30

    The Anova Culinary Sous Vide Precision Cooker Pro has truly elevated my cooking experience. With its precise water circulation at the exact temperature needed, I've achieved perfect results every time, eliminating the risk of over or undercooking my meals. Sous vide cooking with this device has proven to be ...

    $294.99 $399.00 Buy It Now
    Best seller
    Lodge 10.25 Inch Cast Iron Pre-Seasoned Skillet
    SaveSavedRemoved 0

    Lodge 10.25 Inch Cast Iron Pre-Seasoned Skillet

    40

    The Lodge 10.25 Inch Cast Iron Pre-Seasoned Skillet is a versatile and durable kitchen essential, perfect for beginners, home cooks, and chefs alike. Crafted in America with iron and oil, this skillet is designed to handle any kitchen cooktop, oven, grill, or open flame. One of the standout features of Lodge cast ...

    $19.90 $34.25 Buy It Now
    Best seller
    Tovolo Vented Collapsible Medium Microwave Cover
    SaveSavedRemoved 0

    Tovolo Vented Collapsible Medium Microwave Cover

    20

    The Tovolo Vented Collapsible Medium Microwave Cover is a versatile and practical kitchen accessory designed to enhance your microwave cooking experience. This cover features perforated lids that protect your microwave from splatters and spots. Crafted from BPA-free plastic and silicone, the topper covers food to ...

    Best value
    Nostalgia MyMini Personal Electric Skillet
    SaveSavedRemoved 0

    Nostalgia MyMini Personal Electric Skillet

    60

    The Nostalgia MyMini Personal Electric Skillet is a versatile and convenient appliance for on-the-go meals. It offers a quick and healthier way to cook a variety of dishes, including ramen noodles, pasta, mac and cheese, steamed rice, stir fry, omelets, hard-boiled eggs, pancakes, bacon, sausage, hashbrowns, cookies, ...

    Best seller
    Elite Gourmet EG6207 Fry Pan
    SaveSavedRemoved 0

    Elite Gourmet EG6207 Fry Pan

    31

    The Elite Gourmet EG6207 Fry Pan is a versatile and convenient addition to any kitchen. With its 10.5-inch size, it allows you to expand your cooking capabilities without the need for remodeling. The non-stick marble stone coating and cast-in heating element make cooking and clean-up a breeze. Whether you're whipping ...

    Braun MQ7035X 3-in-1 Immersion Hand
    SaveSavedRemoved 0

    Braun MQ7035X 3-in-1 Immersion Hand

    50

    The Braun MQ7035X 3-in-1 Immersion Hand Blender stands out with its innovative features and versatile functionality. The Easy SmartSpeed technology allows for single-hand operation with no predefined speed settings. Simply follow your intuition by pushing gently for roughly chopped results and increasing the ...

    $99.95 $109.95 Buy It Now
    Editor choice
    Breville the Barista Pro Espresso Machine
    SaveSavedRemoved 0

    Breville the Barista Pro Espresso Machine

    30

    The Breville the Barista Pro Espresso Machine offers a barista-quality performance with a user-friendly interface, making it easy to create third wave specialty coffee in the comfort of your home. The integrated grinder ensures that the right amount of freshly ground coffee is delivered on demand, resulting in a rich ...

    $699.95 Buy It Now
    Editor choice
    Cuisinart PRS-50 Pasta Roller & Cutter Attachment
    SaveSavedRemoved 0

    Cuisinart PRS-50 Pasta Roller & Cutter Attachment

    100

    Cuisinart PRS-50 Pasta Roller & Cutter Attachment is a perfect addition to your Precision Master Stand Mixer, allowing you to create a variety of homemade fresh pasta with ease. This attachment includes both spaghetti and fettuccine cutters, as well as a pasta roller, offering versatility in pasta shapes and ...

    $159.20 $179.95 Buy It Now
    Editor choice
    Instant Stand Mixer Pro
    SaveSavedRemoved 0

    Instant Stand Mixer Pro

    40

    Instant Stand Mixer Pro delivers powerful performance with its 600-watt motor, making it a versatile kitchen companion for a variety of culinary tasks. From whipping smooth meringues to kneading yeast dough, this stand mixer handles it all with ease. Featuring a digital interface, the mixer offers 10 speed ...

    $280.66 $299.99 Buy It Now
    Editor choice
    Koolatron 6 Bottle Wine Cooler
    SaveSavedRemoved 0

    Koolatron 6 Bottle Wine Cooler

    90

    The Koolatron 6 Bottle Wine Cooler offers an affordable and elegant solution for wine enthusiasts, providing a stylish and compact freestanding design that accommodates up to 6 standard-sized wine bottles. This wine fridge is a perfect addition to any table or countertop, allowing you to enjoy your favorite vintages ...

    $96.98 $199.99 Buy It Now
    Editor choice
    Hamilton Beach 2 Slice Extra Wide Slot Toaster
    SaveSavedRemoved 0

    Hamilton Beach 2 Slice Extra Wide Slot Toaster

    70

    Hamilton Beach 2 Slice Extra Wide Slot Toaster is a versatile and user-friendly appliance designed to make toasting a breeze. With slots wider than those on many 2-slice toasters, this toaster accommodates thicker breads, bagels, and other specialty bread items effortlessly. The extra-wide slots ensure a perfect ...

    $22.94 $28.99 Buy It Now
    Show next
    Jody's Bakery
    Logo
    Compare items
    • Total (0)
    Compare
    0
    Shopping cart