


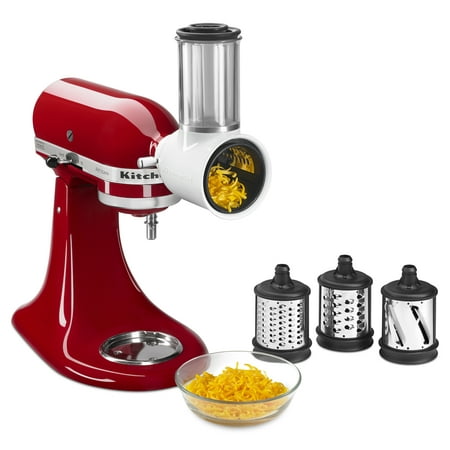

The KitchenAid cheese grater attachment is a popular accessory for...
Read More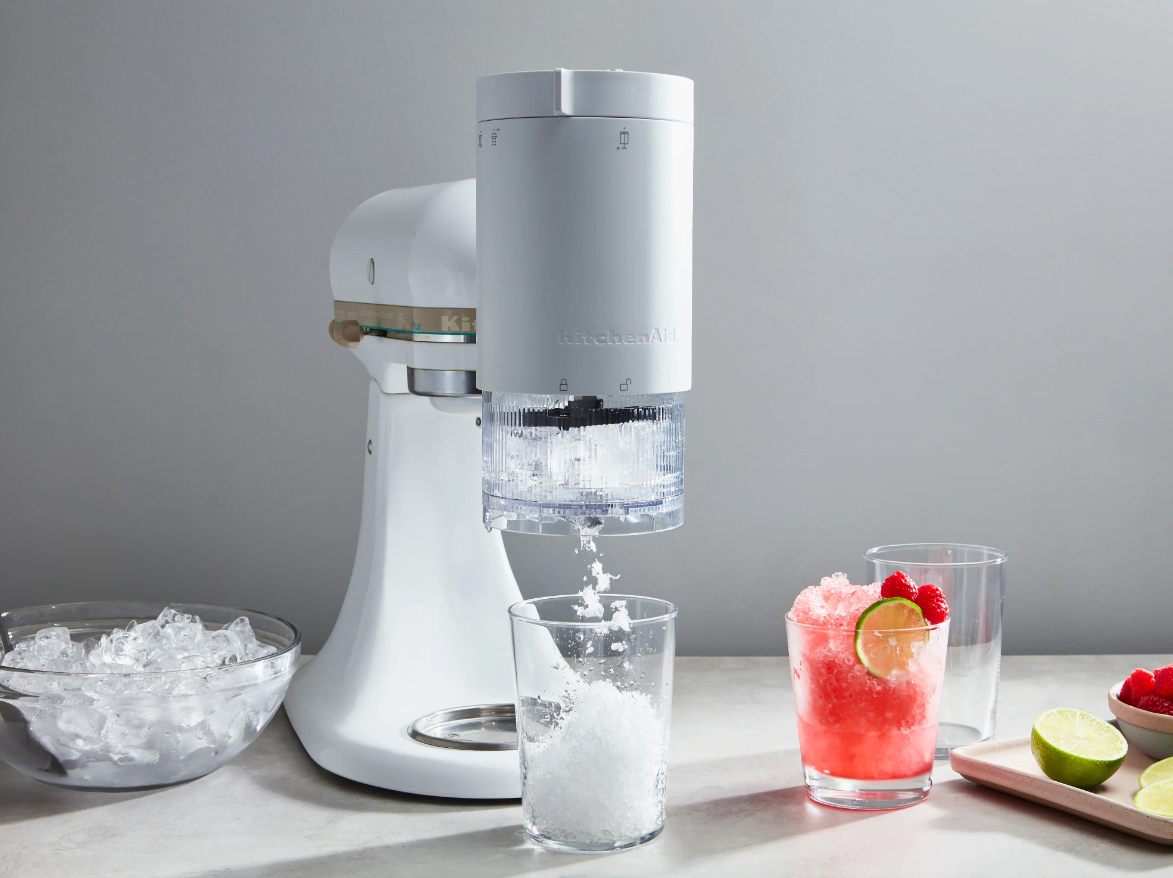
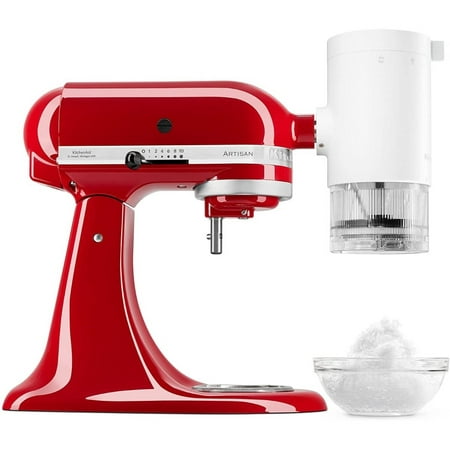
The KitchenAid Shaved Ice Attachment is a versatile accessory designed to enhance your KitchenAid stand mixer’s capabilities. This attachment allows you to effortlessly transform ice cubes into fluffy, snow-like shaved ice, perfect for creating a wide range of refreshing treats.
Whether you’re looking to make shaved ice for snow cones, cocktails, or other frozen desserts, the KitchenAid Shaved Ice Attachment simplifies the process, ensuring consistent and finely textured ice every time.
With its user-friendly design and compatibility with various KitchenAid stand mixer models, this attachment is a convenient addition to any kitchen, allowing you to enjoy icy delights with ease.
Our Top Picks

Shave Ice Attachment For Kitchenaid Stand Mixer,Shaved Ice and Snow Cone Attachment for Kitchenaid Stand Mixer, White(10pcs Ice Mold Include)
Amazon.com

8 Pcs Ice Molds with 8 Lids for KitchenAid Shave Ice Attachment, Ice Mold Replacement for KITOART Shave Ice Attachment, Plastic, Black
3.0
Amazon.com

Replacement Plastic Ice Mold and Lid Compatible with Kitchenaid Ice Shaver Attachment (10 Pack)
4.0
Amazon.com

4PCS Ice Molds Replacement for Kitchenaid, Reusable Silicone Ice Molds with Lids Replacement Compatible with Ice Shaver Machine Accessories Easy to Clean
3.0
Amazon.com

KitchenAid KSIA4IM Plastic Ice Mold Accessory for KitchenAid Shave Ice Attachment, Black
5.0
Amazon.com

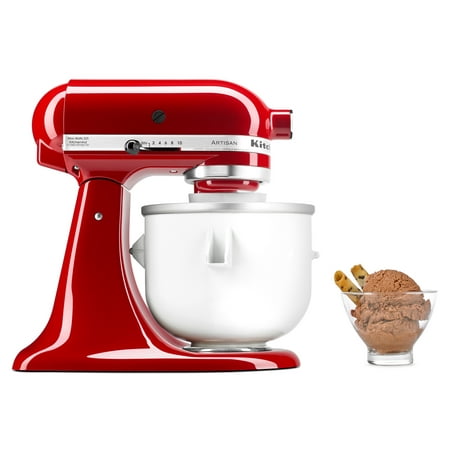
Ice Cream Attachment for Kitchenaid – 2 Quart Frozen Ice Cream & Sorbet Gelato Maker for Kitchenaid Ice Cream Maker Attachment Compatible 4.5 Qt and Larger…
4.0
Amazon.com

Ice Cream Maker Parts for KitchenAid, As KitchenAid Ice Cream Drive Attachment, Ice Cream Drive Attachment for KitchenAid, Fit KitchenAid Ice Cream Maker…
4.0
Amazon.com
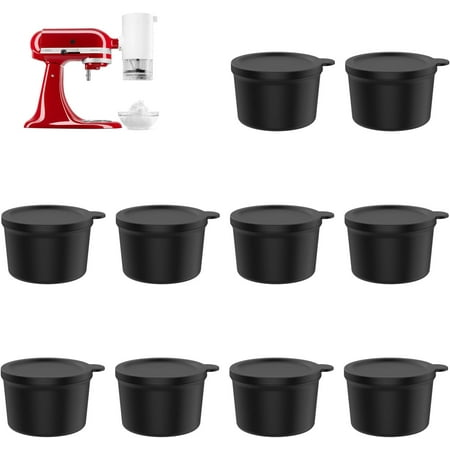
Replacement Plastic Ice Mold and Lid Compatible with Kitchenaid Ice Shaver Attachment (10 Pack)
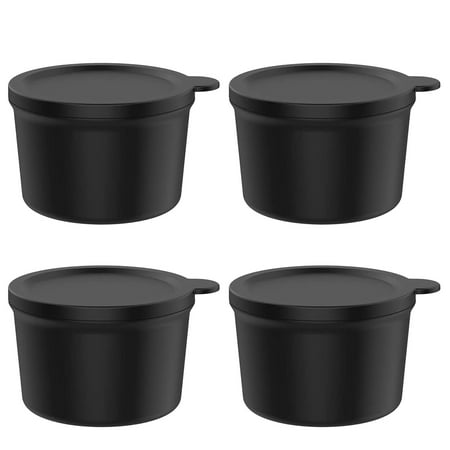
Ana 4pcs Ice Molds with 4 Lids for KitchenAid Shave Ice Attachment, Ice Mold Replacement for Kitchenaid Ice Shaver Shave Ice Attachment, Silicone, Black
KitchenAid Ice Cream Maker Attachment (Fits on Any KitchenAid Mixer) + KitchenAid Ice Cream Scoop
Whirlpool KitchenAid Ice Cream Maker Stand with Mixer Attachment
3.0
Can you use regular ice cubes in KitchenAid shaved ice attachment?
Yes, you can use regular ice cubes in the KitchenAid Shave Ice Attachment. However, it is recommended to use ice that has been frozen for at least 24 hours. This will help to ensure that the ice is hard enough to be shaved evenly. You can also use ice that has been made from water, juice, or milk.
If you do use regular ice cubes, it is important to temper them before shaving. This means removing them from the freezer 10-15 minutes before you plan to shave them. This will help to prevent the ice from shattering and making a mess.
Here are some tips for making the best shaved ice with the KitchenAid Shave Ice Attachment:
- Use cold, hard ice.
- Temper the ice before shaving.
- Use the fine blade for a light and fluffy texture.
- Add your favorite syrups, sauces, and toppings.
With a little practice, you will be making delicious shaved ice at home in no time!
Here are some additional tips:
- If you are using ice cubes, make sure they are not too large. Large ice cubes will be difficult to shave and may not produce a smooth texture.
- If you are using ice that has been made from juice or milk, it is important to strain the liquid before freezing. This will help to prevent the ice from becoming cloudy.
- You can also add flavorings to the ice before freezing. This is a great way to make custom shaved ice flavors.
Experiment with different flavors and toppings to find your favorite combination. With a little creativity, you can make shaved ice that is both delicious and refreshing.
Is shaved ice the same as crushed ice?
Shaved ice and crushed ice are not the same; they have distinct textures and uses:
- Shaved Ice: Shaved ice is very fine and fluffy, with an almost snow-like consistency. It is created by shaving or scraping thin layers of ice from a block or cube of ice. Shaved ice is commonly used as a base for snow cones, flavored syrups, or other frozen treats. It provides a smooth and light texture that absorbs flavors well, making it a popular choice for refreshing desserts and drinks.
- Crushed Ice: Crushed ice, on the other hand, consists of small, irregularly shaped ice pieces that result from breaking ice cubes or larger chunks into smaller fragments. Crushed ice is often used to rapidly chill beverages, as it has more surface area for cooling. It is also used as a bed for seafood presentations, in cocktails, and for certain types of mixed drinks where a cold, crunchy texture is desired.
In summary, the primary difference between shaved ice and crushed ice lies in their texture and intended uses. Shaved ice is fine and fluffy, ideal for absorbing flavors, while crushed ice is smaller, irregular, and used primarily for cooling or for achieving a different texture in drinks and presentations.
What is the best attachment for icing?
The best attachment for icing depends on the type of frosting you are making and your personal preferences. Here are a few of the most common attachments and their uses:
- Flat beater: This is the most versatile attachment and can be used for a variety of tasks, including creaming butter and sugar, mixing cake batter, and frosting cakes and cupcakes. It has a wide, flat surface that helps to evenly distribute ingredients and incorporate air into the mixture. This is important for making light and fluffy frostings.
- Whisk: This attachment is best for whipping air into light and airy frostings, such as a Swiss meringue buttercream. It has a spiral design that helps to incorporate air into the mixture, creating a light and fluffy texture.
- Flex edge beater: This attachment is similar to the flat beater, but it has flexible edges that help to scrape down the sides of the bowl as you mix. This prevents ingredients from building up on the sides of the bowl and ensures that all of the ingredients are evenly mixed. It is a good choice for thicker frostings, such as cream cheese frosting.
- Dough hook: This attachment is designed for mixing doughs, but it can also be used for frostings that are very thick. It has a spiral design that helps to knead the dough and incorporate air into the mixture.
If you are not sure which attachment to use, the flat beater is a good all-purpose option. It is versatile and can be used for a variety of tasks, including icing.
Here are some additional tips for icing with a stand mixer:
- Start on low speed and gradually increase the speed as needed. This will help to prevent the frosting from splattering.
- Scrape down the sides of the bowl as you mix to ensure that all of the ingredients are evenly mixed.
- Stop mixing as soon as the frosting is smooth and creamy. Overmixing can make the frosting tough.
With a little practice, you will be able to make perfect frosting every time using a stand mixer.
Which KitchenAid attachment for icing?
The best KitchenAid attachment for icing is the flat beater. It is the most versatile attachment and can be used for a variety of tasks, including creaming butter and sugar, mixing cake batter, and frosting cakes and cupcakes.
The flat beater has a wide, flat surface that helps to evenly distribute ingredients and incorporate air into the mixture. This is important for making light and fluffy frostings. The flat beater is also dishwasher safe, making cleanup easy.
If you are making a light and airy frosting, such as a Swiss meringue buttercream, you can also use the whisk attachment. The whisk attachment has a spiral design that helps to incorporate air into the mixture, creating a light and fluffy texture.
However, the whisk attachment is not as versatile as the flat beater and cannot be used for tasks such as creaming butter and sugar.
If you are making a thicker frosting, such as a cream cheese frosting, you can use the flex edge beater. The flex edge beater has a flat surface with flexible edges that help to scrape down the sides of the bowl as you mix. This prevents ingredients from building up on the sides of the bowl and ensures that all of the ingredients are evenly mixed.
The flex edge beater is also dishwasher safe.
Ultimately, the best KitchenAid attachment for icing depends on the type of frosting you are making. If you are making a light and airy frosting, the whisk attachment is a good choice. If you are making a thicker frosting, the flex edge beater is a good choice. And if you are making a variety of frostings, the flat beater is the most versatile option.
What setting do I use for ice in my Kitchenaid blender?
The setting you use for ice in your KitchenAid blender will depend on the type of drink you are making and your desired texture. Here are a few general guidelines:
- For crushed ice, use the Pulse setting. This will allow you to control the amount of ice that is crushed.
- For a finer consistency, use the Ice Crush setting. This setting will crush the ice more evenly.
- If you are making a smoothie, you can start on the Pulse setting and then increase the speed to the Low or Medium setting. This will help to incorporate the ice into the smoothie without over-blending it.
- If you are making a frozen drink, you can start on the Ice Crush setting and then increase the speed to the High setting. This will help to create a smooth and creamy texture.
It is important to note that the exact setting you use may vary depending on the model of your KitchenAid blender. Be sure to consult your blender’s manual for specific instructions.
Here are some additional tips for crushing ice in a blender:
- Use cold, hard ice. This will help to prevent the ice from melting and making a watery drink.
- Do not overfill the blender jar. This can cause the ice to fly out of the jar and make a mess.
- Start with a low speed and gradually increase the speed as needed. This will help to prevent the ice from splattering.
- Scrape down the sides of the jar as you blend to ensure that all of the ice is crushed evenly.
With a little practice, you will be able to crush ice like a pro in your KitchenAid blender!
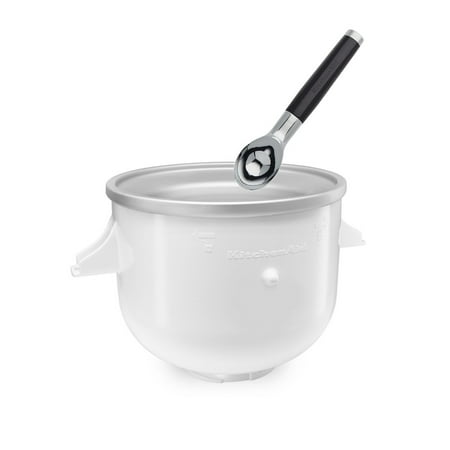
Can my KitchenAid make ice cream?
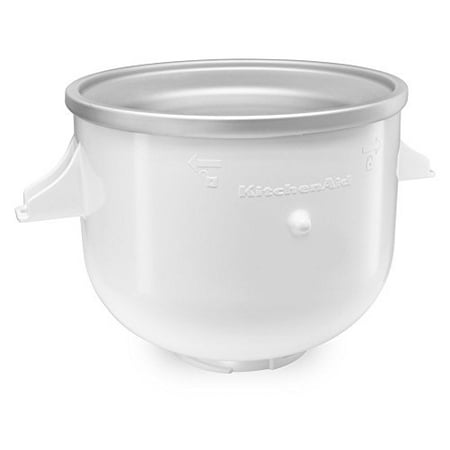
Yes, your KitchenAid stand mixer can be used to make ice cream with the help of a KitchenAid Ice Cream Maker Attachment. This attachment is specifically designed to churn and freeze ice cream, gelato, sorbet, and other frozen desserts. It’s a convenient way to make homemade ice cream without the need for a separate ice cream maker.
Here’s how you can use the KitchenAid Ice Cream Maker Attachment to make ice cream:
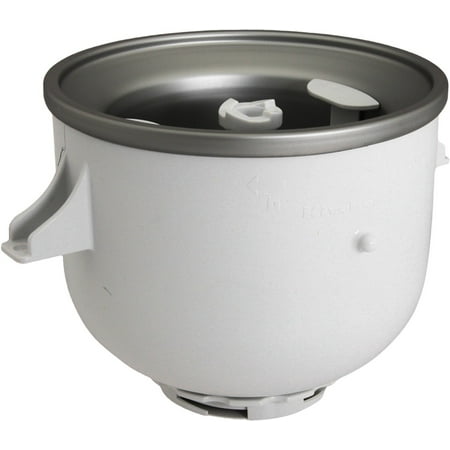
- Freeze the Bowl: Before you start, make sure to freeze the ice cream maker bowl for at least 15 hours or as directed in the manufacturer’s instructions. It’s essential that the bowl is completely frozen to achieve the proper consistency.
- Prepare the Ice Cream Base: Create your ice cream base mixture, which typically includes ingredients like cream, milk, sugar, and flavorings. You can find various ice cream recipes to suit your preferences.
- Assemble the Attachment: Attach the frozen bowl to your KitchenAid stand mixer and install the paddle attachment.
- Churn the Ice Cream: Turn on your stand mixer at a low speed and pour the ice cream base into the frozen bowl. Let it churn for about 15-30 minutes, or until the mixture reaches a creamy consistency and thickens into ice cream.
- Add Mix-Ins (Optional): If you want to add mix-ins like chocolate chips, nuts, or fruit to your ice cream, do so during the last few minutes of churning.
- Transfer and Freeze: Once the ice cream has reached the desired consistency, transfer it to an airtight container and place it in the freezer for a few hours to firm up further.
- Enjoy: Serve your homemade ice cream and enjoy!
Using the KitchenAid Ice Cream Maker Attachment is a convenient way to create customized ice cream flavors and experiment with different ingredients. Just be sure to follow the attachment’s instructions and your chosen ice cream recipe for the best results.
How do you use the KitchenAid shaved ice attachment?
Sure, here are the steps on how to use the KitchenAid Shave Ice Attachment:
- Gather your ingredients and tools. You will need:
- A KitchenAid stand mixer with power hub
- The KitchenAid Shave Ice Attachment
- Ice molds
- Syrup, sauces, and toppings (optional)
- Prepare the ice. Fill the ice molds with your desired ingredients and freeze them for at least 24 hours. You can use water, juice, milk, or dairy to make your ice.
- Attach the shave ice attachment to your stand mixer. Make sure that the attachment is properly aligned and that the lever is in the locked position.
- Insert the ice block into the shave ice attachment. Make sure that the ice block is centered in the attachment.
- Turn on your stand mixer and adjust the speed to medium-high. The ice will begin to be shaved into a fine or coarse texture, depending on the blade you are using.
- Shave the ice until it reaches your desired consistency. You can stop shaving the ice at any time.
- Top your shaved ice with your favorite syrups, sauces, and toppings. Enjoy!
Here are some additional tips for using the KitchenAid Shave Ice Attachment:
- Use cold, hard ice. This will help to prevent the ice from melting and making a watery shave ice.
- Use the fine blade for a light and fluffy texture. Use the coarse blade for a chunkier texture.
- Do not overfill the ice molds. This can cause the ice to overflow and make a mess.
- If you are using regular ice cubes, temper them before shaving. This means removing them from the freezer 10-15 minutes before you plan to shave them. This will help to prevent the ice from shattering and making a mess.
- Experiment with different flavors and toppings to find your favorite combination.
- With a little creativity, you can make shaved ice that is both delicious and refreshing.
How long does it take to freeze the KitchenAid ice cream attachment?
The KitchenAid ice cream attachment needs to be frozen for at least 24 hours before using. This will help to ensure that the bowl is completely frozen and ready to make ice cream. You can also freeze the bowl for up to 48 hours, but this is not necessary.
To freeze the bowl, simply place it in the freezer on a flat surface. Make sure that the bowl is not touching any other objects, as this can prevent it from freezing evenly. You can also place a piece of parchment paper or wax paper between the bowl and the freezer shelf to prevent it from sticking.
Once the bowl is frozen, you can remove it from the freezer and start making ice cream. The ice cream attachment is compatible with all KitchenAid stand mixers with power hubs.
Here are some additional tips for freezing the KitchenAid ice cream attachment:
- Make sure that the bowl is completely dry before freezing. Any moisture can cause the bowl to freeze unevenly.
- If you are freezing the bowl for more than 24 hours, make sure to check it periodically to make sure that it is not thawing.
- Do not overfill the bowl with ice cream. This can prevent the ice cream from churning properly.
With a little planning, you can enjoy homemade ice cream in no time!
Benefits of using Kitchenaid shaved ice attachment
There are many benefits to using the KitchenAid Shave Ice Attachment. Here are a few of the most notable:
- It is easy to use. The attachment is simple to attach to your stand mixer and operate. Once you have the ice in the molds and the attachment is in place, you just need to turn on the mixer and let it do the work.
- It makes light and fluffy shaved ice. The shave ice attachment uses the power of your stand mixer to shave the ice into a fine, light, and fluffy texture. This is perfect for making shaved ice that is both delicious and refreshing.
- It is versatile. You can use the shave ice attachment to make shaved ice from a variety of ingredients, including water, juice, milk, and dairy. You can also add flavorings and toppings to create your own custom shaved ice creations.
- It is dishwasher safe. The shave ice attachment is dishwasher safe, making cleanup quick and easy.
Overall, the KitchenAid Shave Ice Attachment is a great way to make delicious and refreshing shaved ice at home. It is easy to use, versatile, and dishwasher safe. If you are looking for a way to make shaved ice at home, the KitchenAid Shave Ice Attachment is a great option.
Here are some additional benefits of using the KitchenAid Shave Ice Attachment:
- It can save you money.
- Buying shaved ice from a restaurant can be expensive.
- Making your own shaved ice at home is a more affordable option.
- It is a fun and creative way to cool off on a hot day. You can experiment with different flavors and toppings to create your own unique shaved ice creations.
- It is a great way to entertain guests. Shaved ice is a popular treat that everyone loves. Making your own shaved ice at home is a fun and festive way to entertain guests.
If you are looking for a way to make delicious, refreshing, and affordable shaved ice at home, the KitchenAid Shave Ice Attachment is a great option.
Factors to consider when choosing Kitchenaid shaved ice attachment
here are some factors to consider when choosing a KitchenAid shaved ice attachment:
- Compatibility with your stand mixer. Make sure that the shave ice attachment is compatible with your stand mixer. Not all attachments are compatible with all models of stand mixers.
- Ease of use. The shave ice attachment should be easy to attach to your stand mixer and operate. You should not have to struggle to get it to work.
- Quality of construction. The shave ice attachment should be made from high-quality materials and construction. This will ensure that it lasts for a long time.
- Price. The price of the shave ice attachment is also a factor to consider. You should find an attachment that fits your budget.
Warranty. Some shave ice attachments come with a warranty. This can give you peace of mind in case the attachment breaks down.
Here are some additional factors to consider:
- The type of ice you want to use. The shave ice attachment can be used with either regular ice cubes or ice made from water, juice, or milk. If you plan to use regular ice cubes, make sure that the attachment is compatible with them.
- The size of the attachment.
- The shave ice attachment should be large enough to accommodate the amount of ice you want to shave.
- The features of the attachment. Some shave ice attachments come with features such as two interchangeable blades for different textures, a built-in bowl, or a storage case. Consider the features that are important to you.
With so many factors to consider, it can be tough to choose the best KitchenAid shaved ice attachment. However, by taking the time to consider your needs and budget, you can find the perfect attachment for you.
How to clean Kitchenaid shaved ice attachment
Sure, here are the steps on how to clean the KitchenAid Shave Ice Attachment:
1. Detach the attachment from the stand mixer.
2. Remove the blades.
3. Wash the blades and ice cup under warm, running water.
4. Wipe down the plastic parts with a damp cloth.
5. Dry all of the parts with a clean cloth.
6. Reassemble the attachment.
The following parts are dishwasher safe, top rack only:
* Detachable Ice Cup
* Fine and Coarse Blades
* Plastic Ice Molds
* Ice Cup Pusher
* Ice Cup Sleeve and Lids
The following parts are not dishwasher safe:
* Upper Housing
It is important to clean the shave ice attachment after each use to prevent the build-up of bacteria. You can also clean the attachment more often if you are using it frequently.
Here are some additional tips for cleaning the KitchenAid Shave Ice Attachment:
* Do not use harsh chemicals or abrasive cleaners. These can damage the attachment.
* Be careful not to scratch the blades.
* Dry the attachment thoroughly before storing it. This will help to prevent rust.
By following these simple steps, you can keep your KitchenAid Shave Ice Attachment clean and in good condition for years to come.
How to maintain Kitchenaid shaved ice attachment properly
Here are some tips on how to maintain your KitchenAid Shave Ice Attachment properly:
- Clean it after each use. This will help to prevent the build-up of bacteria and keep the attachment in good condition.
- Store it in a dry place. This will help to prevent rust and other damage.
- Do not use harsh chemicals or abrasive cleaners. These can damage the attachment.
- Be careful not to scratch the blades. The blades are sharp and can easily be damaged.
- If the attachment is not working properly, contact KitchenAid customer service. They may be able to help you troubleshoot the problem.
By following these simple tips, you can keep your KitchenAid Shave Ice Attachment in good condition for years to come.
Here are some additional tips:
- If the attachment is not dishwasher safe, you can also clean it by hand. Simply wash the blades and ice cup under warm, running water with a mild dish soap. Be sure to dry all of the parts thoroughly before storing them.
- If the attachment is not working properly, you can try cleaning it first. If that does not work, you can contact KitchenAid customer service for help.
- To prevent the attachment from getting damaged, be sure to store it in a dry place. You can also store it in the original packaging if you have it.
By following these tips, you can keep your KitchenAid Shave Ice Attachment in good condition and enjoy making shaved ice for years to come.
Troubleshooting about Kitchenaid shaved ice attachment
Sure, here are some troubleshooting tips for the KitchenAid Shave Ice Attachment:
- The ice is not shaving.
*Make sure that the ice is cold and hard. Soft ice will not shave properly.
* Make sure that the blades are sharp. Dull blades will not shave the ice evenly.
* Try using the other blade. Sometimes, one blade works better than the other.
* If the ice is still not shaving, try tempering it. This means removing it from the freezer 10-15 minutes before you plan to shave it. This will help to prevent the ice from shattering and making a mess. - The ice is shaving too fine.
* Use the coarse blade. This will give the ice a chunkier texture.
* Try using less ice. If you are using too much ice, it can clog the blades and prevent them from shaving properly.
* If the ice is still shaving too fine, you can try adding a few drops of water to the ice. This will help to prevent the ice from clogging the blades. - The attachment is not working properly.
*Make sure that the attachment is properly assembled. The blades should be inserted into the ice cup correctly.
* Make sure that the attachment is locked into place on the stand mixer.
* If the attachment is still not working properly, contact KitchenAid customer service for help.
Here are some additional tips:
- If you are using regular ice cubes, temper them before shaving. This means removing them from the freezer 10-15 minutes before you plan to shave them. This will help to prevent the ice from shattering and making a mess.
- If you are using ice that has been made from juice or milk, it is important to strain the liquid before freezing. This will help to prevent the ice from becoming cloudy.
- You can also add flavorings to the ice before freezing. This is a great way to make custom shaved ice flavors.
Experiment with different flavors and toppings to find your favorite combination. With a little creativity, you can make shaved ice that is both delicious and refreshing.
Conclusion
The KitchenAid Shave Ice Attachment is a great way to make delicious and refreshing shaved ice at home. It is easy to use, versatile, and dishwasher safe. If you are looking for a way to make shaved ice at home, the KitchenAid Shave Ice Attachment is a great option.
Related Posts
How do you use the KitchenAid chopper attachment?
The KitchenAid chopper attachment is an accessory designed to be...
Read MoreBest Kitchenaid Attachments For Your Stand Mixer
KitchenAid stand mixers are, first and foremost, practical mixers, which...
Read More Post Views: 1,726
Why Trust Us
You will find what you are looking for at Jody's Bakery. From classic to luxury brands, you'll find both. We will help you to select appliances that fit your needs, budget and lifestyle. Whether you want to stop by to learn more — or plan to make a major purchase — we’ll treat you like family and assist you every step of the way. Shop with us today to receive friendly and experienced help along the way.

