


The KitchenAid cheese grater attachment is a popular accessory for...
Read More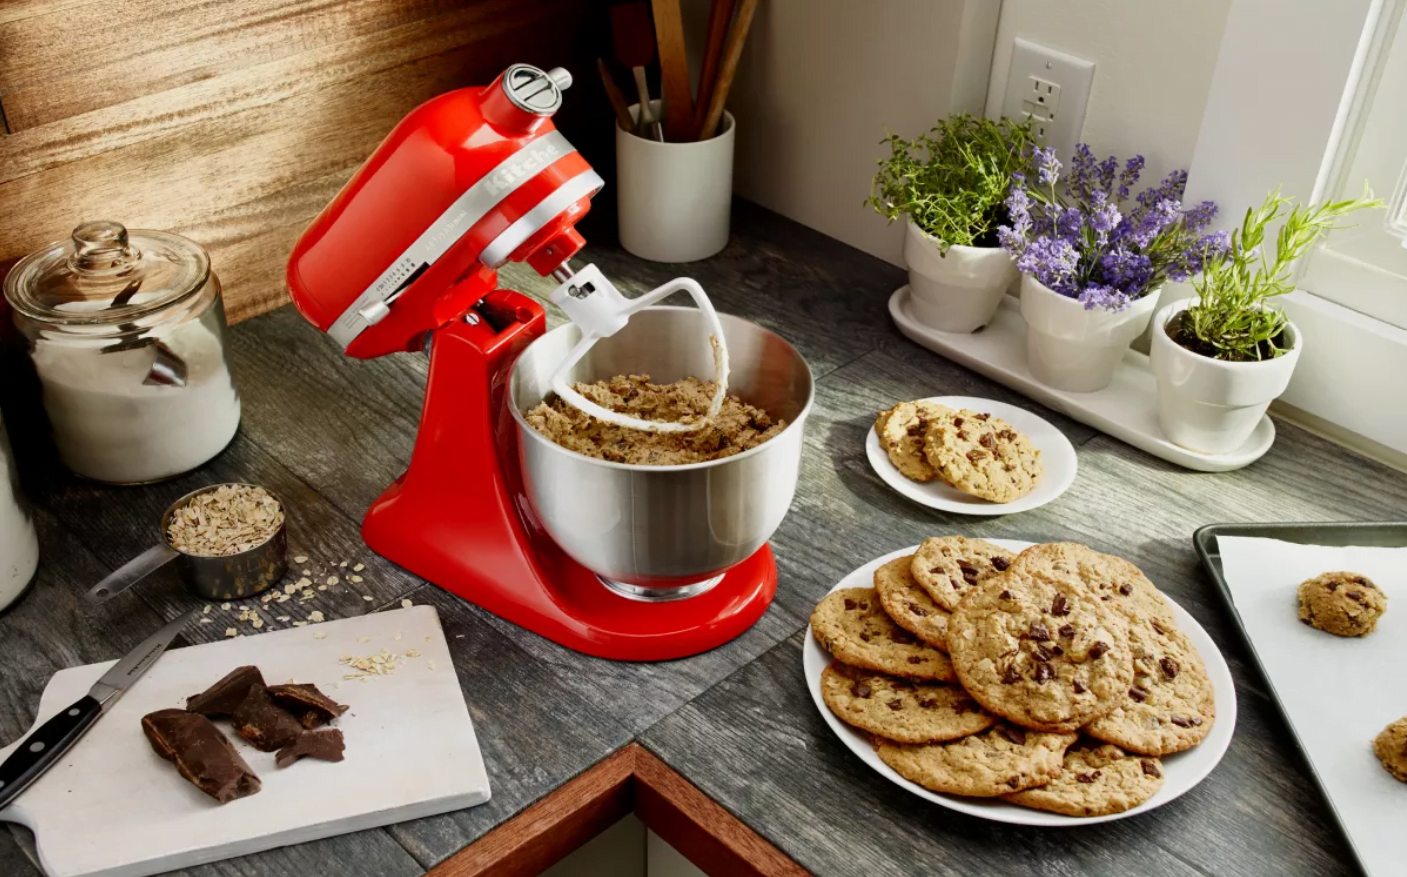
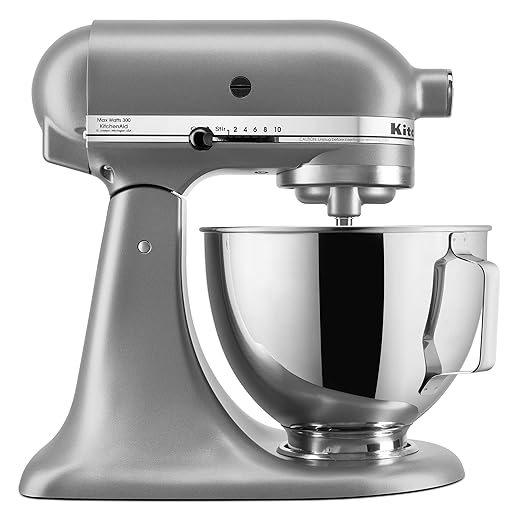
The KitchenAid attachment for cookies is a versatile and handy tool designed to enhance your baking experience. Compatible with KitchenAid stand mixers, this attachment simplifies the process of making delicious cookies by effortlessly mixing, kneading, and shaping your cookie dough. Whether you’re a seasoned baker or a novice in the kitchen, this attachment can help you create perfectly uniform cookie shapes and textures, saving you time and effort.
With various interchangeable discs and settings, it allows you to customize your cookies to suit your preferences, whether you prefer classic chocolate chip cookies, delicate shortbread, or decorative holiday cookies. The KitchenAid attachment for cookies is an essential accessory for anyone who enjoys baking and wants to achieve consistent and professional results with ease.
Can you use a KitchenAid mixer for cookies?
Yes, you can absolutely use a KitchenAid mixer for making cookie dough. In fact, KitchenAid stand mixers are a popular choice among home bakers for this purpose due to their versatility and efficiency. Here’s how you can use a KitchenAid mixer to make cookie dough:
- Assemble Your Mixer: Ensure that your KitchenAid stand mixer is properly set up with the mixing bowl and the appropriate paddle attachment. The flat beater attachment is commonly used for cookie dough.
- Ingredients: Gather all the ingredients for your cookie recipe, including flour, sugar, butter, eggs, and any flavorings or mix-ins like chocolate chips or nuts.
- Creaming Butter and Sugar: Start by adding softened butter and sugar to the mixing bowl. Use the mixer on a low speed setting to initially combine the ingredients, preventing a cloud of powdered sugar.
- Mixing: Gradually increase the mixer speed to medium and beat until the butter and sugar mixture becomes light and fluffy. This is the crucial step for achieving a tender, well-textured cookie.
- Incorporating Eggs and Other Ingredients: Reduce the mixer speed to low and add eggs one at a time, allowing each egg to fully incorporate before adding the next. You can also add any extracts or flavorings at this point.
- Adding Dry Ingredients: With the mixer on low speed, gradually add your dry ingredients (flour, baking soda, salt, etc.). Mix until the dough comes together. Be careful not to overmix; just mix until the ingredients are combined.
- Mix-Ins: If your recipe includes chocolate chips, nuts, or other mix-ins, add them to the dough and mix until evenly distributed.
- Chill the Dough (if needed): Depending on the cookie recipe, you may need to chill the dough in the refrigerator for a specified time to make it easier to handle or for flavor development.
Using a KitchenAid mixer for cookie dough makes the process more efficient and ensures even mixing. However, it’s essential to refer to your specific cookie recipe for precise instructions on mixing times and speeds, as different recipes may have varying requirements. Enjoy baking your delicious cookies with the convenience of your KitchenAid mixer!
Which KitchenAid attachment is best for cookies?
The best KitchenAid attachment for cookies is the flat beater , also known as the paddle attachment. It is the most versatile attachment and can be used for a variety of mixing tasks, including creaming butter and sugar, beating eggs, and mixing batters. The flat beater has a wide, flat surface that distributes the ingredients evenly and helps to prevent them from getting stuck to the sides of the bowl. It is also sturdy enough to handle the denseness of cookie dough without bending or breaking.
The flex edge beater is another good option for making cookies. It has a combination of flat and ribboned edges that help to scrape the sides of the bowl and incorporate all of the ingredients evenly. However, the flex edge beater is not as sturdy as the flat beater and may not be the best choice for thick cookie dough.
The dough hook is not typically used for making cookies, as it is designed for kneading dough. However, it can be used to mix thick cookie doughs, such as those that contain oats or nuts.
If you are only going to buy one KitchenAid attachment for making cookies, the flat beater is the best choice. It is versatile, sturdy, and easy to use. The flex edge beater is a good option if you want an attachment that will scrape the sides of the bowl for you. And the dough hook can be used for thick cookie doughs, but it is not essential.
Here are some additional tips for making cookies with a KitchenAid mixer:
- Start by creaming the butter and sugar until light and fluffy. This is important for creating airy cookies.
- Add the eggs one at a time, beating well after each addition.
- Mix in the dry ingredients until just combined. Do not overmix, or your cookies will be tough.
- Chill the dough for at least 30 minutes before baking. This will help the cookies hold their shape.
- Bake the cookies on a parchment-lined baking sheet at the specified temperature for the desired doneness.
Enjoy your delicious, homemade cookies!
What is the best KitchenAid speed for cookies?
The best KitchenAid speed for cookies is medium speed, which is speeds 4 and 5. This speed is ideal for creaming butter and sugar, beating eggs, and mixing batters. It is important to avoid overmixing the cookie dough, as this can make the cookies tough.
Here are the specific steps for making cookies with a KitchenAid mixer on medium speed:
- Cream the butter and sugar on medium speed until light and fluffy. This will take about 2-3 minutes.
- Add the eggs one at a time, beating well after each addition.
- Beat in the vanilla extract.
- In a separate bowl, whisk together the flour, baking soda, and salt.
- Gradually add the dry ingredients to the wet ingredients, mixing on medium speed until just combined. Do not overmix.
- Chill the dough for at least 30 minutes before baking.
- Bake the cookies on a parchment-lined baking sheet at the specified temperature for the desired doneness.
Here are some additional tips for making cookies with a KitchenAid mixer:
- Use the flat beater attachment for the best results.
- Scrape down the sides of the bowl as needed to ensure that all of the ingredients are incorporated evenly.
- Do not overmix the dough.
- Overmixing will make the cookies tough.
- Chill the dough before baking. This will help the cookies hold their shape.
- Bake the cookies on a parchment-lined baking sheet. This will help prevent the cookies from sticking to the pan.
Which KitchenAid mixer is best for cookies?
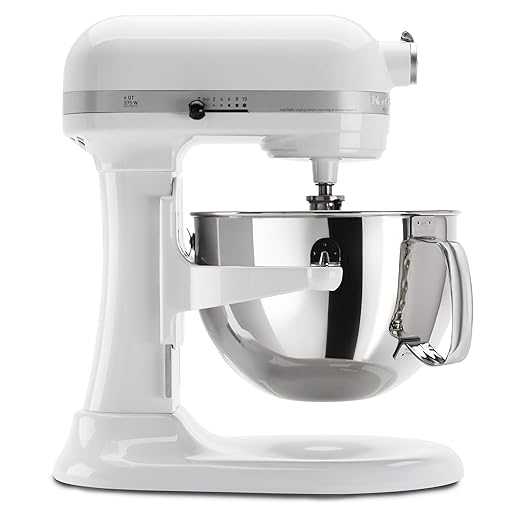
The best KitchenAid mixer for cookies is the KitchenAid Artisan Series 5-Quart Tilt-Head Stand Mixer. It is a versatile mixer that can be used for a variety of tasks, including making cookies, cakes, breads, and more. It has a powerful motor that can handle even the thickest cookie doughs. It also comes with a variety of attachments, including the flat beater, which is ideal for making cookies.
Here are some of the features of the KitchenAid Artisan Series 5-Quart Tilt-Head Stand Mixer that make it a good choice for making cookies:
- Powerful 325-watt motor can handle even the thickest cookie doughs.
- 5-quart capacity is large enough to mix even large batches of cookies.
- Tilt-head design makes it easy to add ingredients and scrape down the sides of the bowl.
- Comes with a variety of attachments, including the flat beater, which is ideal for making cookies.
- Durable construction will last for years of use.
If you are looking for a high-quality KitchenAid mixer that is perfect for making cookies, the Artisan Series 5-Quart Tilt-Head Stand Mixer is a great option.
Here are some other KitchenAid mixers that are also good for making cookies:

KitchenAid KSM155GBCA 5-Qt. Artisan Design Series with Glass Bowl – Candy Apple Red
Amazon.com

KitchenAid KSM150PSBX Artisan Series 5-Qt. Stand Mixer with Pouring Shield – Bordeaux
5.0
Amazon.com
KitchenAid KP26M1XWH 6 Qt. Professional 600 Series Bowl-Lift Stand Mixer – White
5.0
Amazon.com

KitchenAid KP26M1XNP 6 Qt. Professional 600 Series Bowl-Lift Stand Mixer – Nickel Pearl
5.0
Amazon.com

Stand Mixer Cover for KitchenAid 3.5-Qt Artisan Mini/Plus, KSM3311, KSM3316 & All KSM3300 Series Tilt-Head Stand Mixer, 3.5 Quart Dust Cover with Pockets for…
Amazon.com

KitchenAid KSM3311XAQ Artisan Mini Series Tilt-Head Stand Mixer, 3.5 quart, Aqua Sky Blue
5.0
Amazon.com

Kitchenaid Artisan Mini Plus 3.5-Qt. Tilt-Head Stand Mixer with Flex Edge Beater & 3.5 Quart Polished Stainless Steel Bowl with Handle – KSM35SSFP
5.0
Amazon.com

Kitchenaid Artisan Mini Plus 3.5-Qt. Tilt-Head Stand Mixer with Flex Edge Beater & Stand Mixer Glass Bowl, 3.5 Quart Tilt Head
5.0
Amazon.com
- KitchenAid Classic Plus 4.5 Quart Tilt-Head Stand Mixer. Full review here
- KitchenAid Professional 600 Series 6 Quart Stand Mixer. See more review
- KitchenAid Artisan Mini 3.5 Quart Stand Mixer. More reviews here
The best choice for you will depend on your budget and your needs. If you are looking for a more affordable option, the KitchenAid Classic Plus is a good choice. If you are looking for a more powerful mixer with a larger capacity, the KitchenAid Professional 600 Series is a good option. And if you are looking for a smaller mixer, the KitchenAid Artisan Mini is a good choice.
No matter which KitchenAid mixer you choose, you can be sure that it will make making cookies a breeze.
How long to beat sugar and butter KitchenAid?
The amount of time it takes to beat sugar and butter in a KitchenAid mixer depends on a few factors, including the power of the mixer, the size of the bowl, and the temperature of the ingredients. However, in general, it should take about 2-3 minutes on medium speed to cream together the sugar and butter until light and fluffy.
Here are some tips for creaming sugar and butter in a KitchenAid mixer:
- Use softened butter. Cold butter will make it difficult to cream the ingredients together.
- Use the flat beater attachment. The flat beater is the best attachment for creaming sugar and butter.
- Start on low speed and gradually increase the speed as the butter and sugar start to come together.
- Scrape down the sides of the bowl as needed to ensure that all of the ingredients are incorporated evenly.
- Do not overmix.
- Overmixing will make the cookies tough.
If you are not sure how long to beat the sugar and butter, it is always better to err on the side of caution and beat for a shorter amount of time. You can always add more time if needed.
Here are some signs that the sugar and butter are creamed together enough:
- The mixture is light and fluffy.
- The butter is no longer visible.
- The mixture leaves a trail on the bottom of the bowl when the beater is lifted.
Once the sugar and butter are creamed together, you can add the eggs and other ingredients.
What settings does Kitchenaid attachment for cookies?
The best KitchenAid setting for cookies is medium speed, which is speeds 4 and 5. This speed is ideal for creaming butter and sugar, beating eggs, and mixing batters. It is important to avoid overmixing the cookie dough, as this can make the cookies tough.
Here are the specific steps for making cookies with a KitchenAid mixer on medium speed:
- Cream the butter and sugar on medium speed until light and fluffy. This will take about 2-3 minutes.
- Add the eggs one at a time, beating well after each addition.
- Beat in the vanilla extract.
- In a separate bowl, whisk together the flour, baking soda, and salt.
- Gradually add the dry ingredients to the wet ingredients, mixing on medium speed until just combined. Do not overmix.
- Chill the dough for at least 30 minutes before baking.
- Bake the cookies on a parchment-lined baking sheet at the specified temperature for the desired doneness.
Here are some additional tips for making cookies with a KitchenAid mixer:
- Use the flat beater attachment for the best results.
- Scrape down the sides of the bowl as needed to ensure that all of the ingredients are incorporated evenly.
- Do not overmix the dough.
- Overmixing will make the cookies tough.
- Chill the dough before baking. This will help the cookies hold their shape.
- Bake the cookies on a parchment-lined baking sheet. This will help prevent the cookies from sticking to the pan.
Do Kitchenaid attachment for cookies fit all models?
Yes, most KitchenAid attachments for cookies fit all models of KitchenAid stand mixers. This is because all KitchenAid stand mixers have a universal power hub that allows attachments to be easily plugged in and removed.
The only exception is the KitchenAid Artisan Mini. The Artisan Mini has a smaller bowl and power hub, so some attachments, such as the ice cream maker, are not compatible with it.
If you are not sure if an attachment is compatible with your KitchenAid stand mixer, you can always check the product description or contact KitchenAid customer service.
Here are some of the most popular KitchenAid attachments for cookies:
- Flat beater: This is the most versatile attachment and can be used for a variety of mixing tasks, including creaming butter and sugar, beating eggs, and mixing batters.
- Flex edge beater: This attachment has a combination of flat and ribboned edges that help to scrape the sides of the bowl and incorporate all of the ingredients evenly.
- Dough hook: This attachment is designed for kneading dough, but it can also be used to mix thick cookie doughs.
- Spiralizer: This attachment can be used to make spiralized vegetables, which can be used in cookies or other desserts.
- Food processor: This attachment can be used to chop, slice, and puree ingredients, which can be used in cookies or other desserts.
How to attach Kitchenaid attachment for cookies
To attach a KitchenAid attachment for cookies, follow these steps:
- Make sure that the power hub on your KitchenAid stand mixer is clean and free of any debris.
- Align the attachment with the power hub and gently push it down until it clicks into place.
- Make sure that the attachment is securely attached by trying to twist it. If it twists, it is not attached properly.
Here are some additional tips for attaching KitchenAid attachments:
- Make sure that the attachment is compatible with your KitchenAid stand mixer.
- Do not force the attachment into place. If it does not go in easily, it is not compatible with your mixer.
- Be careful not to overtighten the attachment. This can damage the power hub.
Once the attachment is attached, you can start mixing your cookie dough. Be sure to follow the instructions that come with the attachment to get the best results.
Benefits of using Kitchenaid attachment for cookies
Using a KitchenAid attachment for cookies offers several benefits that can enhance your cookie-making experience and improve the quality of your cookies. Here are some of the key advantages:
- Efficiency: KitchenAid attachments, such as the flat beater or paddle attachment, significantly speed up the mixing process, allowing you to prepare cookie dough quickly and with less effort compared to mixing by hand.
- Consistency: The KitchenAid mixer ensures that your cookie dough is consistently mixed, resulting in even distribution of ingredients. This consistency leads to cookies with uniform texture and flavor.
- Precise Mixing: KitchenAid attachments are designed to scrape the sides and bottom of the mixing bowl, ensuring that no ingredients are left unmixed. This precision is challenging to achieve with hand mixing.
- Creaming Butter and Sugar: The KitchenAid mixer excels at creaming butter and sugar together, a critical step in cookie making that contributes to the cookies’ softness and texture.
- Versatility: While the flat beater is the standard attachment for cookies, KitchenAid offers a range of attachments that can help you create various cookie styles and shapes, such as the cookie press or pasta roller with cookie cutter attachments.
- Hands-Free Operation: The stand mixer allows you to mix cookie dough hands-free, freeing you to prepare other ingredients or attend to other tasks while it works.
- Reduced Physical Effort: Using a KitchenAid attachment for cookies reduces the physical strain on your hands and arms that can come with mixing thick or large batches of cookie dough by hand.
- Consistent Results: With precise control over mixing speed and time, KitchenAid mixers help you achieve consistent results every time you bake cookies, reducing the risk of overmixing or undermixing.
- Time-Saving: KitchenAid mixers are efficient and can save you time, especially when making larger batches of cookies for events or special occasions.
- Creative Possibilities: Some KitchenAid attachments, like the cookie press or pasta roller with cookie cutter attachments, open up creative possibilities for making unique cookie shapes and designs.
Overall, using a KitchenAid attachment for cookies streamlines the cookie-making process, enhances the quality and consistency of your cookies, and offers convenience and versatility in your baking endeavors. It’s a valuable tool for both novice and experienced bakers.
Factors to consider when choosing Kitchenaid attachment for cookies
When choosing a KitchenAid attachment for cookies, there are several important factors to consider to ensure you get the right one for your baking needs. Here are some key factors to keep in mind:
- Type of Cookies: Consider the types of cookies you frequently bake. Some attachments are designed for specific types of cookies, such as a cookie press attachment for decorative cookies or a pasta roller attachment with cookie cutter accessories for various shapes. Choose an attachment that aligns with your cookie preferences.
- Compatibility: Ensure that the attachment you choose is compatible with your specific KitchenAid stand mixer model. While most attachments fit a wide range of models, it’s essential to double-check compatibility to avoid any issues.
- Functionality: Assess the functionality of the attachment. For basic cookie dough mixing, the standard KitchenAid flat beater or paddle attachment is suitable. However, if you want to get creative with cookie shapes and designs, consider attachments like the cookie press, pasta roller, or any other specialty attachments that can enhance your cookie-making experience.
- Ease of Use: Look for attachments that are easy to attach, detach, and clean. Some attachments may have intricate parts that require more maintenance, so consider your comfort level with cleaning and maintaining the attachment.
- Construction and Material: Pay attention to the build quality and materials used in the attachment. High-quality, durable materials ensure longevity and reliability, especially if you plan to use the attachment frequently.
- Included Accessories: Some attachments come with additional accessories, such as multiple cookie cutter shapes or different discs for shaping cookies. Evaluate whether the included accessories meet your baking needs.
- Budget: Consider your budget when selecting an attachment. KitchenAid attachments vary in price, so determine how much you’re willing to invest in enhancing your cookie-making capabilities.
- Storage: Think about where you’ll store the attachment when it’s not in use. Some attachments may be larger or have more components that require additional storage space.
- User Reviews and Recommendations: Read user reviews and seek recommendations from fellow bakers who have experience with specific KitchenAid attachments for cookies. Their insights can provide valuable information about the attachment’s performance and reliability.
- Warranty: Check if the attachment comes with a warranty, as it can offer peace of mind in case of any defects or issues.
By considering these factors, you can choose the right KitchenAid attachment for cookies that suits your baking style and preferences, ensuring that your cookie-making experience is both enjoyable and efficient.
How to clean Kitchenaid attachment for cookies
Cleaning your KitchenAid attachment for cookies, such as the flat beater or any other attachment you’ve used for making cookie dough, is essential to maintain hygiene and ensure the longevity of the attachment. Here’s how to clean it effectively:
Materials You’ll Need:
- Warm, soapy water
- Soft brush or sponge
- Dishwashing liquid
- Towel or dish rack for drying
- Optional: Toothpick or small brush for hard-to-reach areas
Steps to Clean KitchenAid Attachment for Cookies:
- Unplug Your Mixer: Before you begin, make sure your KitchenAid stand mixer is unplugged to avoid any accidental activation.
- Remove the Attachment: Detach the cookie attachment from the mixer by lifting the mixer head and releasing it from the attachment hub. Be sure to handle it with care.
- Remove Excess Dough: Use a spatula or your fingers to remove any remaining cookie dough from the attachment. Be gentle, as you don’t want to scratch or damage the attachment.
- Rinse with Warm Water: Rinse the attachment under warm, running water to remove any loose dough or residue. Use a gentle stream of water to avoid forcing dough into crevices.
- Prepare Soapy Water: Fill a basin or sink with warm water and add a few drops of dishwashing liquid. Mix until it creates a soapy solution.
- Soak the Attachment: Submerge the attachment in the soapy water and allow it to soak for a few minutes. This will help loosen any stubborn dough or grease.
- Clean with a Soft Brush or Sponge: Gently scrub the attachment using a soft brush or sponge. Pay extra attention to areas where dough may have accumulated, such as the crevices and the moving parts. If needed, you can use a toothpick or a small brush to reach tight spots.
- Rinse Thoroughly: Rinse the attachment thoroughly under warm running water to remove all soap residue. Ensure that no soapy water remains on the attachment.
- Dry Completely: Use a clean towel or place the attachment on a dish rack to air dry completely before reattaching it to your KitchenAid mixer. Ensure it’s entirely dry to prevent any rust or moisture-related issues.
- Reattach to Mixer: Once the attachment is completely dry, reattach it to your KitchenAid mixer, ensuring it clicks securely into place.
By following these steps, you can keep your KitchenAid attachment for cookies clean and well-maintained, ensuring that it continues to perform effectively and maintain its durability over time. Regular cleaning after each use is recommended to prevent the buildup of dried dough or other residues.
How to maintain Kitchenaid attachment for cookies properly
Properly maintaining your KitchenAid attachment for cookies, whether it’s the standard flat beater or a specialized attachment, is essential to ensure its longevity and continued performance. Here are some tips on how to maintain it effectively:
- Regular Cleaning: After each use, thoroughly clean the attachment as per the cleaning instructions mentioned earlier. Remove any cookie dough or residue to prevent it from hardening or accumulating over time.
- Avoid Dishwasher Use: While some KitchenAid attachments are dishwasher safe, it’s generally recommended to hand wash them. Frequent exposure to the high heat and harsh detergents in dishwashers can cause the attachment’s finish to deteriorate faster.
- Dry Thoroughly: Ensure that the attachment is completely dry before storing it. Moisture can lead to rust and corrosion, which can affect the attachment’s performance and appearance. If necessary, you can use a towel to dry it off after washing and air-dry it further.
- Inspect for Damage: Regularly inspect the attachment for any signs of damage, such as cracks, bent parts, or loose screws. If you notice any issues, discontinue use and contact KitchenAid for repairs or replacement.
- Lubrication (if applicable): If your attachment has moving parts or gears, check the user manual for any recommended lubrication instructions. Proper lubrication can extend the life of these components.
- Store Properly: Store the attachment in a cool, dry place, away from direct sunlight and moisture. It’s a good idea to keep it in its original packaging or a protective cover if available. If you have limited storage space, consider using a designated container or drawer to keep all your KitchenAid attachments organized and protected.
- Use Properly: Follow the manufacturer’s instructions for your specific attachment. Avoid overloading it with heavy dough or using it for tasks it wasn’t designed for, as this can lead to premature wear and tear.
- Avoid Abrasive Cleaners: When cleaning, use a gentle brush or sponge, and avoid abrasive scrubbers or cleaning products that can scratch the attachment’s surface.
- Replace Worn Parts: If you notice any parts, such as beaters or blades, becoming worn or damaged, replace them promptly. Using worn-out parts can affect the quality of your cookie dough and potentially damage the attachment further.
- Periodic Maintenance: Depending on your usage and the specific attachment, consider scheduling periodic maintenance or servicing. Some attachments may require occasional professional maintenance to keep them in optimal condition.
By following these maintenance tips, you can ensure that your KitchenAid attachment for cookies remains in excellent working condition, allowing you to continue making delicious cookies with ease and consistency for years to come.
Troubleshooting about Kitchenaid attachment for cookies
Troubleshooting issues with your KitchenAid attachment for cookies can help you overcome common problems and ensure smooth operation. Here are some common issues and their solutions:
Attachment Doesn’t Fit or Secure Properly:
- Solution: Ensure that you are using the correct attachment for your mixer model. Check for any obstructions or debris in the attachment hub. Make sure the attachment is correctly aligned and securely locked into place.
Attachment Is Difficult to Remove:
- Solution: If the attachment is stuck, turn off and unplug your mixer. Gently wiggle and twist the attachment while applying light pressure to release it from the hub. Avoid using excessive force to prevent damage.
Attachment is Not Mixing Properly:
- Solution: Ensure that you are using the appropriate speed setting for your cookie dough recipe. For cookie dough, a low to medium speed setting is typically sufficient. Also, make sure the attachment is properly secured and the mixer is functioning correctly.
Dough Gets Stuck in the Attachment:
- Solution: This can happen if the dough is too sticky or if you’re using an attachment not suitable for your dough consistency. Try dusting the dough with a bit of flour to reduce stickiness. Consider using the correct attachment for your dough type.
Attachment Makes Unusual Noises:
- Solution: Unusual noises may indicate that the attachment is struggling or that something is obstructing its movement. Turn off the mixer and inspect the attachment for any visible obstructions or damage. If the issue persists, contact KitchenAid for further assistance.
Attachment Is Rusting:
- Solution: Rust can develop if the attachment is not properly dried after cleaning or if it’s exposed to moisture. Ensure that the attachment is thoroughly dried before storage. Consider using a light coating of food-safe mineral oil to prevent rust.
Attachment Parts Are Worn or Damaged:
- Solution: If you notice wear and tear on attachment parts, such as chipped coating or bent beaters, consider replacing those parts with genuine KitchenAid replacement parts. Using damaged parts can affect the quality of your cookies and the attachment’s performance.
Attachment Is Overheating:
- Solution: Overheating can occur if the mixer is used continuously for an extended period. Allow the mixer to rest and cool down before resuming use. If overheating persists, it may indicate a problem with the mixer itself; contact KitchenAid customer support.
Attachment Is Leaking Oil:
- Solution: Some attachments, particularly those with moving parts, may require occasional lubrication. Check your user manual for maintenance instructions. If oil leakage continues, contact KitchenAid support for guidance.
Inconsistent Cookie Dough Texture:
- Solution: Ensure that you follow your cookie recipe’s instructions carefully. Be precise with ingredient measurements and mixing times. Adjust the mixer speed and attachment as needed to achieve the desired dough consistency.
If you encounter persistent issues with your KitchenAid attachment for cookies that you cannot resolve through troubleshooting, it’s advisable to contact KitchenAid customer support or consult the user manual for specific guidance. They can provide assistance tailored to your mixer model and attachment type.
Conclusion
In conclusion, KitchenAid attachments for cookies, such as the flat beater or specialized options like the cookie press or pasta roller with cookie cutter attachments, are valuable tools for any home baker. They offer numerous benefits, including efficiency, consistency, versatility, and time-saving capabilities when making delicious cookies.
Proper maintenance and cleaning practices, as well as troubleshooting solutions for common issues, can help you maximize the performance and lifespan of your KitchenAid attachment, ensuring that you continue to enjoy the convenience and quality they bring to your cookie-baking adventures.
Related Posts
What KitchenAid Accessories Are Used for Cookies and Cakes?
This kitchen aid is available in over 40 different colors....
Read MoreBest Kitchenaid Attachments For Your Stand Mixer
KitchenAid stand mixers are, first and foremost, practical mixers, which...
Read More Post Views: 2,864
Why Trust Us
You will find what you are looking for at Jody's Bakery. From classic to luxury brands, you'll find both. We will help you to select appliances that fit your needs, budget and lifestyle. Whether you want to stop by to learn more — or plan to make a major purchase — we’ll treat you like family and assist you every step of the way. Shop with us today to receive friendly and experienced help along the way.


I found this article both informative and enjoyable. It sparked a lot of ideas. Lets chat more about it. Click on my nickname!