
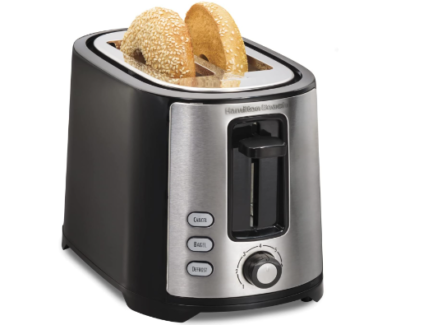
A warm toasted bagel with a spread of creamy cream...
Read More
Toast is a delicious and popular breakfast food, but how long do you need to cook it in a toaster for the perfect slice? In this article, we will answer all your questions about toasting bread in a toaster, including how long it takes to cook it for different types of bread.
We’ll also give you some tips on how to make the perfect slice of toast and tell you about some of the best toasters on the market. So, whether you are a novice toast-maker or an experienced toast-aficionado, read on for all the information you need to create the perfect piece of toast!
Why You Should Toast Bread In Toaster?
Toast bread in toaster for best results. Here are four reasons why:
- The even heat distribution of a toaster ensures that your bread will be evenly toasted on both sides.
- A toaster cooks bread more quickly than an oven, so it’s a great option if you’re in a hurry.
- Toasters come with a range of different settings, so you can choose the level of browning that you prefer.
- Toasted bread is delicious and nutritious – it’s a great way to start your day!
How To Toast Bread In Toaster
Toasting bread in a toaster is a quick and effortless way to enjoy a warm, crispy slice of bread. Here are the steps to follow:
- Plug in the toaster and wait for it to heat up.
- Place a slice of bread on the toaster slots.
- Close the toaster lid and wait for the bread to toast.
- Remove the toast from the slots and enjoy!
If you want your toast to be extra crispy, you can place it in the toaster for a few extra seconds. Be careful not to burn your toast, though – once it’s blackened, it’s not very tasty!
Tips on Toasting Bread In Toaster
Toasting bread in a toaster is a quick and effortless way to enjoy a warm, crispy slice of bread. Here are some tips on how to get the perfect toast every time:
- Make sure your bread is evenly sliced before toasting it. This will help ensure that each slice is evenly toasted.
- Place your bread in the toaster slots so that it is not too close to the edge. If the bread is too close to the edge, it may burn before it is fully toasted.
- Start with a low setting and increase the heat gradually if needed. This will help prevent your bread from burning or becoming too charred.
- Keep an eye on your toast. Once it is toasted to your liking, remove it from the toaster promptly. If you leave it in too long, it may become dry or overdone.
- Toast bread according to the thickness of the slices. Thicker slices will take longer to toast than thinner slices.
- Experiment with different types of bread and toppings to find what you like best. There are endless possibilities when it comes to toasting bread!
We hope these tips help you to enjoy perfect toast every time. 🙂
How Long To Toast Bread In Toaster
There are a lot of variables to consider when it comes to how long to toast bread in a toaster. The size and type of bread, the wattage of your toaster, and the darkness setting you prefer are all factors that can affect how long it takes for your bread to reach the perfect level of toasty-ness.
In general, most people prefer their bread to be a nice golden brown, but you may want to adjust the time depending on your own personal preference.
Here is a general guide for how long to toast different types of bread in a standard toaster:
- 1 slice of thin sliced white bread: 1-2 minutes
- 1 slice of whole wheat bread: 2-3 minutes
- 1 slice of thick sliced white bread: 3-4 minutes
- 1 slice of raisin bread: 3-4 minutes
- 1 slice of cinnamon swirl bread: 4-5 minutes
- 1 slice of Texas toast: 5-6 minutes
- 1 piece of French bread : 7-8 minutes
As you can see, the time it takes to toast bread in a toaster can vary greatly depending on the type and thickness of the bread. So, always start by checking your bread after a minute or two to see if it has reached your desired level of toasty-ness, and then continue toasting it for an additional minute or two if necessary. Enjoy!
How To Store Leftover Bread After Toasting In Toaster
If you have leftover bread after toasting it in a toaster, there are a few ways you can store it.
- One option is to place the bread in a zip-lock bag and put it in the fridge.
- You can also place the bread on a plate and cover it with plastic wrap or aluminum foil.
- Another option is to place the bread in a bread box or on a kitchen shelf.
Whichever way you choose, be sure to store the bread in a cool, dry place. If you do not store the bread properly, it may go stale or become moldy.
Benefits Of Toasting Bread In Toaster
Bread is a staple in many diets, and for good reasons. It’s versatile, filling, and relatively cheap. But some people avoid bread because they think it’s unhealthy. The truth is that bread can be part of a healthy diet when it’s toasted in a toaster.
Toasting bread in a toaster has several benefits:
It makes the bread easier to digest.
The carbohydrates in bread are broken down into sugars when they’re toasted, which makes them easier for your body to digest. This also means that the bread will release energy more slowly, so you’ll feel fuller longer.
It increases the antioxidant content of the bread.
Toasting bread increases the antioxidant content of the bread, which can help protect your body from disease.
It makes the bread taste better.
Bread that’s been toasted in a toaster taste better than plain bread. The toasting process caramelizes the sugars in the bread, which gives it a delicious, nutty flavor.
It’s a healthy way to add variety to your diet.
If you’re getting bored of eating plain old toast, try toasting it in a toaster instead. This will add variety to your diet and make your meals more interesting.
So next time you’re tempted to avoid eating bread, remember that you can make it healthier by toasting it in a toaster. Enjoy!
How To Clean A Toaster After Toasting Bread
After toasting bread in a toaster, it is important to clean the toaster in order to prevent the build-up of stale breadcrumbs and other debris. The following steps can be used to clean a toaster:
- Disconnect the toaster from the power source.
- Remove any loose crumbs or debris from the toaster using a brush or vacuum cleaner.
- If there are any stubborn crumbs or bits of burnt toast stuck inside the toaster, use a toothpick or chopstick to dislodge them.
- Wipe down the exterior of the toaster with a damp cloth.
- Reattach the power cord and plug it back in.
- Turn on the toaster and test it to make sure it is working properly.
If you follow these steps, your toaster should be clean and free of stale breadcrumbs and other debris.
How Long To Toast Bread In Toaster - FAQs
Toast is a classic breakfast food, and it’s easy to make in a toaster. But how long should you toast your bread for optimal results? Here are some FAQs about toasting bread in a toaster.
The time required to toast bread in a toaster varies depending on the type of bread and the toaster. However, most people find that 3-5 minutes is the ideal time for most types of bread.
It’s usually best not to try and toast different types of bread at the same time in a toaster, as they may not all cook evenly.
If your bread is burning or not being toasted evenly, try adjusting the time or the settings on your toaster. You may also need to adjust the distance between the bread and the heating elements.
There are a few ways to tell when toast is done. One way is to look for changes in color. The toast should start out light brown and then progress to a darker brown. Another way to tell if toast is done is to listen for changes in sound. The toast should start out sounding hollow and then progress to a cracklier sound as it cooks. Finally, you can also check the internal temperature of the toast with a food thermometer. It should be about 165 degrees Fahrenheit when it’s done.
If your toast burns or doesn’t come out right, there are a few things you can do. One thing you can try is to cook the toast for a little bit longer. If it’s still not done, you can try turning up the power on your toaster. If that doesn’t work, you can try cooking the toast in a toaster oven instead. Finally, if all else fails, you can just eat the toast that comes out of the toaster, even if it’s not perfect. It’s still better than no toast at all!
The best way to toast bread in a toaster is by placing it on the top rack and setting it to the highest setting.
Yes, you can use frozen bread to make toast in a toaster. Just be sure to place it on the bottom rack and set the toaster to a lower setting. This will help ensure that your bread doesn’t get too brown or burnt.
Yes, you can put multiple pieces of bread in a toaster at once. Just be sure to place them on the bottom rack and set the toaster to a lower setting. This will help ensure that your bread doesn’t get too brown or burnt.
If your toast gets stuck in the toaster, try using a fork or metal spatula to pry it out. Be careful not to get burned. If that does not work, you may need to unplug the toaster and take it apart to remove the toast.
If your toast keeps getting burnt, you may need to adjust the settings on your toaster. You may also need to check to make sure that the bread is not too thick or too moist.
There are many types of bread that can be toasted in a toaster, including white bread, wheat bread, rye bread, and even bagels. However, some types of bread may not work well in all toasters, so it’s important to check the manufacturer’s instructions before trying to toast something new.
No, you don’t need to use margarine or butter on your bread when you toast it. However, some people like to add a layer of spreadable fat to their bread before toasting it in order to add flavor and ensure that the bread stays moist.
In general, it’s safe to put anything else in your toaster besides bread. However, it’s important to check the manufacturer’s instructions for any specific items that you plan to toast. For example, some toasters can’t handle thick slices of fruit or vegetables, so it’s best not to try those items.
If your bread doesn’t want to pop up after you’ve toasted it, there are a few things that you can do. First, check the manufacturer’s instructions to see if there is a specific way that your particular toaster should be used. If there isn’t any guidance given, try lifting the lever on your toaster and popping the bread out manually. If that still doesn’t work, then you may need to unplug your toaster and let it cool down before trying again.
You should wait at least two minutes before trying to toast another piece of bread. This will give the toaster enough time to cool down so that you do not end up with a burnt piece of bread.
It’s not recommended to store your toasted bread in the fridge. The best way to keep your toast fresh is to place it in a sealed container or bag. This will help to keep the bread moist and prevent it from going stale.
Conclusion
In conclusion, there are a few things you need to know about toasting bread in a toaster. For one, the amount of time you need to cook it will vary depending on the thickness and power of your toaster. You can also tell when toast is done by looking for changes in color, listening for changes in sound, or checking the internal temperature with a food thermometer.
If your toast burns or doesn’t come out right, there are a few things you can try before giving up. So don’t worry – even if your toast isn’t perfect every time, it’s still better than no toast at all!
Read more:
- Steamed Ribs With Glutinous Rice
- How to make steamed tofu in bamboo steamer
- How to make mango sticky rice in bamboo steamer
- Strawberry Chocolate Mousse Cake
- How to make Red Velvet cake
- Valentine cake
- Valentine gift for husband
- Valentine gift for wife
- Best Amazon winter sale
- How to find the best turkey roasting pan
Related Posts

Best 2 Slice Toasters That Will Make Your Life Easier
If you are like most people, you rely on your...
Read More
What Is The Best 4 Slice Toaster On The Market?
If you are in the market for a new toaster,...
Read More
Best Long Slot Toaster That Will Make Breakfast a Breeze
A toaster is an appliance that is used to heat...
Read More Post Views: 1,282
Why Trust Us
You will find what you are looking for at Jody's Bakery. From classic to luxury brands, you'll find both. We will help you to select appliances that fit your needs, budget and lifestyle. Whether you want to stop by to learn more — or plan to make a major purchase — we’ll treat you like family and assist you every step of the way. Shop with us today to receive friendly and experienced help along the way.


Appreciate it for this post, I am a big big fan of this internet site would like to continue updated.