
It is universally accepted that stand mixer are the essential kitchen appliance. Whether mashing creamy potatoes, kneading homemade bread, grinding meats, or mixing cookie dough, the stand mixer is necessary for avid bakers. However, despite its numerous benefits, an average stand mixer can become quite filthy, especially when working with sticky dough, greasy butter, and melted chocolate and cheese.
This is one of the reasons why it requires proper care and maintenance. It would be best if you learned how to clean a stand mixer properly to prevent any possible damage that can be caused when it accumulates grease, oil, and other residues. When these residues are not cleaned off, they can build up and clog your mixer’s inner parts, making your food ingredients hard to come out of and can even damage the device permanently.
To ensure that your stand mixer remains in peak operating condition for years to come, follow these cleaning guidelines.
How To Clean a Stand Mixer
Things needs to prepare:
- Baking Soda
- Dish soap
- Cloth made of microfiber or cotton
- A small scrub brush is used for cleaning.
- A toothpick or a pipe cleaner will suffice.
Step by step how to clean a stand mixer
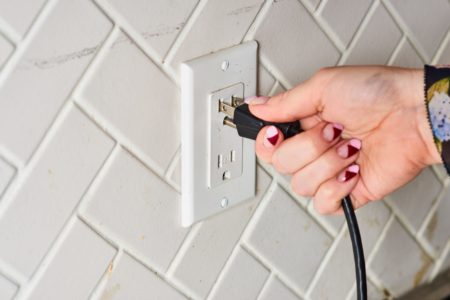
Unplug the appliance from the wall outlet. Before cleaning an appliance, make sure it is unplugged.
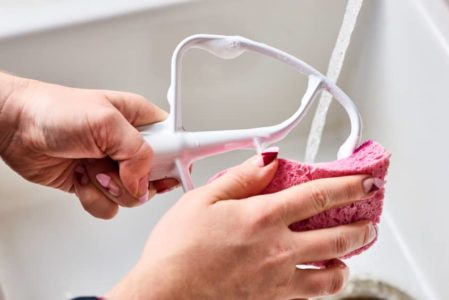
Attachments should be hand-washed. In warm, soapy water, wash beaters, hooks, and pouring shield. Always completely dry attachments before storing or using them.
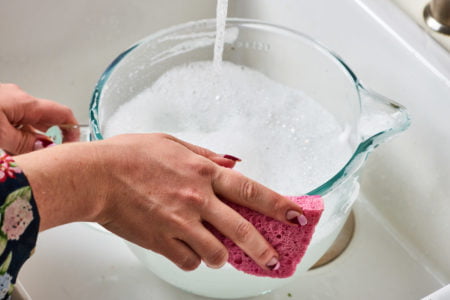
Disinfect the mixing bowl. In hot, soapy water, wash the mixing bowl or place it in a dishwasher load. If your mixer is permanently installed on the counter, take the extra time to clean the bowl with stainless steel cleaner to remove any water spots or blemishes.
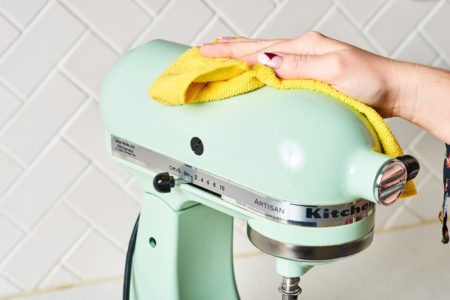
Immediately clean up spills, splatters, and food residue. Wipe down the stand after each use with a damp cloth or mild cleaner. Take care not to allow liquids to leak into ventilation ports or around knobs and levers. Pay close attention to areas near the motorhead, such as the speed control knob and locking lever — ingredients accumulate in these areas when the motor is used frequently.
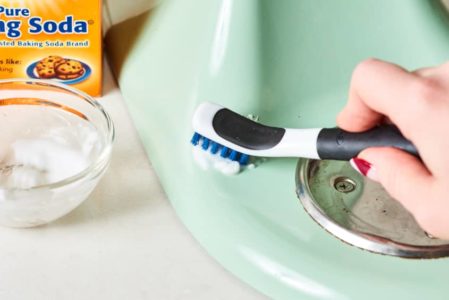
Baking soda can be used to scrub challenging areas. Scrub grime or food residue with a small brush and a water-baking soda solution, attention to particularly stubborn areas such as the speed control strip or bowl clamp plate.
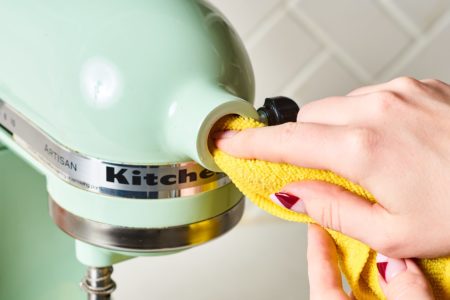
Wipe the interior of the attachment hub. Disconnect the attachment hub plate and thoroughly clean the interior.
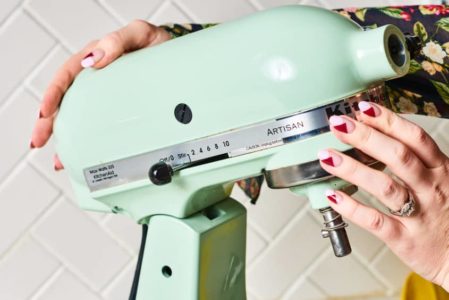
To clean the area beneath the motor head (including the beater shaft), tilt the motorhead back and secure it in place.
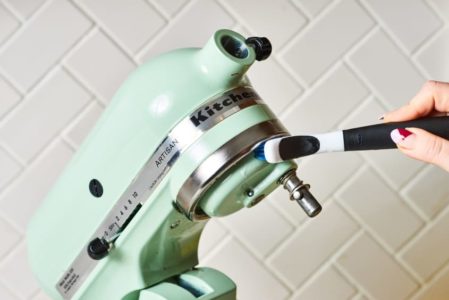
Thoroughly clean the beater shaft. Both the shaft and the clip that surrounds it collects many fine ingredients and must be thoroughly cleaned. Remove the flour and other ingredients with a paper towel or small brush.
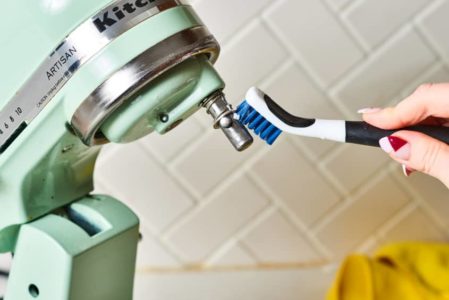
Keep an eye on the build-up. The back of the motorhead casing’s rim collects dust and grime that may go unnoticed. The lipped area beneath the motor head and the rim of the bowl clamping plate, and any exposed screws are prime locations for splatters and food residue. Remove grime and residue with a Q-tip or small brush.
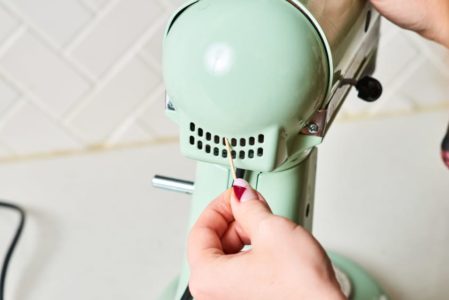
Clean the ventilation shaft of crumbs and dust. Remove crumbs and dust from the ventilation shaft using a toothpick, specialty brush, or vacuum. This area should always be free of obstructions to ensure your mixer performs optimally.
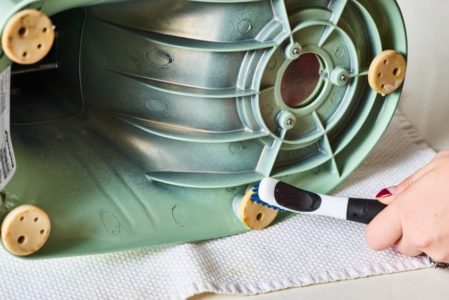
Dust and clean the area beneath. Turn the mixer on its side to clean the appliance’s underside. Sanitary appliance footpads with a small brush or paper towel and a mild cleanser.
Tips & Warning
- A toothbrush is an indispensable tool for cleaning difficult-to-reach areas on attachments and mixers. To remove caked-on food, use a toothbrush with firm bristles.
- Never submerge the stand mixer in water. Only the removable attachments, the bowl, and the blender attachments can be washed safely. If you immerse the mixer in water, the motor could be damaged.
- Use caution when cleaning the surface area with any liquid. Water or cleaning products that enter the area around levers or ventilation ports can harm the motor. Instead, use a damp cloth.
- Never clean your mixer with spray cleaners or soaking-wet towels. Even small amounts of water can cause damage to the mixer’s head motor.
- Unplug the stand mixer immediately after use, even if you are not yet ready to wash it. Mixers can be dangerous for small children, who can injure their fingers if they contact moving attachments.
How often should a stand mixer be cleaned
It’s essential to thoroughly clean your bowl and attachments after extended periods of using your stand mixer. If you’re making macarons or meringues, there’s no benefit to leaving in dust, as your mix will either fail to rise or form stiff peaks in the presence of dust in your bowl.
Clean the vents of the stand mixer every month with a cotton swab or toothbrush. This venting system allows airflow to the motor and is crucial for getting the best mixing results. To get the dust off of hard-to-reach surfaces, dip a dry swab or brush into warm water with a few drops of baking soda. Scrub the surface until it is clean. In case your build-up is getting too hard, you can always fix it with a toothpick.
Bear in mind that these vents provide direct access to the mixer’s motor; therefore, make sure that no water seeps into them. The cotton swab or toothbrush should be dampened, not soaked, in the water-baking soda solution.
How To Clean a Stand Mixer - FAQs
Lorem ipsum dolor sit amet, consectetur adipiscing elit. Ut elit tellus, luctus nec ullamcorper mattis, pulvinar dapibus leo.
You can clean debris around the mixer head’s knobs with a dry toothbrush or a specialty kitchen brush. Once the dirt has been brushed away, wipe the knobs with a damp cloth. Reverse the mixer head and tap the underside clean with a damp cloth.
Avoid immersing the mixer in water. Only the removable attachments, the bowl, and the blender attachments are dishwasher safe. If the mixer is submerged in water, the motor may be damaged. Unplug the electric mixer immediately after use, even if you are not yet ready to wash it.
To create a paste, combine equal parts water and baking soda and apply it directly to the container. Allow the paste to dry for approximately 15 minutes before scrubbing with warm water.
Conclusion
These are the steps to cleaning your ideal stand mixer. Stand mixers are a handy tool to assist us quite well with our kitchen projects, and they are pretty simple to clean.
If you want to use your device safely for an extended period, you must clean it regularly. Utilizing the device safely is also critical for its maintenance. Therefore, before using a machine, you should attempt to understand its advantages and disadvantages. These will also assist you in maintaining and comprehending the specifications of your device.
Why Trust Us
You will find what you are looking for at Jody's Bakery. From classic to luxury brands, you'll find both. We will help you to select appliances that fit your needs, budget and lifestyle. Whether you want to stop by to learn more — or plan to make a major purchase — we’ll treat you like family and assist you every step of the way. Shop with us today to receive friendly and experienced help along the way.


… [Trackback]
[…] Read More on that Topic: jodysbakery.com/how-to-clean-a-stand-mixer-properly/ […]
… [Trackback]
[…] Find More here to that Topic: jodysbakery.com/how-to-clean-a-stand-mixer-properly/ […]
… [Trackback]
[…] Read More on to that Topic: jodysbakery.com/how-to-clean-a-stand-mixer-properly/ […]
… [Trackback]
[…] Find More to that Topic: jodysbakery.com/how-to-clean-a-stand-mixer-properly/ […]
… [Trackback]
[…] Read More here to that Topic: jodysbakery.com/how-to-clean-a-stand-mixer-properly/ […]
… [Trackback]
[…] Read More to that Topic: jodysbakery.com/how-to-clean-a-stand-mixer-properly/ […]
… [Trackback]
[…] Find More Information here on that Topic: jodysbakery.com/how-to-clean-a-stand-mixer-properly/ […]
… [Trackback]
[…] There you will find 18547 more Info on that Topic: jodysbakery.com/how-to-clean-a-stand-mixer-properly/ […]
… [Trackback]
[…] Find More to that Topic: jodysbakery.com/how-to-clean-a-stand-mixer-properly/ […]
… [Trackback]
[…] Read More Information here to that Topic: jodysbakery.com/how-to-clean-a-stand-mixer-properly/ […]
… [Trackback]
[…] Read More Information here to that Topic: jodysbakery.com/how-to-clean-a-stand-mixer-properly/ […]
… [Trackback]
[…] Info to that Topic: jodysbakery.com/how-to-clean-a-stand-mixer-properly/ […]
… [Trackback]
[…] Find More here on that Topic: jodysbakery.com/how-to-clean-a-stand-mixer-properly/ […]