Cake pop maker recipes are a collection of delightful and...
Read More
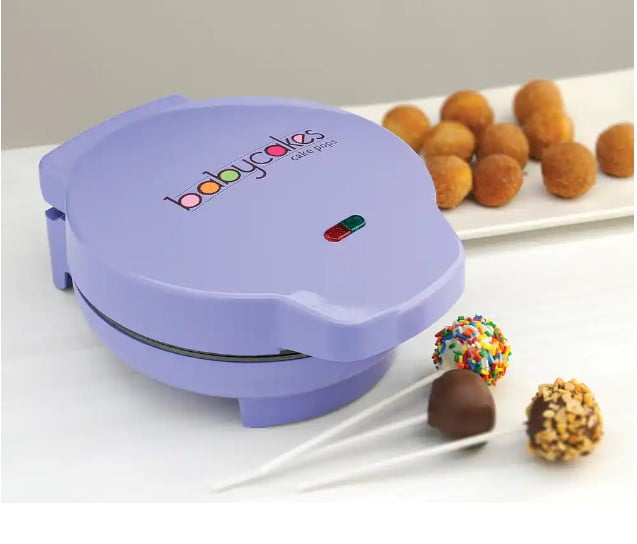
A cake pop maker is a compact kitchen appliance that allows you to easily make cake pops, a popular and delightful dessert. Cake pops are small, round cakes that are mounted on sticks, resembling lollipops. They are not only delicious but also visually appealing, making them a hit at parties, birthdays, and other special occasions.
The cake pop maker typically consists of a heating element, a non-stick baking plate with several cavities, and a handle or lid for easy operation. The baking plate has molds in the shape of spheres, perfect for forming the cake pops. By pouring the cake batter into the molds and closing the lid, the cake pops are cooked and shaped simultaneously.
Using a cake pop maker offers several advantages over traditional baking methods. Firstly, it provides a quicker and more convenient way to make cake pops, as the machine ensures consistent heating and cooking throughout. It also eliminates the need for using an oven or shaping the cake pops by hand, saving time and effort. Additionally, the non-stick surface of the baking plate makes it easier to release the cake pops without sticking.
Cake pop makers come with various features and options. Some models offer adjustable temperature settings, allowing you to control the level of browning or adjust for different cake recipes. Others may have indicator lights or timers to help you monitor the cooking process. Additionally, cake pop makers often come with accessories like sticks, molds, and decorating tools, enhancing your creativity in making and decorating the pops.
In summary, a cake pop maker is a convenient and fun kitchen appliance that simplifies the process of creating delicious and eye-catching cake pops. Whether you’re a seasoned baker or just starting, a cake pop maker can be a great addition to your kitchen, providing endless possibilities for creating delightful treats for yourself, family, and friends.
Are cake pops still popular?
Cake pops continue to be a popular treat, although their popularity may vary depending on location, trends, and personal preferences. Here are a few reasons why cake pops remain popular:
- Appealing Presentation: Cake pops are visually appealing and can be customized to match various themes, events, or holidays. Their small, round shape on a stick makes them eye-catching and perfect for displays or party favors.
- Versatility: Cake pops offer endless possibilities for creativity and customization. They can be made in different flavors, colors, and designs, allowing bakers to showcase their artistic skills and create unique treats.
- Portion Control: The individual size of cake pops makes them a convenient option for portion control. They provide a small, satisfying sweet treat without the commitment of consuming an entire slice of cake.
- Popularity at Events: Cake pops are often featured at events such as weddings, birthdays, baby showers, and corporate gatherings. Their bite-sized nature and convenient stick make them a popular choice for dessert tables and party favors.
- Fun and Interactive: Making and decorating cake pops can be a fun activity for both kids and adults. It offers an opportunity to engage in a hands-on baking experience and get creative with different flavors, coatings, and decorations.
- Shareability: Cake pops are easily shareable and can be enjoyed individually or as part of a dessert spread. They make for great treats to bring to potlucks, parties, or as gifts for friends and family.
While cake pops have been around for several years, their popularity may fluctuate as new dessert trends emerge. However, their versatility, aesthetic appeal, and bite-sized nature contribute to their enduring popularity in the baking and confectionery world.
Is it expensive to make cake pops?
The cost of making cake pops can vary depending on several factors, such as the ingredients you use, the decorations, and the quantity you plan to make. Here are some considerations regarding the expenses involved:
- Cake Mix and Ingredients: Using a cake mix can be a cost-effective option for making the cake base of your cake pops. Cake mixes are generally affordable and readily available in stores. However, if you prefer to make the cake from scratch, the cost may be slightly higher, as it will require purchasing individual ingredients like flour, sugar, eggs, and flavorings.
- Additional Ingredients: Apart from the cake base, you may need additional ingredients like frosting or binder to combine with the cake crumbs and create the cake pop mixture. The cost of these ingredients can vary depending on whether you choose to make your own frosting or purchase pre-made frosting. Homemade frosting tends to be more cost-effective.
- Decorations: Decorating cake pops is where you can get creative and personalize them according to your preference. The cost of decorations, such as candy melts, sprinkles, edible glitter, or colored sugar, can vary depending on the brand and quantity you choose. It’s possible to find budget-friendly options or utilize decorations you already have at home to keep costs down.
- Sticks and Packaging: Cake pops are often served on sticks, which can be purchased in bulk at a relatively low cost. Additionally, if you plan to gift or transport the cake pops, you might need packaging materials like treat bags, ribbons, or styrofoam blocks. These packaging elements can contribute to the overall cost.
Overall, making cake pops can be an affordable treat, especially when prepared in bulk. It allows you to control the ingredients and customize the flavors and decorations according to your budget and preferences. By comparing prices, utilizing discounts or sales, and being resourceful with decorations, you can keep the expenses of making cake pops at a reasonable level.
Are cake pops more expensive than cupcakes?
The cost of cake pops compared to cupcakes can vary depending on several factors. Here are a few considerations to keep in mind:
- Ingredients: Both cake pops and cupcakes require similar ingredients such as flour, sugar, eggs, and flavorings for the cake base. However, the difference lies in the preparation and presentation. Cake pops typically require additional ingredients like frosting or binder to combine with the cake crumbs, as well as candy melts and decorations for coating and decorating. Cupcakes, on the other hand, usually require frosting or icing and can be decorated with various toppings. The cost of these additional ingredients can impact the overall price.
- Labor and Time: Cake pops generally require more labor-intensive preparation compared to cupcakes. Making cake pops involves baking the cake, crumbling it, mixing it with frosting, shaping the pops, and coating and decorating each individual cake pop. Cupcakes, while still requiring baking and frosting, are typically easier and faster to prepare and decorate in larger quantities. The additional time and effort involved in making cake pops can potentially affect the price, especially if you’re purchasing them from a bakery or cake pop vendor.
- Presentation and Customization: Cake pops are often considered more visually appealing and can be customized in various creative ways. They are individually shaped, placed on sticks, and can be decorated with intricate designs, colors, and toppings. This level of customization can contribute to a slightly higher price compared to standard cupcakes, which are typically presented in cupcake liners and may have simpler decorations.
- Size and Quantity: The size and quantity of cake pops and cupcakes can also influence the cost. Cake pops are generally smaller than regular cupcakes, which means you might need more of them to satisfy the same number of people. The price per piece or per serving can vary based on the size and quantity of the treats.
Overall, it’s challenging to make a definitive statement about whether cake pops are more expensive than cupcakes. The cost will depend on factors like ingredients, decorations, labor, and the specific vendor or bakery you choose. It’s recommended to compare prices and options from different sources to determine which option aligns with your budget and preferences.
What else can I use a cake pop maker for?
While a cake pop maker is primarily designed for making cake pops, there are a few other creative uses for this versatile kitchen appliance. Here are a few ideas:
- Donut Holes: Instead of making cake pops, you can use the cake pop maker to create bite-sized donut holes. Simply prepare a donut batter, pour it into the molds, and let the machine do its magic. Once cooked, you can roll the donut holes in powdered sugar, cinnamon sugar, or glaze them with your favorite toppings.
- Mini Pancakes: Use the cake pop maker to whip up mini pancakes that are perfect for breakfast or brunch. Prepare your pancake batter and pour it into the molds. Close the lid and allow the pancakes to cook. You can customize them by adding chocolate chips, blueberries, or other toppings of your choice.
- Savory Bites: The cake pop maker can also be used to make savory appetizers or snacks. Create bite-sized savory balls by making a savory batter or dough and filling the molds. This works well with ingredients like cheese, meat, vegetables, or even falafel mix. Experiment with different flavors and create your own savory delights.
- Brownie Bites: If you’re a fan of brownies, the cake pop maker can be a fun way to make mini brownie bites. Prepare your brownie batter and pour it into the molds. Cook the brownies until they’re firm and fully cooked. Once cooled, you can enjoy these bite-sized treats with or without a stick.
- Cookie Dough Balls: Make cookie dough balls with your cake pop maker for a quick and easy dessert. Prepare your favorite cookie dough recipe, roll the dough into small balls, and place them in the molds. Close the lid and let them cook until they’re golden brown. You’ll have delicious, bite-sized cookies in no time.
Remember to adjust the cooking time and temperature based on the specific recipe you’re using and the ingredients you’re working with. The possibilities are endless, so feel free to get creative and experiment with different flavors and combinations using your cake pop maker.
What is pros and cons of cake pop maker?
Pros:
- Convenience: A cake pop maker offers convenience by streamlining the baking process. It allows you to cook multiple cake pops at once, saving time compared to baking them individually in the oven.
- Consistent Results: With a cake pop maker, you can achieve consistent results in terms of size, shape, and texture. The molds are designed to create evenly cooked cake pops, reducing the chances of undercooked or overcooked ones.
- Ease of Use: Cake pop makers typically come with non-stick molds and easy-to-use controls, making them beginner-friendly. They eliminate the need for shaping and rolling cake balls by hand, simplifying the process.
- Versatility: Some cake pop makers can be used for other purposes, such as making donut holes or savory bites. This versatility allows you to experiment with different recipes and expand your baking options.
Cons:
- Limited Capacity: Most cake pop makers have a limited capacity, allowing you to make a few cake pops at a time. This can be a drawback if you need to bake large quantities for a party or event, as it may require multiple batches.
- Additional Appliance: Owning a cake pop maker means adding another appliance to your kitchen. If you have limited storage space or a crowded kitchen, it may be inconvenient to accommodate another item.
- Specialized Use: A cake pop maker is designed specifically for making cake pops. If you don’t frequently make cake pops or prefer the traditional baking method, the cake pop maker may have limited use in your kitchen.
- Cost: Cake pop makers come in a range of prices, and some models can be expensive compared to other baking tools. The cost may be a deterrent if you’re on a tight budget or if you don’t see yourself using the cake pop maker frequently.
- Cleaning and Maintenance: Like any kitchen appliance, a cake pop maker requires cleaning and maintenance. Depending on the design, the molds and surfaces may be more challenging to clean than traditional baking pans.
When considering a cake pop maker, weigh the convenience, consistent results, and ease of use against the limited capacity, additional appliance in your kitchen, and cost. Assess your baking preferences, frequency of making cake pops, and available space to determine if a cake pop maker is a worthwhile investment for you.
5 best cake pop maker to buy
Here are five cake pop makers that were well-regarded:
- Babycakes Cake Pop Maker: Babycakes is a popular brand known for their cake pop makers. Their models are compact, easy to use, and produce evenly cooked cake pops. They often come with non-stick plates for easy release and clean-up.
- Nordic Ware Cake Pop Pan: Nordic Ware offers a cake pop pan that allows you to bake cake pops in the oven. It features durable construction and provides a larger capacity than some other cake pop makers. The pan is designed with molds to create perfectly round cake pops.
- BELLA Cake Pop and Donut Hole Maker: BELLA is another brand that offers a versatile cake pop maker. Their models often come with interchangeable plates, allowing you to make both cake pops and donut holes. They are compact and efficient for baking small treats.
- Holstein Housewares Cake Pop Maker: Holstein Housewares produces cake pop makers that are well-liked for their reliability and ease of use. They often feature indicator lights, non-stick coating, and a compact design. Holstein Housewares models are generally affordable and produce consistent results.
- Cuisinart Cake Pop Maker: Cuisinart is a trusted brand known for its kitchen appliances, including cake pop makers. Their models offer features like adjustable temperature control, non-stick baking plates, and indicator lights. Cuisinart cake pop makers are typically well-built and user-friendly.
When considering any specific product, I recommend checking customer reviews, comparing prices, and reviewing the features and specifications to determine which cake pop maker best suits your needs and preferences.
Factors when choosing the best cake pop maker
When choosing the best cake pop maker for your needs, consider the following factors:
- Capacity: Determine how many cake pops you want to make at once. Cake pop makers typically have a specific capacity, ranging from a few cake pops to larger batches. Choose a size that suits your baking needs and the quantity you plan to make.
- Quality and Durability: Look for a cake pop maker made from durable materials that can withstand repeated use. Read reviews or check the reputation of the brand to ensure you’re investing in a reliable and long-lasting product.
- Non-Stick Surface: A non-stick surface is essential to easily release the cake pops and facilitate cleaning. Ensure the cake pop maker has a non-stick coating or non-stick molds for hassle-free removal of the cake pops.
- Temperature Control: Opt for a cake pop maker that provides temperature control options. Adjustable temperature settings allow you to customize the cooking process and achieve the desired texture and doneness of the cake pops.
- Even Heat Distribution: Look for a cake pop maker that distributes heat evenly across all molds. This ensures that each cake pop cooks uniformly, preventing uneven browning or undercooked centers.
- Indicator Lights or Timer: Consider a cake pop maker that includes indicator lights or a built-in timer. These features help you monitor the cooking process and prevent overcooking or undercooking the cake pops.
- Versatility: If you desire versatility, choose a cake pop maker that can be used for other recipes or has interchangeable plates to make different treats like donut holes or savory bites. This allows you to expand your baking options.
- Size and Storage: Consider the size of the cake pop maker and whether it fits in your kitchen space. If you have limited storage space, choose a compact model that is easy to store when not in use.
- Ease of Cleaning: Look for a cake pop maker with removable and dishwasher-safe parts for easy cleaning. This saves time and effort when it comes to maintaining the appliance.
- Price: Set a budget for your cake pop maker and find a model that meets your requirements within that range. Compare prices, features, and customer reviews to ensure you’re getting the best value for your money.
Considering these factors will help you choose a cake pop maker that suits your specific needs and preferences, ensuring a satisfying baking experience.
How do you use cake pop maker?
To use a cake pop maker, follow these general steps:
- Preheat: Preheat the cake pop maker according to the manufacturer’s instructions. Most cake pop makers have an indicator light that turns on when it’s ready for use.
- Prepare the Batter: Prepare your cake batter according to your desired recipe. It should be thick enough to hold its shape but still pourable. Avoid overfilling the molds to prevent overflow during cooking.
- Grease the Molds: Lightly grease the cake pop maker’s molds with cooking spray or a small amount of oil. This helps prevent the cake pops from sticking to the surface.
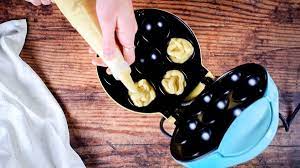
- Fill the Molds: Spoon or pour the cake batter into each mold cavity, filling it about two-thirds full. Be careful not to overfill, as the batter will expand during cooking. Wipe off any excess batter from the edges for a neater appearance.
- Close the Lid: Close the lid of the cake pop maker, ensuring it is securely latched. The heat from the machine will cook the batter, transforming it into cake pops.
- Cooking Time: The cooking time can vary depending on the cake pop maker and the recipe you’re using. Typically, it takes about 4 to 6 minutes for the cake pops to cook. However, it’s essential to refer to the manufacturer’s instructions for the specific cooking time recommended for your cake pop maker.
- Check for Doneness: After the suggested cooking time, open the lid slightly and check the cake pops for doneness. They should be firm to the touch and have a golden brown color. If they need more time, close the lid and cook them for a bit longer.
- Remove the Cake Pops: Once the cake pops are fully cooked, use a non-metallic utensil, such as a plastic or silicone spatula, to carefully remove them from the molds. Gently lift them out, ensuring not to scratch the surface of the cake pop maker.
- Cool and Decorate: Place the cake pops on a wire rack to cool completely. Once cooled, you can decorate them with frosting, candy melts, sprinkles, or any other desired toppings or decorations.
- Enjoy: Once decorated, the cake pops are ready to be enjoyed! Serve them as they are or display them in a cake pop stand or foam block for an attractive presentation.
Always refer to the specific instructions provided by the manufacturer of your cake pop maker for the most accurate and detailed guidance on its usage.
Why do some cake pops crack?
Cake pops can sometimes crack for a few reasons. Here are some common factors that can contribute to cracking:
- Cake Pop Mixture Consistency: The consistency of the cake pop mixture plays a crucial role in preventing cracking. If the mixture is too dry or crumbly, it may not hold together well and can result in cracks when shaping or coating the cake pops. On the other hand, if the mixture is too wet or sticky, it can cause the cake pops to sag or break apart during the process.
- Overmixing or Undermixing: When combining the crumbled cake with frosting or binder to create the cake pop mixture, it’s essential to achieve the right balance. Overmixing the mixture can make it too dense and prone to cracking. Conversely, undermixing can result in a loose mixture that doesn’t hold its shape properly, leading to cracks.
- Improper Shaping: Shaping the cake pop mixture into balls or other desired shapes requires gentle and even pressure. Applying excessive force or uneven pressure while shaping can cause cracks. It’s crucial to handle the mixture delicately and ensure it is evenly compacted without any air pockets, which can weaken the structure.
- Temperature Variations: Drastic temperature changes can cause cake pops to crack. For example, if the cake pops are too cold when dipped into melted candy coating or chocolate, the sudden temperature difference can lead to cracks. Similarly, if the cake pops are not cooled properly before coating, the temperature difference between the warm cake and the coating can cause cracks.
- Coating Technique: The way you coat the cake pops can also impact their tendency to crack. If the coating is too thick or uneven, it can create stress on the cake pop’s surface, resulting in cracks during drying. It’s important to apply a thin, even layer of coating and allow it to dry properly before adding additional layers or decorations.
To prevent cracking, ensure that you have the right consistency for your cake pop mixture, handle the mixture gently while shaping, and allow the cake pops to cool properly before coating. Additionally, pay attention to the coating technique and temperature control throughout the process. By taking these precautions, you can minimize the chances of your cake pops cracking and achieve smooth, beautifully finished treats.
How do you make cake pops that don't crack?
To make cake pops that don’t crack, here are some tips and techniques to follow:
- Cake Pop Mixture Consistency: Ensure your cake pop mixture has the right consistency. It should be moist enough to hold together but not too wet or crumbly. Start by adding a small amount of frosting or binder to the crumbled cake and gradually mix until the mixture can be easily shaped into balls without crumbling.
- Proper Shaping Technique: When shaping the cake pop mixture into balls or other shapes, apply gentle and even pressure. Avoid using excessive force, as it can cause cracks. Roll the mixture between your palms, making sure it’s evenly compacted without any air pockets.
- Temperature Control: Pay attention to temperature control throughout the process. Let the cake fully cool before crumbing it and combining it with the frosting. When dipping the cake pops into melted candy coating or chocolate, ensure they are at room temperature or slightly chilled. Avoid drastic temperature changes, as they can lead to cracks. Allow the coated cake pops to cool and set properly before handling or decorating further.
- Coating Technique: Properly coat the cake pops to create a smooth and even surface. Dip each cake pop into the melted coating and gently tap off any excess. Rotate the cake pop to ensure all sides are coated evenly. Use a spoon or toothpick to help remove any excess coating from the base. Allow the cake pops to dry upright, either by inserting them into a foam block or by placing them on a parchment-lined surface.
- Avoid Overhandling: Minimize excessive handling of the cake pops, as it can increase the risk of cracks. Once the cake pops are shaped and coated, avoid touching them too much. Excessive handling can create stress on the coating, causing cracks.
- Gradual Cooling: After coating, allow the cake pops to cool gradually at room temperature. Avoid placing them in the refrigerator immediately, as rapid temperature changes can lead to cracks. Once they are fully cooled and set, you can transfer them to the refrigerator if needed.
By following these tips and techniques, you can increase the chances of making cake pops that have a smooth and crack-free appearance. Remember that practice and patience are key, so don’t be discouraged if you encounter a few cracks along the way. With experience, you’ll develop a knack for creating beautifully finished cake pops.
How long do homemade cake pops last?
The shelf life of homemade cake pops can vary depending on several factors, including the ingredients used, storage conditions, and the presence of perishable components like frosting or fillings. Here are some general guidelines:
- Uncoated Cake Pops: Cake pops that are not coated or decorated can last for 2 to 3 days at room temperature when stored in an airtight container. Ensure they are kept in a cool, dry place away from direct sunlight, heat, or humidity. After a few days, the texture may become slightly dry, so it’s best to consume them within this time frame.
- Coated Cake Pops: Cake pops that are coated with candy melts, chocolate, or other coatings can have a longer shelf life. The coating acts as a protective layer, helping to seal in moisture and maintain freshness. When properly stored in an airtight container at room temperature, coated cake pops can last for up to a week or possibly longer.
- Refrigeration: If your cake pops have perishable fillings or frostings, such as cream cheese frosting or custard, it’s advisable to store them in the refrigerator. Refrigeration helps maintain their freshness and prevents the growth of bacteria. Typically, refrigerated cake pops can last for about 3 to 5 days.
- Freezing: If you want to extend the shelf life of your homemade cake pops, you can freeze them. Ensure the cake pops are completely cooled before freezing. Wrap each cake pop individually in plastic wrap or place them in airtight containers or freezer bags to prevent freezer burn and maintain their quality. Frozen cake pops can last for several weeks or even a few months. To thaw, simply let them come to room temperature before serving.
It’s important to note that the exact shelf life of homemade cake pops can vary depending on the specific recipe, ingredients, and storage conditions. Always use your judgment and inspect the cake pops for any signs of spoilage, such as mold, off odors, or unusual textures, before consuming them.
How do you dip cake pops perfectly?
Dipping cake pops perfectly requires some practice and attention to detail. Here’s a step-by-step guide to help you achieve smooth and even coating on your cake pops:
- Prepare Your Cake Pops: Ensure that your cake pops are chilled and firm before you begin dipping. It’s best to refrigerate them for at least 30 minutes or until they are well chilled. This helps the coating adhere better and prevents the cake pops from falling apart in the warm coating.
- Melt Your Coating: Melt your candy melts, chocolate, or coating of choice according to the instructions on the package. Use a microwave or a double boiler method to melt the coating gently, stirring frequently until it’s smooth and free of lumps.
- Dip the Stick: Dip the tip of a cake pop stick into the melted coating, then insert it into the center of a cake pop. This helps secure the stick in place and provides stability when dipping.
- Dip and Rotate: Hold the cake pop by the stick and gently dip it straight down into the melted coating until it’s fully submerged. Avoid stirring or swirling the cake pop in the coating, as it can cause it to fall off the stick or become uneven. Instead, let the excess coating drip off by gently tapping your wrist or rotating the cake pop at a slight angle.
- Remove Excess Coating: After dipping, carefully remove any excess coating from the base of the cake pop by gently tapping your wrist or using a toothpick or spoon to scrape off the excess coating. This will create a clean and smooth bottom.
- Let It Dry: Place the dipped cake pop upright into a foam block, cake pop stand, or a parchment-lined surface. Allow it to dry completely. Avoid touching or moving the cake pop during this time to prevent smudging or creating marks on the coating. You can also add sprinkles, edible decorations, or drizzle additional melted coating over the top while the coating is still wet.
- Finishing Touches: Once the coating is fully dry and set, you can add further decorations or details using icing, edible markers, or additional coatings. Decorate as desired to enhance the appearance of your cake pops.
Remember, practice makes perfect! It may take a few attempts to achieve the desired smooth and even coating on your cake pops. Take your time, be patient, and don’t hesitate to experiment with different techniques until you find the method that works best for you.
How to clean cake pop maker
Cleaning a cake pop maker is a relatively simple process. Here’s a step-by-step guide to help you clean your cake pop maker effectively:
- Unplug the Cake Pop Maker: Ensure that the cake pop maker is completely unplugged and has cooled down before starting the cleaning process. This is important for your safety and to avoid any damage to the appliance.
- Remove Removable Parts: If your cake pop maker has removable parts, such as the molds or cooking plates, carefully detach them according to the manufacturer’s instructions. Check the user manual if you’re unsure about the specific removal process.
- Wash the Removable Parts: Wash the removable parts with warm, soapy water. Use a gentle dishwashing liquid and a soft sponge or cloth to scrub away any residue or grease. Avoid using abrasive materials or harsh cleaners that could damage the non-stick coating.
- Rinse Thoroughly: After washing, rinse the removable parts under running water to remove any remaining soap or debris. Ensure that all soap residue is removed to maintain the taste and quality of future batches of cake pops.
- Dry the Parts: Once rinsed, pat the removable parts dry with a clean towel or let them air dry completely before reassembling the cake pop maker. Ensure that all parts are completely dry to prevent any moisture from causing damage or rust.
- Clean the Exterior: Wipe the exterior of the cake pop maker with a damp cloth or sponge to remove any spills, stains, or grease. For stubborn stains, you can use a mild kitchen cleaner or a paste made of baking soda and water. Be sure to wipe off any residue and dry the exterior afterward.
- Reassemble the Cake Pop Maker: Once all the parts are clean and dry, reassemble the cake pop maker according to the manufacturer’s instructions. Make sure everything is properly aligned and securely in place.
- Storage: If you’re not using the cake pop maker regularly, store it in a clean and dry place. Ensure that the appliance is completely cooled and the cord is neatly wrapped to avoid any tangling or damage.
Remember to always consult the user manual that came with your specific cake pop maker for any additional cleaning instructions or precautions recommended by the manufacturer.
How to maintain cake pop maker properly
Proper maintenance of a cake pop maker can help prolong its lifespan and ensure optimal performance. Here are some tips to maintain your cake pop maker properly:
- Read the Manual: Always read and follow the manufacturer’s instructions and guidelines specific to your cake pop maker. Familiarize yourself with the recommended maintenance practices provided in the user manual.
- Clean after Each Use: Clean the cake pop maker thoroughly after each use. Refer to the “How to Clean a Cake Pop Maker” section earlier in this conversation for detailed cleaning instructions. Removing any residue or grease promptly helps prevent buildup and maintain the appliance’s functionality.
- Avoid Abrasive Materials: Use gentle cleaning materials such as soft sponges or cloths when cleaning the cake pop maker. Avoid abrasive scrubbers or harsh cleaning agents that could damage the non-stick surface or other components of the appliance.
- Check the Cord: Regularly inspect the power cord for any signs of wear or damage. If you notice any fraying, cracks, or exposed wires, discontinue use and contact the manufacturer for guidance on how to replace or repair the cord.
- Store Properly: When not in use, store the cake pop maker in a clean, dry, and safe location. Ensure that it is cooled down completely before storing to prevent any moisture buildup. If your cake pop maker has removable parts, store them together with the main unit to keep everything organized.
- Avoid Excessive Heat: Keep the cake pop maker away from extreme heat sources or direct sunlight. High temperatures can damage the appliance or affect its performance. Additionally, avoid placing the cake pop maker near flammable materials or in close proximity to other appliances.
- Use the Proper Utensils: When removing cake pops or cleaning the cake pop maker, use non-metallic utensils to prevent scratching the surfaces. Plastic or silicone spatulas are ideal for gently lifting the cake pops or loosening any stuck-on batter.
- Regular Inspections: Occasionally inspect the cake pop maker for any signs of wear, loose parts, or malfunction. If you notice any issues, contact the manufacturer for troubleshooting or assistance. Avoid using a faulty or damaged cake pop maker to ensure your safety.
By following these maintenance practices, you can keep your cake pop maker in good condition and enjoy its performance for a long time. Remember to consult the specific instructions provided by the manufacturer for any additional maintenance recommendations or precautions.
Troubleshooting about cake pop maker
If you’re experiencing issues with your cake pop maker, here are some common troubleshooting tips:
- Uneven Cooking: If your cake pops are cooking unevenly, it could be due to inconsistent heat distribution. Make sure the cake pop maker is preheated properly before adding the batter. Also, check if the molds or cooking plates are clean and free from any debris that could hinder heat distribution. If the problem persists, try rotating the cake pop maker halfway through the cooking process to promote even cooking.
- Cake Pops Sticking to the Molds: If your cake pops are sticking to the molds, ensure that you’re properly greasing the molds before adding the batter. Use a cooking spray or a small amount of oil to lightly coat the molds. If the sticking persists, you can try using a silicone mold or adding a bit of flour or cocoa powder to the molds to create a barrier between the batter and the surface.
- Cracked Cake Pops: Cracking can occur if the cake pops are overcooked or the batter is too dry. Make sure you’re following the recommended cooking time for your cake pop maker and check the doneness of the cake pops during the cooking process to avoid overcooking. Additionally, ensure that your cake batter has the right consistency. If it’s too dry, try adding a bit more liquid (milk, water, or oil) to achieve a moist batter.
- Batter Overflow: If the batter is overflowing from the molds, you may be overfilling them. Follow the manufacturer’s instructions for recommended batter level or fill the molds about two-thirds full to leave room for expansion during cooking. Be cautious not to overfill, as this can lead to messy overflow.
- Power or Heating Issues: If your cake pop maker is not heating up or turning on, first check if it’s properly plugged into a functioning power outlet. Ensure that the power switch or button is in the “on” position. If it still doesn’t heat up, there may be an issue with the power cord or the appliance itself. Contact the manufacturer or refer to the user manual for further troubleshooting guidance.
- Unevenly Shaped Cake Pops: If your cake pops are coming out misshapen, it could be due to uneven batter distribution or overfilling of the molds. Ensure that you’re distributing the batter evenly among the molds and avoiding overfilling. Also, make sure you’re closing the lid tightly and securely to maintain the desired shape.
If you’ve tried these troubleshooting tips and are still experiencing issues with your cake pop maker, it’s advisable to refer to the manufacturer’s instructions or reach out to their customer support for further assistance.
Are cake pop makers worth it?
Whether a cake pop maker is worth it depends on your personal preferences, baking habits, and the level of convenience you seek. Here are some factors to consider when determining if a cake pop maker is worth the investment for you:
- Frequency of Use: If you plan to make cake pops regularly or for special occasions, a cake pop maker can be a convenient tool. It streamlines the baking process by cooking multiple cake pops at once and can save time compared to baking them in the oven individually. However, if you only make cake pops occasionally or don’t mind the traditional baking method, a cake pop maker may not be necessary.
- Versatility: Some cake pop makers can be used for other purposes, such as making donut holes or savory bites. If you appreciate the versatility and enjoy experimenting with different recipes, a cake pop maker can offer more options beyond just cake pops. Consider whether you would utilize this feature and if it adds value to your baking repertoire.
- Ease of Use: Cake pop makers are designed to simplify the process of making cake pops. They typically come with non-stick molds and easy-to-use controls. If you prefer a straightforward and hassle-free baking experience, a cake pop maker can be worth it. It eliminates the need for shaping and rolling cake balls by hand and can provide consistent results.
- Storage and Counter Space: Consider your available storage space and kitchen setup. If you have limited storage space or a crowded kitchen, adding another appliance may not be ideal. However, if you have enough room or if the cake pop maker’s compact size makes it easy to store, it can be a convenient addition to your baking tools.
- Cost: Evaluate the cost of the cake pop maker and compare it to your budget. Cake pop makers come in a range of prices, so consider the features, durability, and reputation of the brand when making your decision. If you believe the convenience and time-saving aspects outweigh the cost, it may be worth it for you.
Ultimately, the worth of a cake pop maker depends on how much you enjoy making cake pops, the convenience it offers, and your willingness to invest in specialized baking equipment. Consider your baking preferences and habits to determine if a cake pop maker aligns with your needs and adds value to your baking endeavors.
Related Posts
How do you use a mini cake pop maker?
A mini cake pop maker is a compact kitchen appliance...
Read MoreWhy Trust Us
You will find what you are looking for at Jody's Bakery. From classic to luxury brands, you'll find both. We will help you to select appliances that fit your needs, budget and lifestyle. Whether you want to stop by to learn more — or plan to make a major purchase — we’ll treat you like family and assist you every step of the way. Shop with us today to receive friendly and experienced help along the way.


