Disclaimer: There are affiliate links in this post. At no cost to you, I get commissions for purchases made through links in this post.

What is the best blender for grinding grains?

Blender is a kitchen appliance that can be used for grinding grains. It is a versatile device that can be used to blend, mix, puree, and grind various food items. A blender consists of a motorized base, a container, and a blade assembly. The motorized base powers the blade assembly, which can be used to grind grains into fine powder.

Blenders can be used to grind various grains, including rice, wheat, oats, and barley. The process of grinding grains in a blender is simple and straightforward. First, the grains are added to the container of the blender. Then, the blade assembly is attached to the container, and the motor is turned on. The blade assembly grinds the grains into a fine powder, which can then be used for various purposes, such as making flour, baking, or cooking.

Blenders come in different sizes and types, and some models are specifically designed for grinding grains. These models usually have more powerful motors and specialized blades that are optimized for grinding grains. Some blenders also come with additional features, such as multiple speed settings and pulse options, which can be useful for achieving the desired texture when grinding grains.

Overall, blenders are a convenient and efficient tool for grinding grains, and they can be used in a variety of recipes to create delicious and nutritious meals.

What is the best blender for grinding grains?

There are several blenders on the market that are suitable for grinding grains, and the best one for you will depend on your specific needs and budget. Here are some factors to consider when choosing a blender for grinding grains:

  • Motor power: Look for a blender with a powerful motor (at least 1000 watts) as this will ensure that it can handle tough grains like rice and wheat.
  • Blade quality: A high-quality blade assembly with sharp blades is essential for grinding grains. Stainless steel blades are preferable as they are durable and resistant to rust.
  • Container size: The size of the container will determine how much grain you can grind at once. Choose a blender with a large container if you plan on grinding large batches of grains.
  • Ease of use: A blender with simple controls and easy-to-clean components will make the grinding process more efficient and convenient.

Based on these factors, some of the best blenders for grinding grains include:

  1. Vitamix 7500: This blender has a powerful 2.2 horsepower motor, high-quality stainless steel blades, and a large 64-ounce container.
  2. Blendtec Total Classic Original Blender: This blender has a powerful 1560-watt motor, six pre-programmed cycles, and a large 75-ounce container.
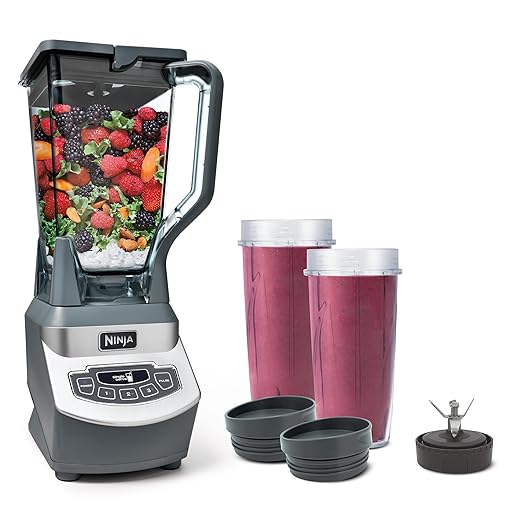
  3. Ninja Mega Kitchen System: This blender has a 1500-watt motor, a 72-ounce container, and includes additional attachments for food processing and blending.
  4. KitchenAid KSB1575ER Blender: This blender has a 550-watt motor, stainless steel blades, and a 60-ounce container.

These are just a few of the top blenders for grinding grains, and there are many other options available on the market. Be sure to consider your specific needs and budget when choosing a blender for grinding grains.

Can you use a blender to grind grains?

Yes, you can use a blender to grind grains. Blenders are versatile kitchen appliances that can be used for a variety of tasks, including grinding grains into flour. However, it is important to note that not all blenders are created equal, and some models may not be powerful enough or equipped with the right type of blade to effectively grind grains.

To grind grains in a blender, simply add the grains to the container of the blender, attach the blade assembly, and turn on the motor. It is important to start on a low speed and gradually increase the speed to prevent overheating and ensure that the grains are ground evenly.

It is also important to keep in mind that different types of grains may require different grinding times and speeds. For example, wheat and rice may require longer grinding times than oats or quinoa.

Overall, a blender can be a convenient and cost-effective option for grinding grains, especially for small batches. However, if you plan to grind grains frequently or in larger quantities, it may be worth investing in a high-quality blender specifically designed for grinding grains to ensure optimal results.

Is a grinder better than a blender?

Whether a grinder or blender is better for grinding grains depends on the specific type of grain and the desired result.

Grinders are specifically designed to grind grains and other hard materials into fine powders. They typically have burrs or blades that are specifically designed for grinding grains, and they often have adjustable settings that allow you to control the fineness of the grind. Grinders tend to produce a more uniform grind and can handle large quantities of grains, making them a great option for making flour.

On the other hand, blenders are more versatile kitchen appliances that can be used for a variety of tasks, including grinding grains. However, not all blenders are created equal, and some may not be powerful enough or equipped with the right type of blade to effectively grind grains. Additionally, blenders may not produce as fine of a grind as a grinder, which could be an issue for certain recipes.

Overall, if you plan to grind grains frequently and want to make fine flour, a grinder may be a better option. However, if you only need to grind grains occasionally or want a versatile kitchen appliance that can be used for multiple tasks, a blender could be a more practical choice.

Which machine is used to grind grain?

A machine used to grind grains is called a grain grinder or grain mill. Grain grinders are specialized machines that are designed to grind grains into flour, and they come in various shapes, sizes, and types depending on the specific grain being ground and the desired result.

Some common types of grain grinders include:

  1. Stone burr mills: These traditional grain grinders use two circular stones – one stationary and one rotating – to grind grains into flour.
  2. Impact mills: These grain grinders use high-speed rotating blades or hammers to crush grains into flour.
  3. Electric burr mills: These modern grain grinders use two plates with sharp metal burrs to grind grains into flour.
  4. Manual grinders: These grain grinders are operated by hand and use a variety of mechanisms, such as a crank or a handle, to grind grains into flour.

Overall, grain grinders are a great option for those who want to grind grains into flour regularly and in large quantities. They can produce a consistent and fine grind, making them ideal for baking and cooking applications. However, if you only need to grind grains occasionally or in small quantities, a blender or food processor may be a more practical choice.

What can I use to grind grains?

There are several options for grinding grains, depending on the amount you need to grind and the type of equipment you have available. Here are some common ways to grind grains:

  1. Grain grinder or mill: A grain grinder or mill is a specialized machine designed for grinding grains into flour. These machines use different methods to grind grains, including stone burrs, metal burrs, or high-speed rotating blades or hammers.
  2. Blender or food processor: A blender or food processor can be used to grind grains, but not all models are powerful enough to handle the task. You may need to grind the grains in small batches, and the resulting flour may not be as fine as flour produced by a grain grinder.
  3. Mortar and pestle: A mortar and pestle is a traditional tool used to grind grains, herbs, and spices. It is best for small quantities and may require some effort to achieve a fine grind.
  4. Coffee grinder: A coffee grinder can be used to grind grains, but it is important to clean it thoroughly to avoid any residual coffee flavor. It may also produce a coarser grind than a grain grinder.
  5. Rolling pin: A rolling pin can be used to crush grains into smaller pieces, but it is not suitable for making flour.

Ultimately, the method you choose to grind grains will depend on the amount you need to grind, the equipment you have available, and the desired result. A grain grinder or mill will produce the finest and most consistent results, but a blender, food processor, or mortar and pestle can also be effective for small quantities or occasional use.

Can I use a blender instead of a grain mill?

Yes, you can use a blender instead of a grain mill to grind grains, but there are some important considerations to keep in mind.

Blenders are not specifically designed for grinding grains, so they may not produce as fine of a grind as a grain mill, and they may also have difficulty processing large quantities of grains at once. Additionally, not all blenders are created equal, and some may not be powerful enough or equipped with the right type of blade to effectively grind grains.

If you do decide to use a blender to grind grains, here are some tips to help you achieve the best results:

  1. Use a blender with a powerful motor and sharp blades. A high-speed blender with stainless steel blades is ideal.
  2. Grind the grains in small batches to ensure even grinding and prevent overheating.
  3. Start on a low speed and gradually increase the speed to prevent overheating and ensure that the grains are ground evenly.
  4. Sift the flour through a fine-mesh strainer to remove any large pieces that were not ground.

Overall, using a blender to grind grains is a convenient and cost-effective option, especially for small batches. However, if you plan to grind grains frequently or in larger quantities, it may be worth investing in a high-quality grain mill specifically designed for grinding grains to ensure optimal results.

How do you grind whole grains at home?

Grinding whole grains at home can be done using a variety of methods, depending on the type of grain and the equipment you have available. Here are some general steps for grinding whole grains at home:

  1. Choose your grains: Select the type of grain you want to grind. Common whole grains include wheat, oats, barley, corn, and rice.
  2. Clean and dry the grains: Rinse the grains thoroughly to remove any dirt or debris, and then dry them completely. Moisture can cause the grains to clump together and make grinding difficult.
  3. Prepare your equipment: Depending on the type of equipment you are using, you may need to adjust the settings or attach specific blades. For example, if you are using a grain mill, you may need to adjust the coarseness of the grind and ensure that the mill is properly lubricated. If you are using a blender or food processor, you may need to use a specific blade attachment or grind the grains in small batches.
  4. Grind the grains: Once your equipment is ready, begin grinding the grains. Follow the manufacturer’s instructions for your specific equipment, and make sure to grind the grains to the desired fineness.
  5. Sift the flour: After grinding the grains, sift the flour through a fine-mesh strainer to remove any large pieces that were not ground.
  6. Store the flour: Store the freshly ground flour in an airtight container in a cool, dry place. Freshly ground flour can spoil more quickly than store-bought flour, so it’s important to use it within a few weeks or store it in the refrigerator or freezer.

Overall, grinding whole grains at home can be a rewarding and cost-effective way to enjoy fresh flour for baking and cooking. With the right equipment and technique, you can achieve a fine and consistent grind for a variety of whole grains.

Can you make flour in a blender?

Yes, you can make flour in a blender, but there are some important considerations to keep in mind.

Blenders are not specifically designed for making flour, so they may not produce as fine of a grind as a grain mill or other specialized equipment. Additionally, not all blenders are created equal, and some may not be powerful enough or equipped with the right type of blade to effectively grind grains into flour.

If you do decide to make flour in a blender, here are some tips to help you achieve the best results:

  1. Use a high-speed blender with a powerful motor and sharp blades. A blender with stainless steel blades is ideal.
  2. Grind the grains in small batches to ensure even grinding and prevent overheating.
  3. Start on a low speed and gradually increase the speed to prevent overheating and ensure that the grains are ground evenly.
  4. Sift the flour through a fine-mesh strainer to remove any large pieces that were not ground.
  5. Repeat the grinding and sifting process until you achieve the desired consistency.

Overall, making flour in a blender can be a convenient and cost-effective option, especially for small batches. However, if you plan to make flour frequently or in larger quantities, it may be worth investing in a high-quality grain mill specifically designed for grinding grains to ensure optimal results.

Benefits of using blender to grind grains

There are several benefits to using a blender to grind grains, including:

  1. Convenience: Blenders are typically more compact and easier to store than large grain mills, making them a convenient option for small kitchens or occasional use.
  2. Cost: Blenders are often less expensive than grain mills, making them a more affordable option for those on a budget.
  3. Versatility: Blenders can be used for a variety of tasks beyond grinding grains, such as making smoothies, soups, sauces, and more, making them a versatile addition to any kitchen.
  4. Customization: With a blender, you can grind small amounts of grains at a time and customize the grind to your preferred consistency, which can be especially useful for specialty flours or for those with dietary restrictions.
  5. Nutrient retention: Some experts argue that blenders may be better than grain mills for preserving the nutrients in whole grains, as the heat generated by grinding in a blender is usually lower than that generated by a grain mill.

Overall, using a blender to grind grains can be a convenient and cost-effective option, especially for small batches or occasional use. However, it’s important to keep in mind that blenders may not produce as fine of a grind as a grain mill and may not be suitable for processing large quantities of grains.

How to clean blender to grind grains

Cleaning a blender after grinding grains is a simple process. Here are the steps you can follow:

  1. Empty the blender: First, remove the container from the blender base and pour out any remaining grains or flour.
  2. Disassemble the blender: Take apart the blender components, including the blade assembly, gasket, and container lid.
  3. Rinse with water: Rinse all the components thoroughly under running water to remove any loose particles.
  4. Soak in warm, soapy water: Fill the sink or a large bowl with warm, soapy water and soak the blender components for a few minutes to loosen any remaining food particles.
  5. Scrub with a sponge or brush: Use a non-abrasive sponge or brush to scrub the blender components, paying special attention to the blade assembly and any hard-to-reach areas.
  6. Rinse and dry: Rinse all the components thoroughly with clean water and dry them with a clean cloth or let them air dry.
  7. Reassemble the blender: Once all the components are dry, reassemble the blender by fitting the blade assembly, gasket, and container lid back onto the blender container.
  8. Store the blender: Store the blender in a clean, dry place until the next use.

It’s important to note that some blenders may have specific cleaning instructions, so it’s always a good idea to check the user manual for any special care instructions. Regular cleaning of your blender after grinding grains will help to ensure that it remains in good working order and ready for your next use.

How to maintain blender to grind grains properly

Proper maintenance of your blender is essential to ensure it functions well and lasts a long time. Here are some tips to help you maintain your blender when using it for grinding grains:

  1. Clean the blender after each use: Cleaning the blender after each use will help to prevent any food particles from sticking to the blades or container, which can lead to corrosion or damage.
  2. Use the right amount of grains: Be careful not to overload the blender with too many grains at once, as this can put extra strain on the motor and blade assembly. Instead, grind small batches of grains at a time.
  3. Use the right speed: When grinding grains, start at a low speed and gradually increase the speed as needed. Avoid using high speeds for extended periods, as this can cause the motor to overheat.
  4. Monitor the blades: Check the blades regularly to ensure they are sharp and not damaged. If the blades are dull or damaged, replace them promptly.
  5. Use the right type of grains: Not all grains are suitable for grinding in a blender, so make sure to use only those grains that are safe for blending.
  6. Store the blender properly: When not in use, store the blender in a dry, cool place, away from moisture and direct sunlight.
  7. Perform regular maintenance: Regularly inspect the blender for any signs of wear or damage, and perform any necessary maintenance or repairs promptly.

By following these tips, you can help to ensure that your blender remains in good condition and functions well for years to come.

Troubleshooting about blender to grind grains

Here are some common issues that can occur when using a blender to grind grains and troubleshooting tips to help resolve them:

  1. Blades not grinding the grains: If the blades are not grinding the grains properly, it may be because the blades are dull or damaged. Try sharpening or replacing the blades.
  2. Blender overheating: If the blender is overheating, it may be because the motor is working too hard. Try reducing the amount of grains you are grinding at one time and using a lower speed setting.
  3. Grain particles not fine enough: If the grain particles are not fine enough, it may be because the blender is not powerful enough to grind them into a fine powder. Consider using a more powerful blender or a grain mill.
  4. Blender leaking: If the blender is leaking, it may be because the gasket is damaged or not seated properly. Try replacing the gasket and ensuring that it is correctly positioned.
  5. Unpleasant odor or taste: If the ground grains have an unpleasant odor or taste, it may be because the blender was not cleaned properly after the previous use. Ensure that the blender is thoroughly cleaned and sanitized before using it to grind grains again.
  6. Blender not turning on: If the blender is not turning on, it may be because the motor is overheated or there is a problem with the electrical connection. Try letting the blender cool down for a few minutes or check the electrical connection to ensure it is working properly.

By following these troubleshooting tips, you can help to resolve common issues that may arise when using a blender to grind grains and ensure that your blender continues to function properly.

Conclusion

In conclusion, a blender can be a convenient and cost-effective option for grinding grains at home. However, it is important to choose a high-powered blender with strong blades and to use it properly to ensure that it can handle the grinding process effectively.

Additionally, it is essential to maintain and clean the blender regularly to prevent damage or contamination. With the right equipment and proper care, a blender can be a great tool for grinding a variety of grains to make flour or other ingredients for cooking and baking.

Related Posts

Why Trust Us

You will find what you are looking for at Jody's Bakery. From classic to luxury brands, you'll find both. We will help you to select appliances that fit your needs, budget and lifestyle. Whether you want to stop by to learn more — or plan to make a major purchase — we’ll treat you like family and assist you every step of the way. Shop with us today to receive friendly and experienced help along the way.

Tags:

1 Comment
  1. Wow, amazing blog layout! How long have you ever been running a blog for?
    you make blogging glance easy. The entire look of your web site is excellent,
    let alone the content material! You can see similar here najlepszy sklep

    Leave a reply

    Best Deals For You

    Best price
    Anova Culinary Sous Vide Precision Cooker Pro
    SaveSavedRemoved 0

    Anova Culinary Sous Vide Precision Cooker Pro

    30

    The Anova Culinary Sous Vide Precision Cooker Pro has truly elevated my cooking experience. With its precise water circulation at the exact temperature needed, I've achieved perfect results every time, eliminating the risk of over or undercooking my meals. Sous vide cooking with this device has proven to be ...

    $294.99 $399.00 Buy It Now
    Best seller
    Lodge 10.25 Inch Cast Iron Pre-Seasoned Skillet
    SaveSavedRemoved 0

    Lodge 10.25 Inch Cast Iron Pre-Seasoned Skillet

    40

    The Lodge 10.25 Inch Cast Iron Pre-Seasoned Skillet is a versatile and durable kitchen essential, perfect for beginners, home cooks, and chefs alike. Crafted in America with iron and oil, this skillet is designed to handle any kitchen cooktop, oven, grill, or open flame. One of the standout features of Lodge cast ...

    $19.90 $34.25 Buy It Now
    Best seller
    Tovolo Vented Collapsible Medium Microwave Cover
    SaveSavedRemoved 0

    Tovolo Vented Collapsible Medium Microwave Cover

    20

    The Tovolo Vented Collapsible Medium Microwave Cover is a versatile and practical kitchen accessory designed to enhance your microwave cooking experience. This cover features perforated lids that protect your microwave from splatters and spots. Crafted from BPA-free plastic and silicone, the topper covers food to ...

    Best value
    Nostalgia MyMini Personal Electric Skillet
    SaveSavedRemoved 0

    Nostalgia MyMini Personal Electric Skillet

    60

    The Nostalgia MyMini Personal Electric Skillet is a versatile and convenient appliance for on-the-go meals. It offers a quick and healthier way to cook a variety of dishes, including ramen noodles, pasta, mac and cheese, steamed rice, stir fry, omelets, hard-boiled eggs, pancakes, bacon, sausage, hashbrowns, cookies, ...

    Best seller
    Elite Gourmet EG6207 Fry Pan
    SaveSavedRemoved 0

    Elite Gourmet EG6207 Fry Pan

    31

    The Elite Gourmet EG6207 Fry Pan is a versatile and convenient addition to any kitchen. With its 10.5-inch size, it allows you to expand your cooking capabilities without the need for remodeling. The non-stick marble stone coating and cast-in heating element make cooking and clean-up a breeze. Whether you're whipping ...

    Braun MQ7035X 3-in-1 Immersion Hand
    SaveSavedRemoved 0

    Braun MQ7035X 3-in-1 Immersion Hand

    50

    The Braun MQ7035X 3-in-1 Immersion Hand Blender stands out with its innovative features and versatile functionality. The Easy SmartSpeed technology allows for single-hand operation with no predefined speed settings. Simply follow your intuition by pushing gently for roughly chopped results and increasing the ...

    $99.95 $109.95 Buy It Now
    Editor choice
    Breville the Barista Pro Espresso Machine
    SaveSavedRemoved 0

    Breville the Barista Pro Espresso Machine

    30

    The Breville the Barista Pro Espresso Machine offers a barista-quality performance with a user-friendly interface, making it easy to create third wave specialty coffee in the comfort of your home. The integrated grinder ensures that the right amount of freshly ground coffee is delivered on demand, resulting in a rich ...

    $699.95 Buy It Now
    Editor choice
    Cuisinart PRS-50 Pasta Roller & Cutter Attachment
    SaveSavedRemoved 0

    Cuisinart PRS-50 Pasta Roller & Cutter Attachment

    100

    Cuisinart PRS-50 Pasta Roller & Cutter Attachment is a perfect addition to your Precision Master Stand Mixer, allowing you to create a variety of homemade fresh pasta with ease. This attachment includes both spaghetti and fettuccine cutters, as well as a pasta roller, offering versatility in pasta shapes and ...

    $159.20 $179.95 Buy It Now
    Editor choice
    Instant Stand Mixer Pro
    SaveSavedRemoved 0

    Instant Stand Mixer Pro

    40

    Instant Stand Mixer Pro delivers powerful performance with its 600-watt motor, making it a versatile kitchen companion for a variety of culinary tasks. From whipping smooth meringues to kneading yeast dough, this stand mixer handles it all with ease. Featuring a digital interface, the mixer offers 10 speed ...

    $280.66 $299.99 Buy It Now
    Editor choice
    Koolatron 6 Bottle Wine Cooler
    SaveSavedRemoved 0

    Koolatron 6 Bottle Wine Cooler

    90

    The Koolatron 6 Bottle Wine Cooler offers an affordable and elegant solution for wine enthusiasts, providing a stylish and compact freestanding design that accommodates up to 6 standard-sized wine bottles. This wine fridge is a perfect addition to any table or countertop, allowing you to enjoy your favorite vintages ...

    $96.98 $199.99 Buy It Now
    Editor choice
    Hamilton Beach 2 Slice Extra Wide Slot Toaster
    SaveSavedRemoved 0

    Hamilton Beach 2 Slice Extra Wide Slot Toaster

    70

    Hamilton Beach 2 Slice Extra Wide Slot Toaster is a versatile and user-friendly appliance designed to make toasting a breeze. With slots wider than those on many 2-slice toasters, this toaster accommodates thicker breads, bagels, and other specialty bread items effortlessly. The extra-wide slots ensure a perfect ...

    Best value
    Hamilton Beach Blender Combo
    SaveSavedRemoved 0

    Hamilton Beach Blender Combo

    40

    The Hamilton Beach Blender for Shakes and Smoothies & Food Processor Combo offers impressive 3-in-1 versatility, making it a powerhouse in the kitchen. This combo includes a 40 oz. glass blending jar for larger servings, a 20 oz. blend-in personal blender travel jar for on-the-go convenience, and a 3-cup ...

    $67.78 $74.99 Buy It Now
    Show next
    Jody's Bakery
    Logo
    Compare items
    • Total (0)
    Compare
    0
    Shopping cart