A bread proofing basket, also known as a banneton or...
Read More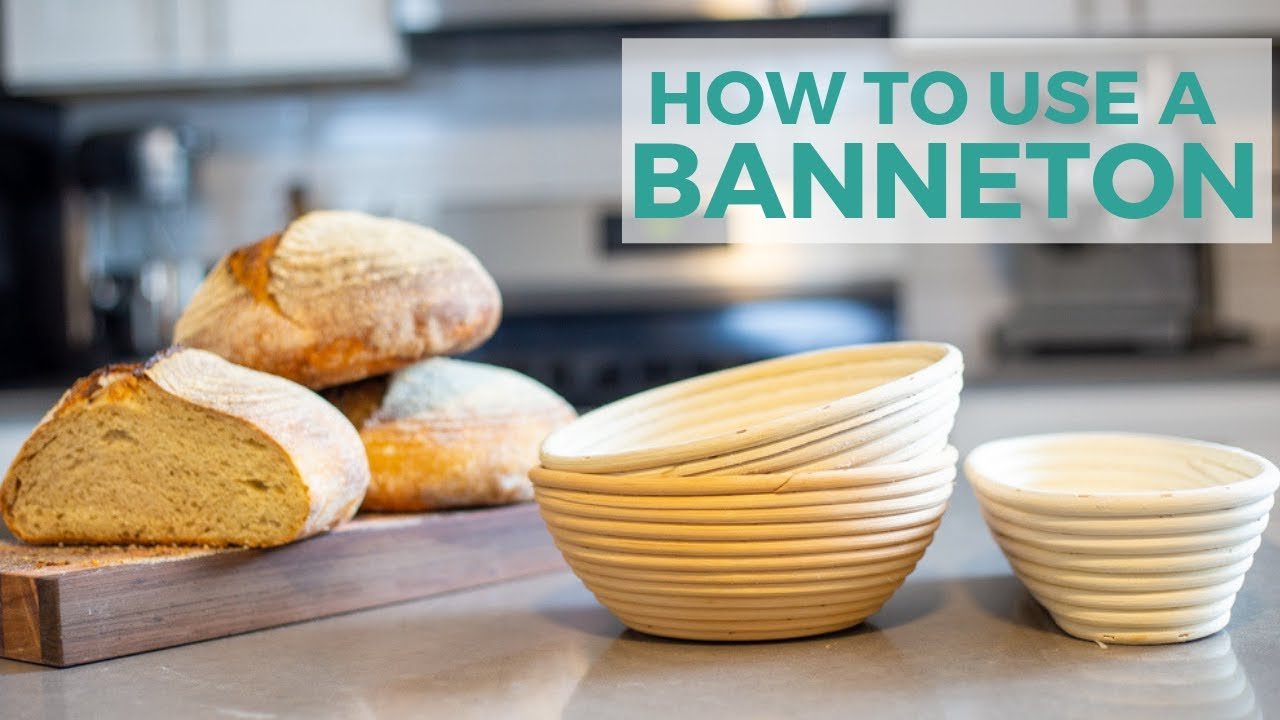
A banneton proofing basket, also known as a brotform or bread proofing basket, is a tool used in bread-making to support the dough as it rises during the final proofing stage. The basket is typically made of natural materials such as cane, wicker, or rattan, which allows for air circulation and helps to absorb excess moisture from the dough.
Banneton proofing baskets come in different shapes and sizes, such as round, oval, or rectangular, and are used to create a variety of bread shapes and styles. The basket leaves an imprint on the dough, creating a unique pattern on the finished bread.
Bakers often dust the basket with flour to prevent the dough from sticking and to enhance the pattern on the bread. Overall, a banneton proofing basket is an essential tool for bakers who want to create high-quality artisanal bread with a beautiful crust and crumb.

$24.49
in stock
as of July 26, 2024 4:42 am
Amazon.com

$29.99
in stock
as of July 26, 2024 4:42 am
Amazon.com

$29.99
in stock
as of July 26, 2024 4:42 am
Amazon.com

$25.97
in stock
as of July 26, 2024 4:42 am
Amazon.com

$17.95
in stock
as of July 26, 2024 4:42 am
Amazon.com

$37.99
in stock
as of July 26, 2024 4:42 am
Amazon.com

$10.99
in stock
as of July 26, 2024 4:42 am
Amazon.com

$26.99
in stock
as of July 26, 2024 4:42 am
Amazon.com

$18.40
in stock
as of July 26, 2024 4:42 am
Amazon.com
$34.95
in stock
as of July 26, 2024 4:42 am
Amazon.com
Last updated on July 26, 2024 4:42 am
What is banneton proofing basket used for?
A banneton proofing basket is used for the final proofing stage of bread-making, which is the process of allowing the dough to rise one last time before baking. The basket helps to support the dough as it rises, preventing it from spreading out and losing its shape. Here are the main steps in using a banneton proofing basket:
- Prepare the basket: Dust the inside of the basket with flour, making sure to coat it evenly.
- Add the dough: Transfer the dough to the basket, making sure to place it seam-side up if the dough has been shaped into a round.
- Let the dough rise: Cover the basket with a clean cloth or plastic wrap and let the dough rise for the final proofing stage. This usually takes between 1 to 2 hours, depending on the recipe and temperature of your kitchen.
- Bake the bread: Once the dough has finished proofing, transfer it to a baking sheet or Dutch oven and bake according to the recipe.
The banneton proofing basket helps to create a consistent texture in the bread and can also leave a unique pattern on the surface of the dough, which adds to its aesthetic appeal. Overall, the banneton proofing basket is a useful tool for any serious bread baker who wants to create high-quality artisanal bread.
What is the best size banneton proofing basket?
The best size banneton proofing basket depends on the amount of dough you are working with and the size of the loaf you want to make. In general, a 8-9 inch (20-23 cm) round banneton proofing basket is suitable for making a 1-2 pound (450-900 g) loaf of bread, while a 10 inch (25 cm) round banneton proofing basket is ideal for making larger loaves of bread. Oval or rectangular baskets can also be used to make different shapes of bread.
It’s important to choose a banneton proofing basket that is the appropriate size for the amount of dough you are working with, as a basket that is too small will cause the dough to spill over the sides, while a basket that is too large may result in a flat or unevenly risen loaf. It’s always a good idea to check the capacity of the banneton proofing basket before purchasing it to ensure it meets your needs.
What is the best material for a banneton proofing basket?
The best material for a banneton proofing basket is a matter of personal preference, but the most common materials used are rattan and cane. These natural materials are durable, breathable, and have a slightly rough surface that helps to create a good crust on the bread.
Rattan is a type of palm that grows in tropical regions and is widely used in the production of banneton proofing baskets. It is a flexible and sturdy material that is easy to shape and mold, making it ideal for use in bread making.
Cane is another natural material that is commonly used in banneton proofing baskets. It is similar to rattan in texture and durability, but is typically made from a different type of palm or bamboo.
Other materials, such as plastic or metal, can also be used to make banneton proofing baskets, but these materials are less common and may not provide the same benefits as natural materials.
Ultimately, the best material for a banneton proofing basket depends on your personal preferences and baking needs. Whichever material you choose, make sure that it is food-safe, durable, and allows air to circulate around the dough during proofing.
Why use a banneton proofing basket?
There are several reasons why a banneton proofing basket is a useful tool for bread-making:
- Supports the dough during the final proofing stage: A banneton proofing basket helps to support the dough as it rises, preventing it from spreading out and losing its shape. The basket allows the dough to rise evenly and develop a consistent texture.
- Creates a beautiful pattern on the bread: The natural materials used to make a banneton proofing basket leave an imprint on the dough, creating a unique pattern on the finished bread. This pattern adds an artisanal touch to the bread and makes it visually appealing.
- Helps to absorb excess moisture: The natural materials used in the basket absorb excess moisture from the dough, creating a better crust on the finished bread.
- Easy to use: A banneton proofing basket is easy to use and requires minimal preparation. Simply dust the basket with flour before adding the dough, and then transfer the dough to a baking sheet or Dutch oven for baking.
Overall, a banneton proofing basket is a valuable tool for bakers who want to create high-quality, artisanal bread with a consistent texture and a beautiful appearance.
What is the difference between a banneton and proofing basket?
“Banneton” and “proofing basket” are two terms that are often used interchangeably to refer to the same type of tool used in bread-making. However, there is no actual difference between the two; “banneton” is simply the French term for a proofing basket, while “proofing basket” is the English equivalent.
Both terms refer to a basket made of natural materials such as cane, wicker, or rattan that is used to support the dough during the final proofing stage of bread-making. The basket helps to maintain the shape of the dough as it rises and also creates a unique pattern on the surface of the bread.
So, whether you call it a banneton or a proofing basket, it is the same tool used for the same purpose.
Do you put dough directly in banneton proofing basket?
Yes, the dough is placed directly into the banneton proofing basket after it has been shaped. Before placing the dough in the basket, it is important to dust the basket with flour to prevent the dough from sticking to the sides. The flour also helps to create a thin layer of insulation that allows the dough to rise evenly while it is proofing. Once the dough is placed in the basket, it is covered with a cloth or plastic wrap and left to rise before being baked. After proofing, the dough is removed from the basket and baked in an oven or other appropriate baking appliance.
What can I use instead of a banneton proofing basket?
If you don’t have a banneton proofing basket, there are several alternative tools that you can use to proof your bread. Here are a few options:
- Mixing bowls: You can use a mixing bowl that is the same size or slightly larger than the dough ball. Grease the bowl with a little oil or dust it with flour, then place the dough inside and cover it with a clean cloth or plastic wrap.
- Colanders: A clean and lightly floured colander can work well as a proofing basket, especially for shaping oblong or oval loaves. Simply line the colander with a clean, lint-free cloth and place the dough inside. Cover with a cloth and let the dough rise.
- Tea towels: You can shape the dough into a round or oblong shape, place it on a clean, lint-free tea towel that has been dusted with flour, and then tie the ends of the towel over the top to create a “nest” for the dough to rise in.
- Improvised baskets: If you have a clean basket made of natural materials such as wicker or rattan, you can line it with a clean cloth that has been dusted with flour and use it as a proofing basket.
It’s worth noting that while these alternatives can work, they may not provide the same level of support or create the same pattern as a dedicated banneton proofing basket. However, if you are just starting out or prefer a more casual approach to baking, these tools can be a good option.
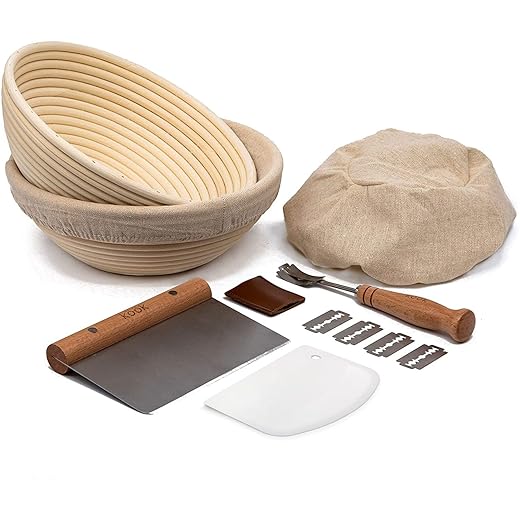
Factors to consider when choosing the best banneton proofing basket
When choosing the best banneton proofing basket, there are several factors to consider:
- Size: Banneton proofing baskets come in various sizes. Choose a size that is appropriate for the size of the bread you are making.
- Material: Banneton proofing baskets are typically made of either rattan, plastic or silicone. Rattan is the traditional material and is often preferred for its natural texture and ability to absorb moisture. However, plastic or silicone baskets may be a better option for those who are allergic to rattan or want a more durable option.
- Shape: Banneton proofing baskets come in different shapes, including round, oval, and rectangular. Choose a shape that is suitable for the type of bread you are making.
- Depth: Consider the depth of the basket when making your choice. A shallow basket may not hold enough dough, while a deep basket may cause the dough to collapse when removing it from the basket.
- Durability: Choose a banneton proofing basket that is durable and can withstand repeated use. Rattan baskets are prone to wear and tear over time, so you may need to replace them more often than plastic or silicone baskets.
- Texture: Look for a basket with a smooth texture that is easy to clean. A rough or uneven texture may cause the dough to stick and make cleaning more difficult.
- Ease of use: Consider how easy it is to use the basket. A basket with a removable cloth liner may be easier to use than a basket without one.
By considering these factors, you can choose the best banneton proofing basket for your bread-making needs.
How to use banneton proofing basket
Here are the general steps on how to use a banneton proofing basket for bread-making:
- Prepare the basket: Dust the inside of the banneton proofing basket with flour, making sure to coat it evenly. Use rice flour if you have it, as it tends to stick less than wheat flour.
- Shape the dough: After the dough has been kneaded and rested, shape it into a round or oval shape that is slightly smaller than the size of the basket. If the dough is too large or too small, it may not rise properly.
- Place the dough in the basket: Place the dough into the prepared banneton proofing basket, seam-side up if you’re using a round basket. The seam will be the bottom of the loaf after it is baked, and placing it seam-side up will ensure that the top of the loaf is smooth.
- Let the dough rise: Cover the basket with a clean cloth or plastic wrap and let the dough rise for the final proofing stage. This usually takes between 1 to 2 hours, depending on the recipe and temperature of your kitchen. The dough should expand to fill the basket and rise to just below the top of the basket.
- Preheat the oven: About 30 minutes before the dough has finished proofing, preheat your oven to the desired temperature according to your recipe.
- Bake the bread: Once the dough has finished proofing, transfer it to a baking sheet or Dutch oven and bake according to the recipe. If you’re using a banneton proofing basket with a cloth liner, you can transfer the dough directly to the baking sheet or Dutch oven without removing the liner.
- Remove the bread from the basket: After baking, carefully turn the basket upside down over a clean surface or wire rack to release the bread. Gently tap the bottom of the basket to loosen the bread if necessary.
With proper use and care, a banneton proofing basket can be a valuable tool for home bakers who want to create beautiful artisanal loaves of bread.
How do you prepare banneton proofing basket for first use?
When preparing a new banneton proofing basket for its first use, there are a few steps you should take to ensure that it is ready to use:
- Clean the basket: First, you should gently brush out any loose debris or dust that may have accumulated during storage or shipping. Do not use water or soap to clean the basket, as this can damage the natural fibers or coating on the basket.
- Season the basket: Once the basket is clean, you can season it by lightly coating the inside with flour. This helps to create a non-stick surface and prevents the dough from sticking to the sides of the basket. You can use wheat flour, rice flour or a mixture of both. Use a dry brush or your hand to evenly dust the flour inside the basket.
- Tap out excess flour: After coating the basket with flour, gently tap the sides of the basket to remove any excess flour. This will ensure that the flour coating is even and will not result in a clumpy texture on your bread.
- Let the basket dry: Allow the basket to air dry for a few hours before using it. This will help the flour to settle evenly and prevent clumps from forming.
By following these steps, you can prepare your banneton proofing basket for its first use and ensure that it is ready to use for many batches of delicious bread to come.
How long to leave sourdough in banneton proofing basket?
The length of time that you should leave sourdough in a banneton proofing basket depends on several factors, including the temperature of your kitchen, the hydration level of the dough, and the desired level of fermentation. However, as a general rule, you should leave sourdough in the basket for about 1 to 2 hours for the final proofing stage.
During this time, the dough will rise and expand to fill the basket, taking on the shape of the basket and developing a slightly dry skin on the surface. If you leave the dough in the basket for too long, it may over-proof, which can cause it to deflate and lose its shape when you transfer it to the oven.
To avoid over-proofing, you can check the dough periodically during the final proofing stage. Gently press the dough with your finger; if it springs back slowly and leaves a small indentation, it is ready to bake. If the indentation remains, the dough needs more time to proof. If the dough springs back quickly and doesn’t leave an indentation, it may be over-proofed and needs to be baked immediately.
Remember that the final proofing time is just a guideline, and you may need to adjust it based on the conditions in your kitchen and the characteristics of your dough. With practice, you’ll develop a feel for the dough and be able to judge when it’s ready to bake.
Should I use a cloth in my banneton proofing basket?
Yes, it is common practice to use a cloth or liner in a banneton proofing basket. The cloth or liner helps to prevent the dough from sticking to the basket and makes it easier to remove the dough after proofing. It also helps to create a thin layer of insulation that allows the dough to rise evenly while it is proofing.
There are a few types of cloths or liners that can be used in a banneton proofing basket:
- Cotton or linen cloths: These are the most common type of liners used in banneton proofing baskets. They are breathable, absorbent, and can be washed and reused multiple times.
- Paper liners: Some bakers prefer to use paper liners in their banneton proofing baskets. These liners are disposable and can be made from parchment paper or other types of baking paper. They also help to prevent the dough from sticking to the basket, but are not as breathable as cloth liners.
- Plastic liners: While not as common, plastic liners can also be used in banneton proofing baskets. These liners are usually made from food-grade plastic and are disposable. They can help to prevent the dough from sticking to the basket, but are not as breathable as cloth liners.
Regardless of the type of liner you choose to use, it is important to dust the liner with flour before placing the dough in the basket. This helps to prevent the dough from sticking to the liner and allows for easy removal after proofing.
Can you wash banneton proofing basket?
It is generally not recommended to wash a banneton proofing basket with water or soap, as this can damage the natural fibers or coating on the basket. Instead, you should brush out any loose flour or debris that may have accumulated after use.
If the basket has become dirty or has an unpleasant odor, you can try the following methods to clean it:
- Dry brushing: Use a dry brush to gently brush out any loose debris or flour from the basket.
- Air out: If the basket has a mild odor, you can try placing it outside in direct sunlight for a few hours to help eliminate any odors.
- Freezing: You can also try freezing the basket for a few hours to kill any bacteria or odor-causing agents. This method is particularly useful for wicker or rattan baskets.
- Vinegar: If the odor persists, you can try wiping the inside of the basket with a cloth dampened with white vinegar. Allow the basket to air dry thoroughly before using it again.
By taking care to gently clean and maintain your banneton proofing basket, you can ensure that it lasts for many years of baking delicious bread.
How do you transfer bread from banneton proofing basket?
To transfer bread from a banneton proofing basket, you will need to gently and carefully flip the basket over onto a baking sheet or Dutch oven. Here are the steps to follow:
- Prepare a baking sheet or Dutch oven: Before removing the dough from the banneton proofing basket, make sure that you have a baking sheet or Dutch oven ready to receive the dough.
- Dust the dough: Dust the top of the dough lightly with flour to prevent it from sticking to the basket or your hands.
- Flip the basket: Place the baking sheet or Dutch oven upside down over the top of the basket. Hold the basket and baking sheet or Dutch oven firmly together with both hands and carefully flip them over so that the basket is upside down on the baking sheet or Dutch oven.
- Remove the basket: Carefully lift the basket away from the dough. If the dough sticks to the basket, gently shake it or use a dough scraper to release it.
- Score the bread: Use a sharp knife or bread lame to make a few shallow cuts on the top of the dough to allow it to expand during baking.
- Bake the bread: Place the baking sheet or Dutch oven with the dough in a preheated oven and bake according to your recipe.
By following these steps, you can easily transfer bread from a banneton proofing basket without damaging the dough or losing its shape.
How to maintain banneton proofing basket properly
Proper maintenance of your banneton proofing basket will help extend its lifespan and keep it in good condition for many uses. Here are some tips for maintaining your banneton proofing basket:
- Remove excess flour: After using the basket, remove any excess flour or debris by tapping or brushing it out. Do not wash the basket with water or soap.
- Dry the basket: Allow the basket to air dry completely before storing it. Do not store the basket while it is still damp, as this can cause mold or mildew to develop.
- Store the basket: Store the basket in a cool, dry place where it will not be exposed to direct sunlight or moisture. A breathable cotton bag or pillowcase can help protect the basket from dust and dirt.
- Rotate the basket: To prevent the basket from becoming misshapen, rotate it regularly and use both sides evenly.
- Refresh the basket: Over time, the natural fibers of the basket may become dry and brittle. To refresh the basket, lightly mist it with water or oil and allow it to dry completely before using it again.
By following these simple steps, you can maintain your banneton proofing basket properly and ensure that it remains in good condition for many years of use.
Troubleshooting about banneton proofing basket
Here are some common troubleshooting issues that can occur when using a banneton proofing basket and some tips on how to address them:
- Dough sticking to the basket: If the dough sticks to the basket, it may be because the basket was not adequately floured or because the dough was too wet. To prevent this, make sure to flour the basket generously before adding the dough. You can also try reducing the hydration of the dough slightly to make it easier to work with.
- Loaf spreading out or flattening: If the loaf spreads out or flattens during proofing, it may be because the dough was too wet or too warm. Try reducing the hydration of the dough or reducing the proofing time to prevent this from happening.
- Loaf sticking to the basket when transferring: If the loaf sticks to the basket when transferring it to the baking sheet, it may be because the basket was not adequately floured or because the dough was not allowed to proof long enough. Make sure to flour the basket generously before adding the dough, and allow the dough to proof until it is puffy and soft before attempting to transfer it.
- Basket becoming misshapen: If the basket becomes misshapen or loses its shape over time, it may be because it was not stored properly or was not rotated regularly. Store the basket in a cool, dry place and rotate it regularly to prevent this from happening.
- Mold or mildew on the basket: If mold or mildew develops on the basket, it may be because it was not properly dried after use or was stored in a damp environment. To prevent this, make sure to air dry the basket completely before storing it, and store it in a dry, well-ventilated place. If mold or mildew does develop, discard the basket and replace it with a new one.
By addressing these common troubleshooting issues, you can ensure that your banneton proofing basket is working properly and that your bread turns out perfectly every time.
Should you buy banneton proofing basket?
Whether or not to buy a banneton proofing basket depends on your personal baking preferences and needs. If you are someone who enjoys making bread or other baked goods from scratch, a banneton proofing basket can be a useful tool to have in your kitchen. It can help create beautiful, professional-looking loaves of bread with a crispy crust and an airy crumb. However, if you are a casual baker or prefer not to invest in specialized baking equipment, you may be able to achieve similar results without a banneton proofing basket.
Consider your baking goals and budget when deciding whether or not to purchase a banneton proofing basket. If you are just starting out and experimenting with different baking techniques, you may want to try proofing your dough in a bowl or other container before investing in a banneton. If you are a more experienced baker and are looking to take your bread-making to the next level, a banneton proofing basket can be a worthwhile investment.
Ultimately, the decision to buy a banneton proofing basket will depend on your personal preferences and baking needs.
Related Posts

How to choose the best bowl for proofing bread
Proofing bread is an essential step in the bread-making process...
Read More
What are the purpose of bamboozle nesting bowls?
Bamboozle nesting bowls are a set of mixing bowls made...
Read More Post Views: 243
Why Trust Us
You will find what you are looking for at Jody's Bakery. From classic to luxury brands, you'll find both. We will help you to select appliances that fit your needs, budget and lifestyle. Whether you want to stop by to learn more — or plan to make a major purchase — we’ll treat you like family and assist you every step of the way. Shop with us today to receive friendly and experienced help along the way.