
Everyone loves bread; some like store-bought bread while some like...
Read More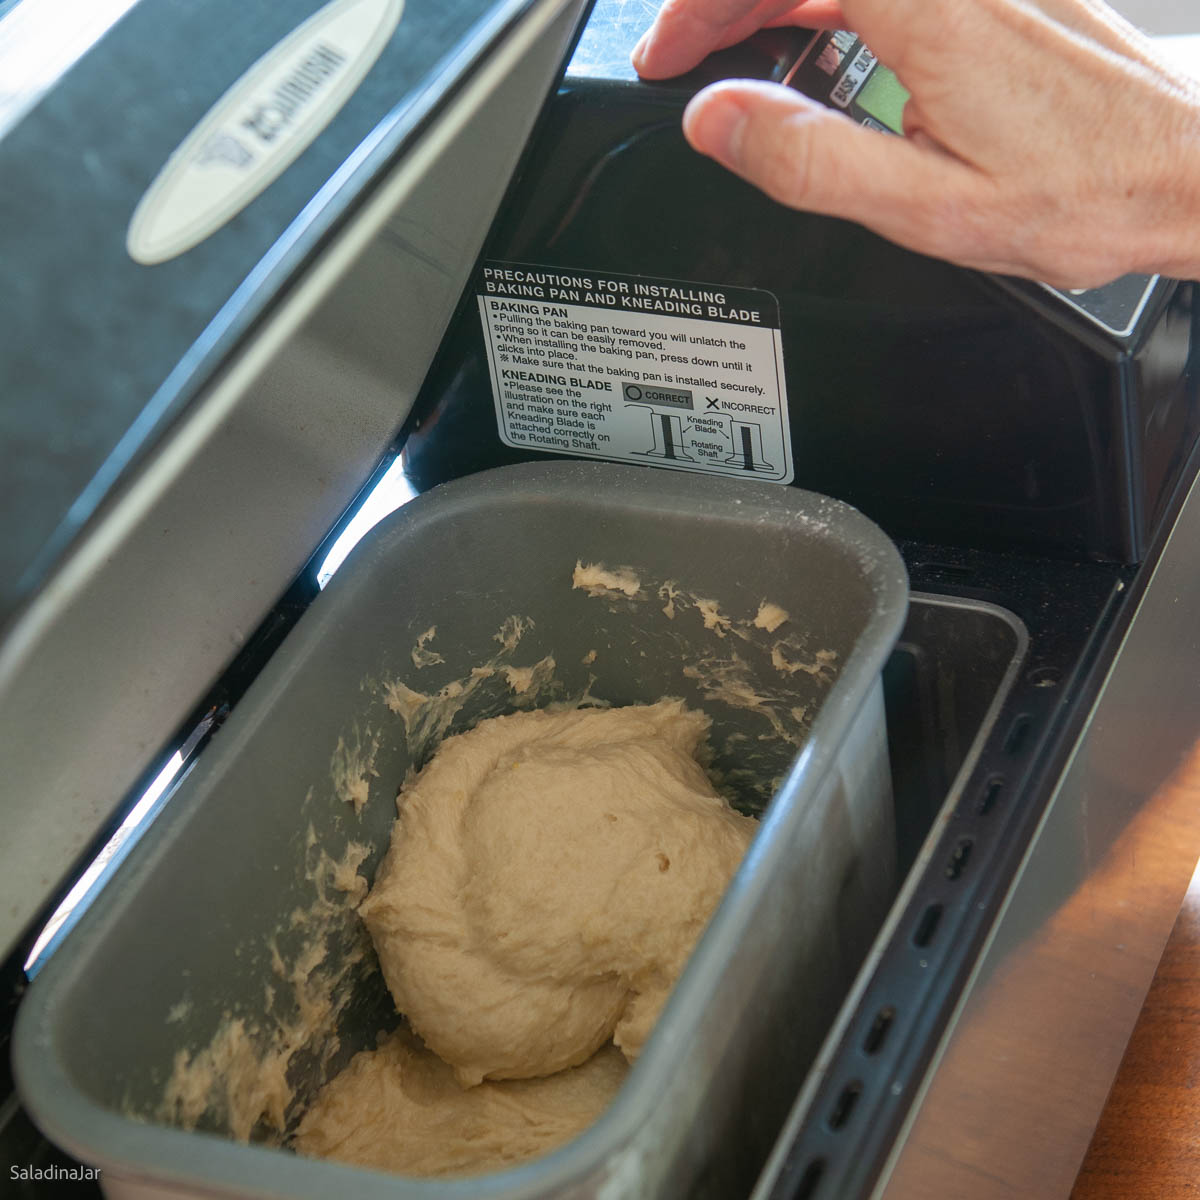
It is common knowledge that bread is necessary for a healthy, balanced diet. It is a breakfast staple that is consumed around the world. In addition to being a breakfast staple, oatmeal is a critical ingredient in many other recipes.
Whether you want to toast it or make a sandwich to satisfy late-night cravings, bread can be used to make various dishes. Consequently, a bread machine is a valuable kitchen appliance used to bake bread immediately. It is also simple to operate, as all that is required is the addition of bread ingredients.
This means that fresh homemade bread can be obtained daily with minimal effort. With a bread machine, consuming semi-stale store-bought bread is no longer necessary.
Although a bread machine makes baking bread significantly more accessible and convenient for everyone, it is still possible to ruin your bread. Similarly, many users have complained that their bread machine does not properly combine the ingredients.
How to Fix a Bread Machine That Does Not Mix?
There are various reasons why your bread maker may not function properly on occasion. Before replacing it, you should try a few troubleshooting steps if you have been experiencing this issue.
Listed below are some effective troubleshooting procedures:
1. Check the Mixing Paddle
If your bread machine isn’t mixing, this is the first workaround to try. When confronted with this issue, the first thing to examine is the bread machine’s mixing paddles.
It is common knowledge that the mixing paddle is the primary component responsible for mixing your ingredients within the bread machine; you should inspect it for defects.
There have been instances in which users forget to insert the mixing paddle into the bread machine. Similarly, you can thoroughly clean the mixing paddle and the area in which it is placed.
Something may be interfering with the paddle’s regular operation, causing it to have difficulty mixing your ingredients. Sometimes, individuals correctly position the mixing paddle but still wonder why the machine is malfunctioning. The mixing paddle is typically dirty.
If you frequently use your bread machine, it is likely that dust has accumulated over time and caused this issue. Remember to remove the mixing paddle once the ingredients have been incorporated. It can leave a hole in your bread if you don’t remove it.
While the hole has little effect on the flavor of the bread, it can affect its appearance and provide an unwelcome outlet for moisture within the loaf.
Remember that moisture is terrible for bread because it promotes bacterial growth. Don’t forget to remove the mixing paddle once it has completed its function.
Remove the mixing paddle before cleaning it. Hold the fixing paddle of your bread machine firmly and rotate it gently. After removing it, wipe it down with a slightly damp cloth.
Consider soaking the item in hot water for a few minutes if it is difficult to clean because dust has settled in. Once it has been adequately cleaned, reinstall it in the bread machine.
2. Checking the Belt
Consider inspecting the bread machine’s belt if the correct placement and cleaning of the mixing paddle were unsuccessful. While a paddle is responsible for mixing the ingredients, a belt assists in moving the paddle.
Consequently, asserting that the belt is equally important to the mixing paddle is safe. And if it is not in good condition, your bread machine will be unable to combine the ingredients properly. Therefore, you must ensure that it is in proper working order.
Bread machine belts can deteriorate over time. If you observe any damage to the belt, you will need to replace it to resolve the issue. You may contact an electrician to replace it or do it yourself.
If repairing electrical appliances is not your cup of tea, it is best to seek assistance from a professional, although the process is relatively straightforward. Also, remember to unplug your bread machine. Flip the bread machine over and remove the screws from the bottom to replace the belt. Remove every screw, including those holding the heating element in place.
After unscrewing it, grasp the metal interior by its edges and lift it carefully. Place the needle-nose pliers’ jaws on each side of the rear plastic clips. After that, gently pry back on the pliers while pulling up on the lid but stop pulling once the lid is released.
A cable must be unplugged from the bread machine to replace the belt. This ribbon cable is accessible through the lid or squeezing your hand into the plastic box. Now, remove the screws securing the metal plate to the plastic base and gently lift and prop up the metal plate to gain access to the belt. If the string is wrapped tightly around the sprocket, cut it carefully.
A razor knife can be used for this purpose. Ensure that you cut it carefully so that you do not also damage the sprocket. After the string has been removed, use the razor to clean the interior of the sprocket. Rubber fragments or dust can enter it, preventing it from operating normally.
Install the new belt around the smaller sprocket and over the larger one. Consider rotating the larger one to ensure that the belt fits snugly. Now put everything back together in reverse order! Install all screws and carefully position the metal box. You should save the heating element screw for last, so it is easier to reach the other screws.
3. Checking the Ingredients
The final recommended workaround for resolving the bread machine’s inability to mix is to inspect the ingredients.
For instance, if too much liquid is added to the bread machine, the appliance may have difficulty mixing the ingredients. It is detrimental to both your bread machine and your bread.
If you add too much water to your dough, the resulting loaf will be dense and flat. If you want your dough to be perfect, add additional flour if it appears too moist.
Similarly, consider adding additional water if it’s dry. Again, we recommend that you verify the ingredients and quantities. If you have exhausted all possible solutions without success, it is time to consult an electrician. It is important to note that most bread machines have a manufacturer’s warranty.
Refer to the manual to determine the warranty’s expiration date. In addition, your bread machine’s manual will contain information about its additional features.
9 Methods to Repair Your Bread Maker
Your bread machine is inoperable. It only emits noise, flashes lights, and displays error codes. Figuring out what is wrong with it is more complex than you anticipated. The following nine steps will assist you in fixing the machine immediately.
1. Ensure the Mains Power Is Working
We must verify that there is no issue with your electrical system. Before assuming a problem with the bread machine, itself, we should conduct this test.
Specifically, you must ensure that your mains power outlet is operational. This is how:
- Unplug the bread maker from the power source.
- Connect the bread machine to a different circuit outlet.
- Try to turn on the bread machine. If it turns on, the electrical outlet is defective. To repair it, you will need to contact an electrician. If the bread machine does not turn on, proceed to the following step.
2. Examine the Circuit Breaker
Before disassembling your bread machine, we must perform one more test to rule out an electrical problem. In other words, we are examining the circuit breaker for a blown fuse. If the fuse box has been tripped, reset it.
However, what can you do if your bread machine keeps blowing fuses? Here are some recommendations:
- Connect the bread machine to a different electrical outlet. Avoid placing it on a circuit that already contains multiple high-voltage devices.
- Immediately stop using the bread machine. Your bread machine should not continually trip the circuit breaker. If so, you will need to contact the manufacturer to have it repaired.
3. Press and Hold “Start”
The next step in getting your bread machine back on track is to perform a mini restart. If its memory is complete and it’s struggling to turn on, this should force it to “wake up.” Here is what must be done:
- Please turn on the bread machine after plugging it in.
- Press and hold the “start” or power button for five seconds or until the display becomes blank.
- Select “start” or the power button. The bread maker should now be operational again. If not, proceed to the following section of this article.
4. Cancel the Timer
Most bread machines have a timer. This allows you to start the baking process at the time you specify. Some bread machines can delay the baking process for up to thirteen hours. But you may be wondering why you would delay your bread. Here are a couple of advantages of having a bread machine timer:
- To assist you in baking bread in the morning. Add the ingredients and set the timer so the bread will begin baking before you awaken.
- To assist you in preparing fresh bread for dinner and not returning home? Then why not set a timer to start the bread so it will be ready when you return?
If your bread machine was inadvertently set to a timer, it might not start baking until several hours after you press the start button. You must clear these settings so the machine will begin baking as soon as you press the “start” button. Uncertain about how to deactivate the delayed start function on your bread machine? Here are three approaches:
- Press and hold the “start” or power button for five seconds until the display becomes blank.
- Press the “delay start time” and “cancel” buttons.
- Unplug the bread machine and leave it unplugged for thirty minutes.
5. Control the interior temperature
Your bread machine may be displaying an unusual error message. Or perhaps it is continuously beeping, and you do not know why. In either case, a temperature issue could be causing the bread machine to malfunction. Your bread machine’s internal temperature may be either too hot or too cold. Therefore:
- Your kitchen is overly chilly. Most bread machines cannot operate in temperatures below 59 degrees Fahrenheit (15 degrees Celsius)
- Your kitchen is hot. Most bread machines cannot work in temperatures above 93 degrees Fahrenheit (34 degrees Celsius)
- You have just baked a loaf of bread, and the bread machine must cool before you can bake another.
So, what can you do if you believe your bread machine is malfunctioning due to a temperature problem? Here are three suggestions:
- If the bread machine is too chilly, relocate it to a warmer location. Attend while the engine warms up. The bread machine’s internal temperature should be above 59 degrees Fahrenheit.
- If the bread machine is overheated, relocate it to a cooler location. Wait until the engine has cooled. The bread machine’s internal temperature should be below 93 degrees Fahrenheit.
- If you have just completed baking bread, give the oven time to cool. Remove the bread pan by removing the bread pan’s lid. Maintain the lid open. Wait 20 minutes before attempting to bake different bread.
6. Unplug It for Half an Hour
Your bread machine retains information. The majority do not exceed 30 minutes. The bread machine’s extended memory enables it to resume baking from where it left off in the event of a power outage.
You must clear this device’s cache, erase its memory, and cancel any delayed start settings. Here is how to proceed:
- Unplug the bread maker from the electrical outlet.
- Keep it unplugged for 30 minutes.
- Reconnect it and attempt to turn it on.
7. Repair the Timing Belt
What if you can turn on your bread machine, but the paddle will not spin to knead the dough? Then there may be an issue with the timing belt. The timing belt may require replacement as it wears out over time.
Each bread maker is unique. However, the following instructions will help you remove the timing belt from your vehicle:
- Remove the loaf pan
- Remove the screws from the side wall of the bread maker using a screwdriver.
- Remove the screws holding the heating element in position.
- Raise the side wall and remove it from the bread machine.
- Remove the screws from the bread maker’s base.
- Disconnect the panel connection
- Remove the screws that secure the panel connector to the bread maker’s base.
- Turn the base over so the timing belt is facing up
- Remove the screw and plate to remove the wheel.
- Remove debris from the pulley gears. If their teeth are worn, they should be replaced.
- Install the replacement pulley gears and attach the belt.
- Turn the pulley wheels and pull the belt in.
8. Grease the Shaft
When you use your bread machine, does it make unusual noises? Then it may be time to lubricate the shaft. The shaft should be oiled every six months to maintain the bread machine’s functionality. However, if you use your bread machine more than once per week, you may find it advantageous to lubricate the shaft more frequently.
However, what type of oil should be used? Here are some suggestions:
- 3-in-1 oil
- Oil for sewing machine
And how can you accomplish this? Here are all the necessary instructions:
- Turn the bread pan over.
- A few drops of oil should be squeezed between the shaft and the retaining ring.
- Turn the ring several times.
- Add a few drops of oil between the shaft and the retaining ring.
- Return the bread pan to the bread machine and proceed as usual.
9. Call a Professional
Have you attempted all the steps in this article to fix your bread machine without success? The best course of action moving forward is to contact a professional. There appears to be a more severe issue with your unit.
You have several options when it comes to requesting assistance:
- Claim coverage under your warranty. You should receive a free repair or replacement if it is still valid.
- Call a professional. If the unit’s warranty has expired, you must contact a specialist.
How to Hard Reset a Bread Machine
To perform a hard reset on your bread machine, you must do more than turn it on and off again. A bread machine has a large memory, allowing it to resume baking from where it left off in the event of a power outage. To reset the device, it must be unplugged for approximately 30 minutes.
How to perform a hard reset on your bread machine:
- Unplug the bread maker from the electrical outlet.
- Unplug the bread machine for thirty minutes.
- Reconnect the cord and turn it back on.
Conclusion
If your bread machine is not mixing the ingredients, we have outlined several viable solutions to the problem. If the problem persists despite the application of these troubleshooting steps, your bread machine may be experiencing a technical issue. If so, you should avoid repairing it yourself and instead consider hiring a skilled electrician.
Read more:
- Keurig K-Duo Hot & Iced Coffee Maker Review: The Smart 2-in-1 Brewer That Makes Every Coffee Lover Say WOW
- Chefman Crispinator Air Fryer Review: The 8-Qt 450°F Air Fryer That Makes Restaurant-Level Crispy Food at Home
- Ninja Kitchen System BR601AMZ Review: The 1200W All-In-One Blender & Food Processor That Replaces Half Your Kitchen
- COSORI 9-in-1 TurboBlaze Air Fryer 6 Qt Review: The Quiet Powerhouse That Makes Crispy Food Healthier & Faster
- Ninja 12-Cup Programmable Coffee Brewer Review: A Reliable, Flavor-Focused Coffee Maker for Everyday Homes
Related Posts
Best Zojirushi bread machine reviews
Zojirushi’s product is one of the best bread machines on...
Read More Post Views: 2,626
Why Trust Us
You will find what you are looking for at Jody's Bakery. From classic to luxury brands, you'll find both. We will help you to select appliances that fit your needs, budget and lifestyle. Whether you want to stop by to learn more — or plan to make a major purchase — we’ll treat you like family and assist you every step of the way. Shop with us today to receive friendly and experienced help along the way.


… [Trackback]
[…] Read More on to that Topic: jodysbakery.com/bread-maker-not-kneading/ […]
… [Trackback]
[…] Here you will find 66054 additional Information to that Topic: jodysbakery.com/bread-maker-not-kneading/ […]
… [Trackback]
[…] Here you can find 24334 additional Information on that Topic: jodysbakery.com/bread-maker-not-kneading/ […]
… [Trackback]
[…] Here you can find 28916 more Information to that Topic: jodysbakery.com/bread-maker-not-kneading/ […]
… [Trackback]
[…] Find More Info here to that Topic: jodysbakery.com/bread-maker-not-kneading/ […]
… [Trackback]
[…] Information to that Topic: jodysbakery.com/bread-maker-not-kneading/ […]
… [Trackback]
[…] Read More on to that Topic: jodysbakery.com/bread-maker-not-kneading/ […]
… [Trackback]
[…] Read More here on that Topic: jodysbakery.com/bread-maker-not-kneading/ […]
… [Trackback]
[…] Find More on on that Topic: jodysbakery.com/bread-maker-not-kneading/ […]
… [Trackback]
[…] Find More on that Topic: jodysbakery.com/bread-maker-not-kneading/ […]
шкаф на парковку москва [url=www.shkaf-parking-3.ru/]шкаф на парковку москва[/url] .
sitio web de servicios del cosmet?logo [url=http://clinics-marbella-1.com]sitio web de servicios del cosmet?logo[/url] .
клиника косметологии [url=http://clinics-marbella-1.ru]клиника косметологии[/url] .
сделать ремонт в квартире под ключ [url=https://remont-kvartir-pod-klyuch-1.ru/]сделать ремонт в квартире под ключ[/url] .
микрозаем онлайн [url=https://zajm-kg.ru/]микрозаем онлайн[/url] .
вклады в банках бишкека [url=https://deposit-kg.ru]вклады в банках бишкека[/url] .
займы онлайн без проверок срочно [url=www.zajm-kg-3.ru/]займы онлайн без проверок срочно[/url] .