

A crepe maker is a specialized kitchen appliance designed for...
Read More
An electric crepe maker is a versatile kitchen appliance designed specifically for making thin, delicate crepes with ease. It features a round, flat cooking surface that heats up evenly and provides precise temperature control, allowing you to create perfect crepes every time. Electric crepe makers are user-friendly and suitable for both beginners and experienced cooks, making it convenient to whip up a variety of sweet and savory crepe recipes in the comfort of your own kitchen.
With their non-stick surfaces and adjustable heat settings, these appliances take the guesswork out of crepe making and are a valuable addition to any culinary repertoire.
What's the best electric crepe maker?
The “best” electric crepe maker can vary depending on individual preferences and needs, but several popular and highly-rated options are often recommended by users. Here are a few electric crepe makers that are well-regarded for their performance and features:

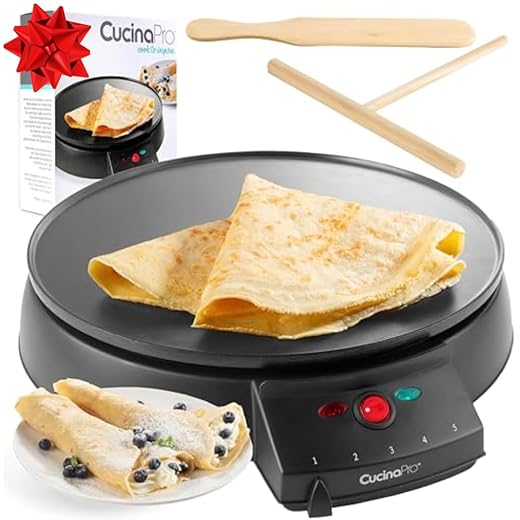
CucinaPro Cordless Crepe Maker- FREE Recipe Guide, NonStick Dipping Plate plus Electric Base & Batter Spatula, Portable Compact Baker, Homemade Holiday…
4.0
Amazon.com

CHEFMAN Electric Crepe Maker: Precise Temp Control, 12" Non-Stick Griddle, Perfect for Crepes, Tortillas, Blintzes, Pancakes, Waffles, Eggs, Bacon, Batter…
Amazon.com

Chefman Electric Crepe Maker & Griddle, Precise Temperature Control Skillet for Perfect Brunch Blintzes, Pancakes, Eggs, Bacon, & Tortillas, 12" Nonstick…
5.0
Amazon.com

Proctor Silex Electric Crepe Maker with 13” Nonstick Griddle for Eggs, Pancakes, Omelets and Quesadillas, with Temperature Control, Spatula, Spreader, Batter…
5.0
Amazon.com

Electric Crepe Maker – Cooks Roti, Tortillas & Pancakes – Nonstick Cooktop – 8-inch Cook Area w/On/Off Switch, Automatic Temperature Control & Cool Touch…
4.0
Amazon.com
12" Griddle & Crepe Maker, Non-Stick Electric Crepe Pan w Batter Spreader & Recipe Guide- Dual Use for Blintzes Eggs Pancakes, Portable, Adjustable…
5.0
Amazon.com

Portable Electric Crepe Maker 110V 8” Household Pancake Machine with Auto Temperature Control Non-stick Crepe Pan for Pancake, Blintz, Chapati,Including Egg…
4.0
Amazon.com
- CucinaPro Crepe Maker and Non-Stick 12″ Griddle: This crepe maker is known for its large cooking surface, making it suitable for making larger crepes or multiple smaller ones simultaneously. It features a non-stick surface, adjustable temperature control, and a batter spreader. See more review
- Morning Star – Crepe Maker Pro: This crepe maker is praised for its even heating, precise temperature control, and non-stick coating. It comes with a wooden batter spreader and a recipe booklet. More reviews here
- NutriChef Electric Crepe Maker: NutriChef offers a compact and easy-to-use crepe maker with a 12-inch cooking surface, adjustable temperature control, and a non-stick coating. It also includes a batter spreader. See more reviews here
- Proctor Silex 38400 Electric Crepe Maker: Known for its simplicity and affordability, this crepe maker is ideal for basic crepe-making needs. It has a non-stick cooking surface, a power light, and an adjustable temperature dial. More reviews here
- Palmer Electric Crepe Maker: Palmer is a trusted brand for crepe makers. Their electric crepe maker is durable and offers precise temperature control. It’s available in various sizes to suit your needs. More reviews here
- Cuisinart CPP-200 International Chef Crepe/Pizzelle/Pancake Plus: This versatile appliance can make crepes, pizzelles, and pancakes. It comes with a reversible non-stick plate, a batter spreader, and adjustable temperature settings. See more reviews
When choosing the best electric crepe maker for you, consider factors such as the size of the cooking surface, temperature control options, non-stick coating quality, ease of cleaning, and any additional features that you may find useful. Reading user reviews and checking product specifications can help you make an informed decision based on your specific requirements.
What are the different types of crepe makers?
There are several types of crepe makers available on the market, each designed to suit different preferences, settings, and cooking styles. Here are the main types of crepe makers:
- Electric Crepe Makers: These are the most common and versatile type of crepe makers. They come in various sizes and styles, from compact, single-plate models for home use to larger commercial versions. Electric crepe makers have a non-stick cooking surface and temperature control, allowing you to adjust the heat for precise cooking. They are suitable for making both sweet and savory crepes.
- Gas Crepe Makers: Gas-powered crepe makers are often used in commercial settings like creperies and restaurants. They provide high heat output and are suitable for cooking a large number of crepes quickly. They require a propane or natural gas hookup, making them less common for home use.
- Cast Iron Crepe Pans: Cast iron crepe pans, also known as crepe griddles or crepe skillets, are stovetop cookware designed specifically for making crepes. They have a flat cooking surface and are typically round or oval in shape. Cast iron crepe pans require preheating on a stovetop, and you have more control over the heat. They are ideal for those who enjoy the traditional crepe-making experience.
- Commercial Crepe Machines: These are large, high-capacity crepe makers commonly used in commercial kitchens and creperies. They are designed for high-volume production and often feature multiple cooking plates to prepare several crepes simultaneously.
- Crepe Makers with Griddles: Some crepe makers come with interchangeable plates, allowing you to use them as griddles for other types of cooking, such as pancakes, eggs, and grilled sandwiches. These versatile appliances offer additional functionality beyond crepe-making.
- Cordless Crepe Makers: Cordless or portable crepe makers are designed for outdoor use, such as picnics or camping. They are powered by rechargeable batteries or butane cartridges, offering convenience and mobility.
- Commercial Crepe Griddles: Large commercial griddles or flat-tops with a smooth cooking surface can also be used to make crepes in bulk. These are often found in professional kitchens and are suitable for high-volume production.
When choosing a crepe maker, consider factors such as the type of crepes you want to make, the quantity you plan to prepare, your available cooking space, and your level of cooking expertise. Each type of crepe maker has its advantages and may cater to specific needs and preferences.
What are differences between crepe maker and pancake maker?
Crepe makers and pancake makers are both kitchen appliances designed to cook flat, round, and thin dishes, but there are some key differences between the two:
Cooking Surface:
- Crepe Maker: A crepe maker typically has a large, flat, and smooth cooking surface that is specifically designed for making crepes. It is usually made of materials like cast iron, non-stick coated aluminum, or ceramic.
- Pancake Maker: A pancake maker, also known as an electric griddle or pancake griddle, has a larger cooking surface with raised edges. It is versatile and can be used to cook a wide range of foods, including pancakes, eggs, bacon, and more.
Shape and Size:
- Crepe Maker: Crepe makers often have a circular or round cooking surface with a diameter ranging from 8 to 16 inches. The shape and size are ideal for making thin and delicate crepes.
- Pancake Maker: Pancake makers come in various shapes and sizes, including square, rectangular, or oval. They can have larger cooking surfaces, typically ranging from 10 to 24 inches in width, making them suitable for cooking multiple pancakes or other breakfast items simultaneously.
Heat Control:
- Crepe Maker: Many crepe makers have precise temperature controls to adjust the heat for cooking crepes at the desired temperature, ensuring even cooking.
- Pancake Maker: Electric griddles often have temperature controls as well, but they offer a wider range of temperature settings to accommodate different types of foods, including pancakes, bacon, sausages, and more.
Versatility:
- Crepe Maker: Crepe makers are specialized for making crepes and may not be as versatile for cooking other types of dishes.
- Pancake Maker: Pancake makers are versatile and can be used for cooking a variety of breakfast foods and even other meals like grilled sandwiches or stir-fries.
Cooking Technique:
- Crepe Maker: Making crepes requires a specific technique, such as spreading the thin batter evenly and delicately flipping the crepe. Crepe makers are designed to facilitate this technique.
- Pancake Maker: Pancakes are thicker and require a different cooking technique, such as flipping them with a spatula. Pancake makers are designed to handle the thicker batter and flipping process.
Cleanup:
- Crepe Maker: Crepe makers often have non-stick cooking surfaces that make cleanup relatively easy. They typically require less oil or butter for cooking crepes.
- Pancake Maker: Electric griddles may have non-stick surfaces as well, but they are larger and may require more effort to clean, especially after cooking a variety of foods.
In summary, crepe makers and pancake makers serve different purposes in the kitchen. Crepe makers are specialized for making thin and delicate crepes, while pancake makers, or electric griddles, are versatile appliances suitable for cooking a wide range of breakfast and other dishes. The choice between the two depends on your cooking preferences and the types of foods you plan to prepare regularly.
How does an electric crepe maker work?
An electric crepe maker, also known as a crepe griddle or crepe pan, works by using a heated cooking surface to cook thin crepes evenly. Here’s how it typically works:
- Heating Element: The electric crepe maker contains a built-in heating element, which can be located beneath the cooking surface or embedded within it. This heating element generates the heat needed to cook the crepes.
- Temperature Control: Most electric crepe makers have an adjustable temperature control feature that allows you to set the desired cooking temperature. This feature is essential for achieving the right level of heat for cooking crepes to perfection.
- Non-Stick Surface: The cooking surface of the crepe maker is typically coated with a non-stick material like Teflon or ceramic. This coating ensures that the crepe batter doesn’t stick to the surface, making it easier to flip and remove the crepes without tearing them.
- Power On and Preheat: When you plug in the crepe maker and turn it on, electricity flows through the heating element, which starts to heat up the cooking surface. The temperature control allows you to adjust the heat to your desired level.
- Pouring Batter: Once the crepe maker reaches the desired cooking temperature, you pour a small amount of crepe batter onto the center of the hot cooking surface. The batter should spread and adhere evenly due to the non-stick coating.
- Spreading Batter: You use a tool called a crepe spreader (often included with the crepe maker) to spread the batter thinly and evenly across the cooking surface. The spreader helps create the characteristic thin and round shape of the crepe.
- Cooking and Flipping: The batter cooks on the first side for a minute or two until it’s lightly golden brown and the edges start to lift. Then, you carefully flip the crepe to cook the other side, which usually takes less time.
- Removing and Filling: Once both sides are cooked to your desired level, you use a spatula to gently lift the crepe from the cooking surface. You can then add your preferred fillings, fold or roll the crepe, and serve it hot.
The electric crepe maker provides consistent and adjustable heat, allowing you to create thin and delicate crepes with ease. Its non-stick surface and temperature control make it a user-friendly kitchen appliance for crepe enthusiasts and anyone looking to make delicious crepes at home.
How do you use an electric crepe maker?
Using an electric crepe maker is a straightforward process, and it allows you to make perfect crepes with ease. Here’s a step-by-step guide on how to use an electric crepe maker:
Ingredients:
- Crepe batter (prepared according to your favorite recipe)
- Cooking spray or a small amount of melted butter (for greasing, if needed)
- Desired fillings and toppings
Equipment:
- Electric crepe maker
- Crepe spreader (usually included with the crepe maker)
Instructions:
Preheat the Crepe Maker:
- Plug in the crepe maker and turn it on to your desired cooking temperature. Most crepe makers have an adjustable temperature control knob or dial. For most crepes, medium-high heat (around 350°F to 375°F or 175°C to 190°C) is suitable.
Prepare the Crepe Batter:
- Ensure that you have prepared your crepe batter in advance according to your favorite recipe. The batter should be smooth and free of lumps. If it has been resting, give it a quick stir before using.
Grease the Cooking Surface (if needed):
- If your crepe maker has a non-stick surface, you may not need to grease it. However, if it’s your first time using the crepe maker or you’re unsure about its non-stick properties, lightly grease the cooking surface with cooking spray or a small amount of melted butter. Use a paper towel or silicone brush to spread it evenly.
Pour the Batter:
- Pour a small amount of crepe batter onto the center of the hot cooking surface. The exact amount will depend on the size of your crepe maker and your preference for thin or slightly thicker crepes.
Spread the Batter:
- Quickly spread the batter evenly across the cooking surface using the crepe spreader. Start from the center and move outward in a circular motion. The goal is to create a thin, even layer of batter.
Cook the Crepe:
- Allow the crepe to cook for approximately 1-2 minutes on the first side. It should turn lightly golden brown and the edges will begin to lift.
Flip the Crepe:
- Gently use a spatula to lift the edges of the crepe and then flip it over. The second side cooks faster, usually in about 30 seconds to 1 minute.
Remove and Fill:
- Transfer the cooked crepe to a plate. Add your desired fillings and toppings, such as Nutella, fruit, cheese, or ham.
Fold and Serve:
- Fold the crepe in half or roll it up, depending on your preference, and serve it hot.
Repeat the Process:
- Continue making crepes with the remaining batter, greasing the cooking surface as needed.
Remember that practice makes perfect when it comes to crepe making. Adjust the cooking temperature and batter quantity to achieve the desired results. With some experimentation, you’ll become skilled at making delicious crepes using your electric crepe maker. Enjoy!
What else can you make with electric crepe maker?
An electric crepe maker is a versatile appliance that can be used to make more than just crepes. Here are some other dishes and recipes you can prepare using an electric crepe maker:
- Blintzes: Blintzes are similar to crepes but often filled with a sweet or savory filling such as cheese, fruit, or vegetables. You can make both the crepe and the filling on the crepe maker.
- Pancakes: While crepes are thin and delicate, you can use your crepe maker to make traditional pancakes as well. Just pour the pancake batter onto the hot surface and cook until they’re golden brown on both sides.
- Quesadillas: Prepare delicious quesadillas by placing tortillas on the crepe maker, adding cheese, veggies, and your choice of protein. Fold them in half and cook until the cheese is melted and the tortillas are crispy.
- Grilled Cheese Sandwiches: Make perfectly grilled cheese sandwiches by placing the bread and cheese directly on the crepe maker. You can also add ingredients like ham or turkey for added flavor.
- Omelets: Create quick and easy omelets by whisking eggs and pouring them onto the crepe maker. Add your favorite omelet fillings, fold it in half, and cook until the eggs are set.
- Tortillas: Use your crepe maker to cook homemade tortillas for tacos, burritos, or quesadillas. Roll out the tortilla dough and cook them on the hot surface until they’re lightly browned.
- Flatbreads: Make flatbreads like naan or pita bread on your crepe maker. Roll out the dough and cook until they puff up and have a nice golden color.
- Potato Pancakes (Latkes): Prepare crispy potato pancakes by grating potatoes and onions, mixing them with eggs and flour, and cooking them on the crepe maker until they’re golden brown.
- Mini Pizzas: Create mini pizzas by placing small rounds of pizza dough on the crepe maker, adding sauce, cheese, and your favorite toppings. Cook until the crust is crispy and the cheese is melted.
- Dosa: Dosa is a South Indian fermented rice and lentil crepe. You can make dosa batter and cook dosas on the crepe maker for a unique and delicious meal.
The versatility of an electric crepe maker makes it a handy kitchen tool for preparing a variety of dishes beyond traditional crepes. Experiment with different recipes and enjoy the convenience of this appliance for various meals and snacks.
Can you make an omelette on an electric crepe maker?
Yes, you can make an omelette on an electric crepe maker. Electric crepe makers typically have a flat, non-stick cooking surface that is perfect for cooking omelettes and other similar dishes. Here’s how you can make an omelette on an electric crepe maker:
Ingredients:
- Eggs (usually 2-3 per omelette)
- Salt and pepper to taste
- Fillings of your choice (e.g., cheese, diced vegetables, cooked ham, mushrooms, etc.)
Instructions:
- Preheat the Crepe Maker: Turn on your electric crepe maker and adjust the temperature to a medium-low setting. The ideal temperature for cooking an omelette is typically around 325°F (160°C) or slightly lower. Make sure the crepe maker is evenly heated.
- Prepare the Eggs: In a bowl, crack the eggs and whisk them together until well combined. Season the beaten eggs with salt and pepper to taste.
- Pour the Eggs: Once the crepe maker is fully heated, lightly grease the cooking surface with a small amount of oil or butter. Pour the beaten eggs onto the center of the crepe maker’s surface.
- Spread the Eggs: Quickly use a spatula to spread the beaten eggs evenly across the cooking surface. Tilt and rotate the crepe maker as needed to ensure the eggs cover the entire surface in a thin, even layer.
- Add Fillings: While the eggs are still slightly runny, add your choice of fillings to one half of the omelette. Common fillings include grated cheese, diced vegetables, cooked ham, mushrooms, and more. Be creative with your choices.
- Fold the Omelette: Once the eggs have mostly set but are still slightly runny on top, use a spatula to gently fold the omelette in half, covering the fillings. Press down gently to seal the omelette.
- Continue Cooking: Allow the omelette to cook for a little longer to ensure it’s fully set and slightly golden on both sides. You can flip it over if needed to achieve even cooking.
- Serve: Carefully slide the cooked omelette onto a plate, garnish with any additional toppings or herbs if desired, and serve hot.
Making an omelette on an electric crepe maker is convenient and allows you to customize your omelette with your favorite ingredients. Adjust the cooking time and temperature as needed to achieve your desired level of doneness for the omelette.
Can you make pancakes in a crepe maker?
Yes, you can make pancakes in a crepe maker, although the cooking process and result may be slightly different from cooking pancakes on a traditional griddle or skillet. Here’s how you can make pancakes on a crepe maker:
Ingredients:
- Pancake batter (pre-made or homemade)
- Cooking spray or a small amount of oil for greasing (if necessary)
- Toppings of your choice (e.g., syrup, butter, fruit, chocolate chips, etc.)
Instructions:
- Preheat the Crepe Maker: Turn on your crepe maker and adjust the temperature to a medium setting, typically around 325°F (160°C) or slightly lower. Make sure the crepe maker is evenly heated.
- Grease the Surface: Depending on the non-stick properties of your crepe maker, you may need to lightly grease the cooking surface with a cooking spray or a small amount of oil. Some crepe makers have non-stick surfaces that require minimal or no greasing.
- Pour the Pancake Batter: Pour pancake batter onto the center of the crepe maker’s surface. The amount of batter you pour will determine the size of your pancakes. Use a ladle or measuring cup for consistent pancake sizes.
- Spread the Batter: Quickly use the back of a spoon or a spatula to spread the pancake batter evenly across the cooking surface. The goal is to create pancakes of the desired thickness and size.
- Cook Until Bubbles Form: Allow the pancakes to cook until bubbles start to form on the surface. This is a sign that the bottom side is cooking and the pancakes are ready to be flipped.
- Flip the Pancakes: Carefully use a spatula to flip the pancakes. Unlike crepes, which are typically only cooked on one side, pancakes are cooked on both sides.
- Continue Cooking: Cook the pancakes on the second side until they are golden brown and cooked through. The cooking time will vary depending on the thickness of the pancakes and the temperature of the crepe maker.
- Serve: Once the pancakes are cooked to your desired level of doneness, transfer them to a plate. Add your favorite toppings such as syrup, butter, fruit, chocolate chips, or whipped cream.
Keep in mind that the cooking surface of a crepe maker is typically larger and flatter than a traditional griddle, so you can cook multiple pancakes at once. Adjust the temperature and cooking time as needed to achieve the perfect pancakes. Experiment with different pancake recipes and toppings to create delicious breakfast or brunch treats.
What is the best temperature for an electric crepe maker?
The best temperature for an electric crepe maker can vary depending on the recipe you’re using and personal preference, but here are some general guidelines for common types of crepes:
- Traditional Crepes: For classic thin and delicate crepes, a medium-high temperature of around 350°F to 375°F (175°C to 190°C) is commonly used. This temperature allows the crepes to cook quickly and evenly without becoming too crispy.
- Buckwheat Crepes: Buckwheat crepes, often used in savory dishes, can be cooked at a slightly lower temperature, around 325°F (160°C). Buckwheat flour can have a lower smoke point, so a lower temperature helps prevent burning.
- Thicker Crepes or Blinis: If you prefer thicker crepes or blinis, you can use a lower temperature of around 300°F (150°C) to 325°F (160°C) to allow for a longer cooking time and a more substantial texture.
- Non-Stick Coating: Keep in mind that most electric crepe makers have a non-stick coating on the cooking surface. This coating allows for easy flipping and removal of the crepes. Cooking at excessively high temperatures can damage the non-stick coating, so it’s essential to stay within the recommended temperature range provided by the manufacturer.
- Adjustable Temperature Control: If your crepe maker has adjustable temperature control, you can experiment with different settings to find the temperature that works best for your specific recipe and desired crepe texture.
Remember that crepe-making may involve a bit of trial and error, especially when you’re getting used to a new crepe maker. It’s a good practice to test one crepe first to determine the ideal temperature and cooking time before making a batch.
Additionally, factors like the thickness of the crepe batter, the size of the crepe maker, and the type of flour used can also influence the cooking temperature. Adjust as needed to achieve the perfect crepe for your culinary creations.
How do you know if crepe batter is too thin?
Crepe batter that is too thin can lead to problems when making crepes. It may result in crepes that are too delicate, tear easily, or have a translucent appearance. Here are some signs that your crepe batter may be too thin:
- Inconsistent Texture: If the crepe batter looks excessively runny and doesn’t coat the back of a spoon evenly, it’s likely too thin.
- Quick Pour and Spread: When you pour the batter onto the crepe maker or skillet, it spreads very quickly and thinly, making it challenging to control the size and shape of the crepe.
- Crepe Tears: Thin batter can result in crepes that tear easily when you try to flip them or remove them from the cooking surface.
- Translucent Appearance: Crepes made with overly thin batter may appear translucent or have a paper-thin, fragile texture.
To remedy thin crepe batter, you can adjust the consistency by adding more dry ingredients, typically flour, and possibly other key ingredients like eggs and milk. Here’s how to thicken crepe batter:
- Add More Flour: Gradually sprinkle in small amounts of all-purpose flour or the specific flour called for in your crepe recipe. Whisk or stir the batter thoroughly after each addition. Continue adding flour until you achieve the desired consistency.
- Egg Adjustment: If necessary, you can add an additional egg to the batter to thicken it. Eggs not only add structure but also flavor to crepes.
- Milk or Liquid Reduction: Conversely, if you suspect that your batter is too thin because you added too much liquid (milk or water), you can balance it by adding a bit more flour. Be sure to do this gradually to avoid over-thickening the batter.
- Resting Time: Sometimes, allowing the batter to rest for a brief period (about 30 minutes) can help it thicken naturally as the flour absorbs more liquid.
Remember that the ideal crepe batter consistency may vary depending on your recipe and personal preference. It’s a good practice to test one crepe initially to assess the batter’s thickness and make any necessary adjustments before making a full batch of crepes.
How long does it take to make crepes in an electric crepe maker?
The time it takes to make crepes in an electric crepe maker can vary depending on several factors, including the size of the crepe maker, the thickness of the crepes, and the cooking temperature. However, on average, it typically takes about 1 to 2 minutes to cook one side of a crepe and another 30 seconds to 1 minute to cook the other side.
Here’s a general guideline for cooking crepes in an electric crepe maker:
- Preheat the crepe maker to the desired temperature. Most crepe makers reach the optimal temperature in a few minutes.
- Pour a small amount of crepe batter onto the hot cooking surface, usually starting from the center and spreading it outward with a crepe spreader.
- Cook the first side for about 1 to 2 minutes. The crepe should turn lightly golden brown, and the edges may start to lift.
- Gently flip the crepe using a spatula or by carefully lifting the edges with your fingers. The second side cooks faster, usually in about 30 seconds to 1 minute.
- Once both sides are cooked to your desired level of doneness, transfer the crepe to a plate and fill it with your preferred fillings.
Keep in mind that these times are approximate, and you may need to adjust the cooking time based on your crepe maker’s specific temperature settings and your preference for the crepe’s texture (slightly crispy or soft and tender). It’s a good idea to experiment with the first crepe to determine the optimal cooking time for your particular crepe maker.
How long do I wait to flip a crepe?
The timing for flipping a crepe depends on several factors, including the thickness of the crepe, the heat of your cooking surface, and the specific recipe you’re following. However, as a general guideline, you can follow these steps for flipping a crepe:
- Pour and Spread the Batter: After pouring the crepe batter onto the hot cooking surface (such as a crepe maker or skillet), use a crepe spreader or the back of a spoon to quickly spread the batter evenly in a thin layer. The goal is to create a thin crepe.
- Watch for Set Edges: Keep a close eye on the edges of the crepe as it cooks. As the crepe begins to cook, the edges will start to set and lift slightly from the cooking surface. This is an indication that the bottom side is cooking and solidifying.
- Check for Dryness: Another sign that it’s time to flip the crepe is when the top surface of the crepe appears dry and the batter is no longer wet and runny. You should be able to touch the top of the crepe lightly without the batter sticking to your fingers.
- Lift the Edges: Gently lift the edges of the crepe with a spatula or your fingers to check the color of the bottom side. When the bottom is lightly golden brown, it’s ready to flip.
- Flip Carefully: Once the bottom side is cooked to your desired level of doneness, use a spatula to carefully flip the crepe. If the crepe is large, you can also use your fingers to help with the flipping process. Be gentle to avoid tearing the crepe.
- Cook the Second Side: After flipping, cook the second side of the crepe for a shorter amount of time, usually about half as long as the first side. This side typically cooks faster.
The entire process of cooking a crepe, including flipping, usually takes just a few minutes for each crepe. However, the exact timing can vary, so it’s important to monitor the crepe closely and adjust as needed based on your specific crepe maker or skillet and the thickness of the batter. As you gain experience, you’ll become more adept at judging the perfect timing for flipping your crepes.
How do you clean an electric crepe maker?
Cleaning an electric crepe maker is a relatively simple process. Here are the steps to clean it effectively:
Materials Needed:
- Mild dish soap
- Warm water
- Soft sponge or cloth
- Paper towels or a clean, dry cloth
- A non-abrasive scrubbing pad (if needed)
- Wooden or plastic spatula (for scraping off any stuck-on batter)
Cleaning Steps:
- Unplug the Crepe Maker: Before you begin cleaning, ensure that the crepe maker is unplugged and has had enough time to cool down. Safety is a priority.
- Remove Excess Batter: If there is any remaining crepe batter or residue on the cooking surface, use a wooden or plastic spatula to gently scrape it off. Be careful not to scratch the non-stick coating.
- Prepare the Soapy Water: Fill a bowl or basin with warm water and add a few drops of mild dish soap. Mix to create a soapy solution.
- Wipe the Surface: Dip a soft sponge or cloth into the soapy water, wring it out, and then gently wipe the cooking surface of the crepe maker. Pay extra attention to any areas with stubborn residue.
- Rinse and Repeat: Rinse the sponge or cloth thoroughly with clean water, and then wipe down the cooking surface again to remove any soap residue.
- Dry with Towels: Use paper towels or a clean, dry cloth to dry the cooking surface and any other parts of the crepe maker that came into contact with water.
- Clean the Exterior: If needed, wipe down the exterior of the crepe maker with a damp cloth to remove any spills or splatters.
- Storing: Once the crepe maker is clean and completely dry, store it in a cool, dry place. Avoid stacking heavy items on top of it to prevent damage to the non-stick surface.
Tips:
- Never submerge the entire crepe maker in water or immerse it in liquid, as this can damage the electrical components.
- Avoid using abrasive sponges or scouring pads, as they can scratch the non-stick coating.
- If there are stubborn stains or burnt-on residue, you can make a paste of baking soda and water, apply it to the affected area, and gently scrub with a non-abrasive scrubbing pad.
- Always refer to the manufacturer’s cleaning instructions provided in the user manual for your specific crepe maker model.
Regular cleaning and proper maintenance will help prolong the life of your electric crepe maker and ensure that it continues to perform well.
Should I use a stand mixer or food processor for pastry?
Both stand mixers and food processors can be used for making pastry dough, and each has its own advantages and disadvantages.
Stand mixers are often preferred by professional bakers and pastry chefs because they allow for precise control over the mixing process. The dough hook attachment can knead the dough thoroughly and evenly, and the mixer can be adjusted to the perfect speed for the recipe. Stand mixers are also capable of handling larger batches of dough than most food processors, making them a good choice for commercial kitchens or large baking projects.
Food processors, on the other hand, are generally faster and more efficient than stand mixers for making pastry dough. The blades of the food processor can cut the butter or other fats into the flour quickly and evenly, resulting in a light, flaky pastry crust. Food processors are also more versatile than stand mixers, as they can be used for a variety of other tasks such as chopping vegetables, making sauces, and grinding nuts.
Ultimately, the choice between a stand mixer and a food processor for making pastry dough comes down to personal preference and the specific needs of the recipe. If you prefer precise control over the mixing process and are making a large batch of dough, a stand mixer may be the better choice. If you value speed and versatility and are making a smaller batch of dough, a food processor may be the better choice.
Which food processors have a dough blade?
Most high-end food processors come with a dough blade attachment. However, not all models include this attachment, so it’s important to check the product specifications before purchasing a food processor if you specifically need a dough blade.
Some popular food processor models that come with a dough blade attachment include:
- Cuisinart Custom 14-Cup Food Processor
- KitchenAid 9-Cup Food Processor
- Hamilton Beach Professional 14-Cup Food Processor
- Breville Sous Chef 16-Cup Food Processor
- Ninja Mega Kitchen System (includes dough blade attachment)
These models are just a few examples, and there are many other food processors on the market that come with a dough blade attachment. If you already own a food processor that doesn’t include a dough blade, you may be able to purchase one separately as an accessory.
What equipment is used in pastry bakery?
Pastry bakeries use a variety of equipment to make their baked goods. Some common equipment used in pastry bakeries include:
- Mixers: Stand mixers or planetary mixers are used to mix and knead dough and batter.
- Ovens: Convection ovens, deck ovens, and rotary ovens are all used in pastry baking, depending on the type of pastry and the desired result.
- Rolling Pins: Rolling pins are used to roll out pastry dough to the desired thickness.
- Pastry Cutters: Pastry cutters are used to cut dough into specific shapes, such as circles for pies or rectangles for pastries.
- Pastry Bags and Tips: Pastry bags and tips are used to pipe pastry dough, cream, and other fillings onto pastries.
- Piping Bags and Nozzles: Piping bags and nozzles are used to decorate cakes and pastries with frosting and other toppings.
- Pastry Brushes: Pastry brushes are used to brush egg washes, glazes, and other coatings onto pastry dough.
- Pastry Dockers: Pastry dockers are used to prick the dough before baking to prevent it from puffing up.
- Pastry Scrapers: Pastry scrapers are used to scrape excess dough or filling from work surfaces and pastry cutters.
- Pastry Molds: Pastry molds are used to shape dough and fillings into specific shapes, such as tart shells or croissants.
- Scales: Accurate measurements are essential in pastry baking, and digital scales are used to measure ingredients precisely.
These are just some examples of the equipment used in pastry bakeries, and there are many other specialized tools and equipment used for specific pastries or techniques.
Benefits of using food processor for making pastry
Using a food processor for making pastry has several benefits:
- Speed: Using a food processor can save you time and effort, as it can mix the ingredients quickly and efficiently.
- Consistency: The food processor ensures that the ingredients are mixed evenly and consistently, resulting in a uniform dough.
- Flakiness: When making pastry, it’s important to keep the butter cold to achieve a flaky texture. The food processor can help you achieve this by cutting the butter into the flour quickly and without warming it up with your hands.
- Less mess: Mixing dough by hand or with a pastry blender can be messy and result in flour all over your kitchen. Using a food processor can help minimize the mess.
- Versatility: A food processor is a versatile kitchen tool that can be used for multiple tasks, including making pastry, chopping vegetables, and grinding nuts. This means you can get more use out of it than just for making pastry.
How do you use a food processor for pastry?
Using a food processor for pastry is a quick and easy way to make dough without the need for a pastry blender or mixing by hand. Here are the general steps for using a food processor for pastry:
- Measure out your dry ingredients (flour, salt, sugar, etc.) and add them to the food processor bowl.
- Cut your chilled butter into small cubes and add them to the food processor bowl.
- Pulse the food processor several times until the butter is cut into the dry ingredients and the mixture looks like coarse sand. Be careful not to overmix or the butter will become too warm and the pastry won’t be as flaky.
- Gradually add cold liquid (water, milk, etc.) to the mixture while pulsing the food processor. Stop adding liquid as soon as the mixture forms a cohesive dough. Again, be careful not to overmix.
- Turn the dough out onto a floured work surface and shape it into a disc. Cover with plastic wrap and refrigerate for at least 30 minutes before using.
Note: The specific instructions for using a food processor for pastry may vary depending on the recipe and the type of pastry you are making. Always refer to the recipe for specific instructions and ingredient amounts.
Factors to consider when choosing the best food processor for making pastry
When choosing the best food processor for making pastry, consider the following factors:
- Power: A food processor with a powerful motor will be able to handle tougher doughs and mixtures, resulting in a smoother and more consistent dough.
- Capacity: Consider the size of the food processor bowl and whether it can accommodate the amount of dough you need to make.
- Attachments: Look for a food processor that comes with a dough blade or attachment specifically designed for making pastry.
- Control options: Some food processors offer variable speed control, which can be helpful when making pastry as it allows you to gradually mix in the liquid and control the consistency of the dough.
- Ease of use and cleaning: Look for a food processor that is easy to use and clean, with dishwasher-safe parts for convenience.
- Brand and reputation: Choose a brand with a good reputation for quality and reliability, with good customer service and a warranty for peace of mind.
- Price: Food processors can range in price, so consider your budget and what features you need before making a purchase.
How to clean food processor for making pastry
To clean a food processor after making pastry, follow these steps:
- Unplug the food processor and remove the bowl and blade.
- Rinse the bowl and blade with hot water to remove any loose bits of dough or flour.
- Use a spatula or brush to remove any remaining bits of dough or flour.
- Fill the bowl with warm water and a small amount of dish soap.
- Use a soft sponge or cloth to scrub the bowl and blade.
- Rinse the bowl and blade with hot water to remove all the soap.
- Dry the bowl and blade with a clean towel or allow them to air dry completely.
- Clean the base of the food processor with a damp cloth or sponge, making sure to remove any food particles or debris.
- Wipe the base dry with a clean towel.
- Reassemble the food processor once all the parts are completely dry.
Note: Some food processors have dishwasher-safe parts, so check the manufacturer’s instructions before cleaning.
How to maintain electric crepe makerproperly
Proper maintenance of your electric crepe maker is essential to ensure its longevity and safe operation. Here are some tips on how to maintain an electric crepe maker:
- Cool Down and Unplug: Always allow the crepe maker to cool down completely before attempting any cleaning or maintenance. Unplug it from the power source to ensure safety.
- Wipe Clean After Each Use: After using the crepe maker, wipe the cooking surface with a clean, damp cloth or paper towel to remove any food residue or batter. Be careful not to immerse the appliance in water, as many electric crepe makers are not waterproof.
- Remove Stains: If there are stubborn stains or burnt-on residue on the cooking surface, you can use a gentle abrasive cleaner or a mixture of baking soda and water to scrub the area. Rinse thoroughly and wipe clean.
- Non-Stick Surface: If your crepe maker has a non-stick cooking surface, avoid using metal utensils, which can scratch and damage the non-stick coating. Use silicone, wooden, or plastic utensils instead.
- Storage: Store your crepe maker in a dry and cool place. If you plan to store it for an extended period, make sure it is clean and completely dry to prevent mold or corrosion.
- Inspect the Cord: Periodically inspect the power cord for any signs of damage, including fraying or exposed wires. If you notice any issues, replace the cord or have it repaired by a qualified technician.
- Check for Loose Parts: Examine the crepe maker for loose or damaged parts, such as knobs, handles, or feet. Tighten or replace any components as needed to ensure safe operation.
- Follow Manufacturer’s Instructions: Refer to the manufacturer’s user manual for specific maintenance guidelines and any recommended cleaning products. Some electric crepe makers may have removable and dishwasher-safe parts.
- Avoid Overheating: Use your crepe maker within the recommended temperature range. Overheating can damage the heating element and the non-stick coating.
- Regularly Inspect for Safety: Periodically check the crepe maker’s electrical components, such as the power cord and plug, for any signs of wear or damage. Ensure that the appliance is properly grounded.
- Use Appropriate Voltage: Make sure your crepe maker is compatible with the voltage in your region. Using it with the wrong voltage can damage the appliance and pose safety risks.
- Service and Repairs: If you encounter any problems with your electric crepe maker or suspect a malfunction, it’s best to have it serviced or repaired by a qualified technician. Attempting DIY repairs can be dangerous.
By following these maintenance tips and adhering to the manufacturer’s guidelines, you can keep your electric crepe maker in good working condition and enjoy many delicious crepes for years to come.
Troubleshooting about electric crepe maker
If you encounter issues with your electric crepe maker, troubleshooting can help identify and resolve the problem. Here are some common troubleshooting steps for electric crepe makers:
No Power or Heat:
- Check that the crepe maker is properly plugged into a functioning outlet.
- Ensure that the power switch or temperature control knob is set to the “On” position.
- Test the outlet with another appliance to verify it’s working.
- Check for any tripped circuit breakers or blown fuses in your home’s electrical panel.
Uneven Heating or Cold Spots:
- Make sure the crepe maker’s cooking surface is clean and free from any food residue or debris that could disrupt even heating.
- Verify that the crepe maker is placed on a level surface.
- If the crepe maker has a removable cooking plate, ensure it is securely attached.
- Some crepe makers have hot spots in the center due to the heating element’s design. Rotate the crepe maker or use a wooden spreader to even out the batter.
Sticking Batter:
- Ensure that the cooking surface is adequately preheated before pouring the crepe batter.
- Lightly grease the cooking surface with oil or a non-stick spray to prevent sticking.
- Adjust the temperature if the batter is cooking too quickly or sticking.
Overcooking or Burning:
- Lower the cooking temperature or reduce the cooking time if your crepes are consistently overcooked or burnt.
- Adjust the temperature control to a lower setting and allow the crepe maker to cool slightly between crepes to prevent excessive heat buildup.
Crepe Batter Doesn’t Spread Evenly:
- Use a crepe spreader or a spatula to help spread the batter evenly across the cooking surface.
- Adjust the thickness of the batter and the amount you pour to achieve the desired crepe thickness.
Crepe Maker Won’t Turn On:
- Check if the crepe maker has a safety feature that requires the cooking plate to be properly attached for it to turn on.
- Inspect the power cord for damage or loose connections.
- Test the crepe maker on a different outlet to rule out electrical issues.
Inconsistent Temperature:
- If the crepe maker’s temperature control doesn’t seem to maintain a consistent heat level, it may have a faulty thermostat. Contact the manufacturer or a qualified technician for repair.
Unusual Odors or Smoke:
- If you notice unusual odors or smoke when using the crepe maker, immediately turn it off, unplug it, and allow it to cool. There may be an issue with the heating element or wiring that requires professional inspection and repair.
Other Technical Issues:
- If you encounter technical problems beyond basic troubleshooting, such as malfunctions with the heating element or electrical components, contact the manufacturer’s customer support or a qualified appliance repair technician for assistance.
Always prioritize safety when troubleshooting and avoid attempting complex repairs yourself if you are not experienced with electrical appliances. Consulting the manufacturer’s user manual for specific troubleshooting guidance is also recommended.
Conclusion
In conclusion, an electric crepe maker is a versatile kitchen appliance that allows you to create delicious crepes with ease. Whether you’re a seasoned crepe chef or a novice cook, it simplifies the crepe-making process and offers consistent results. With proper care and maintenance, you can enjoy many crepe-filled meals and desserts for years to come.
Some key takeaways about electric crepe makers include:
- Convenience: Electric crepe makers are easy to use and provide consistent heat for even cooking. They often have temperature control settings, which allow you to adjust the heat to suit your crepe recipe.
- Versatility: You can make a variety of crepes, from sweet to savory, using an electric crepe maker. Experiment with different fillings, toppings, and batters to create your favorite crepe dishes.
- Maintenance: Proper maintenance, such as cleaning the cooking surface after each use and ensuring the appliance is stored in a dry place, is essential to extend its lifespan.
- Troubleshooting: If you encounter any issues with your electric crepe maker, refer to the user manual for troubleshooting guidance. In some cases, professional repair may be necessary.
- Safety: Always prioritize safety when using any electrical appliance. Follow the manufacturer’s instructions, and be cautious when handling hot surfaces.
Whether you enjoy classic French crepes, hearty breakfast pancakes, or international variations, an electric crepe maker can be a valuable addition to your kitchen. It offers the convenience and precision needed to create perfect crepes, making it a worthwhile investment for crepe lovers and culinary enthusiasts alike.
Related Posts
Do you need a crepe maker to make crepes?
A crepe maker, also known as a crepe griddle or...
Read MoreLight and Fluffy Lemon Pancakes
All-purpose flour, baking soda and salt combined with mixture of...
Read More Post Views: 1,328
Why Trust Us
You will find what you are looking for at Jody's Bakery. From classic to luxury brands, you'll find both. We will help you to select appliances that fit your needs, budget and lifestyle. Whether you want to stop by to learn more — or plan to make a major purchase — we’ll treat you like family and assist you every step of the way. Shop with us today to receive friendly and experienced help along the way.


bookmarked!!, I love your website!
Greetings, I do think your website could be having browser compatibility problems. Whenever I look at your web site in Safari, it looks fine but when opening in I.E., it has some overlapping issues. I simply wanted to provide you with a quick heads up! Aside from that, fantastic website!
Very nice write-up. I definitely appreciate this site. Keep it up!
Oh my goodness! Incredible article dude! Thank you, However I am encountering problems with your RSS. I don’t know why I cannot join it. Is there anybody else getting similar RSS issues? Anybody who knows the answer will you kindly respond? Thanks!
Excellent post. I’m facing many of these issues as well..
Everything is very open with a really clear clarification of the challenges. It was definitely informative. Your site is very helpful. Thanks for sharing.