


A crepe maker, also known as a crepe griddle or...
Read More
A crepe maker is a specialized kitchen appliance designed for making crepes, which are thin, delicate, and versatile French-style pancakes. These appliances typically feature a flat, circular cooking surface that evenly distributes heat, allowing you to create perfectly thin and uniform crepes. Crepe makers come in various sizes and styles, including electric models with non-stick surfaces, traditional cast iron or carbon steel pans, and stovetop versions.
They are a convenient tool for home cooks and professional chefs alike, enabling the preparation of sweet and savory crepes that can be filled with a wide range of ingredients, making them suitable for breakfast, brunch, dessert, or even a quick snack.
Our Top Picks

Moss & Stone Electric Crepe Maker With Auto Power Off, Portable Crepe Maker & Non-Stick Dipping Plate, ON/OFF Switch, Nonstick Coating & Automatic…
4.0
Amazon.com

Salton Cordless Electric Crepe Maker With Bonus Batter Dish and Spatula with Non-Stick Cooking Surface, Automatic Temperature Control for 7.5" Crepes and…
4.0
Amazon.com

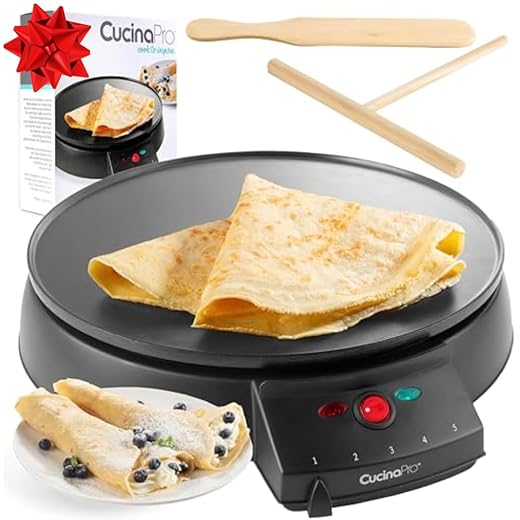
Crepe Maker Machine (Easy to Use), Pancake Griddle – Nonstick 12” Electric Griddle – Pancake Maker, Batter Spreader, Wooden Spatula – Crepe Pan for Roti,…
5.0
Amazon.com

Crepe Maker – Cooks Crepes Bacon, Roti, Tortillas & Pancakes – Nonstick Cooktop – 8-inch Cook Area with On/Off Switch, Automatic Temperature Control &…
4.0
Amazon.com

Chefman Electric Crepe Maker & Griddle, Precise Temperature Control Skillet for Perfect Brunch Blintzes, Pancakes, Eggs, Bacon, & Tortillas, 12" Nonstick…
5.0
Amazon.com

Proctor Silex Electric Crepe Maker with 13” Nonstick Griddle for Eggs, Pancakes, Omelets and Quesadillas, with Temperature Control, Spatula, Spreader, Batter…
5.0
Amazon.com
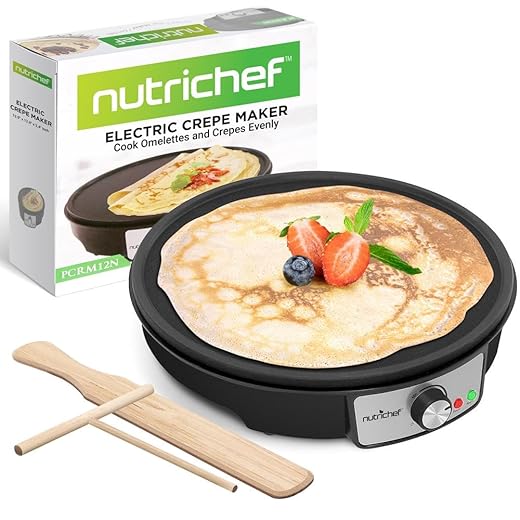
nutrichef Electric Griddle Crepe Maker Cooktop – Nonstick 12 Inch Aluminum Hot Plate with LED Indicator Lights & Adjustable Temperature Control – Wooden…
5.0
Amazon.com
12" Griddle & Crepe Maker, Non-Stick Electric Crepe Pan w Batter Spreader & Recipe Guide- Dual Use for Blintzes Eggs Pancakes, Portable, Adjustable…
5.0
Amazon.com

CHEFMAN Electric Crepe Maker: Precise Temp Control, 12" Non-Stick Griddle, Perfect for Crepes, Tortillas, Blintzes, Pancakes, Waffles, Eggs, Bacon, Batter…
4.0
Amazon.com

Crepe Maker – Cooks Bacon, Roti, Tortillas & Omelets – Easy to Clean Detachable Cooktop – 12 inch Cook Area with Adjustable Temperature – Includes Wooden…
4.0
Amazon.com

Chefman 12” Electric Crepe Maker & Griddle, Non-Stick Grill Pan, Includes Batter Spreader & Spatula, Black
5.0
Moss & Stone Electric Crepe Maker With Auto Power Off, Portable Crepe Maker & Non-Stick Dipping Plate (White)
4.0

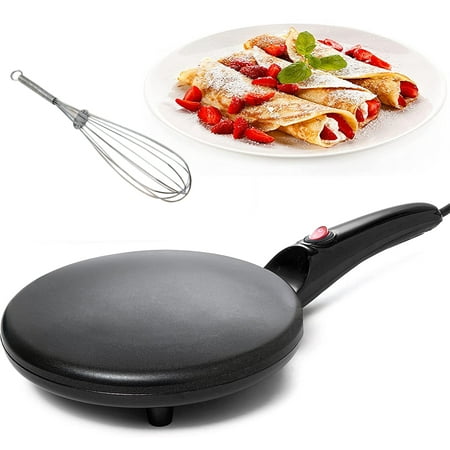
NutriChef 8 Inch Electric Nonstick Griddle Crepe Maker Hot Plate Cooktop, Black
4.0
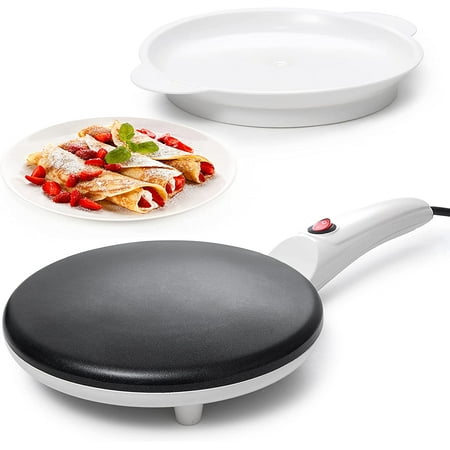
Crepe Maker,Nonstick Cooktop – 8 inch Cook Area, Includes Food Bowl, Whisk
4.0
What can I cook on a crepe maker?
A crepe maker is a versatile kitchen appliance that can be used to cook a variety of dishes beyond traditional crepes. Here are some foods you can cook on a crepe maker:
Sweet Crepes:
- Classic Nutella and Banana Crepes
- Lemon and Sugar Crepes
- Strawberry and Cream Crepes
- Mixed Berry Crepes
- Chocolate and Raspberry Crepes
- Caramel Apple Crepes
Savory Crepes:
- Ham and Cheese Crepes
- Spinach and Feta Crepes
- Chicken and Mushroom Crepes
- Smoked Salmon Crepes
- Sausage and Egg Crepes
- Vegetarian Crepes with Sautéed Vegetables
Flatbreads and Wraps:
- Homemade Flatbreads
- Quesadillas
- Tortillas
- Gyros Wraps
- Falafel Wraps
Stuffed Pancakes:
- Blintzes with Sweet Cheese Filling
- Stuffed Pancakes with Fruit Preserves
- Potato Pancakes with Various Fillings
Dessert Pizzas:
- Fruit and Nut Dessert Pizzas
- Chocolate and Marshmallow Dessert Pizzas
Egg Dishes:
- Omelettes
- Scrambled Eggs with Cheese
- Egg and Veggie Frittatas
Dosa and Crepe Variations:
- Indian Dosas with Various Fillings
- Chinese Spring Onion Pancakes
Mini Pancakes:
- Silver Dollar Pancakes
- Pancake “Tacos” with Toppings
Gluten-Free Crepes:
- Crepes Made with Alternative Flours (e.g., rice flour, buckwheat flour)
Tortillas and Wraps:
- Flour Tortillas
- Corn Tortillas
- Wraps for Sandwiches or Burritos
Pizza Variations:
- Mini Pizzas with Various Toppings
- Pizza Quesadillas
- Dessert Pizza with Fruits and Nutella
Asian Crepes:
- Vietnamese Banh Xeo (Savory Pancakes)
- Thai Roti (Sweet and Savory Pancakes)
The flat and even heat distribution of a crepe maker makes it suitable for cooking these dishes and more. Depending on your crepe maker’s size and features, you can experiment with a wide range of recipes to suit your culinary preferences, from breakfast and brunch items to savory lunches and sweet desserts.
What is the secret to a good crepe batter?
The secret to a good crepe batter lies in achieving the right consistency and flavor. Here are some key tips for making a perfect crepe batter:
Ingredients:
- Flour: Use all-purpose flour for traditional crepes. For a variation, you can use buckwheat flour for a nutty flavor or mix flours to create a unique taste.
- Eggs: Fresh eggs are essential for binding the batter. They also add richness and structure to the crepes.
- Milk: Whole milk is commonly used for crepes, but you can experiment with different types of milk, such as skim, 2%, or even almond milk for a dairy-free option.
- Water: Adding a small amount of water to the batter helps achieve a thin and delicate texture.
- Salt: A pinch of salt enhances the overall flavor of the crepes.
- Butter: Melted butter not only adds a rich flavor but also helps prevent sticking and adds a pleasant aroma.
Tips for the Perfect Crepe Batter:
- Sift the Flour: Sift the flour before adding it to the batter to remove any lumps and ensure a smooth texture.
- Rest the Batter: Let the batter rest for at least 30 minutes or even up to an hour in the refrigerator. This allows the flour to fully hydrate and the gluten to relax, resulting in tender crepes.
- Mix Smoothly: When combining the ingredients, whisk gently until the batter is smooth. Overmixing can activate gluten and lead to tough crepes.
- Consistency: The batter should be thin, similar to heavy cream. If it’s too thick, add a little more milk or water to achieve the desired consistency.
- Temperature: Ensure that the ingredients are at room temperature to prevent the batter from seizing or forming lumps when mixing.
- Butter for Cooking: Brush the crepe maker or pan with a small amount of melted butter before pouring the batter. This adds flavor and helps prevent sticking.
- Strain the Batter: Straining the batter through a fine-mesh sieve or cheesecloth can help remove any small lumps and create an ultra-smooth batter.
- Experiment: Don’t be afraid to experiment with flavorings like vanilla extract, sugar, or grated citrus zest for sweet crepes or herbs and spices for savory versions.
Remember that practice makes perfect when it comes to crepe making. It may take a few tries to get the hang of spreading the batter evenly and achieving the desired thickness. Once you’ve mastered the batter, you can explore a wide range of fillings and toppings to create delicious sweet and savory crepes.
How do you make crepes in a crepe maker?
Making crepes in a crepe maker is a straightforward process once you have your batter ready. Here are step-by-step instructions on how to make crepes using a crepe maker:
Ingredients:
- Crepe batter (prepared according to your favorite recipe)
- Melted butter or oil for greasing the crepe maker
- Toppings and fillings of your choice (e.g., Nutella, sliced bananas, sugar, lemon juice, whipped cream, savory ingredients like cheese and ham)
Equipment:
- Crepe maker
- Batter spreader (typically included with crepe makers)
- Silicone brush or paper towel for greasing
Instructions:
Preheat the Crepe Maker:
- Turn on the crepe maker and adjust the temperature to the desired setting. Most crepe makers have adjustable temperature controls. A medium to medium-high heat setting is usually suitable.
Grease the Cooking Surface:
- Brush the cooking surface of the crepe maker with a thin layer of melted butter or oil using a silicone brush or a folded paper towel. This prevents the crepes from sticking and adds flavor.
Pour the Batter:
- Once the crepe maker is hot, pour a small amount of crepe batter onto the center of the cooking surface. The exact amount will depend on the size of your crepe maker, but it’s typically around 1/4 to 1/3 cup of batter for a standard-sized crepe.
Spread the Batter:
- Quickly use the batter spreader (provided with the crepe maker) to spread the batter evenly across the cooking surface. Start from the center and work outward in a circular motion. The goal is to create a thin, even layer of batter.
Cook the Crepe:
- Allow the crepe to cook for 1-2 minutes or until the edges begin to lift and the bottom is lightly golden brown. You can gently lift a corner of the crepe with a spatula to check the color.
Flip the Crepe:
- Using a spatula or your fingers, carefully flip the crepe over to cook the other side. It should only take about 30 seconds to 1 minute to cook the second side.
Remove and Serve:
- Once both sides are lightly browned, transfer the crepe to a plate. Add your choice of sweet or savory fillings and toppings while the crepe is still warm.
Fold and Enjoy:
- Fold the crepe in half and then in half again to create a triangle or roll it up, depending on your preference. Serve immediately.
Repeat:
- Repeat the process with the remaining batter, greasing the cooking surface as needed between crepes.
Enjoy:
- Serve your freshly made crepes while they are warm. Sweet crepes can be garnished with powdered sugar, whipped cream, and fresh fruits, while savory crepes pair well with various fillings like cheese, ham, spinach, or mushrooms.
Remember that the first crepe you make is often a test crepe to determine the optimal temperature and cooking time for your specific crepe maker. Adjust the heat and cooking time accordingly for subsequent crepes. With practice, you’ll become more skilled at spreading the batter evenly and achieving perfectly thin and delicate crepes.
Do you grease a crepe maker?
Yes, it’s essential to grease a crepe maker before making each crepe to prevent the crepes from sticking to the cooking surface. Greasing the crepe maker also adds flavor and helps achieve a nice, golden-brown color on the crepes. Here’s how to grease a crepe maker:
Ingredients and Equipment:
- Melted butter or vegetable oil
- Silicone brush or folded paper towel
- Crepe maker
Steps:
Preheat the Crepe Maker:
- Turn on the crepe maker and adjust the temperature to the desired setting. Most crepe makers have adjustable temperature controls. A medium to medium-high heat setting is usually suitable.
Apply a Thin Layer of Grease:
- Use a silicone brush or a folded paper towel to apply a thin and even layer of melted butter or vegetable oil to the entire cooking surface of the crepe maker. Make sure to reach the edges.
Wait for the Grease to Heat:
- Allow the greased crepe maker to heat for a minute or two. This ensures that the cooking surface is evenly coated and hot enough for the batter.
Pour and Spread the Crepe Batter:
- Pour a small amount of crepe batter onto the center of the cooking surface and use the batter spreader (usually provided with the crepe maker) to spread the batter evenly across the surface. Start from the center and work outward in a circular motion.
Cook the Crepe:
- Follow the standard crepe-making process: cook one side until it’s lightly golden brown, then flip and cook the other side. The greased surface will help prevent sticking.
Repeat as Needed:
- If you plan to make multiple crepes, repeat the greasing process before pouring each new batch of batter.
Remember that you don’t need to apply excessive grease; a thin layer is sufficient to prevent sticking. If you find that the crepes are still sticking despite greasing, you can add a touch more butter or oil between crepes as needed.
Greasing the crepe maker is a crucial step in making perfect crepes, whether you’re preparing sweet or savory variations. It ensures that the crepes release easily from the cooking surface and maintain their delicate texture.
Can you cook meat on a crepe maker?
A crepe maker is primarily designed for cooking crepes, which are thin, delicate pancakes made from a thin batter. While it’s not typically used for cooking meat directly, you can use the crepe maker in creative ways to complement meat dishes. Here are some ideas:
- Sear Thin Cuts of Meat: While you can’t cook thick cuts of meat on a crepe maker, you can sear thin cuts like chicken cutlets, beef strips, or pork chops. Season the meat and quickly sear it on the hot crepe maker to add a flavorful sear before finishing the meat in the oven or on the stovetop.
- Warm Tortillas: You can use the crepe maker to warm tortillas for tacos, fajitas, or quesadillas. Simply place the tortillas on the hot surface for a short time until they become pliable.
- Prepare Fajita Vegetables: Sauté sliced bell peppers, onions, and other fajita vegetables on the crepe maker to serve alongside your grilled or seared meats.
- Melt Cheese: If you’re making sandwiches or burgers, you can use the crepe maker to melt cheese onto the meat or sandwich fillings.
- Keep Side Dishes Warm: Keep side dishes like pancakes, hash browns, or grilled vegetables warm on the crepe maker while you finish cooking meat on another part of the grill or stovetop.
- Warm Sandwiches: If you’re making sandwiches with cooked meat, you can warm or toast the assembled sandwiches briefly on the crepe maker to enhance their flavor and texture.
Remember that while you can use a crepe maker for these purposes, it may not be the most efficient option for cooking meat, especially thicker cuts. For cooking meat more thoroughly, consider using a grill, stovetop skillet, or oven.
Always be cautious when using the crepe maker for tasks other than making crepes, as it’s designed primarily for delicate, thin foods. Make sure to clean the crepe maker thoroughly after using it for savory dishes to avoid any flavor transfer to sweet crepes in the future.
How long does it take to make crepe in a crepe maker?
The time it takes to make a crepe in a crepe maker can vary depending on several factors, including the size of the crepe maker, the thickness of the batter, and the desired level of browning. However, as a general guideline, here’s an estimate of the time it takes to cook a single crepe:
- Preparation: It typically takes about 5-10 minutes to prepare the crepe batter, including mixing the ingredients and allowing the batter to rest.
- Cooking Time per Crepe: Once the crepe maker is hot and properly greased, it usually takes 1-2 minutes to cook one side of the crepe until it’s lightly golden brown.
- Flipping: After the first side is cooked, you’ll need to flip the crepe to cook the other side. This typically takes an additional 30 seconds to 1 minute.
- Total Time per Crepe: Taking into account both sides of the crepe, you can expect each crepe to be cooked in approximately 2.5 to 3.5 minutes.
Keep in mind that this is just an estimate, and the actual cooking time may vary based on your specific crepe maker’s size and heating element, the thickness of the batter, and the desired level of browning. It’s essential to monitor the crepe closely while it’s cooking to achieve the desired results. You’ll know it’s time to flip the crepe when the edges start to lift, and the bottom is lightly golden.
If you plan to make multiple crepes, you can streamline the process by prepping the batter in advance and cooking them in quick succession. It’s also helpful to have a plate or platter ready to stack the cooked crepes as you make them.
What temperature do you cook crepes at?
The temperature at which you cook crepes can vary depending on your specific crepe maker, pan, or griddle. Crepe makers typically have adjustable temperature controls, while traditional pans or griddles can be set on your stovetop at a specific heat level. Here are some general guidelines:
Crepe Maker with Temperature Control:
- If you’re using an electric crepe maker with a temperature control dial, a medium to medium-high heat setting (around 350°F to 375°F or 175°C to 190°C) is suitable for cooking crepes. You can start at a slightly lower temperature and adjust as needed to achieve the desired browning and cooking time.
Stovetop Crepe Pan or Griddle:
- If you’re using a crepe pan or griddle on your stovetop, you can follow these temperature guidelines:
- Preheat the pan or griddle over medium-high heat until it’s hot.
- Test the heat by sprinkling a few drops of water onto the surface. The water should sizzle and evaporate quickly.
- Reduce the heat to medium or slightly below medium before pouring the crepe batter.
- Adjust the heat as needed during cooking to prevent the crepe from browning too quickly.
- If you’re using a crepe pan or griddle on your stovetop, you can follow these temperature guidelines:
Gas Stovetop:
- On a gas stovetop, you can adjust the flame to achieve the desired heat level. Start with medium-high heat and adjust as necessary.
Remember that the thickness of your crepe batter and the specific equipment you’re using can impact the cooking time and temperature. It may take a bit of experimentation to find the perfect heat setting for your crepe maker or pan. The goal is to cook the crepes until they are lightly golden brown on both sides without burning them.
Additionally, allowing the batter to rest for about 30 minutes before cooking can help improve the texture of the crepes and make them easier to spread thinly on the cooking surface.
Benefits of using crepe maker
Using a crepe maker offers several benefits that make the process of crepe making more convenient and efficient compared to using a regular pan or griddle. Here are some of the advantages of using a crepe maker:
- Even Heat Distribution: Crepe makers are designed to provide consistent and even heat across the entire cooking surface. This helps ensure that crepes cook uniformly, with no hot spots that could lead to uneven browning or sticking.
- Precise Temperature Control: Many electric crepe makers come equipped with temperature control dials, allowing you to set and maintain the ideal cooking temperature. This precision is especially important when making delicate crepes, as it helps prevent overcooking or burning.
- Non-Stick Surface: Crepe makers typically have non-stick cooking surfaces, which reduce the need for excessive greasing and make it easier to flip and remove crepes without tearing them.
- Large Cooking Surface: Crepe makers often have a large, round cooking surface, which allows you to make larger crepes or cook multiple crepes simultaneously. This is advantageous when preparing a batch of crepes for a group or family.
- Batter Spreader: Many crepe makers come with a batter spreader tool that helps you evenly distribute the crepe batter on the cooking surface. This tool makes it easier to create thin, uniform crepes.
- Time Efficiency: Crepe makers can heat up quickly, which can save you time compared to using a stovetop pan that needs more time to reach the desired temperature.
- Consistency: With precise temperature control and even heat distribution, crepe makers allow you to achieve consistent results every time you make crepes. This is especially beneficial for those who frequently make crepes for breakfast or dessert.
- Versatility: While primarily designed for crepes, some crepe makers can also be used to cook other flatbreads like pancakes, tortillas, and blinis. This versatility adds to their usefulness in the kitchen.
- Ease of Cleaning: Non-stick surfaces on crepe makers make them relatively easy to clean. Most models can be wiped down with a damp cloth or sponge after use.
- Safety Features: Many electric crepe makers have built-in safety features like auto-shutoff and cool-touch handles, enhancing user safety during cooking.
- Consistent Results: Using a crepe maker allows you to consistently produce crepes with the desired texture, thickness, and appearance. This can be challenging to achieve consistently with a regular pan.
Overall, a crepe maker can simplify the crepe-making process, making it more accessible to both beginners and experienced cooks. Its precise temperature control and non-stick surface contribute to the perfect crepe, whether you’re making sweet or savory variations.
Factors to consider when choosing the best crepe maker
When choosing the best crepe maker, several factors should be considered to ensure that it meets your cooking needs and preferences. Here are some key factors to keep in mind:
Type of Crepe Maker:
- There are electric crepe makers and stovetop crepe pans. Electric crepe makers are more convenient as they have built-in heating elements and temperature controls. Stovetop pans require a separate heat source, typically a stovetop burner.
Size of Cooking Surface:
- Consider the size of the cooking surface. Larger crepe makers allow you to make bigger crepes or multiple crepes at once, which is useful for serving a group.
Temperature Control:
- Electric crepe makers should have adjustable temperature controls, allowing you to set the desired cooking temperature for different types of crepes and recipes. Precise temperature control is crucial for making perfect crepes.
Material and Coating:
- Look for a crepe maker with a non-stick cooking surface. Teflon or ceramic coatings are commonly used and make it easier to flip and remove crepes without tearing them. Stainless steel or cast iron crepe pans are also available for stovetop use.
Batter Spreader:
- Some crepe makers come with a batter spreader tool, which helps you evenly distribute the crepe batter on the cooking surface. This tool is handy for achieving thin and uniform crepes.
Heat Source (for Stovetop Pans):
- If you opt for a stovetop crepe pan, consider the type of heat source you’ll be using. Make sure the pan is compatible with your stovetop (gas, electric, induction, etc.).
Ease of Cleaning:
- Check whether the crepe maker is easy to clean. Removable cooking plates or surfaces are often more convenient for cleaning. Look for models that are dishwasher-safe or have non-removable parts that are easy to wipe clean.
Durability and Build Quality:
- Invest in a crepe maker made of high-quality materials that will last. Stainless steel or cast iron options are known for their durability.
Price and Budget:
- Determine your budget for a crepe maker. Prices can vary significantly depending on the type, size, and features. Consider how often you plan to use it and choose one that fits your budget.
Brand and Reviews:
- Research different brands and read customer reviews to get an idea of the crepe maker’s performance, reliability, and customer satisfaction.
Accessories and Extras:
- Some crepe makers come with additional accessories like batter spreaders, spatulas, or recipe books. These extras can be a valuable addition to your purchase.
Warranty:
- Check the manufacturer’s warranty for the crepe maker. A longer warranty period can provide peace of mind in case of any defects or issues.
By considering these factors, you can choose a crepe maker that suits your cooking style, kitchen space, and budget, and enjoy making delicious crepes at home with ease.
5 crepe maker recipes
Certainly! Here are five delicious crepe maker recipes to try:
Classic Crepes:
- Ingredients:
- 1 cup all-purpose flour
- 2 large eggs
- 1 1/4 cups milk
- 2 tablespoons melted butter
- A pinch of salt
- Instructions:
- Mix all the ingredients in a blender until smooth.
- Preheat your crepe maker and lightly grease it.
- Pour a small amount of batter onto the cooking surface, spread it thinly, and cook until lightly golden on both sides.
- Serve with your favorite fillings like Nutella, strawberries, or whipped cream.
- Ingredients:
Savory Ham and Cheese Crepes:
- Ingredients:
- Prepared crepes (from the classic recipe above)
- Sliced ham
- Grated Swiss or Gruyere cheese
- Dijon mustard (optional)
- Instructions:
- Place a slice of ham and a generous sprinkle of cheese on each crepe.
- Fold the crepe in half and heat it on the crepe maker until the cheese melts.
- Optionally, add a touch of Dijon mustard for extra flavor.
- Ingredients:
Nutella and Banana Crepes:
- Ingredients:
- Prepared crepes (from the classic recipe above)
- Nutella
- Sliced ripe bananas
- Instructions:
- Spread Nutella over the crepes.
- Add sliced bananas on top.
- Fold or roll the crepes and enjoy a delightful sweet treat.
- Ingredients:
Spinach and Feta Crepes:
- Ingredients:
- Prepared crepes (from the classic recipe above)
- Fresh spinach leaves
- Crumbled feta cheese
- Sautéed mushrooms (optional)
- Instructions:
- Lay spinach leaves and crumbled feta cheese on each crepe.
- Optionally, add sautéed mushrooms.
- Fold or roll the crepes and heat until the cheese softens.
- Ingredients:
Strawberry and Cream Crepes:
- Ingredients:
- Prepared crepes (from the classic recipe above)
- Fresh strawberries, sliced
- Whipped cream
- Powdered sugar (for dusting)
- Instructions:
- Lay sliced strawberries in the center of each crepe.
- Top with a dollop of whipped cream.
- Fold the crepes and dust with powdered sugar for an elegant dessert.
- Ingredients:
These crepe recipes offer a combination of sweet and savory options to suit your taste preferences. Feel free to customize them with your favorite fillings, sauces, or toppings. Enjoy your homemade crepes!
Related Posts
Amaranth Banana Pancakes
Batter prepared from amaranth flour, egg substitute and water. Banana...
Read MoreBlue Corn Pancakes with Pecans
Ground pecans, cornmeal, whole wheat flour, baking powder and sea...
Read More Post Views: 1,765
Why Trust Us
You will find what you are looking for at Jody's Bakery. From classic to luxury brands, you'll find both. We will help you to select appliances that fit your needs, budget and lifestyle. Whether you want to stop by to learn more — or plan to make a major purchase — we’ll treat you like family and assist you every step of the way. Shop with us today to receive friendly and experienced help along the way.

