Old-fashioned rolled oats, all-purpose flour, whole-wheat pastry flour, brown sugar,...
Read More
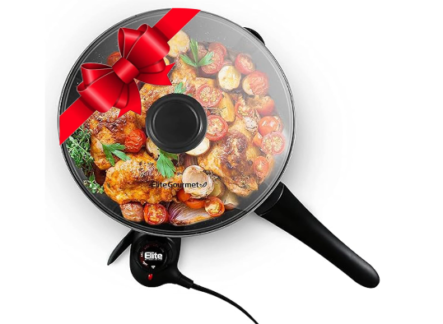
A crepe maker, also known as a crepe griddle or crepe pan, is a specialized kitchen appliance designed for making thin and delicate crepes. Crepes are thin, French-style pancakes that can be filled with a variety of sweet or savory fillings. Crepe makers are equipped with a flat, non-stick cooking surface that allows for even heating and easy flipping of crepes. They come in different sizes and designs, from traditional stovetop models to electric countertop versions, making it convenient to create delicious crepes at home with precision and consistency.
Whether you’re a professional chef or a home cook, a crepe maker is a versatile tool for crafting delectable breakfast, dessert, or snack crepes to suit your taste preferences.
Our top Picks
Does a crepe taste like a pancake?
Crepes and pancakes have some similarities, but they also have distinct differences in taste and texture. Here’s how they compare:
Taste:
- Crepes: Crepes have a mild, neutral flavor. They are not overly sweet, allowing them to be versatile for both sweet and savory fillings. Crepes can take on the flavors of their fillings, making them a great canvas for a wide range of ingredients.
- Pancakes: Pancakes typically have a sweeter flavor due to added sugar in the batter. They have a more pronounced buttery and vanilla taste, making them a popular breakfast choice for those with a sweet tooth.
Texture:
- Crepes: Crepes are thin and delicate, with a soft and slightly chewy texture. They are very thin, almost paper-thin, and have a pliable quality that allows them to be rolled or folded around fillings.
- Pancakes: Pancakes are thicker and fluffier with a lighter and cake-like texture. They are generally more substantial and have a thicker, softer interior.
Appearance:
- Crepes: Crepes are large, thin, and have a lacy, delicate appearance with slightly crispy edges.
- Pancakes: Pancakes are smaller, thicker, and have a more uniform, round shape.
In summary, while both crepes and pancakes are made from similar ingredients, their taste and texture profiles differ. Crepes are known for their thinness and versatility, often used for both sweet and savory dishes. Pancakes, on the other hand, are thicker and sweeter, making them a classic choice for a sweet breakfast. Ultimately, your preference for one over the other may depend on your desired flavor and texture experience.
What is the secret of a good crepe?
The secret to making a good crepe lies in several key factors that contribute to the perfect balance of flavor, texture, and appearance. Here are some secrets to making excellent crepes:
- Proper Batter Consistency: Achieving the right batter consistency is crucial. The batter should be smooth and free of lumps but also thin enough to spread thinly across the pan. Allow the batter to rest for at least 30 minutes to hydrate the flour fully.
- Use the Right Flour: Crepes are traditionally made with all-purpose flour. It provides the right balance of gluten for structure and tenderness. You can also experiment with other flours like buckwheat for a different flavor profile.
- Temperature Control: Ensure that your skillet or pan is properly preheated over medium-high heat. Use a non-stick skillet or a well-seasoned crepe pan. The pan should be hot but not too hot that it burns the crepes.
- Greasing the Pan: Use a small amount of butter or oil to grease the pan before pouring in the batter. This prevents sticking and helps achieve a lovely golden-brown color.
- The Swirling Technique: When pouring the batter into the pan, immediately lift the pan off the heat and tilt it in all directions to spread the batter thinly and evenly. This creates a delicate, lacy texture.
- Timing: Crepes cook quickly, usually in 1-2 minutes per side. Pay close attention to the edges of the crepe; they should lift slightly and turn golden before flipping.
- The Flip: Use a spatula to flip the crepe gently but swiftly. If you’re confident, you can also flip it by tossing it in the air. Practice makes perfect.
- Filling and Presentation: Be creative with your fillings, whether sweet or savory. Fold or roll the crepes around the fillings to create an attractive presentation.
- Experiment: Don’t be afraid to experiment with different flavors and ingredients. Crepes are versatile and can be filled with anything from Nutella and strawberries to ham and cheese.
- Practice: Crepe-making is a skill that improves with practice. Don’t be discouraged if your first crepe isn’t perfect. Keep trying, and you’ll get the hang of it.
- Keep Warm: If you’re making multiple crepes, keep them warm by stacking them on a plate and covering them with a clean kitchen towel or foil. This prevents them from drying out.
Remember that the first crepe in a batch is often a “test” crepe that helps you adjust the heat and batter consistency. As you continue, subsequent crepes tend to improve. With practice and attention to these secrets, you’ll be able to make delicious and beautifully thin crepes.
What tool do you use to make crepes?
To make crepes, you primarily need the following essential tools and equipment:
- Mixing Bowl: A mixing bowl is used to prepare the crepe batter by combining ingredients like flour, eggs, milk, melted butter, and any flavorings or seasonings.
- Whisk: A whisk is essential for thoroughly mixing the crepe batter and ensuring it is smooth and free of lumps.
- Measuring Cups and Spoons: Measuring cups and spoons are used to accurately measure and portion the ingredients for the crepe batter.
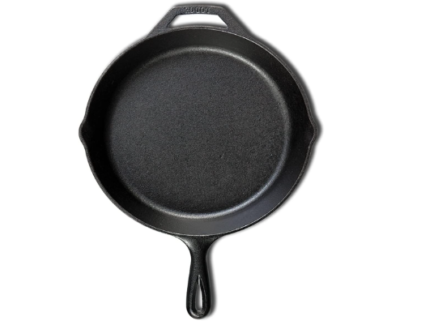
- Non-Stick Skillet or Frying Pan: A non-stick skillet or frying pan is the primary cooking surface for making crepes. A non-stick surface is essential to prevent the crepes from sticking and tearing during cooking.
- Spatula: A spatula is used to flip the crepes when they are cooking to ensure both sides are evenly cooked.
- Cooking Oil or Butter: A small amount of cooking oil or butter is used to grease the skillet or frying pan before cooking each crepe to prevent sticking.
- Ladle or Measuring Cup: A ladle or measuring cup is useful for pouring the crepe batter into the skillet. It helps ensure consistent portion sizes and makes it easier to spread the batter thinly.
- Heat Source: You’ll need a stove or other heat source to cook the crepes. Crepes are typically cooked on a stovetop, but electric griddles or induction cookers can also be used.
Optional tools and equipment that can make crepe-making more convenient include:
- Crepe Spreader: A crepe spreader is a wooden tool with a flat, round surface that can be used to evenly spread the crepe batter in the pan. It helps achieve a thin and uniform crepe.
- Crepe Maker or Crepe Griddle: A dedicated crepe maker or crepe griddle is an electric appliance specifically designed for making crepes. It often has a large, flat, non-stick cooking surface and precise temperature control for consistent results.
While dedicated crepe-making tools can be helpful, it’s entirely possible to make delicious crepes with the basic kitchen tools mentioned earlier. The key is to practice and master the technique of spreading the batter thinly and cooking the crepes evenly.
Do you need a crepe maker to make crepes?
You don’t necessarily need a crepe maker to make crepes. While a crepe maker can make the process more convenient and efficient, crepes can be made using common kitchen equipment that many people already have at home. Here’s how to make crepes without a crepe maker:
Ingredients:
- 1 cup all-purpose flour
- 2 large eggs
- 1 1/4 cups milk
- 2 tablespoons melted butter
- 1/4 teaspoon salt
- 1 tablespoon sugar (for sweet crepes, optional)
- Cooking oil or butter for greasing the pan
Instructions:
Prepare the Batter:
- In a mixing bowl, whisk together the flour, eggs, milk, melted butter, salt, and sugar (if making sweet crepes) until the batter is smooth and free of lumps. Allow the batter to rest for about 30 minutes at room temperature. Resting the batter helps improve the texture of the crepes.
Heat a Non-Stick Pan:
- Place a non-stick skillet or frying pan over medium-high heat. It’s essential to use a non-stick pan to ensure the crepes don’t stick.
Grease the Pan:
- Once the pan is hot, lightly grease it with a small amount of cooking oil or butter. Use a paper towel or a brush to spread the oil evenly.
Pour and Swirl:
- Pour a small ladleful of the crepe batter into the center of the hot pan. Immediately lift the pan from the heat and tilt it in all directions to spread the batter thinly across the bottom, forming a large, thin circle.
Cook the Crepe:
- Cook the crepe for about 1-2 minutes or until the edges start to lift and the bottom is lightly golden. You can use a spatula to check the underside.
Flip the Crepe:
- Carefully flip the crepe using a spatula or your fingers. Cook the other side for an additional 1-2 minutes or until it’s cooked through and lightly browned.
Remove and Repeat:
- Transfer the cooked crepe to a plate and keep it warm. Repeat the process with the remaining batter, adding a touch of oil or butter to the pan as needed to prevent sticking.
Serve: Serve your crepes with a variety of fillings, such as Nutella, strawberries, whipped cream, ham, cheese, or sautéed vegetables, depending on your preference.
While a crepe maker can make the process more streamlined, making crepes without one is entirely possible and can yield delicious results with a bit of practice.
How do you use a crepe maker?
Using a crepe maker is a straightforward process that allows you to make delicious crepes with ease. Here are step-by-step instructions on how to use a crepe maker:
Ingredients:
- Crepe batter (prepared in advance)
- Cooking oil or butter for greasing (optional)
Tools and Equipment:
- Crepe maker (electric or stovetop)
- Wooden crepe spreader (optional)
- Non-stick spatula
Instructions:
Preheat the Crepe Maker:
- If you have an electric crepe maker, plug it in and set it to the desired temperature. Most electric crepe makers have a temperature control dial.
- If you’re using a stovetop crepe maker or crepe pan, place it on the stovetop and heat it over medium-high heat. You can use a thermometer to monitor the temperature. A well-preheated crepe maker is essential for even cooking.
Grease the Cooking Surface (if needed):
- Depending on the type of crepe maker you have, you may need to grease the cooking surface lightly. Some electric crepe makers have non-stick surfaces, while others may benefit from a small amount of oil or butter.
- Use a paper towel or a silicone brush to spread the oil evenly over the cooking surface.
Pour and Spread the Batter:
- Once the crepe maker is properly preheated, pour a small amount of crepe batter onto the center of the cooking surface. The exact amount depends on the size of your crepe maker; usually, it’s about 1/4 to 1/3 cup of batter.
- If you have a wooden crepe spreader, use it to quickly spread the batter evenly in a circular motion from the center outward. Alternatively, you can tilt and rotate the crepe maker to spread the batter thinly and evenly.
Cook the Crepe:
- Allow the crepe to cook for about 1-2 minutes, or until the edges start to lift and the bottom is lightly golden. The exact cooking time may vary depending on your crepe maker and the temperature setting.
- You can use a spatula to gently lift the edge of the crepe to check for doneness.
Flip the Crepe:
- Once the bottom is cooked and the edges are slightly golden, use a spatula to carefully flip the crepe to the other side. Be gentle to avoid tearing the crepe.
Cook the Other Side:
- Cook the other side of the crepe for an additional 1-2 minutes or until it’s cooked through and has a light golden color.
Remove and Serve:
- Transfer the cooked crepe to a plate and keep it warm. You can fold or roll the crepe and fill it with your favorite sweet or savory fillings.
Repeat: Continue the process, greasing the cooking surface as needed, until you’ve made all the crepes you desire.
Clean Up: Allow the crepe maker to cool down before cleaning it. Most electric crepe makers have non-stick surfaces that are easy to wipe clean. Stovetop crepe pans should be cleaned following the manufacturer’s instructions.
With practice, you’ll become more skilled at using your crepe maker, and you’ll be able to create perfect crepes for a variety of delicious meals and desserts.
What can you cook in crepe maker?
A crepe maker is a versatile appliance that can be used to cook a wide range of dishes, both sweet and savory. Here are some popular foods you can cook using a crepe maker:
Sweet Crepes:
- Nutella and Banana Crepes: Spread Nutella on a warm crepe, add sliced bananas, and fold it up for a classic sweet treat.
- Strawberry and Cream Crepes: Fill crepes with fresh strawberries and whipped cream or mascarpone cheese.
- Lemon and Sugar Crepes: Sprinkle crepes with sugar and a squeeze of fresh lemon juice for a simple yet delightful dessert.
- Mixed Berry Crepes: Top crepes with a mixture of mixed berries and a dusting of powdered sugar.
- Chocolate and Raspberry Crepes: Drizzle warm crepes with melted chocolate and add fresh raspberries for a rich and fruity dessert.
Savory Crepes:
- Ham and Cheese Crepes: Fill crepes with ham and grated cheese, then fold and cook until the cheese melts.
- Spinach and Feta Crepes: Sauté spinach with garlic and onions, mix in crumbled feta cheese, and fill crepes for a delicious savory option.
- Chicken and Mushroom Crepes: Cook chicken and mushrooms in a creamy sauce, then use it as a filling for crepes.
- Smoked Salmon Crepes: Spread cream cheese on crepes, add smoked salmon slices, capers, and red onion for an elegant brunch option.
- Sausage and Egg Crepes: Scramble eggs with cooked sausage and cheese, then roll them up in crepes for a hearty breakfast.
Other Crepe Variations:
- Vegetable Crepes: Fill crepes with sautéed or roasted vegetables, such as bell peppers, zucchini, and asparagus, for a vegetarian option.
- Crepes Suzette: A classic French dessert where crepes are flambeed with an orange-flavored liqueur and served with a sweet sauce.
- Seafood Crepes: Make a seafood filling with shrimp or crab, add a creamy sauce, and roll it up in crepes for an indulgent dish.
- Mushroom Crepes: Create a rich and savory mushroom filling with herbs and cream for a vegetarian or vegan option.
- Breakfast Crepes: Fill crepes with scrambled eggs, bacon or sausage, and cheese for a hearty breakfast dish.
The possibilities are nearly endless when it comes to crepe fillings and toppings. You can get creative and customize your crepes to suit your taste preferences, whether you prefer sweet or savory flavors. Crepe makers are a fantastic tool for experimenting with various ingredients and creating delicious meals.
Can you make pizza on a crepe maker?
While a crepe maker is specifically designed for making crepes, it may not be the best choice for making traditional pizzas due to its size and shape. Crepe makers typically have a flat and round cooking surface that is ideal for cooking thin and delicate crepes. However, you can create pizza-inspired dishes on a crepe maker with some modifications:
Crepe Maker Pizza Variation:
- Mini Pizzas: Instead of making one large pizza, consider making mini pizzas or flatbreads on a crepe maker. Use small rounds of pizza dough or flatbread dough that can fit comfortably on the cooking surface.
- Precooked Toppings: Precook the pizza toppings such as sauce, cheese, vegetables, and meat separately before assembling the mini pizzas on the crepe maker. This will help ensure that the toppings are heated through and melted by the time the pizza crust is cooked.
- Quick Cooking: Crepe makers can cook relatively quickly, so keep an eye on the mini pizzas to prevent burning. Since the cooking surface is flat, you may need to flip the mini pizza to ensure even cooking on both sides.
- Thin Crust: Crepe makers are well-suited for thin-crust pizzas or flatbreads. Adjust the thickness of the pizza dough accordingly.
- Non-Stick Surface: Make sure the crepe maker’s cooking surface is adequately greased or non-stick to prevent sticking.
While a crepe maker can be used to create pizza-like dishes, keep in mind that traditional pizza ovens or conventional ovens with pizza stones are better equipped for making traditional, larger-sized pizzas with thicker crusts. If you have access to an oven, it’s usually the preferred method for making traditional pizzas. However, for small, quick, and creative pizza variations, a crepe maker can be a fun and convenient option.
Do you put oil on a crepe maker?
Whether or not you need to put oil or butter on a crepe maker depends on the type of crepe maker you have and its non-stick properties. Here are some guidelines:
- Non-Stick Crepe Maker: Many modern crepe makers come with non-stick cooking surfaces. If your crepe maker has a non-stick coating, you typically don’t need to use oil or butter to prevent sticking. The non-stick surface should allow you to pour the crepe batter directly onto the hot surface without additional greasing.
- Cast Iron Crepe Maker: If you have a traditional cast iron crepe maker or crepe pan, it’s a good practice to lightly grease the cooking surface before making each crepe. Use a small amount of oil or butter on a folded paper towel or a brush to grease the surface. This helps ensure that the crepes release easily and prevents sticking.
- Seasoned Crepe Pan: Some crepe pans are made of carbon steel or cast iron and are seasoned to create a natural non-stick surface. In this case, you may not need to add oil or butter for each crepe once the pan is well-seasoned. However, if you notice any sticking, a small amount of oil or butter can still be used sparingly.
- Electric Crepe Maker: Electric crepe makers vary in terms of their cooking surfaces. Some have non-stick coatings, while others may benefit from a light greasing. Refer to the manufacturer’s instructions for your specific model.
Here are some additional tips:
- Use a small amount of oil or butter when greasing the cooking surface. Too much fat can result in greasy or heavy crepes.
- If you use oil, consider using a neutral-flavored oil like vegetable oil or canola oil.
- After greasing, wipe off any excess oil with a paper towel to ensure an even and thin coating.
- As you make subsequent crepes, you may find that you need to re-grease the surface occasionally if the crepes begin to stick.
In summary, whether or not you need to use oil or butter on a crepe maker depends on the type of crepe maker and its non-stick properties. Always follow the manufacturer’s recommendations and adjust your greasing method accordingly to achieve the best results.
What size crepe maker is best for making crepe?
The best size for a crepe maker depends on your specific needs and the quantity of crepes you plan to make. Crepe makers come in various sizes, but there are two common sizes that are suitable for most home cooks:
- 10 to 12 Inches (25 to 30 cm): This is the most common size for home use. It’s large enough to make standard-sized crepes that are approximately 8 to 10 inches (20 to 25 cm) in diameter. A 10 to 12-inch crepe maker is suitable for making individual crepes and is ideal for small to medium-sized gatherings or family breakfasts.
- 13 to 16 Inches (33 to 40 cm): This larger size is suitable for those who plan to make larger crepes or need to make a larger quantity of crepes at once. It’s a good choice for cooking for a crowd or when you want to make crepes with a larger diameter, such as for dessert crepes.
Here are some factors to consider when choosing the best size for your crepe maker:
- Cooking Space: Ensure that you have enough counter space to accommodate the crepe maker of your chosen size.
- Frequency of Use: If you plan to make crepes regularly or for a family, a larger crepe maker may be more convenient. For occasional use or small batches, a smaller size may suffice.
- Storage Space: Consider where you’ll store the crepe maker when it’s not in use. Larger crepe makers may require more storage space.
- Cooking Speed: A larger crepe maker can cook multiple crepes simultaneously, saving time when making crepes for a group.
- Portability: Smaller crepe makers are often more portable and easier to transport if you plan to take them to events or gatherings.
- Ultimately, the best size for your crepe maker depends on your specific cooking needs and available space. Both 10 to 12-inch and 13 to 16-inch crepe makers can produce delicious crepes, so choose the size that best suits your lifestyle and preferences.
Are crepe makers worth it?
Whether a crepe maker is worth it depends on your cooking preferences and how often you plan to make crepes. Here are some considerations to help you decide if investing in a crepe maker is worth it for you:
Pros of Using a Crepe Maker:
- Ease of Use: Crepe makers are designed specifically for making crepes, and they often have non-stick surfaces that make it easier to spread and flip crepes without sticking or tearing.
- Consistent Results: Crepe makers offer consistent temperature control, ensuring that each crepe cooks evenly and turns out perfectly.
- Speed: With a crepe maker, you can cook crepes quickly and efficiently, making it a convenient tool for preparing meals or desserts.
- Versatility: Crepe makers can be used for both sweet and savory crepes, as well as other dishes like blintzes and dosas.
- Presentation: Crepe makers can help you achieve the traditional thin and delicate texture of crepes, making them look and taste authentic.
Cons of Using a Crepe Maker:
- Specialized Appliance: Crepe makers are a single-purpose appliance, which means they take up storage space and may not be used as frequently as other kitchen tools.
- Cost: Quality crepe makers can be relatively expensive compared to other cookware.
- Limited Capacity: Crepe makers typically make one crepe at a time, so if you need to make a large quantity of crepes for a group, it can be time-consuming.
Considerations for Your Decision:
- Frequency: If you plan to make crepes regularly, a crepe maker can save you time and effort, making it a worthwhile investment.
- Cooking Skill: Crepe makers are especially helpful for those who are less experienced in making crepes on a stovetop, as they provide better control.
- Space: Consider whether you have enough storage space for an additional kitchen appliance.
- Budget: Evaluate your budget and how much you’re willing to spend on a specialized kitchen tool.
- Occasions: Think about the occasions when you’ll use it. If you enjoy hosting brunches or dinner parties where crepes are on the menu, a crepe maker can be a valuable addition to your kitchen.
Ultimately, the decision to invest in a crepe maker depends on your personal preferences and how often you plan to make crepes. If you love crepes and see yourself using it frequently, it may be worth it. However, if you only make crepes occasionally, you can achieve excellent results using a non-stick skillet or crepe pan on your stovetop.
Related Posts
Blueberry and Ginger Mini Pancakes
Blueberries pureed with sour cream and sugar, and set aside....
Read MoreWhy Trust Us
You will find what you are looking for at Jody's Bakery. From classic to luxury brands, you'll find both. We will help you to select appliances that fit your needs, budget and lifestyle. Whether you want to stop by to learn more — or plan to make a major purchase — we’ll treat you like family and assist you every step of the way. Shop with us today to receive friendly and experienced help along the way.


