Creaming butter and sugar are an essential baking technique that...
Read More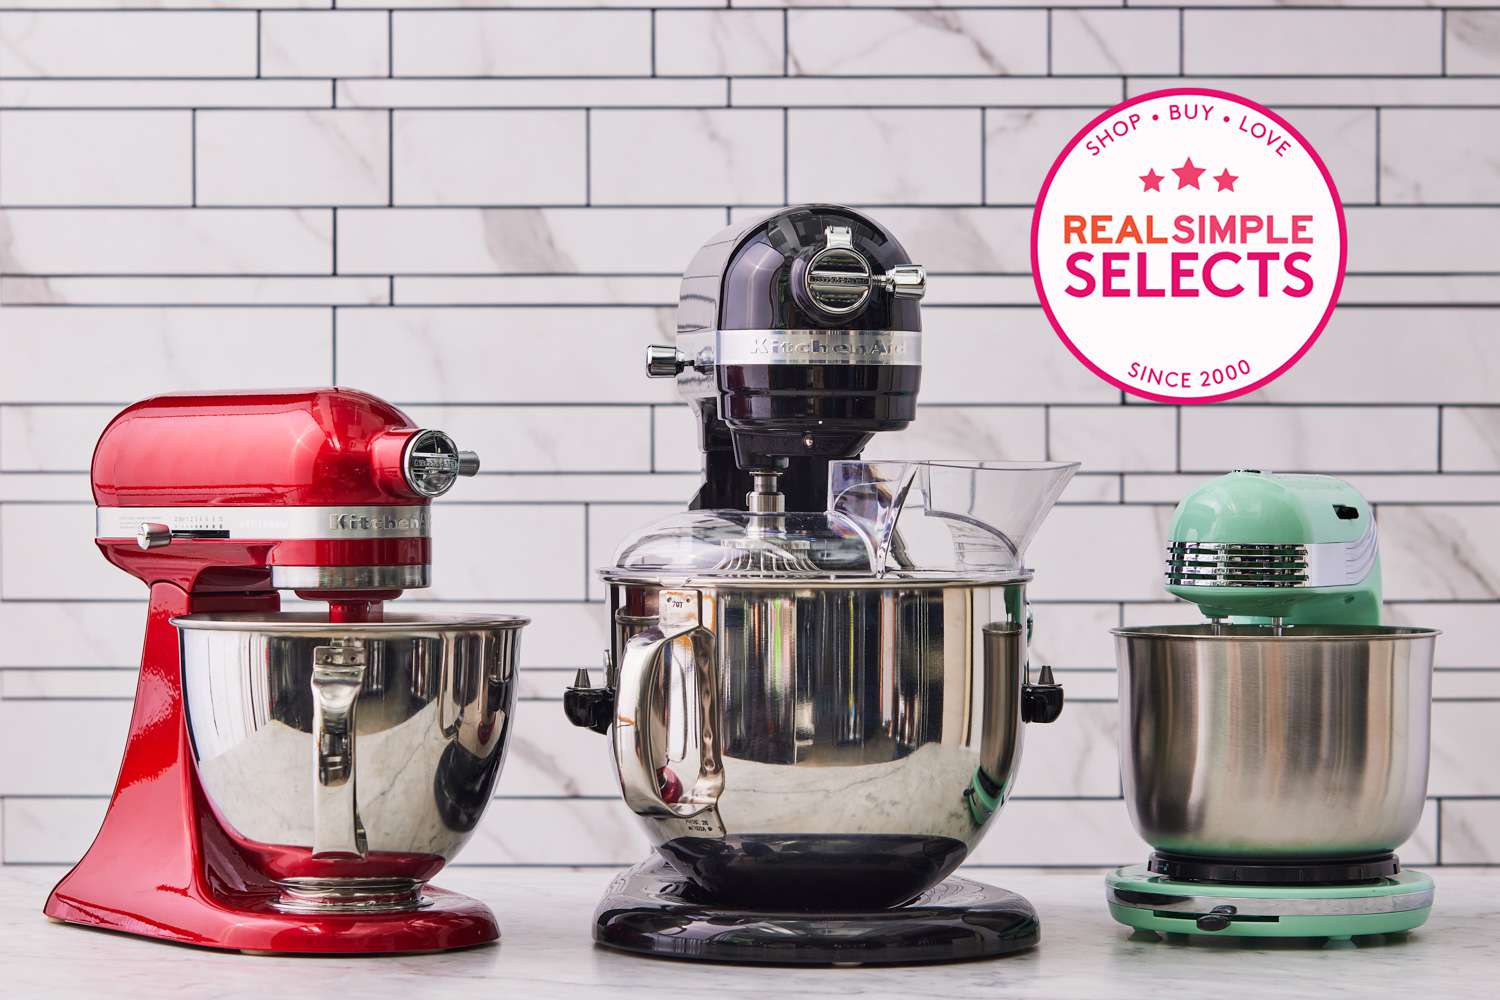
A stand mixer is an essential tool for any baker, especially when it comes to creaming butter. Creaming butter is the process of mixing butter with sugar until it becomes light and fluffy, which is the first step in many baked goods such as cakes, cookies, and frosting. A good stand mixer for creaming butter should have a powerful motor, variable speed settings, and a paddle attachment, as these features can make the process more efficient and effective.
In this regard, there are many stand mixers available in the market that are specifically designed for creaming butter. By choosing the right stand mixer, you can make your baking process more efficient and less time-consuming, while achieving consistent and perfect results every time.
What is the best stand mixer for creaming butter?
The best stand mixer for creaming butter is one that has a powerful motor, variable speed settings, and a paddle attachment. Here are some stand mixers that are well-suited for creaming butter:
- KitchenAid Artisan Series Stand Mixer: This popular stand mixer is known for its powerful 325-watt motor and versatile mixing attachments, including a flat beater that is perfect for creaming butter. It also has ten speed settings, allowing you to easily adjust the mixing speed as needed.
- Cuisinart SM-50BC Stand Mixer: With a 500-watt motor, this stand mixer has plenty of power for creaming butter quickly and efficiently. It also has twelve speed settings and comes with a flat paddle attachment, making it a great option for home bakers.
- Breville Scraper Mixer Pro: This stand mixer has a unique design with a scraper beater that automatically scrapes the sides of the bowl while mixing, ensuring that all ingredients are thoroughly combined. It also has a powerful 550-watt motor and twelve speed settings, making it a great option for creaming butter.
- Kenwood Chef Stand Mixer: This stand mixer is popular for its powerful 1000-watt motor and large capacity, making it ideal for creaming large quantities of butter. It also has eight speed settings and comes with a K-beater attachment that is perfect for creaming butter.
Ultimately, the best stand mixer for creaming butter will depend on your individual needs and preferences. It’s important to choose a stand mixer that has the features you need and is well-suited for the amount of butter you will be creaming.
Is it cheaper to make your own butter?
Making your own butter can be cheaper or more expensive than buying it, depending on various factors such as the cost of ingredients, equipment, and labor involved.
If you have access to inexpensive cream and use a simple method, such as shaking a jar of cream vigorously or using a stand mixer to churn the cream, making your own butter can be more cost-effective than buying it. Additionally, you have the benefit of knowing exactly what is in your butter and being able to customize the flavor to your liking.
However, if you are using high-quality ingredients or specialized equipment, such as a butter churn, making your own butter can be more expensive than buying it. In these cases, the cost of ingredients and equipment may outweigh the cost savings of making your own butter.
In general, if you are interested in making your own butter, it’s a good idea to compare the cost of ingredients and equipment to the cost of buying butter in your area, and consider the amount of time and effort involved.
Can you cream butter in a stand mixer?
Yes, you can definitely cream butter in a stand mixer. In fact, stand mixers are a great tool for creaming butter, as they are designed to handle heavy-duty tasks like this. When creaming butter in a stand mixer, it’s best to use the flat beater or paddle attachment, which is specifically designed for mixing dense ingredients like butter and sugar. The process of creaming butter involves beating it with sugar until it becomes light and fluffy, and a stand mixer with the right attachment can make this process quick and easy.
It’s important to start at a low speed and gradually increase the speed as needed to prevent overworking the mixture. With a stand mixer, you can easily cream butter to the perfect consistency for your baked goods, whether you’re making cakes, cookies, or frosting.
What mixer is best for creaming butter?
A stand mixer is the best type of mixer for creaming butter. Stand mixers are designed to handle heavy-duty tasks such as creaming butter, thanks to their powerful motors and versatile mixing attachments. When it comes to creaming butter, the best stand mixer will have a powerful motor, variable speed settings, and a paddle attachment. The paddle attachment is the best tool for creaming butter, as it allows you to mix the butter and sugar evenly and thoroughly without overworking the mixture.
Some popular stand mixers for creaming butter include the KitchenAid Artisan Series Stand Mixer, the Cuisinart SM-50BC Stand Mixer, and the Breville Scraper Mixer Pro. Ultimately, the best mixer for creaming butter will depend on your individual needs and preferences, but a stand mixer is the most effective and efficient choice for this task.
Which stand mixer attachment is best for creaming butter and sugar?
The best stand mixer attachment for creaming butter and sugar is the flat beater/paddle attachment. This attachment is typically included with most stand mixers and is designed for mixing heavy and dense ingredients such as butter, sugar, and flour. The flat beater/paddle attachment has a flat bottom and wide edges that scrape the sides of the mixing bowl, ensuring that all ingredients are evenly mixed together. When creaming butter and sugar, the flat beater/paddle attachment can incorporate air into the mixture, resulting in a light and fluffy texture that is essential for many baked goods such as cakes, cookies, and frosting.
It’s important to note that when using the flat beater/paddle attachment for creaming butter and sugar, it’s best to start at a low speed and gradually increase the speed as needed to prevent overworking the mixture. Overall, the flat beater/paddle attachment is the most effective and efficient stand mixer attachment for creaming butter and sugar.
What speed stand mixer for creaming butter?
When using a stand mixer for creaming butter, it’s important to start at a low speed and gradually increase the speed as needed. Typically, the recommended speed for creaming butter is medium-low or speed 2 on most stand mixers. Starting at a low speed allows the butter to soften and begin to incorporate air, which is essential for achieving a light and fluffy texture. As the butter begins to cream and the mixture becomes lighter in color, you can gradually increase the speed to medium-high or speed 6-8.
However, it’s important not to overwork the mixture, as this can cause the butter to melt and result in a dense, greasy texture. Ultimately, the speed at which you cream butter will depend on your individual recipe and the specific stand mixer you are using, so it’s best to refer to the instructions and adjust the speed as needed to achieve the desired consistency.
Do you use a whisk or beater for creaming butter?
When creaming butter, it’s best to use a paddle or beater attachment rather than a whisk. The paddle or beater attachment is specifically designed for mixing dense ingredients like butter and sugar, and it’s more effective at incorporating air into the mixture, which is essential for achieving a light and fluffy texture. Whisks, on the other hand, are better suited for mixing liquids and creating aeration in lighter mixtures like egg whites or cream.
When using a stand mixer for creaming butter, be sure to use the paddle or beater attachment, and start at a low speed to gradually incorporate air into the mixture. With the right attachment and the correct speed, you can easily achieve a light and fluffy texture that is perfect for many baked goods like cakes, cookies, and frosting.
How long do you cream butter in stand mixer?
The length of time required to cream butter in a stand mixer will depend on several factors, including the amount of butter being creamed, the temperature of the butter, and the speed of the mixer.
Generally, it takes about 3-5 minutes of creaming on medium-low speed to achieve the desired light and fluffy texture for most recipes. It’s important to scrape down the sides of the mixing bowl periodically to ensure that all of the butter is being evenly incorporated. However, the time required can vary depending on the recipe, and it’s best to refer to the instructions provided with your specific recipe for guidance.
The key is to cream the butter until it becomes pale in color and light and fluffy in texture, which is achieved by incorporating air into the mixture through the creaming process. With practice, you’ll learn to recognize the perfect texture for your specific recipe and achieve the best results with your stand mixer.
Can you soften butter in a stand mixer?
It is not recommended to soften butter in a stand mixer, as the heat generated by the mixer can cause the butter to melt and become too soft, which can affect the texture of your recipe. The best way to soften butter for use in a recipe is to allow it to sit at room temperature for 30-60 minutes, depending on the temperature of your kitchen. You can also soften butter quickly by placing it in a plastic bag and using a rolling pin to gently pound it into a flat layer, which will soften more quickly than a whole stick.
Once the butter is softened, you can use a stand mixer to cream it with sugar or other ingredients as needed for your recipe. It’s important to follow the instructions provided with your specific recipe and to use the correct technique for softening the butter to achieve the best results.
How to choose the best stand mixer for creaming butter
Choosing the best stand mixer for creaming butter requires considering several factors that will affect the mixer’s performance in this task. Here are some tips for choosing the best stand mixer for creaming butter:
- Power: Look for a stand mixer with a powerful motor, as this will be able to handle the task of creaming butter more easily and quickly. A mixer with at least 325 watts of power should be sufficient for most home bakers.
- Speed settings: Choose a stand mixer with variable speed settings, as this will allow you to start the mixing process slowly and gradually increase the speed as needed. This will help prevent splattering and ensure a smooth and even creaming of the butter.
- Attachments: Look for a stand mixer that comes with a paddle attachment, as this is the best tool for creaming butter. Some stand mixers also come with additional attachments that can be used for other tasks, such as whipping cream or kneading dough.
- Bowl size: Consider the size of the bowl, as this will affect how much butter you can cream at one time. A larger bowl will allow you to cream more butter at once, which can be helpful if you are baking in large quantities.
- Brand and reviews: Look for a stand mixer from a reputable brand that has good reviews for creaming butter. Check reviews from other users to see if they have had success with creaming butter using that specific mixer.
Some popular stand mixers for creaming butter include the KitchenAid Artisan Series Stand Mixer, the Cuisinart SM-50BC Stand Mixer, and the Breville Scraper Mixer Pro. Ultimately, the best stand mixer for creaming butter will depend on your individual needs and preferences, so it’s important to consider all of these factors when making your choice.
Benefits of using stand mixer for creaming butter
Using a stand mixer for creaming butter offers several benefits:
- Efficiency: A stand mixer can cream butter more quickly and efficiently than doing it by hand. The mixer’s powerful motor and consistent mixing speed ensure that the butter and sugar are thoroughly creamed together, resulting in a smooth and even mixture.
- Consistency: When creaming butter by hand, it can be difficult to achieve a consistent texture throughout the mixture. A stand mixer ensures that the butter and sugar are evenly mixed, resulting in a more consistent texture and better overall results.
- Time-saving: Creaming butter by hand can be a time-consuming process, especially if you are making a large batch or working with cold butter. A stand mixer allows you to cream butter quickly and with less effort, saving you time and energy.
- Versatility: Stand mixers are versatile appliances that can be used for a variety of tasks, including creaming butter, mixing dough, and whipping cream. Investing in a stand mixer can help you save money and space in your kitchen by replacing multiple appliances with one.
In summary, using a stand mixer for creaming butter can save time and effort, produce a more consistent texture, and offer versatility in the kitchen.
How do you cream butter with a stand mixer?
To cream butter with a stand mixer, follow these steps:
- Start with softened butter. Allow your butter to come to room temperature, which makes it easier to cream. Cut the butter into small cubes for faster and easier creaming.
- Attach the paddle or beater attachment. The paddle attachment is typically used for creaming butter.
- Add sugar to the bowl. Start by adding the required amount of sugar to the bowl with the butter.
- Cream the butter and sugar. Turn the mixer on to a low speed, and gradually increase the speed to medium-low. Beat the mixture for 3-5 minutes, until the butter is pale and creamy, and the sugar has been fully incorporated.
- Scrape down the sides of the bowl. Use a spatula to scrape down the sides of the mixing bowl periodically to ensure that all of the butter and sugar is evenly incorporated.
- Adjust the speed. If needed, adjust the speed of the mixer to achieve the desired texture.
- Use the creamed butter as directed. Once the butter and sugar have been creamed together, use it as directed in your recipe.
It’s important not to overmix the butter and sugar mixture, as this can cause the butter to become too soft or greasy, which can affect the texture of your recipe. With practice, you’ll learn to recognize the perfect texture for your specific recipe and achieve the best results with your stand mixer.
How much sugar to cream butter?
The amount of sugar to cream with butter depends on the recipe you are making. Generally, the ratio for creaming butter and sugar is 1:2, meaning that for every one part butter, you will use two parts sugar. However, some recipes may call for more or less sugar depending on the desired sweetness level and the other ingredients in the recipe.
It’s important to follow the instructions provided with your specific recipe for the exact amount of butter and sugar needed for creaming. If you are adapting a recipe or creating your own, consider the texture and flavor you want to achieve, and adjust the amount of sugar accordingly. Keep in mind that adding too much sugar can make the mixture too sweet and affect the texture of your recipe.
Do you need butter paddles to make butter?
Butter paddles are a traditional tool used for shaping and working with butter, but they are not required to make butter. Butter can be made by simply agitating cream until it separates into butter and buttermilk. This can be done using a stand mixer, food processor, or even by shaking a jar of cream vigorously. Once the butter has formed, it can be shaped and worked with using your hands or a spatula.
However, if you are making butter on a regular basis, or if you want to create a specific shape or texture, butter paddles can be a helpful tool. Butter paddles are designed to shape and compress butter, which can help to remove any remaining buttermilk and create a firmer texture. They can also be used to add flavorings, such as herbs or garlic, to butter.
In summary, while butter paddles can be a useful tool for shaping and working with butter, they are not necessary to make butter.
How to clean stand mixer for creaming butter
Cleaning your stand mixer after creaming butter is an important step in maintaining its performance and prolonging its lifespan. Here are the steps to clean a stand mixer for creaming butter:
- Unplug the mixer: Before cleaning, make sure the mixer is unplugged and the attachments have been removed.
- Wipe down the exterior: Use a damp cloth to wipe down the exterior of the mixer, including the base, head, and attachments. Avoid using abrasive or harsh cleaners, as they can scratch the surface of the mixer.
- Clean the attachments: Wash the paddle attachment and any other attachments used for creaming butter in warm, soapy water. Rinse them thoroughly and dry them with a clean towel.
- Remove butter residue: If there is any butter residue on the mixer or attachments, use a non-abrasive sponge or cloth to remove it. You can also use a small amount of vinegar to help remove any stubborn butter residue.
- Clean the bowl: If any butter residue remains in the bowl, fill it with warm, soapy water and let it soak for a few minutes. Use a non-abrasive sponge or cloth to clean the bowl, then rinse it thoroughly and dry it with a clean towel.
- Store the mixer: Once the mixer and attachments are completely dry, store them in a cool, dry place, covered or in a cabinet.
By following these steps, you can help ensure that your stand mixer stays clean and functions well for many years of creaming butter and other mixing tasks.
How to maintain stand mixer for creaming butter properly
Maintaining a stand mixer properly can help ensure that it functions well and lasts for many years. Here are some tips for maintaining a stand mixer for creaming butter:
- Keep it clean: After using your stand mixer, be sure to wipe it down with a damp cloth to remove any butter or sugar residue. Avoid using harsh abrasives or cleaners that can scratch the surface of the mixer.
- Use the right attachments: When creaming butter, use the paddle attachment instead of the whisk or dough hook. Using the wrong attachment can damage the mixer and affect the quality of the butter mixture.
- Check the speed settings: Make sure you are using the correct speed setting for creaming butter, which is typically medium to high speed. Using a lower speed can cause the butter to separate, while using a higher speed can result in an over-creamed mixture.
- Lubricate the moving parts: Over time, the moving parts of your stand mixer may become stiff or squeaky. To keep them running smoothly, apply a small amount of food-grade lubricant to the gears and other moving parts as needed.
- Store it properly: When not in use, store your stand mixer in a cool, dry place, preferably covered or in a cabinet. This will help protect it from dust and moisture, which can damage the motor and other components.
By following these tips, you can help ensure that your stand mixer for creaming butter stays in good condition and functions well for many years.
Troubleshooting about stand mixer for creaming butter
Here are some troubleshooting tips for food processors used in making pastry:
- Dough is too dry or crumbly: If the dough is too dry, add a small amount of liquid (such as water or milk) while the food processor is running until the dough forms a ball. If the dough is too crumbly, add a small amount of flour while the food processor is running until the dough comes together.
- Dough is too wet or sticky: If the dough is too wet or sticky, add a small amount of flour while the food processor is running until the dough comes together. You may also need to refrigerate the dough for a short period of time to firm it up.
- Uneven mixing: If the dough is not mixing evenly in the food processor, stop the machine and scrape down the sides of the bowl. Continue processing until the dough is mixed evenly.
- Overheating: If the food processor is overheating, turn it off and let it cool down for several minutes before resuming use. If the problem persists, you may need to reduce the load or adjust the processing time to prevent overheating.
- Blade not rotating: If the blade is not rotating, check to see if any dough or other debris is blocking the blade. Stop the machine and remove the debris before resuming use.
- Machine not turning on: If the food processor is not turning on, check to make sure it is properly plugged in and that the safety features are engaged. If the problem persists, contact the manufacturer for assistance.
By following these troubleshooting tips, you can address common issues with food processors used in making pastry and achieve the best results possible.
Conclusion
In conclusion, a stand mixer is an excellent tool for creaming butter. When choosing a stand mixer for this task, it is important to consider the power and speed of the mixer, as well as the type of attachment that comes with it. A stand mixer with a powerful motor and a paddle attachment is ideal for creaming butter.
Maintaining your stand mixer is also important to ensure its longevity and continued performance.
Regular cleaning after use is essential, as butter residue can build up and affect the mixer’s performance over time. It is also important to store the mixer and attachments properly in a cool, dry place. By following these tips, you can ensure that your stand mixer remains in great condition for creaming butter and other mixing tasks.
Related Posts
How To Whip Cream With Hand Mixer
Whipping cream with a hand mixer is a quick and...
Read MoreBest Hand Mixer For Whipping Cream
Americans love their whipped cream. Whether it is on a...
Read MoreWhy Trust Us
You will find what you are looking for at Jody's Bakery. From classic to luxury brands, you'll find both. We will help you to select appliances that fit your needs, budget and lifestyle. Whether you want to stop by to learn more — or plan to make a major purchase — we’ll treat you like family and assist you every step of the way. Shop with us today to receive friendly and experienced help along the way.


