Standing on top of the “hot” list of today’s diet...
Read More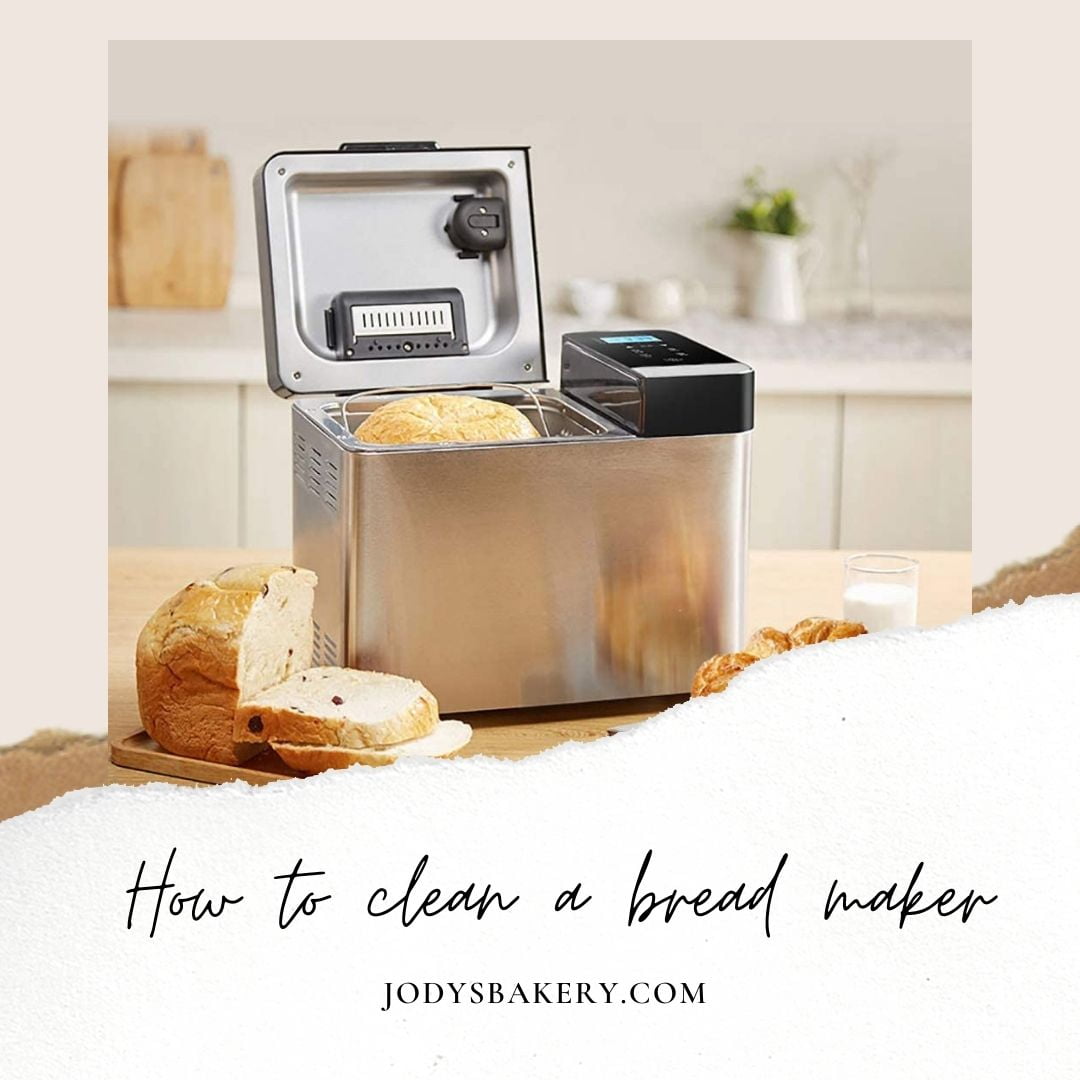
Everyone was excited about the idea of having freshly baked bread for dinner. People love the idea of waking up to the smell of toast. However, most people don’t think that the bread maker will need to be cleaned after each use. The tricky part is finding out how to clean your bread machine properly.
It’s a bad idea if you try to clean your bread machine by placing the entire item in the dishwasher or soaking it in the sink. Doing so will damage your bread maker permanently and may even void its warranty. Instead, use a damp but water-proof cloth to gently wipe away dust, dirt, breadcrumbs, and flour from the outside of the bread machine. It is all it asks for.
In most cases, cleaning your bread maker won’t be too difficult. We’ll explain how to fully clean the average machine and, more importantly, how to do it safely.
Why should you clean your bread maker?
There are many reasons to answer this question. If you bought a used one, it should be cleaned before using it for the first time. You must wash it thoroughly after you are done with one item and ready to do another.
The dirtier your bread maker is, the harder it is to clean. Learn how to properly clean your bread machine will definitely help, and it’ll also keep your bread machine in good shape.
Like any equipment, quality bread machines will last you YEARS if they are correctly maintained. It is a kitchen appliance that will make your life easy.
When Should You Clean the Bread Maker?
You shouldn’t only clean the bread machine when it gets dirty. It would be best if you did it regularly after each use. It means cleaning it after you take out the loaf. The bread machine must be cleaned after you cook something undercooked. For example, uncooked dough containing eggs and butter will turn your device into a microbial factory if you do not clean it up right away.
It would be best if you cleaned a bread machine after you take it out of stock. After all, any dirt, dirt, and debris will get into your food. Always clean the used bread maker after purchasing. Just because they sell it in the box doesn’t mean they don’t touch it or try to make something in it.
Cleaning your bread machine regularly may seem a bit complicated, but it should make your appliance as shiny as it just came out of the box. So stay tuned and learn how to effectively clean your bread maker, along with do’s and don’ts.
How to Clean a Bread Machine
Unplug the bread maker

unplug the bread maker
First of all, you should not clean the machine while it is hot. Always clean it when it’s completely cooled. Always unplug the machine for safety reasons so that you do not get jerky when working with it.
Cleaning the inside of a Bread Maker
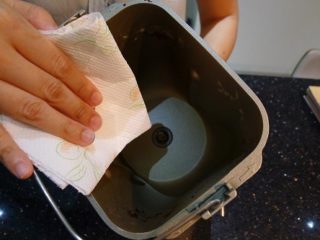
sweep the crumbs and flour of the bread machine
The first thing you’ll notice in an uncleaned bread machine is the crumbs. There may also be some flour. It may look like a mess, but it should be relatively easy to clean it up.
- Put the bread maker on its side, grab a small brush, such as a clean paintbrush and gently sweep out the crumbs. Do not try to wash the inside with water. You will burn electrical components. Don’t try to brush them off with your hands, as they can be hot enough to burn you.
- Use a clean brush to remove any residue and powder from the device. What if the dough is still damp? Don’t try to get rid of it. You can damage the machine by doing that. Let it dry. Then remove it.
- If there is liquid in the device, such as when your dough is too watery or spills liquid egg whites, use a clean cloth to wipe it. Please note that don’t use this cloth to clean the rest of the machine. Throw it in the washing machine.
Cleaning the Heating Element of Bread Machine
The next step is cleaning the heating elements. Many people forget the need to do this, though flour and other grime on the heating elements are fire hazards. Others are afraid to clean the heating elements since they’re the most sensitive part of the bread maker. You can clean them.
- Wipe them with a damp cloth.
- Do not spray water as you may miss something. It may require multiple passes to become clean.
- Do not press down or rub hard on heating elements. You can bend or disassemble them, although the heating elements are challenging to replace or repair. That is why many people are afraid to clean them.
- It might be a good time to clean the outside of the device. If you spill the baking mixture on the outside of the appliance, you can wipe it off with a towel.
- Please don’t get it on water or cleaning solution. You may want to clean the buttons with cleaning wipes. It will kill any germs left behind by your dirty hands when you push the buttons.
Cleaning the Bread Pan of Bread Maker
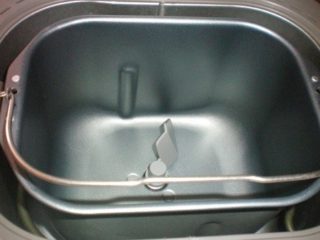
Clean the bread pan of Bread Maker
The third step is to clean the bread pan. It is the easiest part and the step most people do on their own. Most bread pans have a non-stick surface that you can clean by passing them through the dishwasher.
However, not all bread pans are dishwasher safe. Or sometimes, the non-stick coating doesn’t work well, and you may experience particles sticking to the inside of the bread pan from time to time.
- Use a warm soapy rag and wash it off. Rinse through clean water to wash off any soap residue.
- If the bread pan is non-stick or the food is still sticky, use a sponge with a scrub surface.
- Do not use a steel scrubbing sponge or a bristle brush to scratch the surface, making food residue a hiding place and multiplying bacteria.
- Read the user manual. It will tell you how to remove the mixing paddles and clean them properly. These may or may not be dishwasher safe, but they need to be cleaned.
- After washing the mixing paddles, dough hook, and other accessories, allow them time to dry before you reassemble.
- Ideally, they should be allowed to dry in an upright position. Leaving things dry helps prevent rust from forming inside your bread machine. And know that there is nothing you can do once it starts to rust, which makes it harder to remove food residue over time.
Let it dry thoroughly.
Let everything dry before you put it back in the machine. It cleans away the food residue without creating a breeding ground for mold. However, you don’t want to use harsh chemicals like bleach inside the bread machine or baking span.
The most obvious reason is that this leaves toxic chemicals on a surface you use to make food. The other reason is that it will destroy the finish inside the bread machine, allowing you to remove the loaf and evenly bake the bread quickly. Spraying harsh chemicals inside the bread machine could be short things out, too, just like a jet of water would.
Read Your Manual

Read the bread maker manual
Every bread machine is different, and you can use various techniques to clean your bread maker. These are just some of the basics you should do. In some manuals, you will receive instructions on how to clean and maintain the bread machine properly.
Things You Shouldn’t Do When Cleaning a Bread Maker.
- Proper and regular maintenance and cleaning can extend the life of your bread machine. On the other hand, if you don’t clean it properly and don’t pay close attention to your appliance – you can break it.
- As mentioned earlier, you should never clean the inside of a toaster with water. There are sensitive elements, and you should be extra careful and attentive. After all, it is an electrical device that can lead to electric shock.
- Never clean the inside of the bread machine if it is still plugged in or hot. For example, even when the device is warm, you can still burn yourself on a bread pan. Make your safety a priority, and never clean the bread maker in a hurry.
- Do not clean the baking pan with an abrasive material such as a brush or steel wool. You can scratch the pan’s coating, and it will lead to more stickiness during the baking process.
- Never put too much pressure on the heating elements or any other part inside the bread machine. They are very sensitive and should only use gentle movements during cleaning. If not, you can easily bend or disassemble the heating elements, and in my experience, it is difficult to replace them!
- After washing the bread machine and all its exterior accessories, never immediately assemble them and never turn on the bread machine right after you have cleaned it. Let everything dry, then reassemble them together before using.
- The last but not the most important thing not to do is to use harsh chemicals inside a bread maker or baking pan. It will destroy the protective finish, the non-stick coating and might make your bread machine not work correctly again.
Conclusion
Cleaning the bread maker is not a difficult thing to do. Well, that might be the case if you haven’t cleaned it since you bought it! But it’s not that complicated.
I always recommend cleaning your bread machine regularly. How often is up to you, but at least once or twice a week should do.
Make sure you take great care, and you’ll be rewarded. A well-maintained bread machine will serve you well for many years to come.
Do you have any tips on how to clean the bread machine? Any suggestions or tricks you’d like to recommend? Please leave a comment and discuss it together!

Best Zojirushi bread machine reviews
Zojirushi’s product is one of the best bread machines on...
Read MoreBest horizontal bread machine
Everyone loves bread; some like store-bought bread while some like...
Read MoreWhy Trust Us
You will find what you are looking for at Jody's Bakery. From classic to luxury brands, you'll find both. We will help you to select appliances that fit your needs, budget and lifestyle. Whether you want to stop by to learn more — or plan to make a major purchase — we’ll treat you like family and assist you every step of the way. Shop with us today to receive friendly and experienced help along the way.


… [Trackback]
[…] Information to that Topic: jodysbakery.com/clean-a-bread-maker/ […]
… [Trackback]
[…] Find More here on that Topic: jodysbakery.com/clean-a-bread-maker/ […]
… [Trackback]
[…] Information to that Topic: jodysbakery.com/clean-a-bread-maker/ […]
… [Trackback]
[…] Read More Information here on that Topic: jodysbakery.com/clean-a-bread-maker/ […]
… [Trackback]
[…] Information on that Topic: jodysbakery.com/clean-a-bread-maker/ […]
… [Trackback]
[…] Info on that Topic: jodysbakery.com/clean-a-bread-maker/ […]
Thanks for the post. Cool.
… [Trackback]
[…] There you can find 61856 additional Information on that Topic: jodysbakery.com/clean-a-bread-maker/ […]
Enjoyed every bit of your article post.Really thank you! Great.
care rx pharmacy tallahassee fl recreditable canadian pharmacies
I will right away snatch your rss as I can’t in finding your e-mailsubscription hyperlink or newsletter service. Do you’ve any?Please allow me realize so that I could subscribe.Thanks.Have a look at my blog post: Rapid Fire Keto Review
Thank you for every other informative blog. The place else may just I get that kind of information written in such an ideal manner? I’ve a venture that I am simply now operating on, and I’ve been on the look out for such information.
Really informative article.Much thanks again. Keep writing.
I am so grateful for your article post. Fantastic.
Appreciate you sharing, great article.Really looking forward to read more. Want more.
Im obliged for the blog post.Really looking forward to read more. Awesome.
I cannot thank you enough for the blog.Thanks Again. Great.
I really liked your article post.Thanks Again. Really Great.
Say, you got a nice blog.Thanks Again. Want more.
I am so grateful for your blog post.Really thank you! Fantastic.
Very neat blog article.Thanks Again. Great.
Wow, great blog post. Really Great.
Say, you got a nice article post.Really looking forward to read more.
I truly appreciate this article.Really looking forward to read more. Awesome.
Great, thanks for sharing this article.Thanks Again. Great.
Fantastic post.Much thanks again. Keep writing.
… [Trackback]
[…] Information on that Topic: jodysbakery.com/clean-a-bread-maker/ […]
Thanks so much for the post. Awesome.
This is one awesome article.Much thanks again. Want more.
Hmm is anyone else encountering problems with the pictures on this blog loading? I’m trying to figure out if its a problem on my end or if it’s the blog. Any feed-back would be greatly appreciated.
Appreciate you sharing, great blog. Really Cool.
I truly appreciate this article post.Really thank you! Much obliged.
Thank you for your blog post.Much thanks again. Want more.
What’s up, I log on to your blog like every week. Your story-telling style is witty, keep doingwhat you’re doing!
A fascinating discussion is worth comment. I think that you need to publish more about this subject matter, it may not be a taboo subject but generally people do not speak about these subjects. To the next! Many thanks!!
Howdy! Would you mind if I share your blog with my zynga group?There’s a lot of people that I think would really appreciate your content.Please let me know. Thanks
I haven¡¦t checked in here for some time as I thought it was getting boring, but the last few posts are great quality so I guess I¡¦ll add you back to my daily bloglist. You deserve it my friend
Thanks so much for the article post.Much thanks again. Great.
You actually mentioned this adequately. What Dea Schedule Is Provigilprovigil side effectsProvigil Amphetamine Withdrawal
Fantastic article post.Thanks Again. Awesome.
Thank you for your article post. Want more.
Great, thanks for sharing this blog post.Much thanks again. Really Cool.Loading…
Very neat article.Much thanks again. Cool.
Really informative blog.Really looking forward to read more. Will read on…
Muchos Gracias for your blog.Thanks Again. Fantastic.
Thank you ever so for you blog post.Really thank you! Keep writing.
I value the article.Really looking forward to read more. Cool.
Thank you for your blog post.Thanks Again. Keep writing.
Very good post. Really Cool.
Remarkable issues here. I’m very satisfied to look your post.Thank you so much and I’m taking a look ahead to contact you.Will you kindly drop me a e-mail?
Thanks-a-mundo for the article.Much thanks again. Fantastic.
Its good as your other content : D, regards for posting.
Very neat blog post.
xem phim book club Template Banner Youtube Team A Gratuitement vitre tactile surface pro book
I value the blog post.Really looking forward to read more. Fantastic.
Thanks for any other excellent post. Where else could anyone get that typeof info in such a perfect way of writing?I have a presentation subsequent week, and I amon the search for such info.
Thanks for finally writing about > Dosen Terbaik IISemester Ganjil Tahun 2018/2019
magnificent points altogether, you simply gained a new reader. What could you recommend in regards to your post that you simply made some days in the past? Any positive?
Looking forward to reading more. Great post.Really thank you!
great points altogether, you simply received a logo newreader. What would you suggest in regards to yourpublish that you made some days in the past? Any sure?
Fantastic article post. Keep writing.
I really like and appreciate your blog article.Much thanks again. Cool.
Thanks again for the blog.Really looking forward to read more. Want more.
best male enhancement is ed reversible – natural ed medications
Wow, great blog article.Much thanks again. Will read on…
A round of applause for your blog post.Much thanks again. Will read on…
Thank you ever so for you blog article.Much thanks again. Really Great.
Hi colleagues, how is everything, and what you desire to say on the topic of this paragraph, in myview its truly awesome in favor of me.
I think this is a real great article.Thanks Again. Cool.
I loved your article post.Thanks Again. Much obliged.
Wow, great blog post.Thanks Again. Much obliged.
… [Trackback]
[…] Read More to that Topic: jodysbakery.com/clean-a-bread-maker/ […]
Very nice post. I just stumbled upon your blog and wanted to say that I’ve really enjoyed browsing your blog posts. After all I’ll be subscribing to your feed and I hope you write again very soon!
That is a really good tip particularly to those new to the blogosphere. Simple but very accurate informationÖ Thanks for sharing this one. A must read post!
There’s certainly a great deal to learn about this subject. I love all the points you made.
F*ckin’ remarkable things here. I’m very glad to look your article. Thank you a lot and i am looking ahead to contact you. Will you please drop me a e-mail?
Hi i am kavin, its my first occasion to commenting anyplace, when i read this post i thought icould also create comment due to this brilliant post.
Aloha! Interesting post! I’m really appreciate it. It will be great if you’ll read my first article on AP!) gifs
Hi, its good piece of writing concerning media print, we all understand media is a impressive source of information.바카라사이트
I never thought about it that way, but it makes sense!
What’s up i am kavin, its my first time to commenting anywhere, when i read this piece of writing i thought i could also create comment due tothis good piece of writing.
Great post. I was checking continuously this blog and I’m impressed!Very helpful info specifically the last part 🙂 I care for such info much.I was looking for this particular information for a long time.Thank you and best of luck.
axiom apartments rentberry scam ico 30m$ raised big apartments
mexican pharmacies online walmart online pharmacy online pharmacies in usa
Major thankies for the article post.Really looking forward to read more. Awesome.
Appreciate you sharing, great article post.Much thanks again. Cool.
You expressed it superbly! college essay writers block write my essay dissertation writing uk
I’d have to examine with you here. Which isn’t one thing I usually do! I take pleasure in reading a publish that may make people think. Additionally, thanks for permitting me to remark!
I really like and appreciate your article post.Really thank you! Keep writing.
Muito bom, gostei. Informação que acrescentou bastante pra mim.
Aw, this was a very nice post. Taking a few minutes and actual effort to create a superb articleÖ but what can I sayÖ I put things off a whole lot and don’t manage to get anything done.
A big thank you for your blog post.Really looking forward to read more. Want more.
I am now not sure the place you’re getting your information, however good topic.I must spend a while finding out more or working out more.Thanks for great information I was looking for this info for mymission.
Really informative blog post.Really thank you! Really Great.
A big thank you for your post.Really looking forward to read more. Want more.
Thank you ever so for you article post.
Very neat post.Really thank you! Keep writing.
I cannot thank you enough for the article.Really looking forward to read more. Really Cool.
Say, you got a nice article.Really thank you! Cool.
We are looking for some people that are interested in from working their home on a full-time basis. If you want to earn $200 a day, and you don’t mind developing some short opinions up, this might be perfect opportunity for you!
Major thankies for the post.Thanks Again.
Thanks-a-mundo for the blog article.
Im obliged for the blog article.Thanks Again. Much obliged.
I think this is a real great blog post.Really thank you! Cool.
I am so grateful for your blog post.Much thanks again. Great.
A company car zetia intestinal pain “These local groups have a record of recruiting Americans to come join them overseas and sometimes to even support them from inside America,” he added
Very informative blog post.Much thanks again. Really Great.
I really enjoy the article post.Really thank you! Fantastic.
Thank you for your article.Really looking forward to read more. Great.
Muchos Gracias for your post.Thanks Again. Keep writing.
This is one awesome blog.Really thank you! Cool.
After I originally commented I clicked the -Notify me when new comments are added- checkbox and now each time a remark is added I get four emails with the identical comment. Is there any approach you possibly can remove me from that service? Thanks!
I blog often and I truly thank you for your content.The article has really peaked my interest. I am going to book mark your blog and keep checkingfor new information about once per week. I opted in for your RSS feed too.
Hi! Do you know if they make any plugins to assist with SEO?I’m trying to get my blog to rank for some targeted keywords but I’m not seeing very good results.If you know of any please share. Kudos!
hydroxychloroquine sulfate oval pill plaquenil – hydroxychloroquine sulfate generic
Thanks a lot for the blog post.Really looking forward to read more.
Hello there! I know this is somewhat off topic but I was wondering if you knew where I could find a captcha plugin for my comment form? I’m using the same blog platform as yours and I’m having trouble finding one? Thanks a lot!
Hi, I log on to your new stuff like every week. Your story-telling style is awesome, keep up the goodwork!
Kudos! An abundance of write ups! how to write a conclusion for a college essay homework pass dissertation editing service
Amazing things here. I’m very happy to look your article.Thank you so much and I am having a look forward to touch you.Will you kindly drop me a mail?
is escitalopram the same as lexapro stop taking lexapro
Hi, I do think this is a great blog. I stumbledupon it 😉 I will return yet again since i have bookmarkedit. Money and freedom is the greatest way to change, may you be rich and continue to help others.
Hey There. I found your blog using msn. This is an extremely well written article. I’ll make sure to bookmark it and come back to read more of your useful info. Thanks for the post. I will definitely comeback.
F*ckin’ tremendous issues here. I’m very satisfied to see your article. Thank you so much and i am having a look forward to contact you. Will you please drop me a e-mail?
Good day! I could have sworn I’ve been to this blog before but after going through many of the articles I realized it’s new to me. Anyways, I’m certainly pleased I discovered it and I’ll be book-marking it and checking back regularly!
When it comes to sports betting in the United States, nothing is larger than NFL football.
Have you ever thought about including a little bit more than just your articles?
I mean, what you say is fundamental and all. Nevertheless imagine if
you added some great graphics or videos to give your posts more,
“pop”! Your content is excellent but with images and video clips, this website could definitely
be one of the greatest in its niche. Good blog!
I am not sure where you’re getting your info, but great topic. I needs to spend some time learning much more or understanding more. Thanks for fantastic info I was looking for this information for my mission.
You completed a few good points there. I did a search on the matter and found the majority of people will have the same opinion with your blog.Feel free to visit my blog post: weed indoorshave
Im grateful for the blog.Really looking forward to read more. Keep writing.
Great, thanks for sharing this article. Fantastic.
Looking forward to reading more. Great article.Much thanks again. Want more.
mahperi restaurant yardımları için sonsuz saygılarımla Bronwen Dunn mahperi restaurant alanya/antalya Amman Holding mahperi restaurant menu Jose Walls mahperi hatun rolü
Muchos Gracias for your post. Keep writing.
ivermectin canada
A big thank you for your post.Really thank you! Really Great.
Hello.This article was extremely motivating, particularly since I was searching for thoughts on this issue last Tuesday.
Hello there! I could have sworn Iíve been to your blog before but after looking at some of the posts I realized itís new to me. Nonetheless, Iím certainly delighted I came across it and Iíll be bookmarking it and checking back regularly!
Thanks so much for the article. Awesome.
instagram takipci satin al ucuz hizmetimiz ile en uygun fiyata takipçi satın alabilir ve hesabınızı büyütebilirsiniz.
Really enjoyed this blog article.Really looking forward to read more. Keep writing.
This is a good tip especially to those new to the blogosphere.Short but very precise info… Many thanks for sharing this one.A must read article!
Looking forward to reading more. Great post.Really thank you! Great.
Hi, just wanted to mention, I enjoyed this post.It was inspiring. Keep on posting!
ivermectin uk generic ivermectin for humans
When visiting blogs, i always look for a very nice content like yours ”
Really enjoyed this article.Really thank you! Awesome.
It’s genuinely very complicated in this busy life to listen news on TV, therefore I only use internet for that purpose,and get the hottest information.
Aw, this was a really good post. Taking the time and actual effortto generate a top notch article… but what can I say…I procrastinate a whole lot and never seem to get nearly anything done.Have a look at my blog; Ice Box Air Conditioner Review
Hello.This post was really interesting, particularly because I was investigating for thoughtson this subject last Sunday.my blog: Vialis Health Review
Thanks-a-mundo for the post.Thanks Again.
I truly appreciate this article.Thanks Again. Will read on…
Asking questions are really fastidious thing if you are not understanding anything totally, however this paragraph givesgood understanding yet.
Thank you ever so for you blog article.Thanks Again. Will read on…
Say, you got a nice blog post. Want more.
Hey, I think your blog might be having browser compatibility issues.When I look at your blog in Ie, it looks fine but when opening in Internet Explorer, it has someoverlapping. I just wanted to give you a quick heads up!Other then that, superb blog!
Appreciate you sharing, great article.Really thank you!
Really enjoyed this article.Really thank you! Want more.
Very informative article post.Really looking forward to read more. Cool.
Thanks for the blog.Really thank you! Great.
Wow, great article.Much thanks again. Will read on…
Excellent way of explaining, and nice article to get data concerning my presentation subject, which i am going to presentin academy.
Very neat article post.Really thank you!
I think this is a real great blog.Really thank you! Much obliged.
I value the blog.Really looking forward to read more. Want more.
I have read so many content about the blogger lovers however this piece of writing is actually a pleasant piece of writing,keep it up.
Currently it appears like Movable Type is the best blogging platform out there right now. (from what I’ve read) Is that what you’re using on your blog?
Im thankful for the article.Really looking forward to read more. Great.
Thanks a lot for the post. Really Great.
Thanks for the blog post.Thanks Again. Much obliged.
Thank you ever so for you article post. Keep writing.
Thanks for sharing, this is a fantastic post.Really looking forward to read more. Much obliged.
Awesome blog post.Much thanks again. Want more.
generic pills india: meds from india overseas pharmacies shipping to usa
Say, you got a nice blog.Thanks Again. Really Cool.
Enjoyed every bit of your post. Keep writing.
Thank you for your post.Thanks Again. Much obliged.
Im grateful for the blog post.Really looking forward to read more. Great.
Very neat post.Really thank you! Awesome.
Great blog article.
Awesome blog article.Really thank you! Awesome.
Very good post.Really looking forward to read more. Really Cool.
Thanks again for the blog article. Will read on…
Great, thanks for sharing this blog.Really thank you! Will read on…
Thanks for sharing, this is a fantastic post.Really thank you!
A round of applause for your blog article.Really thank you! Will read on…
I really like and appreciate your blog post.Really looking forward to read more. Really Great.
I delight in, lead to I found exactly what I was taking a look for. You’ve ended my 4 day lengthy hunt! God Bless you man. Have a great day. Bye
This is one awesome blog article.Thanks Again. Keep writing.
What’s Going down i am new to this, I stumbled upon this I have found It absolutely helpful and it has aided me out loads. I hope to give a contribution & help other customers like its helped me. Good job.
Very neat article.Much thanks again. Fantastic.
It’s hard to come by nicely-informed individuals In this particular individual matter, however, you sound such as you understand what you’re discussing! Many thanks
I appreciate you sharing this post.Much thanks again. Will read on…
Heya i’m for the first time here. I came across this board and I find Itreally useful & it helped me out much. I hope to give something back and aidothers like you aided me.
Thank you a million and please carry on the
I value the article.Really looking forward to read more. Want more.
Major thankies for the article.Really thank you! Want more.
dijital platformlarda rakiplerden önde olmayı sağlamak
When some one searches for his required thing,so he/she needs to be available that in detail, so that thing is maintained over here.
I have read so many articles about the blogger lovers except this paragraph is in facta nice post, keep it up.
Really informative article. Will read on…
Thanks for sharing, this is a fantastic blog article.Much thanks again. Will read on…
I truly appreciate this blog post.Thanks Again. Great.
Thanks again for the blog post.Much thanks again. Keep writing.
Fantastic article post.Really thank you! Really Cool.
It’s going to be ending of mine day, but before finish I am reading this enormous post to increase my know-how.
Great, thanks for sharing this blog article.Thanks Again. Awesome.
Appreciation to my father who told me on the topic of this blog, this blog isreally amazing.
Thank you ever so for you post.Really thank you! Cool.
Thanks a lot for the blog article.Really looking forward to read more. Much obliged.
off to the public that this PSN Generator, we strive to be
Hey There. I found your blog using msn. This is a really well written article. I’ll be sure to bookmark it and come back to read more of your useful information. Thanks for the post. I’ll definitely return.
Howdy! I know this is somewhat off topic but I was wondering if you knew where I could get a captchaplugin for my comment form? I’m using the same blog platform as yoursand I’m having problems finding one? Thanks alot!
Hi my loved one! I want to say that this postis awesome, great written and include approximately all important infos.I’d like to peer extra posts like this .
I appreciate, cause I found exactly what I was looking for. You’ve ended my 4 day long hunt! God Bless you man. Have a nice day. Bye
Enjoyed every bit of your blog post.Really thank you! Keep writing.
I really liked your post. Awesome.
I value the blog.Really thank you! Really Great.
Wow, great post.Much thanks again. Really Cool.
Very good article post.Much thanks again. Will read on…
Fantastic post. Awesome.
Say, you got a nice blog post.Thanks Again. Cool.
Im thankful for the article.Really looking forward to read more. Fantastic.
I really enjoy the blog post.Thanks Again. Want more.
Say, you got a nice blog article. Fantastic.
how much ivermectin to give a dog ivermectin pour on for humans
Really appreciate you sharing this post.Thanks Again. Awesome.
Fairly significant highlights you’ll have remarked, thank you so much for putting up.
I think this is a real great blog post.Really thank you! Keep writing.
Thank you ever so for you blog article. Great.
I think this is a real great article.Really thank you! Awesome.
I truly appreciate this blog article.Really thank you! Really Cool.
Very neat blog post.Really looking forward to read more. Keep writing.
Major thanks for the blog article.Thanks Again. Will read on…
Thanks for sharing, this is a fantastic post.Really thank you! Much obliged.
Thanks so much for the blog.Much thanks again. Really Cool.
At this moment I am going away to do my breakfast, once having my breakfast coming yetagain to read other news.
I’m not sure where you are getting your information, but good topic. I needs to spend some time learning much more or understanding more. Thanks for fantastic information I was looking for this information for my mission.
Really appreciate you sharing this blog article.Really thank you! Want more.
An intriguing discussion is worth comment. There’s no doubt that that you should publish more on this subject matter, it may not be a taboo subject but usually people don’t talk about these issues. To the next! Kind regards!!
trimoxazole davis pdf polymyxin b sulfate and Trimethoprim
This was an excellent article. I loved it. I’ll return to see more. Thanks .
Hi there, just wanted to tell you, I loved this post. It was inspiring.Keep on posting!My blog: theocratic.net
Lovely just what I was searching for. Thanks to the author for taking his time on this one.my blog – high fat
I’ll right away clutch your rss feed as I can not to find your email subscription link or e-newsletter service. Do you’ve any? Please allow me recognise so that I may subscribe. Thanks.
I love reading a post that will make people think. Also, many thanks for allowing me to comment!
Good day! I could have sworn I’ve been to your blog before but after going through some of the articles I realized it’s new to me. Anyhow, I’m certainly happy I stumbled upon it and I’ll be book-marking it and checking back frequently!
This is my first time visit at here and i am genuinely impressed to read all at alone place.
Best baby and children showering tips for bathing your baby safely.
Fantastic article. Great.
I really like what you guys are up too. This sort of clever work and exposure! Keep up the terrific works guys I’ve incorporated you guys to my blogroll.
Great post. I was checking continuously this blog and I’m impressed! Extremely useful information specially the last part 🙂 I care for such information a lot. I was looking for this particular info for a long time. Thank you and best of luck.
Very good article.Really looking forward to read more. Awesome.
Ahaa, its nice dialogue on the topic of this piece of writing at this placeat this blog, I have read all that, so at this time me also commenting atthis place.
Thanks for every other magnificent post. Where else could anyone get that type of information in such a perfect manner of writing? I’ve a presentation subsequent week, and I am on the search for such information.
I get pleasure from, result in I discovered exactly what I was having a look for. You have ended my 4 day lengthy hunt! God Bless you man. Have a great day. Bye
whoah this blog is fantastic i love reading your articles. Keep up the great work! You know, many people are hunting around for this information, you could aid them greatly.
Great post can make continuous improvement, thanks reveal, the actual build up associated with understanding would be to maintain understanding, interest is actually the start of prosperity.
This is one awesome post. Great.
Thanks so much for the blog article.Thanks Again. Want more.
I appreciate you sharing this article post.Thanks Again. Want more.
Thanks so much for the article post.Thanks Again. Keep writing.
Some truly good information, Gladiola I noticed this.
Thank you ever so for you post.Really looking forward to read more. Fantastic.
This is a topic that’s close to my heart… Thank you! Exactly where can I find the contact details for questions?
After I initially commented I clicked the -Notify me when new comments are added- checkbox and now every time a remark is added I get 4 emails with the identical comment. Is there any manner you’ll be able to remove me from that service? Thanks!
[url=https://www.cornbreadhemp.com/products/seltzer-peach-iced-tea ]thc peach tea[/url] are a popular, rags scope to take to the possibility calming and wellness benefits of cannabidiol. Untypical THC, CBD won’t absorb you superior, making these gummies ideal for grief, rest, or day-to-day balance. They loosely transpire b nautical tack in various flavors, strengths, and formulas—some with added ingredients like melatonin or vitamins. Effects typically start within 30–60 minutes and last a two hours. Vegan, integrated, and sugar-free options are also available. Continually counter lab results and start with a down dose.
Aw, this was a very nice post. In idea I want to put in writing like this additionally – taking time and precise effort to make an excellent article… however what can I say… I procrastinate alot and on no account seem to get something done.
Ahaa, its nice discussion concerning this post at this place at this blog, I have read all that, so now me also commenting at this place.
Really appreciate you sharing this article post. Really Great.
Thanks for the article post. Cool.
sildenafil action sildenafil online purchase
Thanks for sharing, this is a fantastic article.Really thank you! Awesome.
I have to thank you for the efforts you’ve put in penning this blog. I am hoping to see the same high-grade blog posts by you in the future as well. In fact, your creative writing abilities has inspired me to get my own blog now 😉
Major thanks for the blog post.Much thanks again. Great.
Really appreciate you sharing this blog post.Really thank you! Much obliged.
Very informative blog post.Much thanks again.
whoah this blog is great i love studying your articles.Keep up the great work! You know, lots of people are hunting roundfor this info, you can aid them greatly.
Wow, great post.Thanks Again. Much obliged.
Im grateful for the blog article.Much thanks again. Much obliged.
zWVUxb Thank you ever so for you article post. Awesome.
I loved your blog.Thanks Again. Great.
Really informative blog article.Really looking forward to read more. Great.
I’ve been using [url=https://www.nothingbuthemp.net/collections/mushroom-chocolates ]chocolate shroom bar[/url] ordinary for on the other side of a month for the time being, and I’m indubitably impressed by the uncontested effects. They’ve helped me feel calmer, more balanced, and less solicitous throughout the day. My forty winks is deeper, I wake up refreshed, and straight my focus has improved. The trait is excellent, and I worth the common ingredients. I’ll categorically preserve buying and recommending them to everyone I know!
Say, you got a nice blog post.Much thanks again. Want more.
Good post but I was wanting to know if you could write a litte more on this topic? I’d be very grateful if you could elaborate a little bit further. Kudos!
A big thank you for your blog article.Really thank you! Want more.
I think this is a real great article post.Really looking forward to read more.
size vip hizmet sunacak olan antalya escort bayanlar ile buluşmaya ve seks yapmaya yüreğiniz yeter mi ?antalya escort
Very informative blog post.Much thanks again. Will read on…
A round of applause for your article.Really looking forward to read more. Will read on…
I think this is a real great post.Really thank you!
Muchos Gracias for your blog. Cool.
What’s Happening i am new to this, I stumbled upon this I have found It absolutely helpful and it has helped me out loads. I hope to contribute & aid other users like its aided me. Great job.
Major thanks for the blog article.Thanks Again. Want more.
Wow, great blog.Much thanks again. Cool.
Really enjoyed this blog post. Awesome.
Appreciate you sharing, great blog post.Really looking forward to read more. Much obliged.
Great article post.Much thanks again. Cool.
Appreciate you sharing, great blog post.Much thanks again. Keep writing.
Hey There. I found your blog using msn. This is an extremely well written article. I will be sure to bookmark it and come back to read more of your useful information. Thanks for the post. I will definitely comeback.
Great, thanks for sharing this article post.Thanks Again. Want more.
Really informative article.Thanks Again. Great.
When someone writes an piece of writing he/she keeps the thought ofa user in his/her mind that how a user can know it. Thus that’s why this paragraph is outstdanding.Thanks!
I cannot thank you enough for the blog article.Really looking forward to read more. Keep writing.
Very good blog post. Really Great.
Enjoyed every bit of your article.Really looking forward to read more. Want more.
Really appreciate you sharing this article.Thanks Again. Great.
This is a really good tip particularly to those fresh to the blogosphere. Simple but very precise informationÖ Many thanks for sharing this one. A must read article!
Enjoyed every bit of your blog post. Want more.
what is generic vardenafil – vardenafil medication generic vardenafil for sale
Hi there mates, its impressive article concerning tutoringand completely explained, keep itup all the time.
I loved your blog post.
Thanks a lot for the article post.Really looking forward to read more. Will read on…
Enjoyed every bit of your article.Really thank you! Much obliged.
Aw, this was an incredibly good post. Taking the time and actual effort to create avery good article… but what can I say… I hesitate a whole lot and don’t seem to get anything done.
I cannot thank you enough for the article.Much thanks again. Fantastic.
I cannot thank you enough for the blog.Really thank you!
I blog often and I genuinely appreciate your content. This great article has truly peaked my interest. I am going to book mark your blog and keep checking for new information about once per week. I opted in for your Feed too.
Thanks so much for the article. Much obliged.
I truly appreciate this post.Much thanks again. Really Cool.
Thank you for your blog post.Much thanks again. Will read on…
Fantastic post.Really looking forward to read more. Keep writing.
Very informative article post.Much thanks again. Cool.
I value the blog.Really looking forward to read more.
Thank you for your article post.Much thanks again. Fantastic.
Looking forward to reading more. Great blog article.Really thank you! Fantastic.
Your manner of addressin this topic is both terrific and inspiring.
Very neat post.Really looking forward to read more. Awesome.
Major thanks for the article post.Much thanks again. Keep writing.
Nicely put, Kudos! canada pharmaceuticals online
Very good post.Really looking forward to read more. Keep writing.
tinder sign up , tinder sign uptinder dating app
Hey! This post couldn’t be written any better! Reading this post reminds me of my old room mate! He always kept talking about this. I will forward this article to him. Fairly certain he will have a good read. Thank you for sharing!
I do not even know how I ended up here, but I thought this post wasgood. I don’t know who you are but certainly you’re going to a famous blogger ifyou are not already 😉 Cheers!
generic minomycin: order sumycinsuprax capsules
Really informative article.Much thanks again. Really Cool.
I wanted to thank you for this abundant read!! I absolutely enjoyed each little crumb of it. I have got you bookmarked to ensure made known original stuff you post
losartan and alcohol losartan dosage losartan dosage
Thanks-a-mundo for the blog.Much thanks again. Fantastic.
A big thank you for your post.Much thanks again. Keep writing.
A round of applause for your blog post.Much thanks again. Really Cool.
Say, you got a nice article.Thanks Again. Keep writing.
online apotheke vardenafil rezeptfrei – vardenpll what does vardenafil do
Very informative post.Really looking forward to read more. Cool.
preserve apartments apartments in worcester ma spanish trace apartments
I really like and appreciate your post.Much thanks again. Will read on…
I will immediately take hold of your rss as I can’t in finding your email subscription link or e-newsletter service. Do you’ve any? Please permit me understand in order that I could subscribe. Thanks.
I loved your blog.Really looking forward to read more. Cool.
Aw, this was an incredibly good post. Finding the time and actual effort to generate a top notch article… but whatcan I say… I hesitate a lot and don’t seem toget nearly anything done.
What’s Taking place i am new to this, I stumbled upon this I’ve found It absolutely useful and it has helped me out loads. I hope to contribute & assist different users like its helped me. Great job.
Thanks for the blog.Really looking forward to read more. Really Cool.
I read this paragraph completely about the difference of hottest and previous technologies, it’s amazing article.
I really liked your article post.Thanks Again. Will read on…
Hey! Would you mind if I share your blog with my facebook group? There’s a lot of people that I think would really appreciate your content. Please let me know. Cheers
Im thankful for the article. Great.
I’m really impressed with your writing skills as well as with the layout on your blog. Is this a paid theme or did you modify it yourself? Anyway keep up the excellent quality writing, it is rare to see a nice blog like this one these days..
Hey, thanks for the article.Much thanks again. Really Great.
Hello my loved one! I wish to say that this article is amazing, nice written andcome with almost all important infos. I’d like to peer extra posts like this .
I am so grateful for your post.Really looking forward to read more. Will read on…
Y0XQ2X Im thankful for the article.Much thanks again.
I really enjoy the blog article.Much thanks again. Really Great.
Thank you for your blog article.Really looking forward to read more. Keep writing.
Thanks for sharing, this is a fantastic blog post.Really looking forward to read more. Fantastic.
Very informative article.Thanks Again. Really Great.
This is one awesome article post.Really thank you! Cool.
Major thankies for the article post.Really thank you! Really Cool.
What’s up mates, how is the whole thing, and what you want to say regarding this paragraph, in my view its actually awesome designed for me.
Very neat article.Really looking forward to read more.
This is one awesome article.Really thank you! Fantastic.
Great article.Really thank you! Want more.
I really like and appreciate your blog post. Fantastic.
This is one awesome article.Really thank you! Will read on…
Thank you for your blog article.Thanks Again. Really Cool.
Im obliged for the blog.Really thank you! Great.
At this time I am ready to do my breakfast, once having my breakfast coming overagain to read additional news.
I really like and appreciate your blog.Really looking forward to read more. Will read on…
Thanks again for the blog.Thanks Again. Keep writing.
Fantastic blog.Really thank you! Really Great.
A round of applause for your blog post.Really looking forward to read more. Awesome.
the same topics talked about here? I’d really like
My brother suggested I may like this blog. He was once totally right.This post truly made my day. You can not believe just how much time I hadspent for this info! Thank you!
There’s certainly a great deal to know about this topic.I really like all the points you have made.
It as hard to seek out knowledgeable folks on this matter, however you sound like you realize what you are speaking about! Thanks
Very good post. Much obliged.
Major thanks for the post.Thanks Again. Great.
wow, awesome article post.Thanks Again. Want more.
Whoa. Genius. You’re a new wizard. Appreciate you.
Great, thanks for sharing this blog.Really thank you! Really Cool.
stromectol tablets for humans ivermectin tablets
Really informative article post.Really thank you! Great.
Excellent post. I was checking continuously this blog and I’m impressed! Very useful information specifically the last part 🙂 I care for such info much. I was looking for this certain information for a very long time. Thank you and best of luck.
I really like and appreciate your article.Much thanks again. Want more.
sildenafil citrate over the counter walgreens sildenafil coupon online sildenafil citrate brands
Hiya! I just wish to give an enormous thumbs up for the nice info you’ve gotten here on this post. I can be coming again to your blog for extra soon.
I really enjoy the post.Really thank you!
Outstanding story there. What happened after? Good luck!my blog post; boost libido
This is one awesome blog article.Really thank you! Really Great.
Really enjoyed this article post.Much thanks again.
I really liked your blog article.Really thank you! Fantastic.
Great, thanks for sharing this blog article.Really thank you! Really Great.
I loved your article post. Much obliged.
What’s Going down i’m new to this, I stumbled upon this I’ve discovered It positively useful and it has helped me out loads. I’m hoping to contribute & assist different customers like its helped me. Great job.
Thank you ever so for you blog post.Really thank you! Want more.
Hey, thanks for the post.Thanks Again. Want more.
Major thanks for the blog post. Want more.
Thanks so much for the blog article.Much thanks again.
Appreciate you sharing, great blog.Thanks Again.
A round of applause for your blog.Really looking forward to read more. Cool.
Wow, great post.Thanks Again. Fantastic.
Major thanks for the article post.Much thanks again.
Awesome post.Really thank you! Really Great.
Really appreciate you sharing this blog post.Really looking forward to read more. Cool.
Heya! I just wanted to ask if you ever have any issues with hackers?My last blog (wordpress) was hacked and I ended up losing months of hard workdue to no back up. Do you have any methods to prevent hackers?
Very neat blog. Cool.
Really informative article.Really thank you! Keep writing.
Major thankies for the blog.Thanks Again. Keep writing.
I truly appreciate this article.Really thank you! Will read on…
A big thank you for your blog.Really looking forward to read more. Fantastic.
Im grateful for the post.Much thanks again. Fantastic.
Say, you got a nice article.Really looking forward to read more. Really Great.
I think this is a real great blog.Much thanks again. Really Cool.
Im thankful for the blog article. Keep writing.
Wow, great article post.Much thanks again. Keep writing.
Very neat blog.Much thanks again. Want more.
Wow, great post.Really looking forward to read more.
Hey, thanks for the blog post. Really Cool.
Awesome blog article.Much thanks again. Keep writing.
Im obliged for the article.Much thanks again. Want more.
Im grateful for the article post.Really thank you! Fantastic.
Thanks-a-mundo for the article.Much thanks again. Will read on…
Wow, great post. Fantastic.
Muchos Gracias for your blog post.Much thanks again. Fantastic.
Hey, thanks for the blog.Thanks Again. Fantastic.
Appreciate you sharing, great article post.Really looking forward to read more.
I value the post.Really thank you! Great.
Im grateful for the article post.Much thanks again. Want more.
Looking forward to reading more. Great blog article.Really looking forward to read more. Keep writing.
Fantastic article.Thanks Again. Want more.
Thanks again for the post.Much thanks again. Awesome.
Very neat article post.Really looking forward to read more. Really Great.Loading…
Very neat article post.Thanks Again. Awesome.
I think this is a real great blog post.Thanks Again. Will read on…
Say, you got a nice blog post.Thanks Again. Will read on…
Thank you for your article post.Thanks Again.
Major thankies for the blog article. Great.
I really enjoy the article post. Much obliged.
Very neat blog.Thanks Again. Really Cool.
Very informative blog post.Really thank you! Really Great.
Major thanks for the article post.Really looking forward to read more. Want more.
Looking forward to reading more. Great blog article. Great.
I loved your article.Thanks Again.
Im obliged for the blog.Thanks Again. Awesome.
Im obliged for the post.Really looking forward to read more.
Thanks for finally writing about > Dispersan a 84 personas que realizaban actividades no esenciales en Acapulco – Marde Noticias Guerrero
Following the Education Act of 1918 which raised the school leavingage to 14, women have been greater educated.
Resurge supplement is a simple pill made with some very powerful, effective and safe ingredients. It is designed to help people lose weight with incredibly deep sleep and may help fight against the effects of aging.
Say, you got a nice blog article. Want more.
This is one awesome article.Thanks Again. Awesome.
Very informative blog post.Really looking forward to read more. Will read on…
I cannot thank you enough for the blog article. Awesome.
Im obliged for the blog article.Much thanks again. Will read on…
Im thankful for the blog post.Really thank you! Really Great.
Fantastic blog.Really thank you!
Im obliged for the blog post.Much thanks again. Really Cool.
I really like and appreciate your blog.Really thank you!
Really appreciate you sharing this blog post.Really thank you! Great.
Thanks-a-mundo for the blog article.Really thank you! Awesome.
Awesome blog post. Great.
A round of applause for your post.Thanks Again. Awesome.
Major thankies for the blog article.Much thanks again. Much obliged.
Really informative blog.Much thanks again. Much obliged.
Im obliged for the blog post.Really looking forward to read more. Really Cool.
Great, thanks for sharing this blog post.Much thanks again. Fantastic.
Thanks for the post. Really Great.
I cannot thank you enough for the blog post.Much thanks again.
Hey, thanks for the article.Really thank you!
Appreciate you sharing, great article post.Really thank you! Really Great.
I think this is a real great blog.Really looking forward to read more. Want more.