Most people would agree that a toaster is one of...
Read MoreDetermining the “best” camping toaster can depend on individual preferences and specific needs. However, here are a few popular and highly regarded camping toasters that have received positive reviews from campers:

Coghlan's 504D Camp Stove Toaster, 9", Silver
$12.50
Amazon.com

Texsport Heavy Duty Adjustable Outdoor Camping Rotisserie Grill and Spit
Amazon.com
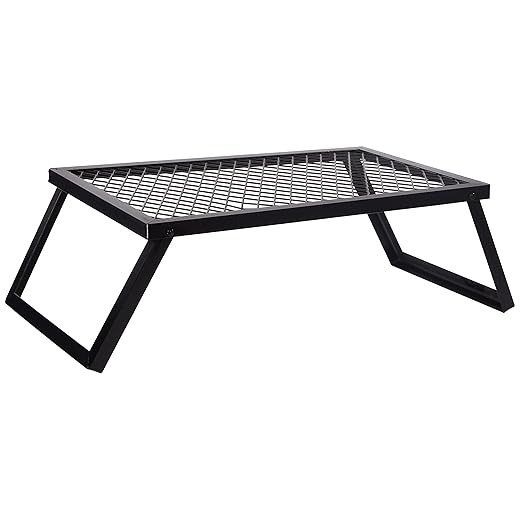
Texsport Heavy Duty Camp Large Grill Black, Extra Large
Amazon.com

Snow Peak GigaPower LI Stove – A Group Cooking Essential – 13.7 x 16.5 in
$395.58
Amazon.com

Coleman Camp Oven
$38.92
Amazon.com

Camp-A-Toaster CT1
Amazon.com

Ibili Classica Foldable Tin Plate Bread Toaster Camping Cookware, Ideal For Use On Gas Flame – Made in Spain – 20cmx20cm – 7.8"x7.8"
$16.94
Amazon.com

Yoshikawa SJ2408 Hot Sandwich Maker, For Gas Stoves, Crispy Grilled, Single, Fluorine Treated, Total Width 5.9 x Total Length 13.8 x Height 1.3 inches (15 x…
$18.45
Amazon.com

Camper Toaster, Stainless Steel 4 Slice Propane Bread Toaster with cooking tongs, Folding Camp Stove Toaster, Portable Backpacking Outdoor Toaster Rack…
Amazon.com

GSI Outdoors Glacier Stainless Steel Toaster | Collapsible, Hand-Held Toaster for Camping and Backpacking
Amazon.com

Sandwich Hand Toaster,Sandwich Maker Grill,Hand Toaster,Sandwich Maker,Sandwich Toaster,Sandwich maker nonstick,Toaster,Grill Sandwich Maker,Nonstick Gas…
$13.99
Amazon.com

1 Pack Stainless Camping Toaster – Portable Folding Camp Stove Toaster 4 Slice – 1 Pack Barbeque Bread Clip Included – Camp Stove Toaster Rack For Indoor…
$18.99
Amazon.com

Stansport Folding Camp Stove Toaster , Silver , 8.66" L x 8.66" W x 4.33" H
$11.53
Amazon.com

iSiLER 2 Slice Toaster, 1.3 Inches Wide Slot Bagel Toaster with 7 Shade Settings and Double Side Baking, Compact Bread Toaster with Removable Crumb Tray,…
$29.99
Amazon.com
- Coleman Camp Stove Toaster: This toaster is designed to be used with a camping stove. It is made of durable steel and can toast up to four slices of bread at once. The compact and lightweight design makes it easy to transport.
- Texsport Heavy Duty Camp Grill Toaster: This toaster features a sturdy construction with a heavy-duty steel plate and mesh rack. It can be used over a campfire or a camping stove and can toast up to four slices of bread simultaneously.
- Snow Peak Foldable Toaster: This toaster is known for its compact and foldable design, making it easy to store and transport. It is made of stainless steel and can toast two slices of bread at a time. The toaster also features a wire rack for even toasting.
- Coghlan’s Camp Stove Toaster: This toaster is designed to be used with camping stoves. It can toast up to four slices of bread simultaneously and features a durable steel construction. The compact and lightweight design makes it convenient for camping trips.
When selecting the best camping toaster, consider your specific needs, such as the size of your camping group, the heat source available, and your preferred toasting capacity. Read reviews from other campers to gain insights into their experiences with different models, and choose a toaster that aligns with your requirements and budget.
Best Long Slot Toaster That Will Make Breakfast a Breeze
A toaster is an appliance that is used to heat...
Read MoreWhat Is The Best 4 Slice Toaster On The Market?
If you are in the market for a new toaster,...
Read MoreWhy Trust Us
You will find what you are looking for at Jody's Bakery. From classic to luxury brands, you'll find both. We will help you to select appliances that fit your needs, budget and lifestyle. Whether you want to stop by to learn more — or plan to make a major purchase — we’ll treat you like family and assist you every step of the way. Shop with us today to receive friendly and experienced help along the way.

