Disclaimer: There are affiliate links in this post. At no cost to you, I get commissions for purchases made through links in this post.

Best Bread Machine With Fruit And Nut Dispenser

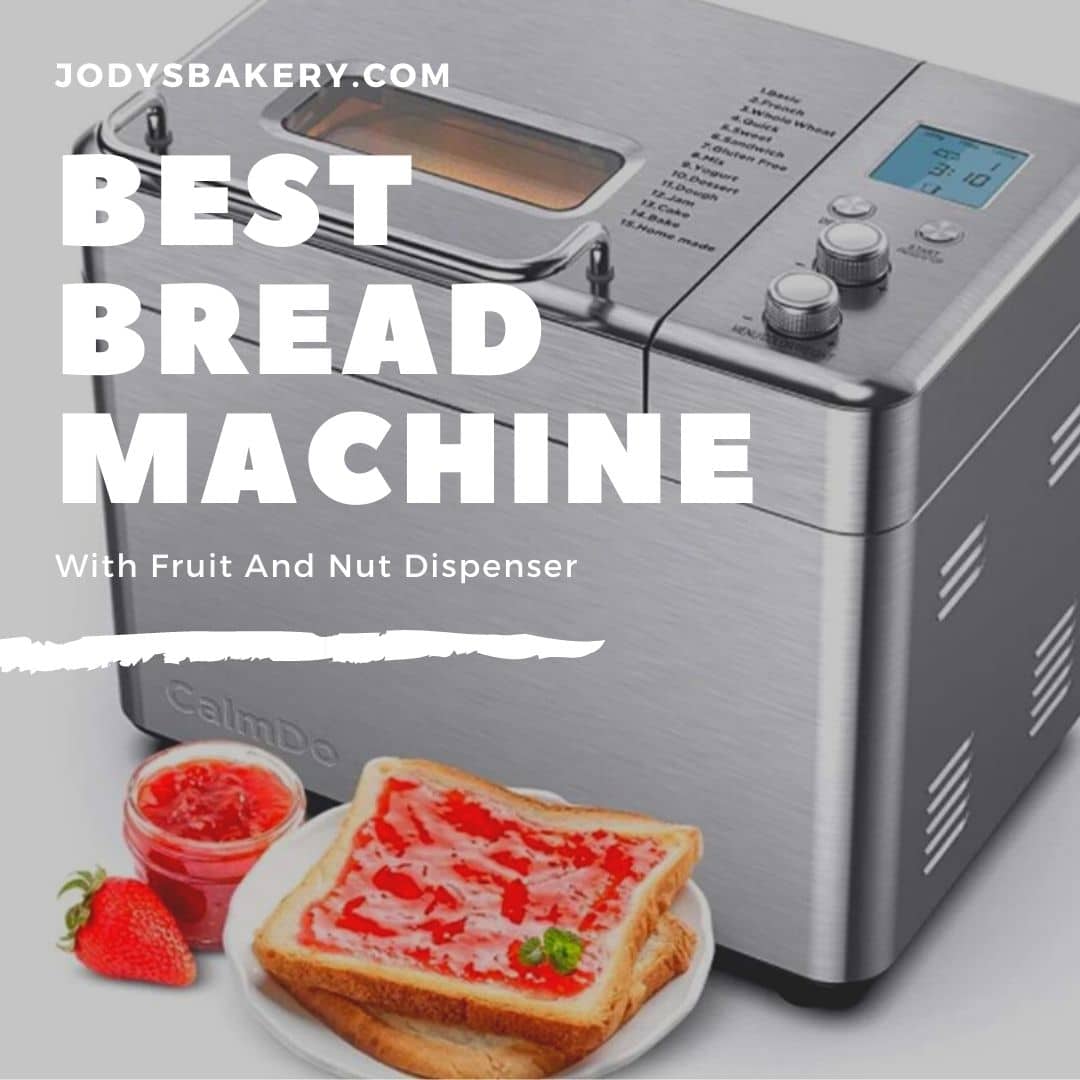
If you’re looking for a bread machine that can handle fruit and nuts, you will want to check out our list of the best bread machines with fruit and nut dispensers.  

We’ve scoured the internet for the best machines that can make delicious bread with ease, and we’ve found some great options for you to choose from. Whether you’re looking for a basic bread machine or one with all the bells and whistles, we’ve got you covered. 

So, what are the best bread machines with fruit and nut dispensers on the market? Read on to find out. 

Our Top Picks


What Is Bread Machine With Fruit And Nut Dispenser? 

A bread machine with fruit and nut dispenser is a kitchen appliance that automatically mixes, kneads, and bakes bread. It has several settings that allow you to customize the process according to the type of bread you are making. Some machines also have a “delay start” feature that allows you to set the machine to start baking later. 

The fruit and nut dispensers are one of the most popular features of bread machines. This allows you to add fruits and nuts into the bread dough without having to measure or chop them up beforehand. Many machines come with different size dispensers so that you can use different types of fruits and nuts. 

How Does Bread Machine With Fruit And Nut Dispenser Work?  

When you’re short on time but still want to enjoy fresh, homemade bread, a bread machine with fruit and nut dispenser can be a lifesaver. These machines do all the work for you, from mixing the ingredients to kneading the dough to baking the bread. And, best of all, they have a special compartment for adding fruit and nuts so you can customize your loaf however you like. 

So, how does a bread machine with fruit and nut dispenser work? It’s actually quite simple. First, you add all of your ingredients – including the fruit and nuts – into the machine’s baking pan. Then, you select the cycle you want (usually there are options for white or wheat bread) and hit start. 

The machine will mix the ingredients together, knead the dough, and then bake it. Depending on the model, you may have to add the fruit and nuts manually during the kneading cycle or they may be dispensed automatically. 

Once the bread is done, it will be ejected from the pan and is ready to enjoy! Slice it up and spread on some butter or jam – it’s sure to be a hit with everyone in the family. 

So, there you have it – a quick overview of how a bread machine with fruit and nut dispenser works. These machines are convenient and easy to use, so if you’re looking for an effortless way to enjoy fresh, homemade bread, they’re definitely worth considering. Give one a try today! 

How To Use Bread Machine With Fruit And Nut Dispenser 

If you’re looking for a delicious and healthy way to add fruit and nuts to your diet, consider using a bread machine with a fruit and nut dispenser. This kitchen appliance makes it easy to create homemade breads that are packed with nutrients and flavor. Plus, the dispenser ensures that the ingredients are evenly distributed throughout the dough, so you’ll get perfect results every time. Here’s how to use a bread machine with a fruit and nut dispenser: 

  1. Choose your recipe. There are many recipes available online or in cookbooks specifically designed for bread machines. Be sure to select a recipe that includes both fruits and nuts in the ingredient list.
  2. Prepare the ingredients. Before you start, gather all the ingredients you’ll need, including the bread flour, yeast, salt, sugar, butter (or margarine), eggs, and milk. If your recipe calls for fresh or frozen fruits and nuts, be sure to thaw them completely before using.
  3. Add the ingredients to the bread machine pan in the order specified by the recipe. Most recipes will call for adding the dry ingredients first, followed by the wet ingredients. Be sure to add the fruits and nuts last so they do not get caught in the blades.
  4. Select the “Fruit and Nut” cycle on your bread machine. This cycle is usually longer than other cycles, so be patient while your bread bakes.
  5. Enjoy! Once the bread is finished, allow it to cool slightly before slicing. Enjoy your healthy and delicious fruit and nut bread plain or with your favorite spreads and toppings.

Tips On Using Bread Machine With Fruit And Nut Dispenser 

One of the great things about owning a bread machine is that you can add fruit and nuts to the mix, giving your bread a unique flavor and texture. Here are some tips on using the fruit and nut dispenser on your bread machine: 

  • When adding fruits or nuts to the dispenser, make sure they are chopped into small pieces so that they will be evenly distributed in the dough. 
  • If you are using dried fruits, soak them in water for about 30 minutes before adding them to the dispenser. This will help them plump up and be evenly distributed in the dough. 
  • Be careful not to overfill the dispenser. The fruits and nuts should not make up more than 10% of the total weight of the ingredients in the recipe. 
  • If you are using fresh fruits or nuts, add them to the dough after it has been kneaded and is ready to rise. This will prevent them from sinking to the bottom of the bread pan. 

With these tips in mind, you can experiment with different fruits and nuts to create unique breads that your family and friends will love! 

Benefits Of Using Bread Machine With Fruit And Nut Dispenser 

If you are looking for an easy and convenient way to make delicious bread at home, then you should consider getting a bread machine with a fruit and nut dispenser. Here are some of the benefits that you can enjoy by using this type of bread machine:

It is very convenient to use.

You do not need to measure the ingredients or knead the dough by hand when you use a bread machine with a fruit and nut dispenser. All you need to do is add the ingredients into the bread pan, select the appropriate cycle, and then let the machine do its job.

It saves time.

Making bread from scratch can be quite time-consuming. With a bread machine, you can have fresh bread in just a few hours.

It is perfect for making large batches of bread.

If you often need to make large batches of bread, such as for parties or gatherings, then a bread machine with a fruit and nut dispenser is perfect for you. You can make enough bread for a crowd without having to spend hours baking in the oven.

It is easy to clean.

Cleaning a bread machine is extremely easy since most of them have removable parts that can be washed in the dishwasher.

It is affordable.

Compared to other kitchen appliances, bread machines are very affordable. You can find one that fits your budget easily. 

These are just some of the benefits that you can enjoy by using a bread machine with a fruit and nut dispenser. If you love to bake, then this is a great appliance to have in your kitchen. 

8 Best Bread Machines With Fruit And Nut Dispenser 

Are you looking for the best bread machine with fruit and nut dispenser? If so, you’ve come to the right place. In this article, we’ll take a look at 10 different options, all of which would make a great addition to your kitchen. 

1. Best Overall: Breville BBM800XL Custom Loaf Bread Maker

Breville Custom Loaf Bread Maker, Brushed Stainless Steel, BBM800XL

★★★★★
Amazon.com

User reviews

producing half baked “brick” without possibility to continue baking unless you would wait for Zo would cool down. Besides it bei. Let me start with short review of Breville’s competitor I had an opportunity to try before buying this piece of home magic.My dear husband gave me an expensive Zojirushi as a B-day gift. I was exited to test it, but the recipie from the booklet failed immediately – bread was lumpy, tasteless and rock-hard. We’ve gave it another try and tried a cake recipie from the book, and it failed again, producing half baked “brick” without possibility to continue baking unless you would wait for Zo would cool down.Besides it being a lemon made in China (not in Japan, as expected), it also looks and feels like “Hello, housewives from 80-s!” with tiny dark lcd display, bulky body and colorful booklet, which looks more like a childrens book (not just because it is colored, but also by the mentoring tone some adults use with children – many repeats, minimum useful information, colorful simplified schemes and attractive pictures…). My guess, the model was not updated for the last 20-30 years, except the smooth buttons (a la 2000’s) and gluten free option, which probably was an encoding for some other modern trend from the past and now was just renamed for the sake of health consciousness buyers. There is no ways to modify pre-set programs and only three options for custom recipies, where you can choose only order and number of steps, but not the time or temperature. There are no crust settings for Wheat! I guess everybody in Japan like their wheat bread made only one way… I was more than disappointed not only by bad quality, but by Zo’s intend to standartize my baking and limit my creativity, the true essence if cooking. We’ve returned it without regrets.So, now about Breville. Compare to the traktor-like Zo, this is a top notch Rolls Roys. My first try of milk and honey bread from the booklet turned to be amaizing, tasty and exeeded mine and my family expectations (see photo). The bread was soft, spongy inside and with evenly golden artisian crust outside. The machine itself looks modern and stylish, with huge lighted display, easy to read text and icons, intuitive navigation and fancy buttons. The booklet is full of quite useful information, tips, tricks and recipies. Compare to Zo, it has only one paddle for bread, but it is collapsible and there is another paddle for the jam included. Nice feature Zo was missing, is fruts and nuts dispenser, which this machine has on the detachable cover. But most importantly, this beauty has a magic button “Modify”, which can change any pre-set ptogram to your desite for the length of each step and, where applicable, for the temperature as well. There are 9 custom programs you can keep in Breville’s memory for some of your favorite recipies, or your experiments. I have not tried it yet, but I believe it could be programmed to be a yogurt maker or sourdough starter. The pickaboo window is big enough to catch moments where you may want to add liquid or flour during kneeding, and there is a light inside to see how bread is breathing and rising.A few cons, which might be disturbing for some, but does not downgrade my opinion about this breadmaker:1. the signal has a higher pitch, but you can turn it off.2. It moves more and noizier compare to my old Toastmaster or Zojihushi. However, it has rubber pads on the legs, so I doubht it may walk away from my countertop one day.3. Collapsible pad would require better cleaning and some practice to put it in the open position while adding ingredients (mine was collapsing, so I had to hold it with a spoon while adding liquids).4. Stainless steel frame is a fingertip and drops magnet and would require periodic cleaningDespite these minor nuances, the result beats the minor inconveniences. I am happy to have this model as my B-day present and my husband loves it even more!P.S. Accidently found a trick to switch from light to medium crust without restarting the programm – close the dispenser before baking step.
Solid Machine. I’d like to offer insights not already covered by other owners: Like other Breville appliances, this bread maker uses a multi-function rotary switch for navigating and changing the values of various settings. This is a faster, easier method than keypad buttons used on other machines. This machine has a high level of features and settings, so this choice of interface really shines. There’s also tactile metallic buttons that perform single purposes, (Ex: Oven light), and their layout and size make them unambiguous. This layout, and the large, easy to read black-over-white LCD display are friendly to old duffers like me who don’t appreciate scrambling to find our glasses to use an appliance. Also, the important buttons have an illuminating halo ring that changes color to indicate they are, or are not available for use depending on the present state of the machine’s cycle. Another clever detail.A word on the folding paddle angst some owners have expressed: Complaints relate to seizing, cleaning or aesthetics of the ‘hole’ in the bottom of the loaf . . really?I lube the thing with olive oil prior to use. I also place a cup of hot water in the baking tin w/paddle after it cools to soften remnant dough, then use the edge of a common dish brush to clean away baking remnants. Cleaning takes seconds not minutes – far less time than complaining, and if a small hole or gash in the bread your about to digest troubles you, consider meditation or a therapist.Things to like:1. Widest range of loaf sizes of any machine I could find.2. Oven light is awesome – not critical, but a really thoughtful luxury.3. Fruit/nut dispenser a plus.4. 850watt rating – most powerful machine I could find.5. Fixed and folding paddles provide for a wide range of uses.6. Greatest number of custom program settings and memory for personal recipes.Lastly, and surprisingly important,7. The manual/recipe book is a real quality item. Thick, glossy pages, spirally bound so you can open to a recipe and it lays flat. It is made to be in a kitchen. Most other manufacturers completely cheap out at this point. The many recipes are a great starting point for spectacular personalized custom loafs. A note on price: Welcome to inflation. I had to pay $300. Who WANTS to do that? I didn’t, and first I bought a KBS import special with a fancy glass top for $150. But on only the second loaf, that machine’s wimpy motor started to make unhealthy sounds and got returned. On the other hand, my 6-7 year old Breville espresso machine, juicer, and countertop oven function as perfectly today as they did in 2015. Coincidence? Maybe, or it shows value for the prices paid – who’s to say. In the end, performance and longevity are more important to me than low price. Once the money is spent, it’s easy to forget the pain as long as the product excels year after year. O.K., time for a perfect crusty dill rye for Reuben sandwiches. It’s a ripper :)P.S. If you haven’t tried Bob’s Red Mill Artisan Bread flour, there’s a real pleasure waiting for you.
Excellent Gluten Free Bread. I only bake gluten free (GF) bread. Been doing it for years. I bake 3-4 loaves a week. Recently I decided to switch to a bread machine. This machine produced an excellent GF loaf – on the first attempt! It comes with a detailed book (thick and spiral bound) that gives you everything you need to know like times and temps of each cycle, step by step directions and some recipes. You can create your own homemade bake cycle by programming your unique settings. My only small complaint: the view window is pretty small. Quality control was bad for me. The first machine I received had a piece of black rubber stuck under the glass of the screen. It obscured the read out. Returned it. The second machine wasn’t sent in a shipping box. Arrived busted up and scratched. Returned it. My bad luck. Check your machine!!
En relación con otras panificadoras esta tiene mucho más posibilidades de crear un buen pan tuve mala suerte con las otras al fin encontré lo qué deseaba me tardaron casi un mes en entregar pero al fin la recibí
I use this bread maker twice a week at least to make whole wheat bread and it yields perfect results every time. I love the preheat feature which allows for a lovely rise and enjoy the lay flat paddle. I will say the paddle does not always work and sometimes stays up but this is not a big issue for me as it’s quit skinny so it affects very little of the bread in general. I bought this to replace my broken Cuisinart bread maker and I couldn’t be more pleased. The only concern I have involves the cleaning of the pan. There are 6 plastic circles at the bottom of the pan which get bread stuck around them. Cleaning that area is annoying and time consuming. Not annoying enough for me to take a star off but something you should be aware of.Separate from bread this also makes excellent dough and I am a rock star at home right now because I can make cinnamon buns regularly with little effort on my part.This machine is far superior to the Cuisinart in my opinion. The texture and quality of the bread is much better. Our 100% whole wheat loaves are light and fluffy and my family has been eating it without complaint. A great way to keep everyone healthy and save money in the long run as it’s far cheaper to buy ingredients and bake it ourselves. If you’re looking for a new machine this one is solid and shouldn’t let you down.
Excelente, un poco difícil de entender, pero hace todo!! Uno solo agrega los ingredientes y listo!
Purchased this wonderful bread maker about 6 wk ago and just love it. I bake about 2-3 times aweek and no failures so far however be warned thr 4-5 cup flour recipes are huge, definately family size, even with whole wheat flour. I never use the vital gluten as our Canadian wheat is great and gives good rise always. The only door stop loaf so far was the recipe in the book containing cinnamon which kills yeast apparently. I mixed it in the flour with all the other dry ingredients, guess that was not a good idea! I always add yeast last on top of dry ingredients and warm water and butter first.The top of every loaf is always nicely browned on every setting however the sides and botton are a little too brown even on light setting basic recipe for white bread, perhaps due to too much sugar or whole milk powder? The whole wheat setting for crust is auto preset and bottom and sides crust are very dark but still wonderful high loaf bread and this too was a high sugar bread.The winner in the preset loaf where crust cannot be adjusted is the french bread crusty loaf…….a beautiful light airy bread, taste excellent and perfect golden crust all around but it had no sugar or milk powder, just oil and salt any maybe that is why, so still have more fun experiments to try it seems.The pan is surpprisingly light, with very slick coating. Single paddle and pan shape and kneading very thorough, I am impressed and loaf shape is quite high semi rectangular deep enough so no stick to lid issues.Anyway the machine works great, the paddle only lays partly prone due to dough caught under the paddle , makes a dent in bottom of loaf but that is still better than the machines that tear a huge hole when paddle is left in to bake. However there is a beep after last knead so you can remove paddle if desired.The add in dispenser works fine and goodies get mixed in properly.The dough is extremely well mixed and finished loaf shap is smooth unless the dough is too dry then thhe top may be lumpy.I am really delighted to have a completely hands free bread making machine and enjoy it very much. I did a lot of research before buying and am pleased with my choice of Breville.I have 2 other Breville products and found them very good, heavy duty also just like this bread machine.
So far, we are really happy about this Breville bread making machine. This is the first bread maker we own and so far we’re having a great experience with this appliance.All bread makers make some noise, and this one does too, as mentioned in some of the previous reviews, but it is bearable to be in the same room while it does the kneading. The main issue we have with noise is that at some point in the cycle, the machine will vibrate, probably to dislodge the nuts in the nut dispenser. This makes A LOT of noise, enough to wake us up. Sadly, this function cannot be turned off, even when the nut dispenser is not used. Only the beeping can be turned off.This being said, the nut dispenser is a really cool feature. The machine wobbles quite a bit when kneading, we found that putting it on the floor helped reduce the noise and make the kneading more efficient.The collapsible paddle, which seem to cause trouble to some users (see previous reviews), does indeed occasionally fail to collapse, but still does most of the time. When it does not, it does not “take a big chunk” out of the bread, but only a small one. It is always possible to retrieve the paddle without tearing the whole bread apart. For us, this is not an issue. This paddle is really small anyway, but the kneading is so effective.The breads we made were good. Now we really eat more bread than before (maybe too much?). We tried all recipes without the milk powder and the results were fine. Probably not a necessary ingredient. We have also tried the pizza dough, to great success. We really like the “delay” feature, too. It is just amazing to wake up and have this freshly baked bread smell in the apartment and a very fresh loaf to start the day.Some tips if you want to add flaxseed to your bread, do not put them in the nuts dispenser but rather add them at the start, with the other dry ingredients. Also, always make sure you add whatever you want to put in the nuts dispenser AFTER you’ve put the bread pan in the machine, as some nuts can fall through the slits.One more thing for francophones who might be using the North American version of the users manual: there are errors in the French part of the booklet. Some columns have not been translated and there even are mistakes in the quantities used in the recipes. So stick to the quantities mentioned in the English version…Finally, one unfortunate design flaw: no OFF switch. When plugged in, the machine is always on, drawing electricity for nothing. Thankfully, the plug is sturdy and will not mind the machine being plugged in and out constantly, but this is inconvenient.

View all reviews

The Breville BBM800XL is my favorite bread machine, which is ideal for any aspiring baker. It has an impressive thirteen settings and three crust colors, allowing you to bake any loaf you desire. This machine can produce anything, from a simple white loaf to cake and jam. 

The Breville, like the other machines on my shortlist, has an automatic fruit and nut dispenser, allowing you to add the exact amount of your favorite ingredients. In addition, it includes an impressive 12-month warranty, so you know you’re getting a high-quality item. 

The Breville’s unique collapsible paddle design ensures your loaf has a smooth finish and no large holes at the bottom, which is one of my favorite features. No more large holes in the base of these sweet loves! This machine’s only drawback is that it is somewhat bulky and requires considerable counter space. 

If you are a busy person with limited free time who enjoys homemade bread, bread makers are an excellent investment. They are so convenient and perform most of our work. And the result is bakery-quality, high-quality bread. 

Breville has gone above and beyond to make this bread maker user-friendly. Every detail has been accounted for, from the cord wrap to the automatic dispenser to the user-friendly interface. They have even installed a light beneath the lid! Additionally, it is one of the few bread machines that allow you to customize your loaf. 

If you’re looking for a more affordable option, don’t fret; plenty of excellent bread machines cost less than half as much! 

Key Features 
  • Automatic fruit and nut dispenser releases ingredients at the right moment during the knead phase so they are evenly incorporated within the dough. Voltage : 110–120 Volts 
  • Unique collapsible kneading paddle thoroughly mixes ingredients then collapses before bake phase to minimize the hole at the base of the baked loaf 
  • Smart lcd screen with progress indicator displaying 13 automatic settings, 3 crust colors, and 4 loaf sizes 
  • Loaf sizes include 1.0-pound, 1-1/2-pound, 2.0 ln and 2-1/2-pound (Family size) 
  • 46 step by step recipes (basic, whole wheat, gluten free, crusty loaf, sweet, yeast free, dough, jam as well custom recipe charts). Power : 830 Watts 
PROS
  • Produces bakery-quality bread
  • Durable and reliable
  • Simple to use
CONS
  • Paddle sometimes imprints on loaf

2. KBS 17-in-1 Bread Machine

KBS Large 17-in-1 Bread Machine, 2LB All Stainless Steel Bread Maker with Auto Fruit Nut Dispenser, Nonstick Ceramic Pan, Full Touch Panel Tempered Glass, Reserve& Keep Warm Set, Oven Mitt and Recipes

★★★★★
Amazon.com

User reviews

Great Customer Service and Great Bread but a little tricky to use but I have some tips. The media could not be loaded.  I now have three KBS bread machines/makers in the house. I bought one almost two years ago and it made great bread — plain white, raisin, italian, etc — for three months (used it every four days) — but suddenly the bread came out pale, dense and short like a brick or didn’t bake properly and had a gummy center. I realized one of the heating coils died so I ordered another one since I loved the bread it made but I didn’t have the warranty info from the box since I tossed it. I kept the broken one just in case I could repair it when I had some time. Then I found out I couldn’t find the heating element anywhere so I decided I would attempt to write the contact (byran@jmkbs.com) to see if I could order a new heating element and replace it myself.It was nearing the two year warranty date and I was pleasantly surprised to find out that the order number and a report of the failed bread machine would suffice. The person was very pleasant via email and considerate and told me that they would just replace it — I don’t think the heating element is available. They told me I would be receiving a new one within the week and that I didn’t have to return the broken one (now used to knead dough). Well, I have received the new one as promised and it is working just fine and the second one I bought — the 2lb stainless steel with the extra ingredient/nuts/raisin container — is also still working ever since and I use it every four days to every week. So I am quite happy with this purchase, the customer service, and the products it makes. I have made plain white, sweet, multigrain, yogurt, jam (peach jam in one of the photos), dough for cinnamon rolls, dough for pizza, challah, bagel dough, donut dough, pita dough, etc.The instructions – I don’t believe I understood it so I looked for videos on youtube to help me. I’m more of a visual learner anyway. I think there is some mention of an interior light which I haven’t found but I keep a flashlight next to my KBS bread machine…maybe they meant the led touchscreen. Idk.I have a few tips though:1. Don’t plug it in until you have set up the ingredients in the pan. The touchscreen is very sensitive and I’ve accidentally started something with the edge of my hand, elbow, or fingertip. If that happens, hold down the menu button until everything clears or you need to unplug it, wait for about 15 minutes and it clears whatever you changed and then re-program it again.2. I suggest using warm water or milk or whatever liquid you’re putting in (liquids first) especially in the winter where the ambient temperature is lower and the air is less humid. When using plain room temperature water, the results can vary. Of course if you program it to make bread for a later time, then it won’t work so well to use warmed liquid since it cools but I’ve still had more successes than failures with room temp liquids. I just prefer to keep the yeast as warm, cozy and happy as possible for a consistent end-product.3. Cover the corners evenly with the flour in the pan before you sprinkle in the yeast to make a slight well in the center. I get much better results when the yeast is closer to the center of the flour. In the beginning I didn’t pay attention to that and let the yeast touch the water — not such a great result. 4. I’ve developed the habit of starting the machine but hanging around for about 5 minutes so I can get a silicone spatula to wipe down any dough that may be clinging to the the inside walls and push it up against the dough before it gets more developed. This happens with some more wet mixes/doughs and it’s alright since I prefer the ceramic to nonstick since I’ve read less chemicals are leaching into the food. It still releases the loaf well in the end, and cleans up just fine with soap, warm water and once in a while those plastic scrapers. It happens to me with the more sugary loaves like raisin cinnamon.5. I have learned not to open up the lid once it starts baking especially in the winter because it can make the bread drop a little. I did this to split the top with a knife and/or to add an egg wash on top. Now I watch the timer on the screen and do it a little sooner.6. Sometimes, I will just create a dough and move it to a pan or a pullman loaf pan and let it rise in the oven covered with the oven light on for a little warmth if I don’t want to have the hole or if I’m making different shapes but it’s basically just for me and the family and we don’t really care if it’s there. The aroma of fresh baked bread is amazing, the fresh crust is delectable, and so is the flavor.7. I cool it on a rack with some space below (there are photos attached of plain white bread, some showing what the hole looks like that the paddle creates in it, a closer pic for an idea of the crumb, and a loaf that has had an egg wash). I haven’t attempted to cut it while hot but a bread knife is fine when it cools.8. With that, I tend to use Bob’s Red Mill Bread flour or King Arthur flour, and non fluoridated, filtered water (I use the Clearly Filtered brand since Brita doesn’t remove fluoride). Fluoridated water will affect the rise since it can kill some or all of the yeast — same as chlorine. I believe some places also have a little something-something extra in their water such as NY that has microscopic copepods to eat mosquito larvae (not Kosher). I do prefer Bob’s or my own milled. I’ve also had success with pre-milled kamut, farro, spelt, and teff.Good luck. I hope you enjoy the KBS bread machine as much as I have and the easy, delicious bread it makes. With three, I am ready for the holidays!
Solid machine, but safer as well due to its ceramic pot. Ok, it’s been about a year now since I decided to buy this particular bread maker, so I can give you my honest perspective on it. Originally, I purchased the bread maker out of concerns that Covid was going to impact my family’s everyday life and of course Covid has done that. I thought bread was going to be scarce for awhile and it was for a short while. And I wasn’t too sure about eating good from restaurants, so I thought the bread maker would be a good idea for making home made pizza.Spin forward a year and I can honestly say that if you are thinking of buying a bread maker, consider buying one for making pizza dough. This machine makes great pizza dough and to date, we’ve made 57 pizza’s with our bread maker. We just put 1-1/3 cups water, 1/4 cup olive oil, 3-1/2 cups I bleached all purpose flour, 1 tbsp sugar, 1-1/2 teaspoons salt and 2 teaspoons of SAF yeast into the bucket in this specific order, and set the bread machine to setting 11 (dough mixing mode) and in 23 minutes, we have enough dough for 2 large pizzas! We cut the dough in two chunks and place them in plastic bags and refrigerate or freeze. The KBS make the process of making pizza’s so easy, that it’s now an effortless process for us during the week to make 1 or more batches.Yeas, we tried bread once, but as a result of Covid, I’ve found that making the type of quality sourdough you see in the pic I’ve provided, that hand kneading yields much higher rising. So I just hand mix and knead my sourdough. The rising is not an issue with the KBS, it’s just that sourdough rising is a process better left to a slow and easy kneading method.As far as the one bread loaf I did make, it was from the 3rd party cookbook others mentioned. I made a white bread loaf and I have to say so myself, that it came out beautifully. But because sourdough is healthier, I’m satisfied with the KBS making just pizza dough.In regards to the machine, it works flawlessly for us. The non-stick ceramic pot is what sold me when reading about the horrors of PTFE’s which are embedded in all the major brands that don’t use ceramic pots. And the ceramic coating makes cleaning up a breeze.Initially, I there was a flaw in the machine that I had read about where others were complaining that if you hit the start button by mistake, the bread machine would run a cycle with no way to cancel it, even if you unplug the device. Well, those people probably don’t use computers much. Being an IT professional, I figured it would be a simple matter of holding down one of the buttons for 5 seconds to reset the machine, and sure enough, by holding down the start button (I believe it’s actually called th Menu button) for a few seconds, you should hear a beat that will tell you that the selected mixing recipe has been cancelled.Other than this one initial flaw in the design, I can’t complain much. The people that complain are probably not used to using a bread machine of any kind and they’ll complain about bad results. The key thing to realize about bread machines is that the ingredients must be added in the specific order specified in the recipe for best results. Just winging things in the pot will get you sub par results no matter what machine you use.And as far as being made in China, tell me what machine probably does not have major internal components from the Far East. These days, we tend to blame the device when 9 times out of 10, it’s operator inexperience or improper use.One area that is poor is the user guide. That I will admit is pretty shabby. But hey! You can get a great guide with another bread maker along with some really tasty PTFE chemicals from their Teflon coated pots! Yum!The pics I’ve provided of my results tell the story. This machine is well made and it can make good breads, pizza doughs, etc. I can highly recommend it, especially if you’ve used other bread maker machines. It’s use is pretty simple with even the tiniest bit of intuitiveness.
Bien beau d’avoir 3 livres d’info et ils sont tous en Anglais, infio sur le fonctionnement (2) et recettes. Je comprend un peu l’anglais mais il y a certain mot qu’on ne comprent pas toujours nous sommes francais eton parle et lit le francais , ca serait la moindre chose d’avoir des infos en francais. Merci
Si me gusto hace muy bien su funcion, sin embargo debido a que se me perdió la pala amazadora el repuesto original es muy costo y no hay entrega en mi país
Really easy to use and silent compare to other I owned before.The only thing is one of the recipe book that comes with it I really bad so I would suggest you guys to find other recipes online instead.
ME ENCANTA HACER EN CASA MI PROPIO PAN CON ESTA MÁQUINA QUE ADQUIRÍ EN UN MOMENTO APROPIADO Y A UN PRECIO RAZONABLE.
Premier pain et agréablement surprise, bonne machine. Oui, c’est vrai quelle fait un peu de bruit au pétrissage mais je ne vais pas l’utiliser dans une bibliothèque. Après le pétrissage elle est complètement silencieuse. Pour aider : les recettes de pain Robin Hood pour machine à pain s’adaptent à la machine KBS sans problème. Ce pain est aux canneberge et zeste de 3 citrons (pain brioché)***Il faut laver votre machine et faire chauffer au moins 4 à 5 fois (10 minutes) avant de faire du pain pour éliminer les odeurs des composants intérieur. C’est normal, c’est du neuf!***Bien suivre les INSTRUCTIONS à la lettre pour un bon résultat. Le prochain pain… au fromage! Bon appétit.

View all reviews

The KBS bread maker is an excellent option for those on a budget seeking a high-quality bread machine. It has 17 settings, allowing you to bake any type of bread imaginable. Some settings will enable you to make a cake, jam, and even yogurt if you feel adventurous. 

This bread machine also features an automatic, detachable fruit and nut dispenser, allowing you to add your preferred ingredients without stopping the machine mid-knead. It’s great that the dispenser is detachable, allowing you to remove it from the machine, add your ingredients, and reattach it. Additionally, it is much simpler to clean! 

In terms of specifications, the KBS can bake a 2-pound loaf with three different crust colors, a 15-hour delayed timer, a 1-hour keep-warm function, and a 10-minute power failure. 

The bread pan is another great feature of this machine. It has a ceramic pan, unlike the typical Teflon-coated alternatives, so you can rest assured that your bread will be chemical-free! 

Key Features 
  • 17 Multifunctional Customized Automatic Programs  
  • 2LB Large Capacity  
  • 710W Powerful Motor   
  • Unique Non-stick Ceramic Pan  
  • Intelligent Fruit and Nut Dispenser   
  • 15H Timer & 1H Automatic Warm-Keeping Function  
  • Intuitive Digital Touch Panel Control &   
  • Sleek Stainless-Steel Shell   
  • 360° Surrounding Baking  
  • Superior Humanized Design   
  • More Practical Accessories/Recipes Included 
PROS
  • Easy to use
  • Attractive appearance
  • Numerous distinct baking options
CONS
  • Can't deviate from factory-set programs
  • Loaves too wide for most toasters
  • Costs significantly more than entry-level bread makers

3. Best Programmable: Breadman 2 lb Professional Bread Maker

Breadman 2 lb Professional Bread Maker, Stainless Steel, BK1050S

★★★★★
Amazon.com

User reviews

Love the bread, hated the PADDLE. Problem solved. UPDATE Mar 2020: thoroughly enjoy this bread machine. I haven’t had any problems at all with it. The bread is fantastic. Although I really don’t know what the beeping is that occurs at 1 hr 42 min remaining on a basic loaf time is, is that for adding something to the top of the loaf? Who knows. I have never figured that out. But it makes a damn good loaf of bread and that’s what counts for me. I continue to bake bread with this machine twice a week. Perfect bread every time. I love this machine. UPDATE Apr 2019: I was having so much trouble that I decided to contact the manufacturer, what a stand up company! They worked to resolve my problem and I have not had a problem since! I love the great texture of the Breadman bread machine bread, which is why I was willing to live with the struggles, but after contacting them the problem is fixed and I am back to making our favorite jalapeno bread 2 times a week – I have not had any problem whatsoever. I love it!I would definitely recommend this machine, it makes a delicious bread. Previous review: I owned a Breadman machine for 22 years, until the paddle support ring broke off. I couldn’t find replacement parts so I tried a few other brands of bread machines that I could find locally. None came close to comparing to my original Breadman. I was delighted to find this one! I do love the texture of the bread and the fact that I am very familiar with Breadman. I was thrilled to see the addition of a collapsible paddle to avoid those nasty indentations in the slices.I am very disappointed though that the paddle pops off many times during the entire bread making process. Every time I make bread I have to be nearby because the dough will pull the paddle off and I have to take out the dough and dig out the paddle, waiting for it to pause so I can work quickly to put the paddle back on and put the dough back in the pan. I have gotten very good at recognizing the sound when it has come off and is no longer kneading the dough.This is incredibly frustrating! Just this morning I had the paddle come off 4 times. 4 times!! I wish I could figure out a way to keep this from happening.This machine makes an excellent loaf of bread, I make fresh bread twice a week. I am never disappointed in the finished loaf. But I seriously wish something could be done about the paddle coming off.UPDATE: I make fresh bread twice a week. The paddle on this machine falls of at least 5 to 6 times with each loaf. Each and EVERY time.
Easy to use, nice features, bakes a little hot. I had a Breadman just like this one for years and was replacing it since it was making a noise and likely on its last leg. I liked the machine so much that I bought the same one in a newer version. I’m updating this review because initially it was burning my bread. However, it seems to have calmed down a bit on the heat and I’m also adding a little extra water (per Breadman help line direction). I really like how easy this machine is to use and they improved it by having the “extras” chamber (holds nuts, raisins…) automatically release so no additional button to ensure is pressed. Their cinnamon raisin bread recipe is much better from the old machine book, but I just use that in this machine. In about 5 minutes, I can make bread that filled the house with that great smell, so I’m still in. UPDATE: I again love this machine. I use at least weekly and I purchased the bread book that was recommended when I purchased the machine. Good recipes are critical like with all baking.
Obsessed With My Breadman. Once you get past the wonderful smell of fresh baked bread.. the taste will blow you away. The bread machine does everything I mean everything. You placed all the ingredients in the baking pan at the beginning and set the program walk away three later you have fresh baked bread! The first loaf of bread I made was milk and honey, second loaf of bread I made was cinnamon raisin bread, the last loaf of bread I made was brioche. I’m hooked for life! Use of timer works great but, if your bedrooms are close to the kitchen, the bread maker is loud and you can hear it go through the many cycles. Best to just make the bread the night before and wake up to fresh bread and coffee the next morning. I’ve purchased my last loaf of bread .. fresh bake for me going forward.. With simple ingredients organic flour, butter, sugar or honey, milk or water, yeast and dash of salt. Simple ingredients .. you actually know what’s in your bread and can pronounce all the ingredients. I make a loaf or two weekly. Thank you Breadman!
Me gustó porque tiene el dispensador automático de semillas y no hay que hacer nada una vez que dejas los ingredientes. Es fácil de lavar aunque hay que tener cuidado porque tiene superficie autoadherente. No ocupa demasiado espacio porque es rectangular y no muy profunda. Automáticamente amasa, deja reposar a una temperatura fija y hornea. Tiene forma de programarla para inicio retardado y mantiene caliente el pan hasta sacarlo. La pala amasadora se dobla cuando inicia el horneado y solo hay que sacarla del pan una vez frío. Por el precio creo que es una muy buena máquina de pan. Tiene funciones de máquinas mucho más caras. Yo pagué poco mas de 2000 pesos mexicanos (aprox 110 dlls). Otras con funcionalidad similar cuestan más de 3 mil pesos. Hace pan de 1, 1/2 y 2 libras y el pan puede congelarse para irse consumiendo. El pan dura sin congelar, bien cerrado poco más de 7 días. Lo más importante es colocar las cantidades precisas en el orden señalado en la receta. Ya hice: pan blanco, pan de baguette, pan 100% integral, panqué de plátano, mermelada de fresa y pan multigrano. Se puede usar cualquier harina de trigo, pero recomiendo la de fuerza o alta proteína (al menos 13% proteína) para que tenga mejor consistencia y levadura de buena calidad. La hogaza de pan es alta, por lo que generalmente la parto a la mitad para que queden rebanadas similares a las comerciales. Hasta ahora puedo decir que ha sido una de mis mejores adquisiciones.
This is my second bread maker the first was a Sunbeam that stopped working in the first month. From the first loaf that the Breadman made I new it was a superior machine. The bread is light, fluffy and perfect. I make bread 3 to 4 times a week and have not had one bad loaf. The recipes are awesome. I have noticed that I need to adjust the recipes 1/3 cup more of water. The delay bake function works well and is easy to use. It is also relatively quiet when it is kneading the dough. We love the Breadman!
Le encantó a mi esposa, es la manera más fácil de hacer pan casero y no depender de los altos precios de las tiendas. Es genial poder utilizar ingredientes puros y obtener pan sin conservadores. Las instrucciones y el uso no pueden ser mas sencillos, y que se incluya un recetario es un excelente agregado. Funciona perfectamente a casi un año de uso.
It’s a little hard to see setting. I’m short but once I stand on a stool lol I am able to read it but still a little hardAwesome machine, very easy to use. Love the recipe book.Would recommend this machine
I would have given this 5 stars. It’s our second unit. The bread is quite good and is all we used during Covid. It loses the star only because their replacement parts are not available. The paddle and bowl should be available without having to buy a second unit.

View all reviews

The Breadman bread maker is perfect for those who wish to bake artisanal bread at home. It has 14 different settings, allowing you to bake virtually any type of loaf. The settings include recipes for white, French, and whole wheat bread, as well as recipes for dough and jam. 

The fruit and nut dispenser are situated on the machine’s top. Add your ingredients before starting the machine, and it will automatically release them during the kneading process. 

With the Breadman, you can select from 1-pound, 1.5-pound, and 2-pound loaves with three distinct crust colors. If you forget your loaf in the machine, the one-hour keep-warm function will keep it warm, and the 15-hour delayed timer allows you to plan. 

The combination of customizable settings and even-heating technology ensures a good result, and despite the appliance’s large footprint, you won’t mind too much because of its attractive design. 

Key Features 
  • 14 pre-programmed bake settings; 3 crust colors; 1lb, 1.5lb and 2lb loaf sizes 
  • 15-hour delay start, and 1-hour keep warm options 
  • Fruit and Nut dispenser, collapsible kneading paddle 
  • Digital Display and viewing window 
  • Recipe book, measuring cup and adjustable measuring spoon included 
PROS
  • Bakes evenly
  • Automatic fruit and nut dispenser
  • Adjustable settings and loaf size
CONS
  • Bulky
  • Digital display and viewing window are difficult to see due to height of the unit

4. Hamilton Beach Bread Maker 29888

Hamilton Beach Premium Dough & Bread Maker Machine with Auto Fruit and Nut Dispenser, 2 lb. Loaf Capacity, Stainless Steel (29888)

★★★★★
Amazon.com

User reviews

EXCEPTIONAL. This is my second Hamilton- Beach breadmaker. I replaced my first one (which still works well) because this newer one has some newer features and is stainless steel). The newer features include more loaf size choices, a few more types of items to make, and – most importantly – automatic seed/fruit inclusion – so you don’t have to wait around for 25-30 minutes before adding seeds, etc. The only “odd” thing with this model is the “start” button: Apparently you have to hold it down for a few seconds, let up, and then push it again to start. Not a big deal but this is not mentioned in the instructions. The cycles are a bit longer – about 30 minutes for the same recipe in my older model – but, again, that is not a dealbreaker. And finally my older machine came withan extra paddle – but there is just one with the new machine. New bread bakers will love this machine and “we older” bread bakers will use it occasionally, and for partial aspects of breadmaking. But I would not be without one, as you can make a loaf of bread quickly – and/or overnight with the delay option, which is really convenient. It’s also very nice to wake up to a warm loaf of newly baked bread.Bread machines (all of them) work the same way, and produce a good loaf – not exactly the same texture as “regular” loaves – but certainly loaves that are good tasting, simple and easy. The price of the H-B machine is probably the best of all comparable machines and is the only bread machine brand that I would buy.UPDATE: There are some on here who have complained that the “start” button does not work. Well yes and no. The directions are not clear on this point, but in order for the start button to work immediately, you must first program in crust, loaf size, and the cycle number – each time – before hitting the start button. Also, you must unplug the machine every time after you are done with it (I have mine plugged into a “strip” with an on/off switch). These are not dealbreakers – just quirks.
It takes the work out of bread making. Great warranty. Works like a champ. You can make a variety of loaf sizes. The instruction booklet comes with several recipes. I have found better recipes (videos) on the internet that use milk and egg for a heartier loaf of bread. There are multiple settings. For example, you can toss all the ingredients in, hit start, and wait for your fresh-baked bread; or you can use the bread machine as the workhorse to mix and knead artisan bread dough, then shape your loaf or rolls yourself and bake in your conventional oven. 120 Volts, not dual voltage.
Great Value Consistent Results. Like other users I have a little difficulty with the knob settings, but that is my only complaint. This is a very good breadmaker at a modest price point. It makes perfect pizza dough and I am impressed with the perfectly baked white bread, 1.5 lb loaf works the best. I love to make bread by hand but sometimes just don’t have the time – this is a nice product for those days. Considering that a mediocre loaf of store bought bread is about $5, this machine quickly pays for itself!
Works well. Made a cinnamon swirl quick bread and two loaves of regular bread. Works well
Not worth a fire. I have had this bread maker for less than a year and it worked great at first then today I went to use it. I had it on the regular bread cycle for less than a minute when smoke started pouring out of the top of it and it smells like burnt electrical. I’m so glad I didn’t leave the room. But a different one, this one is dangerous.
1st Review–>Didn’t even get to run the test! 2nd Review—> Positive Update. Ordered the bread machine. I opened the box, took the machine out, and unwrapped it with care. Read the instruction booklet… Step 1: Check all parts. Step 2: Clean the removeable parts. Step 3: Plug it in for a 10 minute test run… Instantly received an error code EEE. Called Hamilton Beach customer service. They want you to email them explaining your problem, then it hangs up. Googled error code EEE only to find out it’s an error that cannot be fixed by the consumer. Talk about deflation. I’m returning it. I was so excited to try this machine. I would give it 5 stars for beauty, but I’m too angry to say anything nice. Didn’t even get to test it. The shame of it all.***UPDATE 5/5/22: Returned the defective machine to Amazon, received a refund promptly, and then turned around and bought the exact same machine. I had already spent way too much time researching bread machines and reading reviews. I had my heart set on this one. I’m glad I remained stubborn and stuck to my original decision. The second one works like a dream. Washed the parts, plugged it in, ran the test, washed it again, made two two loaves of white bread. The first loaf was something of a raw-tasting brick because I used All Purpose Flour and room-temperature salted butter–not good (not wholly terrible, but definitely nothing to write home about). Second loaf, using bread flour and a recipe from a book I purchased (The Bread Lover’s Bread Machine Cookbook: A Master Baker’s 300 Favorite Recipes for Perfect-Every-Time Bread-From Every Kind of Machine by Beth Hensperger), came out light, fluffy, and quite delicious. The only con to this machine is Hamilton Beach’s Customer Service, of which I have STILL not heard from! At the rate they’re solving problems, I’d still be machineless, breadless, and writing angry reviews. lol Praying I don’t ever have to actually deal with them… Still, changing the overall rating from 1 to 5. Would buy this machine again (obviously) and would recommend to others. Happy baking to all 🙂
First one lasted 7 mo. And new one does not bake as good. Need better warranty
fast and easy. the first one i got was faulty . seller replaced with no fuss couldnt be happier
I make bread and dough with it regularly. Comes with recipe book that will have you producing your first piping hot fresh loaf of bread in a few hours. This gizmo is plug and play, insert ingredients correctly and accurately, voila! you’ve got bread. You can access the dough in process to make adjustments if you’d like. I also use it to make different types of dough, many different types, so I have no need for a Kitchenaid type stand mixer. Good little unit.
Es fabulosa y super útil para hacer pan ya sea blanco, dulce o con semillas. Sólo sigues la receta, dejas que trabaje y tienes un buen pan casero.
I really like this bread make it is very easy to use and makes great bread Very happy with this purchase
I loved this bread machine at first (for just under a year), it was working impeccably with child-proof bread preparation and always delivered the same result: perfect whole-grain bread with pumpkin seeds that even my 1-year-old adored. We even offered one to my mother-in-law. I put the ingredients in the machine every few evenings and woke up to the fresh bread smell. Until……Until it started waking us up during the night with its horrible screeching sound that got worse and worse. I started using the machine only during the day (no more waking up to fresh bread) and then that got too bad and I reached out to the customer service. They sent me a new model without the nut dispenser. I thought to myself “well I’ll just put the pumpkins seeds in right away” — not that simple. Even if I put them in after the first cycle as I’m supposed to (which means I can never prepare it overnight), it’s always a big mystery what result I’m getting: one day it goes way over and makes a terrible hard-to-clean mess (see the photo) while the top isn’t even baked, the other day it barely reaches half the container and the entire bread seems half-baked and unsafe to eat. I even bought a high-precision scale for this purpose and always follow their same original result like I’m supposed to. While I could be super NOT precise with the original machine and the bread was always perfect!So I reached out to the customer service again and what happened? They sent me the same new model machine once again!! Seriously?!? I now have 3 bread machines and none of them does what it’s supposed to! I’ve asked for a refund or a credit for their store — they keep saying that bread machine is “unavailable” but it’s still obviously available to order on their website as well as here on Amazon… and that they “don’t do refunds or credits” — even if their product doesn’t meet the customer’s satisfaction? And with a 5-year warranty?I’m just utterly disappointed with their attitude, I bought the machine BECAUSE of the nut dispenser and the simplicity of operation — now both of them are gone and my making-bread experience that used to offer me joy is just something I dread. We own a small business as well and always solve the customer’s problem, one way or another. This is not the way it’s done. I’ll stay away from this brand and recommend you to do the same.
Let’s start by saying it’s a great looking machine. The first time using it though I thought that it was going to be fiddly. When I pushed the menu fine but when I turned the knob it didn’t respond very well. Ah just me turning too fast. Turn slowly and voila. When I pushed the start/pause again me. Pushed too hard and it stuck down. Hmmm nothing happening. Maybe it’s paused now so pressed it againg and noticed it was stuck. Me again.Now when I got it going and saw 3 hrs. on the timer hmmm time to watch a movie and a nap here. Had to turn the volume up on the tv cause this thing sounds like a cement mixer. Nap is out of the question so outside I go and cut the lawn. I kept coming in and checking on it cause the directions say it may walk off the counter. No way, this thing with the little rubber pads sits solid. Not going anywhere.After all is said and done this machine makes great bread. I made a raisin bread and it was great as well. Raisins were well distributed throughout the bread and I can see my wife and I will be gaining a few lbs.Cleaning is easy. I just put the bread pan in the sink, add some water and in 10 minutes the paddle pulls off with ease. Clean with a little soap and water, place in dish tray and let it dry. Easy peasy.The hardest part is to try and eat less. We love both the machine and the bread.

View all reviews

The Hamilton Beach bread maker is an excellent machine for beginners in the bread-making industry. It has 19 settings, allowing you to easily bake a variety of loaves, cake, jam, and yogurt. The fruit and nut dispenser are easily accessible and located on the machine’s top. Add your preferred nuts, seeds, or herbs before you begin, and your device will automatically release them without your intervention. 

This bread machine also features a 13-hour delayed timer, allowing you to wake up to the aroma of freshly baked bread, and a 60-minute keep-warm function in case you forget your loaf inside. 

The Hamilton Beach bread machine is also one of the most reasonably priced machines available. It may not have as many bells and whistles as other machines, but it does the job effectively. 

Key Features 
  • 3 easy steps: add ingredients, select cycle, start 
  • 14 programmed cycles 
  • 3 loaf sizes and 3 crust options 
  • Dishwasher safe bread pan & paddle 
  • Viewing window – Watch bread as it kneads, rises, and bakes 
PROS
  • Automatic Fruit and Nut Dispenser
  • 14 Programmed Cycles
  • Viewing Window, Countdown Timer with LCD Display & Delay Timer
  • 3 loaf sizes and 3 crust options
  • Dishwasher safe bread pan & paddle
CONS
  • Bucky

5. Best Mini: Zojirushi BB-SSC10WZ Home Bakery Maestro Breadmaker

Zojirushi BB-SSC10WZ Home Bakery Maestro Breadmaker, Premium White

★★★★★
Amazon.com

User reviews

Great quality and easy to use. Love our Zojirushi bread maker, especially the quality of the machine and the size. It doesn’t take up too much space and the built-in handle makes it super easy to stow when not in use. Some bread makers are absolute giants, this is not. Only downside is the size of the loaf is rather small (they say half the size of a standard store loaf, which I think is a bit generous) but not a huge issue for us being we’re a small family, just know that if you’re a large family you’ll be making multiple loafs, and each takes 2.5-3 hours. But the results are great. Haven’t mastered it yet, but with every loaf each gets better and better.
Makes good bread with a little bit of work. I’ve made probably 45 loaves of bread with this machine, mostly White (using active dry yeast) or Quick White (using instant yeast). They’re easy to make and tasty following the included recipe book. I’ve even been able to adapt a few from various recipe websites by adjusting the ratios of the ingredients so the flour comes out to about 2C. Overall the machine works great, although I have a couple of medium complaint and a couple of small ones:My only real complaint is that the ingredients don’t always get mixed fabulously in the beginning (the water/fat will cause some of the flour/salt/sugar/yeast to stick to the wall) and so you’ll often end up with the burnt piles of stuff at the corner of the bread. If this ends up being most of your salt or sugar, the result bread is not great. To fix it I’ve been premixing all the dry ingredients except the yeast, and then scraping down the sides when the Add Ingredient beep happens. This means you get perfect, beautiful loaves with only a bit more work. While I’m home all day that’s no problem, but I may start to feel otherwise once that’s no longer the case.As for minor complaints, it would be great if it could detect that I’ve left out the mixer paddle (yet again), although I realize that’s probably challenging. It would also be nice if the instruction manual or recipe book could talk about how to go about making your own recipes. Like I said, I’ve had some success doing that, but it’d be nice if they explained how to go about designing one. There are several “homemade” modes, so I’m not sure why they didn’t do this.
Excellent tasting homemade bread. Excellent bread machine for one person and maybe two if you make a loaf of bread more often. So far I have only made some basic white, some raisin cinnamon, and a honey. All were delicious and did not last more than two days since they were so good. I do not buy bread from any retail stores anymore. I also purchased a bread slicer aide so that I can get consistent thickness of slices of bread for sandwiches. This is so easy and quick to make a loaf and also very easy and quick to clean up afterwards. Not idea for a family due to the size (1 pound loaf) but maybe ok if used as a supplement to commercial made bread. One not so good thing is the noise it makes when it’s time to add things like nuts, raisins, etc. The loud popping noise makes the dog bark and if used on the timer function so that a fresh loaf of bread would be ready in the morning while you were sleeping the noise may wake you up. I know it would wake me up plus the dog. Other than that I have no complaints.
This thing is LOUD. 15 MONTH UPDATE:So I have been making 1 to 3 loaves of bread a week and this has never failed. I mainly make White Bread in the summer as it uses butter and can’t seem to get it soft in the winter and Italian Herb Bread in the winter, it doesn’t require butter. I’ve made other breads, like the Hawaiian bread and banana bread but only a few times.As for hard crust I mentioned in my original review, I didn’t know this at the time but all bread makers do this, you need to put them in an air tight container for an hour 30 minutes after it comes out of the machine. Sometimes I eat a few hot pieces with butter and then put the rest of the loaf in the container for an hour. Also, it can’t be a bag. I’m not sure why but every bag I tried either doesn’t soften the bread or makes it soggy. I bought ‘LocknLock Easy Essentials Food lids/Pantry Storage/Airtight containers, BPA Free, Square-16.9 Cup-for Chips, Clear’, that is the Amazon description, it fits the loaf nearly perfectly, it only pushes the top down a bit.If I was to buy another bread machine I’d still buy from Zojirushi but buy a full loaf maker. A half a loaf I sometimes make two a day and I don’t think I’d let it go to waste. Also, I have only used the automatic ingredient dropper once, but I don’t see myself looking at the bread while it cooks either. You get a window or an ingredient adder, I think with a full loaf maker you can have both anyway.So I’ve been really happy, like I said I have made 1-3 loaves of bread a week the entire time I’ve owned it and it has never failed me. The power went out once and although I can’t remember if the cycle continued or I just started it over but the bread came out great in the end.ORIGINAL REVIEW:So this is a little, i.e. lot, on the expensive side but I have had one of their rice cookers that lasted for 15 years with one 12 or 15 dollar silicone part to keep it running that long so I bit the bullet and bought it. The crust always comes out a little hard, it might be an elevation thing I have to adjust ingredients, not a baker, need to look into that. Anyway, the bread it makes is great, and I HIGHLY recommend it just for that. I’ll have to make a ton of loaves of bread to justify the price but eh, since the loaves come out shaped like, you know, loaves rather than rods I can live with the price.However, I live in an apartment complex and with this thing does the ‘punch down’ I’m worried the people around me are going to call the cops. This thing is loud and I can feel it in the next room. The other parts of the cycle are not bad, I mean I can hear them, but I’m not sure what it does to do the punch down but it sounds like it has a sledge hammer in there or something. I haven’t been in the same room, I kinda want to be to see if the unit moves.That is really the only downfall. If I didn’t have a bread maker I wouldn’t be making bread, and like I said the bread is AMAZING and is worth a loud sound. I haven’t had a bread maker before, my Mom had one when I was a kid and I have had friends that had one, and none of those made loaf shaped bread.I highly recommend it.
Pros: makes great bread, no knowledge or skill required, easy to use, super high quality, sturdy, small (less counter space than an air fryer), quiet, great instructions and recipe book. Cons: expensive (but get what you pay for), only makes 1 lb loaf (for small family), heavy, non-stick bread pan scratches easily (don’t touch with a metal utensil).
I have no baseline to judge this against, but I found it to be easy to use and clean. The loaves are smaller than what we are used to buying at the bakery, nothing can beat the smell and taste of warm, freshly bread in the morning. I live in Australia, and had to use a step-down converter to use this appliance, because it is rated for 110V, as opposed to the Australian 220V. Fortunately, I had a step-down converter, because I have a Japanese mochi maker. Mmmmmmh, carbs.
I’ve never owned a bread machine before, but we were tired of poor quality bread from the store, and all my baking attempts were messy, time consuming, and poor results. I just don’t enjoy baking bread. So we were spending up to $6 for a loaf at the supermarket, and never happy.The first simple white loaf I baked in this little Zo was fantastic. Light, fluffy, slightly chewy, just amazing with a little butter. My yeast is 2 years past it’s sell date which I thought might be a problem, but nope, turned out just perfect. The crust is just the right crunch.I honestly can’t priase this little box enough. Worth every penny. It’s the right size for just the two of us, super simple to set up, put ingredients in and hit start. Maybe some raisin or banana bread next!
I was slightly hesitate to purchase this because of the price but I am so glad I decided to purchase this one ! It is the best bread machine I have ever owned ! Very easy to use. The instructions are so well done plus if you go to their website there are tons of recipes and hints and tips. The white bread recipe is very easy and awesome ! I have even made the pound cake that comes in the instruction book and the results were fantastic !I can’t praise this bread machine enough ! It is definitely worth the price ! I will never be buying store bought bread again !
This is my third bread machine, I still have a good old Panasonic (excellent for larger breads), followed by a new Cuisinart that was so bad that I threw it away.This Zojirushi does only small breads (one pound), but it does it very well. I tried whole wheat breads with different combination of flours and the breads turned excellent in each case. Same for pizza dough.The recipe book is superb, with clear and fool-proof instructions stated in weight as well as in volume. Weight is the only acceptable measure for making bread because various ingredients have different weights. For example, the weight of Kosher salt is half of sea salt, resulting in doubling the volume for the same quantity. If you only follow the volume you will fail your bread.In addition to standard breads, the machine makes all sort of breads for special needs: gluten free, salt free, sugar free, etc.This machine is more expensive than others but this is a clear case where you get what you pay for.

View all reviews

The Zojirushi BB-SSC is an excellent machine for those searching for a durable, high-quality breadmaker. Like the KBS bread machine, it has a fruit and nut dispenser located under the machine’s lid and can be removed and cleaned very easily. 

The machine has 15 settings, allowing you to bake any bread you desire, including cake and jam. The Zojirushi BB-SSC has a 13-hour delayed timer and bakes bread in under 1 hour and 20 minutes, significantly less than most bread machines. This bread maker is also surprisingly small and compact, making it relatively easy to store! 

The only disadvantage of Zojirushi is its price. If you are looking for a machine with a lower price tag, you should look elsewhere. 

Key Features 
  • Automatic 1-pound bread maker 
  • Auto add dispenser automatically dispenses nuts and other ingredients; removable and washable 
  • Various healthy course settings include Multigrain, whole wheat, quick whole wheat, gluten free, salt free, sugar free, and vegan 
  • Versatile course settings include bread and pizza dough, pasta dough, cake and jam 
  • 3 homemade memory settings allow the user to customize the Knead, rise, and bake times 
  • Recipe book in full color with 50 delicious recipes included 
PROS
  • Auto add dispenser
  • Double heaters
  • Crust Control
  • Carry handle
  • Pre-programmed course settings
CONS
  • Expensive
  • No viewing windows

6. Rosewill Bread Maker Machine

Rosewill Bread Maker Machine with Automatic Fruit and Nut Dispenser, Gluten-Free, 2 Lbs Capacity, Programmable, 12 Settings – RHBM-15001

★★★★★
Amazon.com

User reviews

This was a Cyber Monday deal and it works great. We love the bread that this machine makes. It is so easy to use. After one loaf of bread we did have an issue, the seller was willing to take it back. But we unplugged it for a few hours and it works perfecly ever since. So easy to make your favorite bread.
Love this machine…wish i had found it years ago. I am LOVING this machine!! I have never had a bread machine before. So simple, it’s astonishing to me! You just add the wet ingredients first, then the dry on top- and lastly, the finely measured dry yeast in a “pocket” last on top of the flour. I had to really read well to find that the YEAST is added dry, not wet. It can not come in contact with anything wet until the bread maker chooses to mix it. And the automatic raisin, nut, fruit compartment is amazing. Make sure the door on the bottom of it is shut before you add the stuff.Follow the instructions carefully for settings just before you start the machine. You set the SIZE of the load, and the COLOR of crust (light, medium, dark). The medium is plenty dark enough- in fact, I found that the LIGHT is less waste on the crust, and perfect. Then you push the type bread you are cooking. (1- for normal bread, 2- etc… ) The booklet gives you the examples of each- 1-12 settings. I’ve used 1 for regular bread and 1 again for the raisin cinnamon bread, and both turned out fine. Next time I will add more cinnamon- and pour it all in one spot- and let the bread maker spread it out….as I use Ceylon cinnamon and could hardly taste it after loaf was made. Also, unless you use a soft yellow raisin, soak your raisins first. (for cinnamon raisin bread)Make your first loaf exactly like recipe, then you can add beaten eggs, butter, etc… as I did on raisin loaf. Don’t be tempted to give your dog tidbits of the raisin loaf, as raisins are deadly to most dogs. I even added 1/2 cup almond flour to the raisin bread. You can go on line and find bread maker recipes.Unless you are doing a ”quick bread recipe”, always use REGULAR yeast, not Quick yeast.This breadmaker can make cakes, jams, etc… I haven’t done them yet, but will.After the initial mess of 10 or 15 minutes putting flour, etc in the machine, you start the machine, clean up, and forget it for about 3 hours. It beeps 10 solid beeps when it is ready to be removed. If you don’t remove it then, it continues to keep the bread warm for an hour.A tip. * I lightly greased the inside of the pan with olive oil- and around the blade that may stick inside your bread when it comes out….I have not had it stick to sides of pan. It may make the sides a bit darker (not sure), but I love the way it comes out so easily.You take a plastic spatula and go down on all sides before you turn it upside down on a towel to fall out and cool for 10 minutes or so before you cut it with a SAW blade knife. IF the kneader blade (small plastic item at bottom of bread bucket) comes off in the loaf (my first one did), just leave it until you slice the bread, then you can easily removed it from the bread and put back on the machine.Another hint * if you plan to use milk in your recipes, dry milk may be the best choice, unless you set the milk out to room temperature first. As the cold of the milk slightly hinders the yeast rising. ALSO, use BREAD FLOUR, not regular flour. There is a difference. You can substitute part of the bread flour for oat flour, almond flour, whole wheat flour… but should probably use at least half of it in Bread Flour for the bread consistency you want. I found an Ezekiel bread recipe on line. I’m going to making it soon!Again, make your first loaf as recipe says.Hope this machine lasts a long time, as I love making this delicious bread- without all the additives that store bought bread might have in them.
THE SECRETS OF THE ITALIAN ROLL REVEALED!!!!!!!!!!!!! by Julie Sands. Do you like ‘Italian Rolls’ or Amoroso rolls but are having a difficult time getting them where you live? Fret no more. With one of these amazing bread machines and a little prep you can have them any time of the day or night, the freshest and tastiest ever!!!! I have to share my discovery as “THE SECRETS OF THE ITALIAN ROLL” are now revealed…First you need to make a starter culture (bread starter) utilizing unbleached organic flour and water-this is the prep part. Get yourself a 64 ounce glass mason jar with a lid and band type lid. These lids come in two parts, an aluminum outer ring which screws around the opening of the jar, and a circle that fits inside it. Ball makes these type. They sell them 12 to a box.Next mix 2 cups organic unbleached flour (weigh it on electronic scale,) and add enough water that is between 105 degrees Fahrenheit and 115 degrees (use a . You can use a food processor or other mixer. Start with 1 1/2 cups of water (I got this figure from the Bob’s Red Mill Sourdough starter recipe-they sell excellent flour by the way.) Then slowly keep adding the warm water until you have a pourable mix the consistency of pancake batter-but not too watery.Pour this dough mix in your 64 ounce mason jar and cover it with cheesecloth. (I HIGHLY RECOMMEND GETTING THE BEST QUALITY GRADE ITALIANA MIGLIORE CHEESECLOTH sold on Amazon in lengths of 4.8 square yards. This is unbleached and amazing. After use rinse it briefly under water then you can throw it in the wash with towels or something and reuse it. After the jar is covered with the cloth, (cut it to size with scissors,) place only the ring part of the mason jar lid over it so it can breathe. Now get a saucer or something and place it under the mason jarj ust in case it goes wild reproducing and explodes on the top of the refrigerator as mine did this morning. Don’t worry I reduced the amount of flour so this will not happen, but it still can’t hurt to place a saucer under it.You you can stir it with either a dough whisk (available at breadtopia.com or a large oversized fork.) It will take off quickly and you will see it bubble and foam. It is then ready to make the best, freshest most delectable Italian bread ever. Stir it again just before using. I have two 64 ounce jars of starter I store in my oven unrefrigerated since I use them often-just put a note on your oven-make sure it does’nt get accidentally turned on with bread starter inside if you do this.Use this recipe to make fantastic bread for yourself and I guarantee you will not regret it:Ingredients- 1 Rosewill (or other) Bread Machine – I recommend Rosewill as the pan and paddle are dishwasher safe and there is an automatic dispenser. It also comes with a few handy tools. Note the paddle on this machine is not retractable, also note if you are using 100% whole wheat dough a lot you might want another bread machine as this one works best with a blend of 100% whole wheat and unbleached, or all unbleached flours. Note though I have made some amazing whole grain bread with it including rye. The only time I notice it can improve is when I use 100% whole wheat from Bob’s Red Mill. It is a fantastic bread machine on the whole. I liked it so much I have made it part of my bread system usually running no fewer than two Rosewill bread machines at once. With this Italian bread disappearing (getting eaten) so quickly you will probably end up making several starter cultures (bread starters) and have a few mason jars on hand. Note I am a small size 4 and 5’9” and this bread and all my bread machines do not cause me to gain weight although I listen to my brain and stop eating when I am full. I also make low fat breads and cakes, etc. CAUTION: Please do not get a bread machine unless you are already adept at making low fat foods and feel full easily.Now you are ready for the most amazing bread recipe ever!Italian Bread by Julie SandsIngredients:8 ounces Active (bubbly) Unrefrigerated Starter (you can have it in the refrigerator just take it out a day before and stir it to get it ready-add some105 degree to 115 degrees Fahrenheit water if you need to make it the consistency of pancake batter. To keep your starter going if refrigerated once a week or after use add ½ cup organic unbleached flour to it and stir again-Note the amount of flour and water to add I got from Bob’s Red Mill-someone there is the original author of that.)12 ounces unbleached organic flour (I recommend Bob’s Red Mill)1 Tablespoon Extra Virgin Olive Oil-I recommend Toscano from Italy available at Costco1 teaspoon salt180 milliliters 115 degree Fahrenheit water (use a cooking thermometer to check temperature)OPTIONAL but heartily recommended-grind a vitamin C tablet in a food processor-you will add this powder to your bread-you only need 250 mg, but can use more if that is what you have on hand-I like to add a Vitamin C tablet as it makes the bread rise fast for bread machines, also I make sure mine has Rose Hips and Citrus Bioflavonoids in addition to Vitamin C as it is just that much more fantastic-I use Kirkland Signature Vitamin C 1000 mg with Rose Hips and Citrus Bioflavonoid Complex 500 tablets ITEM #98268 which happens to be gluten free for those using their Rosewill Bread Machine to make gluten free bread-I grind up two tablets in a mini food processor in a few seconds and split the contents between 3 bread pans as we usually make 3 loaves at a timeDirections:Add the ingredients to the Rosewill Bread Machine pan in this order:Extra Virgin Olive OilWaterVitamin C powderSalt8 ounces of bread starter (using an electronic scale place your bread pan on it, zero it out, then slowly pour the starter in until it reads 8 ounces. Make sure you get a scale you can zero out once an object is placed on it.)12 ounces organic unbleached flour1 1/4 teaspoon Active Dry Yeast-Now with your finger make a small well (indention in the dry flour) with your finger. Do not push your finger down too far as you do not want to mix the wet ingredients with the dry in the bread machine. It does that. Now pour 1 1/4 teaspoon of yeast (I recommend Bob’s Red Mill Active Dry Yeast, Fleischmann’s Active Dry Yeast or Bioreal Organic Yeast available at breadtopia.com) in the indentation.-Place the bread pan in the machine, make sure it is secured. Now if using the Rosewill set it to number 7 (Rapid Bake) and 2 pounds, light crust. Press start. If using another bread machine find its ultra fast setting (the setting where bread is made in under 1 hour and use that, if it lets you choose the color crust choose light. If it doesn’t it will do it automatically.-Now get your butter or mayonnaise out, your fixins’ ready and prepare to savor the most incredible tasting bread ever. Enjoy–MAKE SURE YOU ADD MORE 115 DEGREE WATER AND ABOUT 8 SPOONFULS OF DOUGH TO YOUR JAR OF STARTER AND STIR IT BEFORE RECOVERING IT WITH FRESH CHEESECLOTH AND STORING IT UNTIL NEXT USE-MAKE SURE IT IS FOAMY BEFORE USE-IF NOT ADD SOME MORE DOUGH/AND OR WARM WATER AND STIR AND WAIT A FEW MINUTESYOU CAN USE YOUR BREAD STARTER FOR MAKING ROLLS, PRETZELS, ETC., AS WELL AS OTHER TYPES OF BREAD-JUST TRY THE 8 OZ OF STARTER AND 12 OUNCES OF OTHER FLOUR WHEN TRYING OUT RECIPES AND ADJUST FROM THERE IF NEEDED-(note: if you think I know bread, let me tell you I am an award winning filmmaker, a director, writer and producer who has switched my genre from horror to all happy (no antagonist/no protagonist/no sadness/meanness/g-rated fare. I do this even better than I make bread, I am best at filmmaking-directing/writing and producing, and look forward to making my all happy feature film projects.)NOTE ON BREAD MACHINES: I and my spouse make all our bread using them. There are just two of us and we run 3 machines at once and use a deli slicer (I recommend getting your own Chef’s Choice Deli Slicer-I got mine from Costco) to slice it, and a Checkered Chef Checkered Chef Pizza Cutter Sharp Rocker Blade With Cover that is available on Amazon as this easily slices hot bread. Please use Chef’s Star High Cut Resistant level 5 protective gloves when using a rocker blade or deli slicer. These gloves are available on Amazon. I have found the best way to store fresh bread in my small kitchen is to use washable 17″ cloth bread bags available on the Bob’s Red Mill site in their Merchandise section. Get more then you think you need so you can wash them when they get dirty. We use plastic bread bags to freeze bread in, we just double bag it, then freeze. These are available in bulk, 1000 to a carton on Amazon. If you have a small kitchen know you can plug in bread machines in any outlet, you just have to think outside the box. The Rosewills are light and easy to lift and put away after use. I have a small, though the not smallest kitchen and we can run 3 bread machines in it but can only keep one of them out on the counter. The others we put away after use. With two people we average running all three at least twice a week. So you will have to figure out how many you should buy. We started with one, got to know our bread machine and when it was super simple to us we started adding more. Realize that even when making different breads a lot of ingredients are the same so it does not take that much extra time to run multiple machines and there is only one clean up but you have three loaves of bread. We make one loaf of sandwich bread and two loaves of Rapid Bake at once. Knowing all these things will save you a lot of time when you start putting together a bread system of your own. It has taken me almost a year to figure them out.Another timesaving tip is to make bread one day, store it in the oven in the breadpans it was made in, then slice it all the next day on a deli slicer-just remember put a post it note on your oven not to turn it on so you or another does not accidentally turn the oven on with the bread in itMY ADDITIONAL RECOMMENDATIONS FOR OTHER BREAD RECIPES USING THE ROSEWILL BREAD MACHINE:I recommend using 300 ml of water with each loaf if not using a bread starter1 tablespoon of Extra Virgin olive oilif adding sugar only 1 tablespoon Sugar in the Rawonly 1 teaspoon saltno butterI also add a bit of homemade organic soymilk to my sandwich breadUPDATE 4 YEARS LATER: I own 3 different brands of bread machines so far. My spouse and I make all our own breads, rolls, etc., excepting some pretzels and crackers, but we use our bread machines almost daily whether to make pizza dough, naan dough, pasta, sandwich bread, breakfast Amoroso style bread, or a classic sourdough bread bowl for our home made soup. WE RARELY eat at a restaurant or diner or buffet. We eat at home for the most part. After 4 years I can pinpoint some features that are outstanding to the Rosewill. The Breakfast bread setting is phenomenal and it is worthwhile to buy one of these new for that setting alone it is so amazing. It makes a perfect Pepperidge Farm brand style loaf of bread, but you need to use your own recipe, unless you know Pepperidge Farms-I always check the list of ingredients and go from there when making a taste alike. Once again note you have to provide your own recipes as this brands manual does not come with recipes, just guidelines. The Quick bread setting is faster than another brand clocking in at 2 hours and 10 minutes with the same result as my three hour quick bread model. The dispenser is handy and I use this when making most of my add in bread. NOTE: I have NOT gained any weight from making my own bread though I eat very low fat, whole grain, no eggs, etc. Okay now for some things to consider and be aware of so you are not disappointed. In my case I somehow melted my plastic lid hinges on the dispenser by cleaning the machine before it was completely cooled since I have a small kitchen and needed to use the counter for something else. I just place the lids on top and they still work and do not fall off. I noticed some of the coating around the spindle is coming off and once in a while I see some on the bottom of a loaf or spot it in the dough. It is easy to spot and I remove it, but I do think future editions they might improve the coating so this is prevented. The problem might have already been solved on brand new ones as my two Rosewills are four years old at the time of this writing in early 2020. Still all in all a worthwhile bread machine, assuming these are still sold new as I see they are, for those that use/own several bread machines. PLEASE REMEMBER TO KEEP ALL OLD ELECTRONICS YOU HAVE AND DO NOT THROW THEM IN THE TRASH IF SOMETHING BETTER COMES OUT-Julie Sands
Buy it! Get more than your money’s worth. Very nice machine and easy to use. Lighter than I had and has some tiny jiggly motion when kneading the dough. but only at that time. The loaves rise nicely and I like the size of the loaf.( I usually make the 3 cup flour recipes). And I add a heaping teaspoon, or 2, of Vital Wheat Gluten in with my flour as I don’t use Bread Flour. I use All Purpose Flour and it doesn’t have as much Gluten in it. The V.W.G. lasts like “forever” and safely makes your bread beautiful each time and not as expensive as the Bread Flour.( I also, live in high altitude, so the Gluten really solves a lot of problems.) I use the amount of Yeast the recipe calls for. I have read that in high altitude you need to “decrease the Yeast” by 1/4 teaspoon. I have done this and went back to just relying on the added gluten and that seems to solve the problem” without” decreasing the Yeast.My” Rosewill” arrived on time and was in perfect condition. Compared to other machines, even the expensive ones, this is more than an excellent buy! A higher priced machine doesn’t make it a better machine. In reading consumer reports, many of the very expensive have a lot of problems.
Love it. Picked this up last year wife and I love it but having trouble figuring out the fruit despensor any ideas.
Easy to understand makes different bread types

View all reviews

The Rosewill bread maker is excellent for those searching for an affordable entry-level bread machine. It has 12 settings, allowing you to bake a variety of loaves easily. 

The fruit and nut dispenser are located at the top of the machine and will automatically release all your preferred ingredients. Additionally, the dispenser is detachable for easy cleaning. The device has a 60-minute keep-warm function, so you don’t have to worry about your bread becoming cold. 

The Rosewill RHBM-15001’s two-pound capacity is standard for bread machines and is also present on the Rosewill RHBM-15001. Its default setting is for a 1.5-pound load with a medium-brown crust, but this can be altered based on what you are baking. In addition to the Rapid Bake setting, there are options for French, Whole Wheat, Sweet, and gluten-free bread. 

In addition to 11 recipes, the Rosewill RHBM-15001 comes with a measuring cup, a spoon, and a kneading blade removal hook. Regarding blades, this bread machine includes one kneading blade. There is one less blade to remove from your loaf before slicing it, although most bread machines have two. The bread pan and kneading blade can both be cleaned in the dishwasher. 

Consider the Rosewill RHBM-15001 Bread Maker if you’re looking for an affordable bread maker with a wide array of settings. It has an impressive variety of functions for the price and can bake delicious gluten-free bread and dispense fruit and nuts automatically. Some higher-end bread machines have better aesthetics, with two kneading blades and more tactile controls, but the Rosewill is an affordable and dependable bread machine for those on a budget. 

Key Features 
  • Auto Fruit and Nut dispenser 
  • 12 Digital Programs 
  • 13-Hour programmable delay timer 
  • Loaf Sizes: 1.5 lbs, 2 lbs. 
  • 60 minutes “keep warm” function 
PROS
  • Automatic nut and fruit dispenser
  • Dishwasher-safe blade and tin
  • 12 programs and three-color options
  • Make gluten free, quick, and whole wheat bread
CONS
  • Only one kneading blade
  • Fiddly controls

7. Breadman TR2700 Stainless-Steel Programmable Convection Bread Maker

Breadman TR2700 Stainless-Steel Programmable Convection Bread Maker

★★★★★
Amazon.com

User reviews

Sturdy for years. I purchased this bread maker a few years ago and it’s lasted me and is still going strong.This little machine is pretty awesome. Of course, it makes 1, 1.5, and 2 lb loaves and it does them pretty well.Originally I used the couple of recipes that come in the back of the instruction guide but I later branched out to a full fledged bread cook book. Enough about that though.This machine makes bread wonderfully. It has a timer so you can set it to run over night so you have warm bread in the morning with the fresh smell throughout the house. The two things I noticed that I’m not too keen about are: if you’re making raisins, you must coat them with flour before putting them into the condiment/add on bin, or they will get stuck to the sides and won’t drop when the machine tries to add them to the bread.The other thing is; the paddle gets stuck in the bread after you make it. Now this is definitely just how homemade bread makers work, but I still think it’s a pain. Often when I’m making a loaf, I’ll forget about the paddle and when I slice into the bread, I hit the paddle with my knife which is a annoying. Don’t forget about taking that little sucker out before you slice the bread!Great bread machine! I hope you give it a chance if you’re in the market. It’s definitely a little pricey, but it’s well worth what you’ll pay for it. Every now and then it goes on sale through Amazon, so keep your eyes open.And it truly does work with Gluten Free bread mixes! Which is amazing!
Good But Could Be Better. After a year of use this bread machine continuously makes great looking and tasting loaves but I have discovered a flaw. The kneader leaks grease into the bread pan. Keep in mind we use it at least 3 times a week so it has gotten an extensive work out but the seal which contains the grease for the kneader began leaking grease into the bread pan which gets mixed into the bread. I will attempt to get this replaced under warranty but look out for that as an extra added “bonus” in your bread after a year of use. That aside, the features and durability of this unit make it a good purchase. The non-stick surface of the bread pan continues to wear very well. We have gone through two other bread machines in a number of years and this one produces the most consistent loaves of any of them. I like the features and consistency but would look out for the leaky seal.
Breadman TR2700 is a disappointment. I bought this after our 8 year old Breadman Ultimate TR2200C finally died. I was hoping it would be a similar product, if not an upgrade, as it has the convection baking and stainless steel.I was surprised to see that out of the box there were a couple of differences from our old machine; the cord is shorter, and the machine itself appeared to be poor quality; the lid was loose, and when I placed it on our countertop to run it through its recommended empty-bake phase, it wobbled; one of the legs was shorter than the others. Also, I had to bend the plug prongs to get them to fit in the outlet as the prongs were too close together. The breadpan did not click into place as it had on our prior machine, so I wasn’t sure if it was properly seated. I decided to give it a try, anyway, as those were not major issues.After doing the bake with the machine empty to burn off the manufacturing oils, I attempted the first recipe. The bread came out doughy, short and brick-like. It was hard and appeared not to be cooked from the outside, but when I cut into it, it was raw in the middle. Disappointed, I figured I had somehow done something wrong, despite doing exactly what was recommended in the recipe. I thought maybe I had put it in too soon after running the empty-bake, and it was just too warm, and hadn’t cooked the bread properly. I decided to let it cool overnight and try again the next day. Same results – hard and light-colored from the outside, raw throughout when cutting into it. I thought I would hear a fan running to indicate the convection oven was working, but I didn’t hear anything different from our previous model. Disappointed, as this was laid out very similarly to the model it replaced.Since the bread machine was only a couple days old, I thought I would try a different machine, thinking this was just a lemon. Waiting to receive the replacement in the mail, and hoping for better results the second time around!Hoping to update with a better review once I receive the replacement. I had originally wanted to order the 2500BC as this looked the most like our old machine, but after reading the reviews thought this would be a safer bet. Sorry to say that wasn’t the case.UPDATEWell, I received the new machine in the mail yesterday. I’m beginning to wonder if Amazon is perhaps getting factory “seconds” of these units? While the prongs were not crooked and the feet were stable on this model, the lid is still loose (although not as loose as the first one I received last week), and there’s a big dent in the bottom corner on the front of the unit.That being said, I could actually hear the fan running during the initial empty bake I ran, so that was an improvement. I decided to try a different recipe from in the manual this time, and the bread came out looking amazing; it had risen to over the top of the pan (unlike last time) and was a beautiful golden brown all over. I tore a piece off the bottom as I was digging out the paddle and it was delicious! The only thing odd was it appeared as though a flap of (baked) dough was covering the top of the loaf. It looked cooked, so I figured it was just something odd that had happened in mixing/rising. I lifted the flap to see if it was cooked underneath, and it was completely raw in the center of the loaf. I have a call in to Applica customer service, so we’ll see if they call back, and what they suggest.Customer Service UpdateWell, customer service never returned my call, but I did call again when they were open (love how it tells you to call during normal business hours on the message, but doesn’t list their normal business hours or time zone). I was told that she wasn’t sure how to troubleshoot that particular problem, but that it sounded like a heating element failure. She recommended I cut the cord off to send it in for a replacement. Since I have read in several places/reviews that people are often not sent an equivalent replacement from Applica, I declined. Sadly, I guess this will also have to be returned to Amazon. I was really hoping for a suitable replacement for my TR2200C, but apparently I need to start looking for a different manufacturer! Apparently Breadman isn’t what it used to be.
Noisy & Paddle Sticks, But Otherwise Lovely. It’s noisy, and when it’s time to remove the paddle, it can really get stuck. I don’t know why. No one else seems to have this problem, but there it is. HOWEVER, it make multiple sizes, with or without extras, various crust shades, and in the shape of a loaf of bread! ☺ I make bread all the time, and it is SO easy, I give it away. For two minutes of filling the pan with ingredients, I can have a loaf of bread in an hour and a half on the “rapid” setting. Great breadmaker!

View all reviews

The Breadman TR2700 resembles a miniature version of a commercial bread machine. The machine can bake the size of the loaf, and its large, well-organized control panel houses several outstanding features. 

However, the unit’s occasional unreliability makes it somewhat risky. The Breadman TR2700 has eleven pre-programmed functions, significantly more than competing models at this price point. Among the functions are presets for White, Whole Wheat, French, and more… the standard selection of options. 

However, using this unit, you can also easily make Sweet, Low Carb, and Gluten-Free foods. In addition, a setting makes it simple to prepare pizza dough, and, unlike some models, the unit has ample power for thoroughly kneading the dough. 

This Gluten-Free setting merits a bit more consideration. It is uncommon to find a pre-programmed setting for a notoriously difficult-to-make bread style. Breadman deserves praise for recognizing this and incorporating an easy-to-use option. 

The Breadman TR2700 machine measures 19 inches by 11 inches by 15 inches, which is large enough to bake any loaf. This is a huge capacity for a mid-priced bread maker. Even though the loaf weight is average (there are 1-pound, 1.5-pound, and 2-pound options), there will be sufficient bread for everyone. 

Due to its large width, the TR2700 produces loaves with a horizontal shape. Vertical bread may be equally delicious, but it is more difficult to slice for an attractive presentation. 

The TR2700 is enclosed in an easy-to-clean stainless-steel case. The large case contains a Mylar control panel and a substantial rectangular viewing window. Therefore, you will have no trouble observing all internal activity during each cycle. When it is time to remove the bread, the large lid has a large lip that can be easily flipped up. 

Since the pan is nonstick, cleaning it is also not difficult. Additionally, the TR2700 has an automatic ingredient container. This feature is a lifesaver if you like to add raisins or nuts during the middle of the baking cycle but are sometimes forgetful or too busy. The small cup at the top is easily accessible and straightforward to clean in the future. 

If you enjoy experimenting with alternative bread, you’ll appreciate the automatic nut and fruit dispenser and cycles designed for low-carb and gluten-free recipes. With more than 100 baking options and 16 different settings, the TR2700 can bake any bread. 

The Breadman TR2700 is an exceptional bread maker when it functions properly. This is the case in approximately 80% of all available units. Unfortunately, that 20% is large enough to make me hesitant to recommend this model when so many excellent bread maker machines on the market still function well after ten years. 

Most customers are satisfied with this product. The best part is, if you purchase the bread maker on Amazon, you can always return it if it’s defective. The motor of the machine is more potent than that of its predecessors. It will not be heard laboring over the dense dough! 

You will receive a recipe book with hundreds of recipes when you purchase the Breadman TR2700. The Breadman TR2700 has a two-year warranty. 

Key Features 
  • Stainless-steel programmable breadmaker bakes 1-, 1-1/2-, and 2-pound horizontal loaves 
  • Nonstick baking pan; digital display; 24-hour delay timer; 1-hour keep-warm cycle 
  • 100+ baking options; 16 settings including low carb and gluten free; crust color control 
  • Automatic fruit and nut dispenser; viewing window; convection fan for excellent results 
  • Measures 18-3/5 by 11-1/5 by 15 inches 
PROS
  • Easy cleanup
  • Easy to operate
  • Limited warranty
  • Can produce a variety of breads
CONS
  • You should wash hand to offer protection to nonstick surface.

8. Breadman TR2500BC Convection Breadmaker

Breadman TR2500BC Ultimate Plus 2-Pound Convection Breadmaker, Stainless-Steel

★★★★★
Amazon.com

User reviews

UPDATED 12/2015! Strong performer, takes a little TLC, will buy again. UPDATE 12/2015: We finally killed our third Breadman. Well, the bearing in the pan gave out, not the unit itself, but you need to know, that’s after 21 months of making bread almost every day (yes, really), plus 4 pounds of pizza dough most Fridays (we love pizza night). We make all our own bread, except the occasional specialty bread where we haven’t gotten our chops to make it right yet. We beat the thing to death, and it performs. I think its ability to last this long under our heavy use is a testament to the quality of this product. We’ve got another Breadman on its way today. If you read my advice on use and maintenance below, I think you’ll have a good experience with your Breadman. Still five stars from me.Summary of tips: Always scrape corners 5-10 minutes into mixing/kneading, and check consistency and adjust if needed; don’t use long soaks to clean, and don’t use the time delay–the liquid standing around the bearing shaft will shorten its life; after cleaning and drying, use a little cutting board (food-safe mineral) oil on the shaft and bearing to lubricate it for next use (a couple of drops inside on the shaft, then spin it a few seconds to work it in, is all it takes). Use the recipe at the bottom for instant sandwich bread success. Details on all of this are below.Original review:I want to speak in favor of the lowly Breadman.My wife bought this machine 15 months ago. We use it several times a week; for about the last year, in pursuit of consuming fewer chemicals, I have since made almost ALL of the bread that gets consumed in our household. Our machine has stood up to a 5-8 batch per week pace of bread and bagels throughout, sometimes even 5 a day, although not without some challenges. But the short version of my opinion is I WOULD BUY THIS AGAIN, HAPPILY. It is the three-legged dog in our family: not perfect but we love it completely.The good: the machine makes excellent pizza dough; this stands out for us. When it began showing signs of wear, we borrowed my sister’s big Zojirushi to try as posslbe replacement candidate, and it was completely lacking in it’s ability to knead dough and produce a springy result, especially pizza dough. The Breadman has put up with a LOT of use and stood up to it, and its problems have been minor (more below). If you pay a little attention to what you’re doing in the first ten minutes, you get consistently good results (more on this below, too). The controls are simple, and it bakes evenly and consistently.The bad (and solutions): On our first machine, the plastic button panel (white/gray at right on top of the machine in the pictures) looked like it was slapped on with no care–it was bubbled, off center, and anything but straight. It was so bad that the bottom rows of buttons didn’t work at all–you couldn’t push through the wrinkles to reach the start button itself. Instead of just returning it right then and there, I took a bit of a risk: having some experience with electronics and plastic panels like this, I pulled out my heat gun (you could use a hair dryer), warmed up the panel to soften its adhesive, and removed it. I then reapplied it with the care the manufacturer should have given it, and it’s been perfect since. Then, about 6 months in, we noticed the “hub” of the bread pan oozing rust around the seal and bearing. We never soak our pan, we know that trashes the seal, but even just regular brief exposure to water for washing was taking its toll–they don’t use stainless or rust-proof materials in this very important, often-wet part, apparently. The cir-clip at the bottom was especially rusty. We solved this and extended the pan’s life by putting a few drops of food-safe mineral oil (e.g. cutting board oil) on the hub before storing–the oil seeps down past the seal and keeps things clean and lubed up, and the small amount doesn’t affect the next batch, so no need to wash it out before using again. No rust since starting this routine. About 9 months in, one of the “paddles” broke off the “impeller” (I’m using those terms to mean the motorized bit in the base that turns the kneading paddle in the pan). The broken piece wedged against its brother and froze the motor solid–we found the machine buzzing and not kneading dough, and we thought it was done at that point. Nope… pulled the broken piece out with pliers, and the machine has continued to work as well as ever since, although quite a bit noisier during kneading. As I write this, it’s making a batch of a modified version of the “Milk Bread” from the recipe book–which I think has a printing error that affects the quality of the result–the sugar measurement should be tablespoons, not teaspoons, for all loaf sizes. Also see my modified version of this recipe below.Finally, a word about bread and bread makers. For all of these bread machines, I see a lot of complaints and low scoring in reviews, mostly with people griping about odd-shaped loaves, low rise, over-rise, and dry corners. Look folks, bread is art. If it’s your expectation that you are consistently going to make good bread by just throwing the ingredients into ANY machine (be it $99 or $300), hitting “Start” and walking away, the only thing you will get consistently is disappointment. If, however, you put a little time into it in the first 10 minutes, you can make consistently good bread in this or any other machine. Here is my #1 tip for breadmaker success: about 5-10 minutes into mixing/kneading, take a peek. If the dough looks dry or a ball is just spinning on the kneading paddle and not hitting the sides, add some of whatever liquid (water or milk for most breads, olive oil for pizza dough)–just ONE tablespoon at a time–until you get a soft, but not sticky, dough ball getting a nice knead in the machine. If dry corners are a problem for your machine, try slightly wetter dough (may cause top to collapse during rise or baking if you overdo it), or just pause the machine and scrape the corners with a rubber spatula and resume. If the dough is too wet and you’ve got glop on the paddle, add flour ONE tablespoon at a time. Any additions you make, give the machine one or two minutes to work it in. REMEMBER, then, what you did, and make a note in the recipe book (that’s actually tip #2–make notes!). If you notice that you consistently need to add 3 tbsp of water to get a recipe to come out right, just make that addition a permanent part of the recipe. That’s it. In that first 10 minutes of kneading, pay a little attention and make sure the dough has the right consistency, and you will make great bread every time. After a few batches, you’ll know what it should look like at that stage and be able to make adjustments fast if they are needed at all. Your patience and attention here for just a few minutes are all that is needed to change your world. Tip #3: skip the yeast in little packets and use the stuff that comes in a jar, and pay close attention to dates. Exception: for pizza dough, the Fleischman’s Pizza Crust yeast is the bomb and the packets are fine. Tip #4: always cool completely before cutting; cutting too soon changes the texture. Really. Just wait. Tip #5: If you have trouble slicing neat slices, especially softer breads, get a “slicing guide.” Tip #6: DO NOT soak your bread pan; hot water in it for two minutes and then your fingernail will loosen anything. Dry it completely and let it stand open-end-down on the counter for a couple of hours. If you’re completely Type A like me, put a couple of drops of mineral oil on the hub inside and let it stand to work down into the seal and bearing (spinning with a finger helps). Tip #7: Do NOT use the delay timer function–your liquid goes in the machine first in most recipes, and that liquid standing there during the delay gets into the hub and bearing of the pan and will cause its early failure–you’re breaking the “no soaking” rule when you use the delay feature, so don’t. Tip #8: Use unsalted butter when butter is called for in a recipe, if possible. The salt content of butter can vary a lot between brands and batches, so using unsalted and controlling salt by your own measurement helps get you more consistent. Also remember that salt attenuates yeast (it slows it down), so if you over-salt, your loaf may not rise completely before baking. Less salt or more yeast will fix this.OK–the upshot on the machine: It has some minor quality issues but in the big picture it works great and is an excellent value because of it. We’re still using our machine despite some wear–we’ll run it until it truly dies, and then buy another. This machine has been great to us, and continues to take a lot of punishment. The lowly, inexpensive Breadman is king in our house.Modified “Milk Bread” recipe: a kid-friendly white bread. Into the pan in the order listed: 1-1/4 cups whole milk, 1-1/2 teaspoons plain salt, 2 tablespoons sugar, 2-1/4 teaspoons bread yeast (regular, not rapid rise). At this point, slosh the mixture around gently in the pan to dissolve sugar and salt and hydrate the yeast; don’t worry if stuff is sticking to the sides. Then add 3 cups bread flour (not all-purpose, you need at least 12% protein), and 3 tablespoons melted UNSALTED butter (note: butter goes in last and separate from the yeast because hot melted butter will kill the yeast if the two are added immediately together). If you don’t have unsalted butter, it’s not the end of the world; party on–you can always adjust salt in the next batch. Set machine for 1-1/2 pound white bread cycle; medium crust darkness (recommended for your first try, then adjust to your preference). As I said, about 5-10 minutes into kneading, open the lid and look–for this bread, you want a wet, slightly sticky dough, so add milk in one tablespoon increments, one minute between additions, until you get soft and sticky dough working. Then, go about your business. When baking finishes, allow machine to cool 15 minutes before removing pan, then shake bread out and cool completely on a rack–DO NOT cut into the bread while warm, you’ll let the magic out. If the paddle stuck in the loaf when you de-panned it, leave the paddle in until the bread is completely cool. Once cooled, slice with a serrated bread knife.
Good mid-priced machine. The first machine I got was dented, and Amazon sent me a second that was fine. I was really excited to get this machine and try it out. I’ve had cheaper machines and I was never overly impressed with them. Plus, I really hate the weird loaf shapes of most of the machines out there. This machine has more of the horizontal loaf shape plus it has tons of settings and even a timer in case you want to set the machine to bake at a later time.I have made 4 loaves and three different recipes, and the first loaf didn’t turn out. It was the first recipe in the booklet, the basic white bread, and it was very dense. I came back here to the reviews and saw people recommending bread machine yeast (duh) instead of the dry active yeast called for in the booklet, and so I threw it out and made my second loaf, the onion cheese bread, with bread machine yeast. Perfect! It is still more dense than store bread, but it’s soft, chewy, and the crust is perfect on the medium setting.I have tried all three sizes and determined that the 1.5 pound loaf size is closest to the store size. All the loaves have been a bit uneven, but I can deal with that.This machine is loud, but no louder than any other machine I’ve used and it does not jump around on the counter like some of those. It mixes evenly and I have never had an instance where there is a dry patch in the corner of the pan because the paddle could not reach. The pan is easy to clean and the bread releases nicely. I usually bake at night and leave the loaf in the pan to cool overnight, and the paddle stays in the pan when I pull the loaf out, instead of sticking in the loaf.I wish it was white, because it sticks out like a sore thumb with all my white appliances.Overall I think this is a very good mid-priced machine and the bread is delicious.
Good Fortune with my Breadman 2500. After reading other reviews, I took my life in my hands and ordered the Breadman 2500. Fortunately, I have had no trouble with the machine at any of the stages. Having baked bread by hand regularly for over 40 years, I was surprised to find the Breadman texture quite acceptable. Here are a couple of tips I got from the company while trying to do the basic set up: 1. When you turn on the machine to “burn off manufacturing oils”, take the bread pan out and leave the top of the machine open. This was not mentioned in the booklet. 2. When you set the cycle you want for a loaf, don’t expect to see words like “white bread” – you get only the amount of time it takes to run the full cycle. Keep pressing “Select” until the arrow on the right stops where you want it. Then do the same with “Crust Control” and “Loaf Size”. Then you’re ready to push “Start”. 3. After you have completed the entire baking, push the Reset button and hold down for 4 seconds. Do this as well if the electricity goes off but you are not baking, or if you unplug the machine. This precautionary measure will keep you from finding yourself in an emergency cycle. Some people have trouble with the dough ball not picking up all the flour during kneading. My suggestion is that your dough ball isn’t quite moist enough. I am creating my own recipes, especially since I like to make some breads with cooked cereal. The important thing if there is some question as to whether you have the right balance of wet and dry ingredients is to observe your dough ball during the 2nd kneading. If there is any flour in the corners that has not picked up after a few minutes, use your rubber spatula to scrape it toward the middle. If this doesn’t work, I suggest using a spritzer on the dough ball until the flour adheres. If the dough is sticking a little to the sides of the pan as it goes around, begin lightly sprinkling flour on the ball until it stops doing this. The whole wheat bread, which I made precisely according to the recipe, turned out perfect, but, as I say, if you are experimenting, this is how you can bake any bread recipe you want to and it will turn out perfectly. Your dough ball should be spongy and only slightly sticky. I hope this is helplful information for Breadman owners. The key to all good bread is learning how to recognize the look and feel of a good lump during and after kneading.NEARLY TWO YEARS LATER:It is July 15, 2008, and I’m still baking away. So far I’ve never had a failure with this machine. I have found a few corrections to the white bread recipe (for 1 1/2 lb loaf) make a better loaf. To start with, I always use King Arthur bread Flour, which a lot of Wal-Marts carry. I use 1 cup plus 3 teaspoons water instead of 2 teaspoons, 2 teaspoons of yeast rather than 1 1/2, tho 1 1/2 works fine. That little bit of extra water helps. I also probably use couple of TBS oil, rather than 1 1/2. And I use 2 teasp. salt rather than 1/1/2. It is important to know that different flours behave different ways, and different batches of flours of the same kind can need more or less moisture. This is especially noticeable using whole wheat flour. If you let the bread sit in the machine for 10-15 minutes after baking is complete, the steam softens the sides enough to dump the loaf out but doesn’t leave the loaf soggy. Before I figured that out, I used a small rubber spatula to loosen the sides. Be sure you don’t scrape the pan with a metal utensil as it scratches easily. Well, happy baking!!PUSHING FIVE YEARSMarch 2011: Well, here we are, still baking away. The only adjustment has been that I have upped the baking time slightly (I use the 2# setting for a 1 1/2 lb. loaf). The old relic is still performing and making perfect loaves of bread! Hey, is this thing still on the market anyway??IT’S NOW JUNE OF 2013And still kicking. We moved into a tiny log cabin with a teensy weensy stove and oven, so if I want to bake bread, my only option is the bread machine. I noticed that the temperature has dropped only slightly, so I cranked up the browning option and that fixed it. If only it would bake cakes and pies!February 2014More good things to say about this machine. It is still cranking and I realized it is not slowing down and I can use the settings I originally used. Also, the manual that comes with the machine has an amazing amount of information and lots of different kinds of recipes. The machine itself has a multitude of settings.So many people had this machine break on them but I guess I got the good one.I started making sour dough bread today and it came out GREAT!! I added dried onion, dill weed and rosemary from the yard, my favorite herb combination. When I bake white bread I add 1 tsp mace. Warning: this bread will disappear in no time.For people who want a 1 lb loaf just make a 1 1/2 lb loaf and freeze part of it. I used to regularly bake 13 loaves of sour dough at a time by hand and never had a problem with freezing bread.Pushing 9 years 1/21/15My husband wanted to go gluten-free so I tried two of the recipes in the book. One was a pumpernickel and the other a cheese-onion (the one with a cup of Swiss, except I used cheddar). Both breads came out great. They hold together, slice well, and work in the toaster. The key is checking to make sure the top of the batter makes a swirl or knob once it is mixed. If it is too wet, add more flour. This bread only takes an hour 20 minutes from start to finish, though there are a lot of ingredients. I make up several ziplocks of dry ingredients at a time and add the wet ingredients and yeast for each loaf. The ingredients aren’t cheap but homemade is cheaper than buying gluten-free bread. Happy baking!
Firstly, be aware that this is a 110VAC operated unit imported from the USA, so ensure you plug it into a 110 Volt AC 15A electric outlet, or buy a step down 220 VAC to 110 VAC transformer with sufficient wattage for the purpose.Now the review:Very good bread maker.The controls for loaf size, crust control, bread type, dough, etc are easy to operate, and control options are versatile.The automatic fruit and nut dispenser is a great feature, found normally on only a select range of higher end and high priced bread makers.Have tried making normal white bread and some versions of sweet bread too.The results have been good so far.Remember that for all bread makers, follow the recipe book ingredients and their recommended measures exactly, else the result may not be good.
Its good very convenient to use gives good results. But the manual could have beenmore elaborate so that it would be easier to use by first timers. Had to check on you tube to understand.

View all reviews

Here comes an original item from the Breadman. First and foremost, you should be aware of the unique cooking function. Most bread machines struggle to create a crisp crust while also thoroughly cooking the loaf’s interior. However, if you have a Breadman TR2500BC, you have nothing to worry about. It has a convection bake function for a crust that is even crispier. The heat is evenly distributed throughout the loaf. 

This bread machine is truly one-of-a-kind, as it has a 24-hour delay timer. The maximum standard timer on most devices was 13 or 15 hours. In addition, you receive a fully automated nut dispenser and a viewing window on top. You get the impression that it is intended to indulge amateur bakers. 

This bread machine, in my opinion, is best suited for experienced bread machine users. It is known as the ultimate advantage for a reason. Numerous additional features may be unnecessary for a beginner bread maker. It even includes an interior light for enhanced progress monitoring. The light automatically turns on when the lid is opened. There are more than 300 preprogrammed recipes. Consider preparing low-carb whole wheat white bread, cake batter, jam, pizza, and pasta dough. Three bread sizes are available: 1 pound, 1-1/2 pounds, and 2 pounds. The bread pan and the paddle must only be washed by hand. Additionally, the lid is detachable for easy cleanup. 

Key Features 
  • Programmable bread machine bakes 1-, 1-1/2-, and 2-pound horizontal loaves 
  • Convection bake function for crisper crust; 300+ pre-programmed recipes 
  • Gluten-free, low-carb, cake batter, jam, and pizza-, bagel-, and pasta-dough options 
  • Fruit, nut, and herb “add-in” dispenser; 24-hour delay-bake timer 
  • Product in that box may vary slightly from that pictured 
PROS
  • Gluten-Free Setting
  • Viewing window on top
  • Easy to use, large digital display
  • Rapid cycle settings
  • Additional accessories such as measuring cup and spoon
  • Automatic fruit and nuts dispenser
CONS
  • Cord is too short (22 inches)

Factors To Consider When Choosing The Bread Machine With Fruit And Nut Dispenser 

When choosing a bread machine with fruit and nut dispenser, there are several factors to consider. Here are some of the key factors:

Capacity

The first factor to consider is the capacity of the bread machine. You need to choose a machine that is large enough to accommodate the amount of bread you want to bake. If you only want to bake small batches of bread, then you can choose a smaller machine. However, if you plan on baking large batches of bread, then you will need to choose a larger machine.

Price

The second factor to consider is the price of the bread machine. There are a variety of machines available at different price points. You need to decide how much you are willing to spend on the machine. If you are on a budget, then you can choose a cheaper machine. However, if you are willing to spend more, then you can choose a higher quality machine.

Features

The third factor to consider is the features of the bread machine. There are a variety of machines that come with different features. You need to decide which features are important to you and which ones you can live without. For example, some machines come with a delay timer so that you can bake bread later. Other machines come with a crusty top feature so that your bread will have a crispy crust.

Ease of use

The fourth factor to consider is the ease of use of the bread machine. You need to choose a machine that is easy to use. Some machines have a lot of buttons and settings that can be confusing for some people. If you are not comfortable using all the features of the machine, then you should choose a simpler machine.

Warranty

The fifth factor to consider is the warranty for the bread machine. You need to choose a machine that comes with a good warranty. This way, if something goes wrong with the machine, you will be covered. 

These are just some of the factors to consider when choosing a bread machine with fruit and nut dispenser. Make sure to take your time and choose the right machine for your needs. 

Bread Machine With Fruit And Nut Dispenser - FAQs

There are several benefits to using a bread machine with a fruit and nut dispenser. First, it can help you make healthier bread. By adding fruits and nuts to your bread, you can increase the nutritional value of your meal. Second, it can help you save time. Instead of having to chop up fruits and nuts by hand, the bread machine will do it for you. Third, it can help you save money. By using a bread machine with a fruit and nut dispenser, you can cut down on the cost of buying pre-sliced bread. Finally, it can help you add variety to your diet. With a bread machine, you can make bread with different fruits and nuts, which can give your meals a new and exciting flavor. 

No, you do not need a special recipe to use a bread machine with a fruit and nut dispenser. However, there are some recipes that are specifically designed for use with these machines. If you want to try one of these recipes, you can find them online or in cookbooks that focus on bread machine recipes. 

Yes, you can use any type of fruit or nut in your bread machine with a fruit and nut dispenser. However, some fruits and nuts work better than others. For example, raisins and dates can get stuck in the dispenser, so it is best to avoid using them. Fruits that are high in moisture, such as bananas and oranges, can also cause problems. If you are unsure about whether a particular fruit or nut will work well in your bread machine, you can always test it out on a small piece of bread before using it in a larger batch. 

Here are some tips for using a bread machine with a fruit and nut dispenser: 

  • Read the instructions that come with your bread machine carefully before using it. This will help you understand how the machine works and what you need to do to get the best results. 
  • When adding fruits or nuts to your bread dough, be sure to add them gradually. Adding too much at once can cause the dough to become too sticky and difficult to work with. 
  • Be careful not to overfill the fruit and nut dispenser. If the dispenser is too full, the bread dough may not rise properly. 
  • If you are having trouble getting the bread dough to rise, try adding a little bit of yeast to it. This will help to provide the yeast with more food so that it can do its job better. 
  • Once the bread dough has risen, be sure to bake it in a preheated oven. This will help to ensure that the bread cooks evenly and comes out looking its best. 

Yes, you can make bread without the fruit and nut dispenser. However, the machine will not add the fruits and nuts for you. You will need to add them manually. 

The amount of fruit and nuts you can add to your bread will depend on the recipe you are using. Some recipes may call for fruit and nuts than others. Be sure to read your recipe carefully before adding any ingredients. 

Almost any type of fruit or nut can be used in bread, although some may be better suited than others. Common fruits and nuts that are used in bread include raisins, cranberries, cherries, apricots, peaches, apples, pears, walnuts, almonds, and hazelnuts. 

Yes, you can use frozen fruit in your bread. Just be sure to thaw the fruit before adding it to the bread machine. 

Yes, you can use dried fruit in your bread. Be sure to soak the dried fruit in water for at least 30 minutes before adding it to the machine. This will help to rehydrate the fruit and prevent it from drying out the bread. 

Yes, you can use fresh fruit in your bread. Just be sure to chop the fruit into small pieces before adding it to the machine. 

There are a few things that could be causing your bread to turn out poorly. Be sure to check that you are using the correct type of flour, that your yeast is still active, and that you are following the recipe correctly. If you are still having trouble, try contacting the manufacturer of your bread machine for assistance. 

I hope these tips are helpful! If you have any further questions about using a bread machine with a fruit and nut dispenser, feel free to ask them in the comments section below. 

Conclusion

The bread machine with fruit and nut dispenser is a fantastic kitchen appliance that can make baking bread much easier and faster. If you are looking for a way to make delicious and healthy bread at home, then this is the appliance for you.  

It is simple to use and can make a variety of different types of bread, including whole wheat, rye, sourdough, and even gluten-free varieties. The dispenser makes it easy to add fruits and nuts to your dough without having to measure or mix them in, which can save you time and hassle in the kitchen. 

We hope this guide has helped you learn more about bread machines with fruit and nut dispensers. Be sure to browse our website for more information on bread machines and other kitchen appliances. Thanks for reading! 

Related Posts

Why Trust Us

You will find what you are looking for at Jody's Bakery. From classic to luxury brands, you'll find both. We will help you to select appliances that fit your needs, budget and lifestyle. Whether you want to stop by to learn more — or plan to make a major purchase — we’ll treat you like family and assist you every step of the way. Shop with us today to receive friendly and experienced help along the way.

We will be happy to hear your thoughts

      Leave a reply

      Best Deals For You

      Best price
      Anova Culinary Sous Vide Precision Cooker Pro
      SaveSavedRemoved 0

      Anova Culinary Sous Vide Precision Cooker Pro

      20

      The Anova Culinary Sous Vide Precision Cooker Pro has truly elevated my cooking experience. With its precise water circulation at the exact temperature needed, I've achieved perfect results every time, eliminating the risk of over or undercooking my meals. Sous vide cooking with this device has proven to be ...

      $290.00 $399.00 Buy It Now
      Best seller
      Lodge 10.25 Inch Cast Iron Pre-Seasoned Skillet
      SaveSavedRemoved 0

      Lodge 10.25 Inch Cast Iron Pre-Seasoned Skillet

      20

      The Lodge 10.25 Inch Cast Iron Pre-Seasoned Skillet is a versatile and durable kitchen essential, perfect for beginners, home cooks, and chefs alike. Crafted in America with iron and oil, this skillet is designed to handle any kitchen cooktop, oven, grill, or open flame. One of the standout features of Lodge cast ...

      $19.90 $34.25 Buy It Now
      Best seller
      Tovolo Vented Collapsible Medium Microwave Cover
      SaveSavedRemoved 0

      Tovolo Vented Collapsible Medium Microwave Cover

      10

      The Tovolo Vented Collapsible Medium Microwave Cover is a versatile and practical kitchen accessory designed to enhance your microwave cooking experience. This cover features perforated lids that protect your microwave from splatters and spots. Crafted from BPA-free plastic and silicone, the topper covers food to ...

      Best value
      Nostalgia MyMini Personal Electric Skillet
      SaveSavedRemoved 0

      Nostalgia MyMini Personal Electric Skillet

      50

      The Nostalgia MyMini Personal Electric Skillet is a versatile and convenient appliance for on-the-go meals. It offers a quick and healthier way to cook a variety of dishes, including ramen noodles, pasta, mac and cheese, steamed rice, stir fry, omelets, hard-boiled eggs, pancakes, bacon, sausage, hashbrowns, cookies, ...

      Best seller
      Elite Gourmet EG6207 Fry Pan
      SaveSavedRemoved 0

      Elite Gourmet EG6207 Fry Pan

      10

      The Elite Gourmet EG6207 Fry Pan is a versatile and convenient addition to any kitchen. With its 10.5-inch size, it allows you to expand your cooking capabilities without the need for remodeling. The non-stick marble stone coating and cast-in heating element make cooking and clean-up a breeze. Whether you're whipping ...

      Braun MQ7035X 3-in-1 Immersion Hand
      SaveSavedRemoved 0

      Braun MQ7035X 3-in-1 Immersion Hand

      40

      The Braun MQ7035X 3-in-1 Immersion Hand Blender stands out with its innovative features and versatile functionality. The Easy SmartSpeed technology allows for single-hand operation with no predefined speed settings. Simply follow your intuition by pushing gently for roughly chopped results and increasing the ...

      $79.96 $109.95 Buy It Now
      Editor choice
      Breville the Barista Pro Espresso Machine
      SaveSavedRemoved 0

      Breville the Barista Pro Espresso Machine

      30

      The Breville the Barista Pro Espresso Machine offers a barista-quality performance with a user-friendly interface, making it easy to create third wave specialty coffee in the comfort of your home. The integrated grinder ensures that the right amount of freshly ground coffee is delivered on demand, resulting in a rich ...

      $699.99 Buy It Now
      Editor choice
      Cuisinart PRS-50 Pasta Roller & Cutter Attachment
      SaveSavedRemoved 0

      Cuisinart PRS-50 Pasta Roller & Cutter Attachment

      90

      Cuisinart PRS-50 Pasta Roller & Cutter Attachment is a perfect addition to your Precision Master Stand Mixer, allowing you to create a variety of homemade fresh pasta with ease. This attachment includes both spaghetti and fettuccine cutters, as well as a pasta roller, offering versatility in pasta shapes and ...

      $169.95 $179.95 Buy It Now
      Editor choice
      Instant Stand Mixer Pro
      SaveSavedRemoved 0

      Instant Stand Mixer Pro

      40

      Instant Stand Mixer Pro delivers powerful performance with its 600-watt motor, making it a versatile kitchen companion for a variety of culinary tasks. From whipping smooth meringues to kneading yeast dough, this stand mixer handles it all with ease. Featuring a digital interface, the mixer offers 10 speed ...

      $199.95 $299.99 Buy It Now
      Editor choice
      Koolatron 6 Bottle Wine Cooler
      SaveSavedRemoved 0

      Koolatron 6 Bottle Wine Cooler

      80

      The Koolatron 6 Bottle Wine Cooler offers an affordable and elegant solution for wine enthusiasts, providing a stylish and compact freestanding design that accommodates up to 6 standard-sized wine bottles. This wine fridge is a perfect addition to any table or countertop, allowing you to enjoy your favorite vintages ...

      Editor choice
      Hamilton Beach 2 Slice Extra Wide Slot Toaster
      SaveSavedRemoved 0

      Hamilton Beach 2 Slice Extra Wide Slot Toaster

      60

      Hamilton Beach 2 Slice Extra Wide Slot Toaster is a versatile and user-friendly appliance designed to make toasting a breeze. With slots wider than those on many 2-slice toasters, this toaster accommodates thicker breads, bagels, and other specialty bread items effortlessly. The extra-wide slots ensure a perfect ...

      Best value
      Hamilton Beach Blender Combo
      SaveSavedRemoved 0

      Hamilton Beach Blender Combo

      40

      The Hamilton Beach Blender for Shakes and Smoothies & Food Processor Combo offers impressive 3-in-1 versatility, making it a powerhouse in the kitchen. This combo includes a 40 oz. glass blending jar for larger servings, a 20 oz. blend-in personal blender travel jar for on-the-go convenience, and a 3-cup ...

      $68.65 $74.99 Buy It Now
      Show next
      Jody's Bakery
      Logo
      Compare items
      • Total (0)
      Compare
      0
      Shopping cart